Hitachi P 14DSL Handling Instructions Manual
Cordless planer
Hide thumbs
Also See for P 14DSL:
- Handling instructions manual (132 pages) ,
- Handling instructions manual (64 pages) ,
- Handling instructions manual (81 pages)

Related Manuals for Hitachi P 14DSL


Summary of Contents for Hitachi P 14DSL
- Page 1 Cordless Planer P 14DSL P 18DSL • P 18DSL Read through carefully and understand these instructions before use. Handling instructions...
- Page 2 9 mm (Max) 82 mm (Max) 9 mm (Max) 〈UC18YFSL〉 〈UC18YSL3〉 &...
- Page 4 1 mm 1 mm...
- Page 5 3.5 mm 24.5 mm ™ ¡ ¢ 4 mm £ 11 mm...
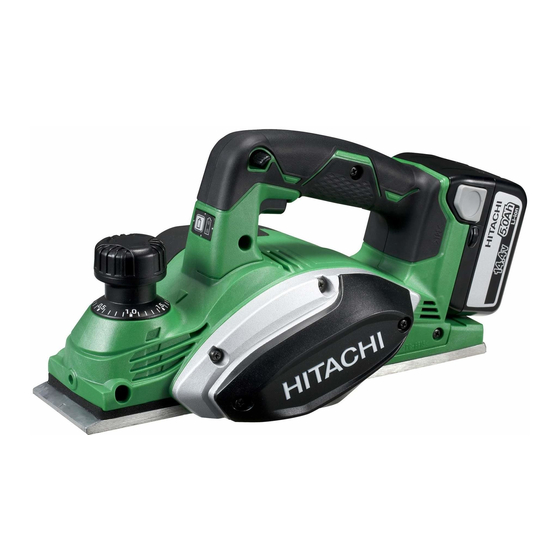
- Page 6 Planing Switch trigger Set plate (A) Remaining battery indicator Beveling Set gauge switch Rabberting Remaining battery indicator lamp Wall surface b Tapering Knob Flat portion of the cutter block Rechargeable battery Scale Groove Blade Latch Mark (Resharpenable blade type) Battery cover Beginning of cutting operation Cutter block Terminals...
-
Page 7: General Power Tool Safety Warnings
Carrying power tools with your fi nger on the switch or GENERAL POWER TOOL SAFETY WARNINGS energising power tools that have the switch on invites accidents. WARNING d) Remove any adjusting key or wrench before Read all safety warnings and all instructions. turning the power tool on. -
Page 8: Caution On Lithium-Ion Battery
Use of any other battery packs may create a risk of 1. When the battery power remaining runs out, the motor injury and fi re. stops. c) When battery pack is not in use, keep it away In such case, charge it up immediately. from other metal objects, like paper clips, coins, 2. -
Page 9: Regarding Lithium-Ion Battery Transportation
○ Either install the battery in the power tool or store USB DEVICE CONNECTION PRECAUTIONS by securely pressing into the battery cover until the (ONLY WITH UC18YSL3 CHARGER) ventilation holes are concealed to prevent short- circuits (See Fig. 5). When an unexpected problem occurs, the data in a USB device connected to this product may be corrupted or lost. -
Page 10: Standard Accessories
STANDARD ACCESSORIES OPTIONAL ACCESSORIES (sold separately) In addition to the main unit (1), the package contains the 1. Battery accessories listed in the table below. 1 Box Wrench ........... 1 (for securing cutter blade) 2 Set Gauge ..........1 (for adjusting cutter height) 3 Guide ............. - Page 11 3. Charging <UC18YSL3> <UC18YFSL> When inserting a battery in the charger, the charge When inserting a battery in the charger, the pilot lamp will indicator lamp will blink in blue. light up continuously in red. When the battery becomes fully recharged, the charge When the battery becomes fully recharged, the pilot lamp indicator lamp will light up in green.
-
Page 12: Prior To Operation
30 seconds or so. If this does not cause Table 3 Charging time (At 20°C) the pilot lamp or charge indicator lamp to blink in red (every second), please take the charger to the Hitachi Charger UC18YFSL UC18YSL3 Authorized Service Center. - Page 13 5. Beginning and ending the cutting operation PLANING PROCEDURES As shown in Fig. 13, place the front base of the planer on the material and support the planer horizontally. Turn ON 1. Operation of switch (Fig. 10) the power switch, and slowly operate the planer toward (1) For safe operation of the machine, a “switch lock”...
-
Page 14: Sharpening The Resharpenable Blades
(1) As shown in Fig. 19, lift set plate (B) and insert the new 3. Adjustment of blade height carbide blade between cutter block and set plate (B). (1) Loosen the 2 screws holding on the blade and set plate (2) As shown in Fig. -
Page 15: Maintenance And Inspection
2. Handling Repair, modifi cation and inspection of Hitachi Power CAUTION Tools must be carried out by a Hitachi Authorized Service The front base, rear base, and cutting depth control Center. knob are precisely machined to obtain specifi cally high This Parts List will be helpful if presented with the tool to precision. - Page 20 Shinagawa Intercity Tower A, 15-1, Konan 2-chome, Minato-ku, Tokyo, Japan Code No. C99211411 F Printed in China...