Table of Contents
Advertisement
Quick Links
Advertisement
Table of Contents

Related Manuals for Nokia MEDIAMASTER 9400S


Summary of Contents for Nokia MEDIAMASTER 9400S
- Page 1 Owner’s Manual MEDIAMASTER 9400S...
-
Page 3: Table Of Contents
Program Information, the “ i ” button TV Guide Nokia Multimedia Terminals operates a policy of continuous development. Therefore we reserve the right to make changes and improvements to any of the products described in this manual without any prior notice. -
Page 4: For Your Safety
FOR YOUR SAFETY Rear panel LNB input RS232 TV SCART VIDEO OUTPUT TV AERIAL POWER CABLE LNB output TV/VCR AUX SCART AUDIO L R... -
Page 5: Front Panel
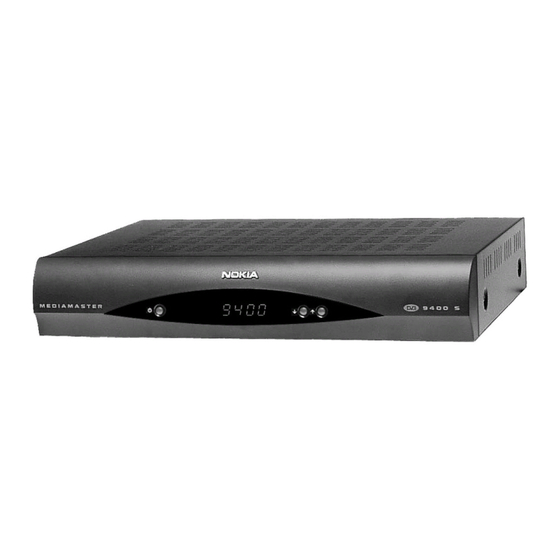
Shows channel number, remote control signal and time in standby mode. At start up, it displays the model number. INSTALLATION OF THE MEDIAMASTER The box for your Mediamaster should contain the following items: Mediamaster 9400 S includes RF-Cable About the SCART sockets Ÿ... -
Page 6: Connecting The Mediamaster To The Satellite Dish
Connecting the Mediamaster to the satellite dish Installing the satellite dish Ÿ Your satellite dish should be installed with a cable for you to connect to the Mediamaster. If you do not have this cable you will need to buy one from a dealer (tell the dealer you need a coaxial cable and F-connectors). -
Page 7: Connecting To A Tv And A Video Recorder
Connecting to a TV and a Video recorder Refer to your video recorder manual for full instructions. Ÿ Connect one SCART cable between the main SCART socket on the TV and the TV SCART socket on the Mediamaster. Ÿ Connect another SCART cable between the VCR and the AUX SCART socket on the Mediamaster. -
Page 8: Connecting To Hi Fi System
Connecting to Hi Fi system Connect an RCA/Cinch stereo cable from the AUDIO L R sockets on the Mediamaster to the LINE, AUX, SPARE or EXTRA input sockets on your Hi Fi system. Preparing the remote control Ÿ Remove the cover on the battery compartment at the bottom of the remote control handset. -
Page 9: Remote Control
REMOTE CONTROL This section describes how to operate the Mediamaster using the buttons on the remote control. Some of the functions can also be carried out using the buttons on the front panel. To switch the Mediamaster in and out of standby mode. EXIT TV To return to the viewing mode from a menu without storing settings (in menu mode). -
Page 10: Basic Settings
BASIC SETTINGS Once you have correctly connected the Mediamaster, you also have to perform some “Basic Settings”. During this procedure, helpful information is displayed at the bottom of the menus. Please note! The OK button always confirms a selection within these menus, and pressing it will take you to the next step in the installation process. -
Page 11: The Welcome Menu
The Welcome Menu Language Settings Installation Antenna Satellite Configuration Antenna Satellite Configuration Antenna Alternative... -
Page 12: Automatic Channel Search
Satellite name: From here you can select a name for the configuration. Switch Type: There are in principle two kinds of external DiSEqC switches on the market at present. One for connection of two LNBs. The other one for connection of up to 4 LNBs. If you have the other switch, defined as DiSEqC, Level 1 or 2 on the market, select “DiSEqC 1, 2, (3 or 4)”, for each LNB connected to respective inputs on this switch. -
Page 13: Manual Channel Search
Manual Channel Search You can use manual channel search if you want to add new channels later. For example If you have a special antenna configuration which is not assigned in the “Antenna alternative” menu, you can add new channels using the “manual channel search”... -
Page 14: Tv Screen Format
TV Screen Format If you have a TV set with a 4:3 picture format, and the transmission is in 16:9, you can select “4:3 (Pan & Scan)” or “4:3 (Letterbox)” to change display format. “4:3 (Pan & Scan)” will fill up the screen vertically, but cut off some information from the left and right sides of the picture. -
Page 15: Tv Guide
TV Guide By pressing the GUIDE button you obtain access to the TV Guide which gives the titles of the current programmes on the different channels. By pressing the LEFT or RIGHT button you also can also obtain information about the next programme. The minimized viewing window also helps you to select channels and information. -
Page 16: List Of Radio Channels
List of Radio Channels While listening to radio Programmes you can see a programme list on the screen by pressing the OK button. You can change to another channel by pressing the UP/DOWN buttons and then pressing the OK button. To move faster (8 at the time) between the channels you can also use the DOUBLE ARROW buttons. -
Page 17: Tv Channels And Radio Channels
TV Channels and Radio Channels TV/Radio Channels will show a list with the names of the different channels. To move faster within the list, use the DOUBLE ARROW buttons. Press OK to enter a marked channel. TV Guide and Radio Guide These guides will give you an overview of programme information from the TV/Radio channels. -
Page 18: Rearrange List
Rearrange List If you have created several Favorite lists you can determine the sequence in which the lists will appear. To rearrange channels, select the list which you want to move using the OK button. position using the UP/DOWN button and press OK. Rename List You can change the list name with the virtual keyboard on the screen. -
Page 19: Rearrange Channels
Rearrange Channels You can arrange the order of channels within your favorite lists. To rearrange channels, select the channel which you want to move using the OK button. Move the channels to the desired position using the UP/DOWN button and press OK. Remove Channels From here, when the “All TV”... -
Page 20: Language Settings
DO NOT FORGET IT! Without it you do not have access to any of the functions where the code is required! If you forget it, you have to contact an Authorized Nokia Service Center to get help. Language Settings From here you can change the language for the menus, main audio language and alternative audio language. -
Page 21: On/Off Timer Setting
On/Off Timer Setting You can enjoy this On/Off Timer for such a convenience as wake-up or automatic VCR recording. Mediamaster will be automatically switched-on and play specified channel for the specified time, and then switched-off. You may specify up to 8 separate lists with turn-on time, date, duration, channel and occurrence options. -
Page 22: Installation Submenus
INSTALLATION SUBMENUS Select this Menu from the line “Installation” in the Main Menu. The submenu will give you the opportunity to change the preferences performed during first time installation. You can also add features that were not included in the first installation. -
Page 23: Reinstall
Reinstall This will start the Installation procedure from the “Welcome Menu”. When you press OK in the “Welcome Menu” again, be aware of the fact, that all previous channels and settings will be erased! To exit the ”Reinstall” menu without erasing any channels, press “Back”. System Information This gives general information about which hardware and software version your Mediamaster is running on. -
Page 24: Glossary Of Terms
GLOSSARY OF TERMS Acquisition Gain Control. Audio system With digital satellite reception, the sound is transmitted in packages and is elected either in a special audio mode or pre-selected by using the installation set-up. This makes it possible to select between several different languages in a film. -
Page 25: Problem Solving
PROBLEM SOLVING Problem Possible causes The display on the Mains lead is not connected. front panel does not light up/is not lit. No sound or picture. The satellite dish is not pointing at the satellite. No signal or weak signal. The LNB is faulty. -
Page 26: Technical Specification
TECHNICAL SPECIFICATION Transmission Standards DVB,MPEG2 LNB/Tuner input Connector 2 x F-type (Loop Through) Input frequency 950-2150MHz Max Current 500mA max Supply Voltage 13V/18V DiSEqC RF Impedance 75 ohm Demodulator QPSK Symbol rate 2-45 Msym/s SCPC and MCPC Video decoder MPEG-2 Main Profile @ Main Level Data rates up to 15Mbit/s Video formats... -
Page 27: Menus Screen Structure
MENUS SCREEN STRUCTURE First Time Installation Welcome Language Settings Menu 1.Menu Language 2.Main Audio Lang… 3.Alternative… 4…… Main Menu 1.TV Channels 2.Radio Channels 3.TV Guide 4.Radio Guide 5.Edit Channels 6.User Preferences 7.Game 8.Installation 5.Edit Channels <All TV> 1.Rearrage List 2.Rename List 3.Add Channels 4.Lock Channels 5.Rearrange Channels... - Page 28 Nokia is a registered trademark of Nokia Corporation www.nokia.com 66 76967-10 KQX1A668Y...