Table of Contents
Advertisement
Advertisement
Chapters
Table of Contents

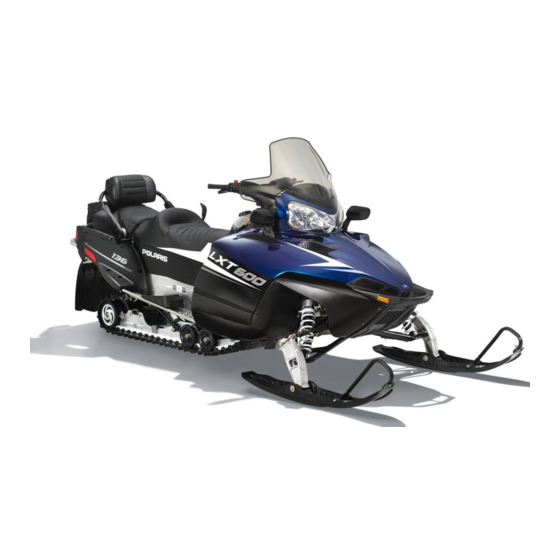
Related Manuals for Polaris 600 IQ LXT


Summary of Contents for Polaris 600 IQ LXT
- Page 1 600 IQ LXT Snowmobile Owner's Manual for Maintenance and Safety...
- Page 2 The engine exhaust from this product contains chemicals known to the State of California to cause cancer, birth defects or other reproductive harm. For videos and more information about a safe riding experience with your Polaris vehicle, scan this QR code with your smartphone.
- Page 3 WELCOME Thank you for purchasing a POLARIS vehicle, and welcome to our world-wide family of POLARIS enthusiasts. Be sure to visit us online at www.polaris.com for the latest news, new product introductions, upcoming events, career opportunities and more. Here at POLARIS we proudly produce an exciting line of utility and recreational products.
- Page 4 IQ® RIDER SELECT® Copyright 2014 POLARIS Industries Inc. All information contained within this publication is based on the latest product information at the time of publication. Due to constant improvements in the design and quality of production components, some minor discrepancies may result between the actual vehicle and the information presented in this publication.
-
Page 5: Table Of Contents
Specifications ......120 POLARIS Products..... 122 Troubleshooting . -
Page 7: Introduction
INTRODUCTION Important Notes for Owners and Drivers After reading this manual, store it in the snowmobile for convenient reference. It should remain with the snowmobile when the snowmobile is sold. Some of the illustrations and photos used in this manual are general representations. -
Page 8: Preservation Of The Environment
POLARIS snowmobiles are engineered to conform to these SAE standards. Our muffler systems are designed to reduce noise levels and must not be altered or removed. The sound of your snowmobile may not be welcome to non-snowmobilers, so you have a responsibility to operate your snowmobile with concern for others. -
Page 9: Vehicle Identification Numbers
Remove the spare key and store it in a safe place. Your key can be duplicated only by mating a POLARIS key blank with one of your existing keys, so if both keys are lost, the ignition switch must be replaced. -
Page 10: Safety
SAFETY Operator Safety The following signal words and symbols appear throughout this manual and on your vehicle. Your safety is involved when these words and symbols are used. Become familiar with their meanings before reading the manual. The safety alert symbol indicates a potential personal injury hazard. DANGER A DANGER indicates a hazardous situation that, if not avoided, will result in death or serious injury. -
Page 11: Operator Safety
Always check major and vital safety components before every ride. All POLARIS snowmobiles are designed and tested to provide safe operation when used as directed. Failure of critical machine components may result from operation with any modifications, especially those that increase speed or power. - Page 12 SAFETY Operator Safety Stay Clear of Track Your snowmobile is propelled by a revolving track that must be partially exposed for proper operation. WARNING! Serious injuries may result if hands, feet, or clothing become entangled in the track. Be alert when riding, and remain properly seated to stay clear of the track.
-
Page 13: Riding Position
SAFETY Operator Safety Riding Position Operating a snowmobile requires skill and balance for proper control. Rider positions may vary with experience; but under many conditions, the proper position is to be seated with both feet on the running boards and both hands on the handlebar grips for proper throttle, brake and steering control. -
Page 14: Riding Apparel
Riding Apparel Helmet Wearing a helmet can prevent a severe head injury. Whenever riding a POLARIS vehicle, always wear a helmet that meets or exceeds established safety standards. Approved helmets in the USA and Canada bear a U.S. Department of Transportation (DOT) label. -
Page 15: Rider Capacity
SAFETY Operator Safety Rider Capacity Driving 1-Up - Some POLARIS snowmobiles are designed for a single rider only. A decal on the console of these models indicates single rider operation. Driving 2-Up - Some POLARIS snowmobiles are designed for up to two riders. -
Page 16: Disabled Operators
SAFETY Operator Safety Disabled Operators Safe operation of this rider-active vehicle requires good judgement and physical skills. WARNING! Operators with cognitive or physical disabilities have an increased risk of loss of control, which could result in serious injury or death. Do not allow disabled persons to operate this vehicle. -
Page 17: Excessive Speed
SAFETY Operator Safety Excessive Speed WARNING! High speed driving, especially at night, could result in serious injury or death. Always reduce speed when driving at night or in inclement weather. Always observe all state and local laws governing snowmobile operation and speed limits. Always be alert and pay attention to the trail ahead. -
Page 18: Driver Awareness
SAFETY Operator Safety Driver Awareness Slow down when traveling near poles, posts, or other obstacles. Be especially alert if you’re snowmobiling after dark. Always be on the alert for wire fences. Single strands are especially dangerous, since there may be a great distance between posts. Guy wires on utility poles are also difficult to distinguish. - Page 19 SAFETY Operator Safety Avalanches Snowmobilers should always be properly trained and equipped before traveling in mountainous terrain: • Take an avalanche class • Travel with experienced people • Travel on designated trails • Make sure each person is equipped with a shovel, probe and avalanche beacon.
-
Page 20: Driving Downhill
SAFETY Operator Safety Ice and Snow Build-up WARNING! Ice and snow build-up may interfere with the steering of your snowmobile, resulting in serious injury or death. Keep the underhood area free of snow and ice. Before driving, manually turn the skis to the left and right to be sure ice and snow are not interfering with full left and right steering. -
Page 21: Driving On Slippery Surfaces
SAFETY Operator Safety Driving on Slippery Surfaces WARNING! Never attempt an abrupt change of direction when operating on slippery surfaces. Proceed slowly and use extra caution. Driving on ice or hard- packed snow reduces steering and braking control, which may result in loss of control and serious injury or death. -
Page 22: Drive Belt
SAFETY Operator Safety Drive Belt Do not operate the engine with the drive belt removed. Any servicing that requires operation without a belt must be performed by your dealer. NOTICE: Operation of the engine with the belt removed may result in damage to the engine. -
Page 23: Inadequate Snow Conditions
SAFETY Operator Safety Inadequate Snow Conditions Since snow provides the only lubrication for the power slide suspension and, on liquid cooled models, cooling for the engine, adequate snow cover is a requirement for operation of your snowmobile. NOTICE: Driving in too little snow will result in excessive wear and damage to the slide rail, track and/or engine. -
Page 24: Driving Responsibly
SAFETY Operator Safety Driving Responsibly Every snowmobile handles differently, and even the most docile conditions may become dangerous if operators drive improperly. If you’re new to snowmobiling, acquaint yourself with the machine and with what it will and won’t do under various conditions. Even seasoned drivers should spend some time getting the feel for a machine before attempting ambitious maneuvers. - Page 25 SAFETY Operator Safety Windchill/Temperature Charts The following information is provided to help you determine when temperatures become dangerous for riding. WIND CHILL CHART (°F) Wind Actual Thermometer Reading (°F) Speed -10 -15 -20 -25 -30 -35 -40 -45 Equivalent Temperature (°F) Calm -10 -15 -20 -25 -30 -35 -40 -45 -11 -16 -22 -28 -34 -40 -46 -52 -57 -63...
-
Page 26: Safety Decals And Locations
If any decal becomes illegible or comes off, contact your POLARIS dealer to purchase a replacement. Replacement safety decals are provided by POLARIS at no charge. The part number is printed on the decal. Clutch Cover Warning... -
Page 27: Passenger Warning
SAFETY Safety Decals and Locations Passenger Warning Snowmobiles designed for an operator and one passenger have a “One Passenger” warning decal on the left console. Warning For more information on operating with a passenger, see page 13. WARNING This vehicle is designed for operator and “ONE”... -
Page 28: Reverse Warning
Safety Decals and Locations Reverse Warning Operation Warning Reverse Warning POLARIS snowmobiles equipped with electric reverse will have this decal on the console: WARNING Reverse operation, even at low speeds, can cause loss of control resulting in serious injury or death. To avoid loss of control, always: •... -
Page 29: Operation Warning
SAFETY Safety Decals and Locations Operation Warning An operation warning decal is present on the console of all POLARIS snowmobiles: WARNING • To avoid serious injury or death, read and understand all warnings and the Owner’s Manual before operation. If manual is missing, contact a POLARIS dealer for a replacement. -
Page 30: Features
FEATURES 1. Nosepan 2. Skis 3. Front Bumper (do not use for pulling or dragging the snowmobile) 4. Hood 5. Headlight 6. Windshield 7. Mirrors 8. Operator Seat 9. Passenger Grab Handle 10. Passenger Seat 11. Backrest 12. Cargo Bag 13. -
Page 31: Features
FEATURES 1. MFD Display 9. Ignition Switch 2. Handlebar Grip Warmer 10. Heated Windshield Power Switch Plug 3. Thumbwarmer Switch 11. Engine Stop Switch 4. Electronic Reverse Button 12. Throttle Control 5. MFD Control 13. Hood Hold Down Straps 6. Headlight Dimmer Switch 14. -
Page 32: Features
FEATURES Backrest The backrest can be adjusted for rider comfort. Whenever making adjustments, always make sure all lock levers are securely locked before operating. Tip: If an adjustment is difficult, rotate the lock levers to relieve tension, then make the adjustment. Height Adjustment 1. -
Page 33: Features
FEATURES Adjustable Headlights Move the adjuster to the left to lower the headlight beam. Move the adjuster to the right to raise the headlight beam. Radiator Compartment Access Panel The access panel is provided for cleaning debris from the radiator. Cargo Bag The cargo bag is secured to the rear Seat Latch... -
Page 34: Features
FEATURES Passenger Grab Handle On some models the position of the passenger grab handles can be adjusted for rider preference. 1. Unscrew and remove the knob assemblies that secure the grab handles. 2. Reposition the grab handles to one of the three available positions on the grab handle tube between the operator seat and the passenger seat. -
Page 35: Features
WARNING! If your snowmobile has five adjustment positions, do not remove the RIDER SELECT lockout. Your POLARIS snowmobile has been engineered for this range of adjustability. Removing this lockout and using RIDER SELECT position 6 or 7 will result in the handlebars and brake lever contacting other components and interfering with steering and braking. - Page 36 FEATURES RIDER SELECT Adjustable Steering System WARNING! Attempting to adjust the handlebar position while the snowmobile is moving could result in loss of control and serious injury or death. Always stop the snowmobile before attempting to adjust the steering system. 1.
-
Page 37: Features
In extreme conditions the DET system retards timing and holds it in a retarded state. If this occurs, replace the fuel with recommended fuel or see your POLARIS dealer for service. Cause of DET Activation... -
Page 38: Features
FEATURES Instrumentation MFD Component Identification Item 1 Analog (if equipped) 2 Digital Gauge 3 Check Engine Indicator 4 Low Oil Indicator 5 High Temp Indicator 6 Brake Indicator 7 Reverse Indicator 8 High Beam Indicator Digital Display Identification Item 1 RPM or Speed Altitude (if equipped) Service Interval 2 Electrical System Voltage... -
Page 39: Features
FEATURES Instrumentation MFD Settings The MFD control switch allows you to set the MFD display to your preferences. The rocker switch has a MODE button (top) and a SET MODE button (bottom). Specific instructions are outlined on the following pages. Standard vs. -
Page 40: Features
FEATURES Instrumentation MFD Settings Speedometer/Tachometer The speedometer and tachometer can be viewed in either the analog or the digital display. If the analog display is set to show speedometer readings, the digital screen will automatically display the tachometer (option 1). If the analog is set to show the tachometer, the digital screen will show the speedometer (option 2). -
Page 41: Features
FEATURES Instrumentation MFD Digital Display Programs Press and release the MODE button to cycle through the three MFD programs: Performance, Engine and History. Each program remains active until you cycle to the next program. While any program is active, press and release the SET button to cycle through the program’s screens. Performance Program The Performance Program automatically displays either speed or tachometer, whichever is opposite the analog display. -
Page 42: Features
FEATURES Instrumentation MFD Digital Display Programs Trip Settings Trip 1 and Trip 2 are odometers used to check fuel mileage or to keep track of distance traveled. Both odometers can be reset to zero. 1. Enter the Performance Program. 2. Press and release the SET button until the desired trip screen is active. -
Page 43: Features
FEATURES Instrumentation MFD Digital Display Programs Performance Program Trip Settings If the snowmobile is equipped with an electronic fuel gauge, Trip F automatically displays when the fuel level is low. The fuel symbol and the last fuel bar on the MFD gauge will blink when the fuel level reaches 1/8th tank. -
Page 44: Features
FEATURES Instrumentation MFD Digital Display Programs Performance Program Clock Setting (if equipped) 1. Enter the Performance Program. 2. Press and release the SET button until the clock screen is active. 3. Press and hold the SET button for five seconds. 4. -
Page 45: Features
FEATURES Instrumentation MFD Digital Display Programs Engine Program The Engine Program automatically displays the engine coolant temperature, engine hours, electrical system voltage level and fuel level (if equipped). On machines equipped with altimeter sensor and ambient air temperature sensors, altitude and ambient air temperature will display as additional screens in the engine program. -
Page 46: Features
FEATURES Instrumentation MFD Digital Display Programs Engine Program Altitude (if equipped) The rider can calibrate the altimeter for current atmospheric conditions. Altimeter accuracy will be +/-300 ft. (91 m) after adjustment. 1. Enter the Engine Program. Tip: Press and hold the MODE switch for ten sec- onds to switch between standard and metric units of measurement. -
Page 47: Features
FEATURES Instrumentation MFD Digital Display Programs History Program The History Program automatically displays electrical system voltage level and fuel level (if equipped). While in the History mode, press the SET button to view maximum vehicle speed, maximum engine rpm or the current service interval setting. -
Page 48: Features
FEATURES Instrumentation MFD Digital Display Programs History Program Service Interval Reminder The gauge logs the number of engine hours accumulated between service reminders. When the logged hours reaches the designated service interval (set by the user), the gauge provides a reminder that service is due. -
Page 49: Features
FEATURES Instrumentation MFD Digital Display Programs History Program Service Interval Reminder To reset the reminder at a new interval: 1. Enter the History Program. 2. Press and release the SET button until the service interval screen is active. 3. Press and hold the SET button for five seconds, until the hours begin to flash. -
Page 50: Features
FEATURES Instrumentation MFD Battery Replacement Models equipped with the clock feature have a battery to power the clock. If the clock function of the MFD isn't working properly, replace the battery. Replacement batteries are available from your dealer. 1. Remove the plenum from the underside of the hood. -
Page 51: Features
FEATURES Instrumentation MFD Battery Replacement 5. Using needle-nose pliers, grasp the battery and rotate it so the leading edge of the battery is raised away from the battery holder. Pull the battery out gently. Tip: The battery will not come out of the holder unless the leading edge of the battery is raised. -
Page 52: The Perfect Fit
THE PERFECT FIT IQ Front Suspension Adjustments Independent Front Suspension (IFS) Break in the suspension for approximately 150 miles (240 km) before making any fine-tuning adjustments. Settings will vary from rider to rider, depending on rider weight, vehicle speed, riding style, and trail conditions. We recommend starting with factory settings and then customizing each adjustment individually to suit rider preference. -
Page 53: Front Shock Spring Preload
THE PERFECT FIT IQ Front Suspension Adjustments Front Shock Spring Preload Increasing spring preload will increase ski-to-ground pressure. Decreasing spring preload will decrease ski-to-ground pressure. When adjusting, be sure the springs on both the left and right sides of the machine are at the same adjustment. To change front shock spring preload, grasp the spring and rotate it. -
Page 54: Shock Valving
Shocks contain high-pressure nitrogen gas. Use extreme caution when handling high-pressure service equipment. We recommend that this work be performed by a POLARIS dealer. -
Page 55: Rear Suspension Adjustments
Bogie wheel kits are available from your dealer. • POLARIS offers track kits for improved flotation in deep snow. See your dealer for assistance. Tip: Keep the suspension pivot points lubricated. This will reduce moisture and rust build-up and ensure proper function of the suspension components. - Page 56 THE PERFECT FIT IQ Rear Suspension Adjustments Initial Spring Preload Setting (Sag Method) To set up the rear suspension torsion spring preload, measure the distance between the ground and rear bumper. This is measurement X. No Rider Take the first measurement with no rider and with the rear suspension at full extension.
-
Page 57: Torsion Spring Preload
THE PERFECT FIT IQ Rear Suspension Adjustments Torsion Spring Preload To adjust rear torsion spring preload, rotate the three-position cam using the engine spark plug tool. Adjustment is easiest when the cam is rotated from low to medium, and then to high. Rotating directly from low to high will require significantly more effort. - Page 58 THE PERFECT FIT IQ Rear Suspension Adjustments Limiter Strap Position (Ski Pressure) Ski pressure is set at the factory to deliver the optimum balance between ride and handling. If a rider prefers more ski pressure for improved steering performance, adjustments can be made to the Upper front limiter straps.
-
Page 59: Suspension Coupling
THE PERFECT FIT IQ Rear Suspension Adjustments Suspension Coupling On all POLARIS snowmobile rear suspensions, there are two torque arms that control the movement of the rail beam. Prior to the advent of suspension coupling, these torque arms could move independently of each other. - Page 60 THE PERFECT FIT IQ Rear Suspension Adjustments Rear To Front Coupling and the Rear Rear Scissor Stop (RRSS) The rear rear scissor stop (RRSS) couples the movement of the rear torque arm with the front torque arm and limits the amount of independent movement between the rear torque and the front torque arm.
-
Page 61: Weight Transfer During Acceleration
THE PERFECT FIT IQ Rear Suspension Adjustments Weight Transfer During Acceleration The preferred method for controlling HIGH weight transfer during acceleration is by adjusting the rear rear scissor stop (RRSS). The factory setting is the best for most trail riding conditions. MEDIUM To decrease weight transfer under acceleration (for improved corner-... -
Page 62: Handlebar Adjustments
THE PERFECT FIT Handlebar Adjustments Use the RIDER SELECT feature to adjust handlebar position. See page 33. Use the following steps to adjust handlebar angle at the handlebar block. 1. Remove the handlebar cover to expose the handlebar and the four adjuster block bolts. Handlebar Cover 2. - Page 63 THE PERFECT FIT Accessories POLARIS offers a wide range of accessories for your snowmobile to help make each ride more enjoyable. Use only POLARIS parts and accessories on your POLARIS snowmobile. Use of unapproved parts and accessories may result in: •...
-
Page 64: Traction Products
Before equipping your snowmobile with traction products, be aware of the laws in your area pertaining to the use of traction products. Use only POLARIS traction products on your snowmobile. Track warranties are void if track damage or failure results from improper or excessive stud installation or the use of non-POLARIS traction products. -
Page 65: Carbide Skags
THE PERFECT FIT Traction Products Carbide Skags A skag is a replaceable bar attached to the underside of the ski to assist in turning the snowmobile and to prevent ski wear caused by contact with roads and other bare terrain. Use carbide skags with studded tracks to help maintain proper vehicle steering and control. -
Page 66: Pre-Ride Inspections
PRE-RIDE INSPECTIONS Pre-Ride Checklist Inspect all items on the checklist for proper operation or condition before each use of the snowmobile. Procedures are outlined on the referenced pages. Item See Page Drive Belt Condition Steering System Recoil Rope Parking Brake Lock/Brake Lever/Brake System 67, 68, 100 Throttle Lever Throttle Safety Switch... -
Page 67: Before Starting The Engine
Ensure that the seat latches are securely in place before every use of the snowmobile. Recoil Rope Inspect the recoil rope and handle for excessive wear, and make sure the knot securing the rope inside the handle is secure. If excessive wear is found, see your POLARIS dealer for replacement. -
Page 68: Steering System
PRE-RIDE INSPECTIONS Before Starting the Engine Hood Latches The hood of the snowmobile protects the operator from moving parts as well as aiding in sound emission control and other functions. Under no circumstances should your snowmobile be operated with the hood open or removed. - Page 69 PRE-RIDE INSPECTIONS Before Starting the Engine Brakes Always check the following items for proper operation before starting the engine. Brake Lever Travel Squeeze the brake lever. It should move no closer to the 1/2" (1.3 cm) handgrip than 1/2” (1.3 cm). A smaller distance indicates low brake fluid level or air in the hydraulic system.
-
Page 70: Parking Brake Lock/Brake Lever/Brake System
PRE-RIDE INSPECTIONS Before Starting the Engine Parking Brake Lever Lock Use the parking brake lever lock only when you want the snowmobile to remain stationary; for example, when parked on an incline for a period of five minutes or less. 1. - Page 71 PRE-RIDE INSPECTIONS Before Starting the Engine Track Inspection WARNING! Operating the snowmobile with a damaged track increases the possibility of track failure, which could cause loss of control resulting in serious injury or death. Always inspect the track for damage before using the vehicle. WARNING! Use of traction products such as studs increases the possibility of track damage and/or failure.
-
Page 72: Suspension Inspection
PRE-RIDE INSPECTIONS Before Starting the Engine Suspension Inspection Loose nuts and bolts can reduce your snowmobile's reliability and cause needless repairs and down time. Before beginning any snowmobile trip, a visual inspection will uncover potential problems. Check the following items on a weekly basis or before any long trip. Item Check Page... -
Page 73: Start The Engine And Check
PRE-RIDE INSPECTIONS Start the Engine and Check Engine Stop Switch Check the auxiliary shut-off switch for proper operation. Push the switch down to stop the engine. Pull it up to allow restarting. Ignition Switch Make sure the engine stops when the ignition switch is turned to OFF. Lighting Check the headlight (high and low beam), taillight, and brake light. -
Page 74: Operation
Never mix brands of oil. Serious chemical reactions can cause injection system blockage, resulting in serious engine damage. Oils may also be incompatible and the result could be sludge formation, filter blockage, and reduced cold weather flow rates. All POLARIS oils are compatible with each other. Initial Fuel Premix Always premix fuel in 5-gallon (19-liter) increments in a separate fuel container. -
Page 75: Oil Injection System
NOTICE: Use of any lubricants other than those recommended by POLARIS may cause serious engine damage. We recommend the use of POLARIS lubricants for your vehicle. -
Page 76: Slide Rail And Track Cooling
OPERATION Slide Rail and Track Cooling NOTICE: Inadequate cooling and lubrication will lead to overheating of the slide rail and track, resulting in premature wear and failure. Reduce speeds and frequently drive into fresh snow to allow adequate cooling and polishing of the slide rail and track surfaces. -
Page 77: Fuel Safety
OPERATION Fuel Safety WARNING Gasoline is highly flammable and explosive under certain conditions. • Always exercise extreme caution whenever handling gasoline. • Always refuel outdoors or in a well-ventilated area. • Always turn off the engine before refueling. • Do not overfill the tank. Do not fill the tank neck. •... -
Page 78: Fuel System Deicers
OPERATION Fuel For peak performance, POLARIS recommends the use of 91 octane or higher fuel. Although 87 octane fuel is usable, some engine performance will be lost and fuel economy will decrease. Do not use lower than 87 octane fuel. Do not use fuel containing more than 10% ethanol (including E85). -
Page 79: Low Oil Indicator Light
Always do a visual check of the oil level when refueling. When the oil reaches the low level mark, add the recommended oil to the tank. The POLARIS oil cap on the oil bottle is vented to allow proper oil flow. See your POLARIS dealer for recommended replacement parts. - Page 80 OPERATION Engine Stop Switch Stop Switch Push down on the engine stop switch to ground out the ignition and stop the engine quickly. Pull the switch up to the RUN position to allow restarting. Throttle Safety Switch The throttle safety switch is designed to stop the engine whenever all pressure is removed from the throttle lever and the throttle cable or valves do not return to the normal closed position.
-
Page 81: Throttle Lever
When these switches are disconnected, the ignition key switch must be used to shut off the engine. DO NOT continue to operate the machine with the throttle safety switch disconnected. Return the machine to an authorized POLARIS dealer for service as soon as possible. - Page 82 OPERATION Electronic Reverse (PERC) Electronic reverse will activate only if the engine RPM is below 4000 WARNING! Improper reverse operation, even at low speeds, may cause loss of control, resulting in serious injury or death. Damage will occur to the gearcase or transmission if shifting is attempted when the engine is operating above idle speed.
-
Page 83: Throttle Safety Switch
OPERATION Electronic Reverse (PERC) Disengaging Reverse 1. Stop the snowmobile and leave the engine idling. 2. Push the yellow reverse button for one second and release. The light on the instrument panel will shut off. 3. Apply the throttle slowly to make sure the transmission is in forward. -
Page 84: Daily Storage
OPERATION Daily Storage At the end of each ride, park the snowmobile on a level surface and support it at the rear with an appropriate track stand. The track should be suspended approximately 4" (10 cm) off the ground. Remove the key and cover the snowmobile. Towing Do not use the front bumper to pull or drag the snowmobile. -
Page 85: Maintenance
Please read the Snowmobile Engine Emissions Limited Warranty, and read the maintenance section of your owner's manual. You are responsible for ensuring that the specified maintenance is performed. POLARIS recommends that you contact an authorized POLARIS dealer to perform any service that may be necessary. Non-ionizing Radiation This vehicle emits some electromagnetic energy. - Page 86 MAINTENANCE POLARIS Recommended Maintenance Program To ensure many trouble-free miles of snowmobiling enjoyment, follow recommended regular maintenance and perform service checks as outlined in this manual. Record maintenance and service in the Maintenance Log beginning on page 136. The recommended maintenance schedule on your snowmobile calls for service and maintenance inspections at 150 miles (240 km), 500 miles (800 km) and 1000 miles (1600 km).
- Page 87 The following chart is a guide based on average riding conditions. You may need to increase frequency based on riding conditions. When inspection reveals the need for replacement parts, always use genuine POLARIS parts, available from your POLARIS dealer. Item Frequency Page 150 mi.
-
Page 88: Taillight/Brake Light/Headlight
MAINTENANCE Periodic Maintenance Interval Table Item Frequency Page 150 mi. 500 mi. 1000 mi. 2000 mi. Pre- (240 km) (800 km) (1600 km) (3200 km) Season BRAKES Hose Routing Hose Condition Fluid Leaks Brake Pads Brake Disc Parking Brakes Brake System Brake Fluid FUEL MANAGEMENT Idle RPM... -
Page 89: Chaincase Oil Level
MAINTENANCE Periodic Maintenance Interval Table Item Frequency Page 150 mi. 500 mi. 1000 mi. 2000 mi. Pre- (240 km) (800 km) (1600 km) (3200 km) Season CHASSIS Ski Toe Alignment Suspension Mounting Bolts Steering Fasteners Rear Suspension Fasteners Cooling Fins and Shroud Drive Shaft Bearing Skags (Wear Bars) -
Page 90: Rear Suspension
MAINTENANCE Lubrication Rear Suspension Lubricate the suspension pivot shafts with POLARIS All Season Grease at the intervals outlined in the Periodic Maintenance Table beginning on page 85 and before seasonal storage. When operating in heavy, wet snow conditions, lubricate every 500 miles (800 km). -
Page 91: Throttle Cable
MAINTENANCE Lubrication Drive Shaft Bearing Fitting Inject grease into the fitting on the speedometer sensor housing until grease purges from the seal on the inside of the tunnel. This should take approximately two pumps. Do not use more than four pumps. Throttle Cable Lubricate the throttle cable lightly with grease or oil. -
Page 92: Chaincase Oil
(2). Change the chaincase oil after the first 500 miles (800 km), then every 2000 miles (3200 km) or seasonally. POLARIS recommends the use of POLARIS Synthetic Chaincase Lube. See page 122 for the part numbers of POLARIS products. -
Page 93: Oil Change
MAINTENANCE Chaincase Oil Oil Change 1. Position the vehicle on a level surface. 2. Remove the drain plug (4) and drain the oil into a drain pan. Allow the oil to drain completely. 3. Clean off all metal shavings from the plug. -
Page 94: Spark Plugs
MAINTENANCE Spark Plugs A new engine can cause temporary spark plug fouling due to the preservative added during the assembly process. Avoid prolonged idle speeds, which cause plug fouling and carbonization. NOTICE: Using non-recommended spark plugs can result in serious engine damage. - Page 95 MAINTENANCE Spark Plugs Normal Spark Plug The normal insulator tip is gray, tan or light brown. There will be few combustion deposits. The electrodes are not burned or eroded. This indicates the proper type and heat range for the engine and the service. Tip: The tip should not be white.
-
Page 96: Intake Filters
Do not attempt to service the fuel pump. Fuel Filter See your POLARIS dealer for replacement of the fuel filter at the intervals outlined in the Periodic Maintenance Table beginning on page Contaminated or poor quality fuel will shorten the life of the fuel filter and result in poor engine performance. -
Page 97: Oil Filter
MAINTENANCE Oil Lines Inspect oil line condition every 1000 miles (1600 km). Oil Filter The oil filter is located at the side of the oil tank. Have your dealer change the oil filter and bleed the system annually or every 1000 miles (1600 km). -
Page 98: Cooling System
POLARIS recommends the use of POLARIS Antifreeze 50/50 Premix. This antifreeze is already premixed and ready to use. Do not dilute with water. See page 122 for the part numbers of POLARIS products. Any time the cooling system has been drained for maintenance or repair, replace the coolant with fresh Antifreeze 50/50 Premix. -
Page 99: Flushing The Cooling System
(5) years and fresh Antifreeze 50/50 Premix added. This service must be performed when the engine is cold. Ask your POLARIS dealer to check the coolant when he performs the fall tune-up on your snowmobile. -
Page 100: Bleeding The Cooling System
MAINTENANCE Cooling System Bleeding the Cooling System CAUTION! Steam and hot liquids will cause burns to your skin. Never bleed the cooling system or remove the pressure cap when the engine is warm or hot. Use of a non-standard pressure cap will not allow the recovery system to function properly. -
Page 101: Drive Chain Tension
MAINTENANCE Drive Chain Tension Check drive chain tension weekly and before each long trip. To obtain correct chain tension: 1. Rotate the driven clutch counter- clockwise to move all chain slack to the tensioner side. Lock the brake lever lock, or have an assistant hold the brake lever firmly. -
Page 102: Hydraulic Brake Inspection
2. Brake Disc 3. Brake Pad Material (Replace when thickness is less than 1/16”/1.5 mm). Excessive Lever Travel Hydraulic brakes are self- adjusting, but if excessive brake pad clearance develops bring the snowmobile to an authorized POLARIS dealer for inspection and adjustment. -
Page 103: Brake Fluid
NOTICE: Brake fluid will damage decals, paint and some plastics. Always wipe up spills immediately. Replace brake fluid at least every two Sight Glass years with POLARIS DOT 4 high temperature brake fluid. See page 122 for the part numbers of POLARIS products. -
Page 104: Bleeding The Hydraulic Brake System
MAINTENANCE Brakes Bleeding the Hydraulic Brake System Air in the hydraulic brake system will cause spongy brake lever action. Bleed the system before operating the snowmobile. WARNING! Operating the vehicle with a spongy brake lever can result in loss of brakes, which could cause an accident and lead to serious injury or death. -
Page 105: Removing Halogen Bulbs
MAINTENANCE Lights Removing Halogen Bulbs Tip: Do not touch a halogen bulb with bare fingers. Oil from skin leaves a resi- due, causing a hot spot that will shorten the life of the lamp. If fingers do touch the bulb, clean it with an alcohol-moistened towel. 1. -
Page 106: Clutch System
POLARIS dealer. Any unauthorized modifications to clutches, such as adding or removing weights, will void the warranty. NOTICE: The bushings in the weights and rollers of POLARIS clutches are made of a material that may be damaged if lubricated. Do not lubricate clutch bushings. -
Page 107: Drive Belt Condition
MAINTENANCE Clutch System Drive Belt Condition Periodically check the condition and tension of the drive belt, and always carry a spare. Inspect the belt for signs of excessive wear: frayed edges, missing cogs, cracks and excessive looseness. Replace the belt if any of these conditions exist. -
Page 108: Drive Belt Removal
MAINTENANCE Clutch System Drive Belt Removal NOTICE: Do not attempt to remove the drive belt after operating in reverse. The snowmobile must be stopped after forward motion to prevent damage to components during belt removal. 1. Stop the engine after operat- ing in a forward motion. -
Page 109: Drive Belt Installation
MAINTENANCE Clutch System Drive Belt Installation 1. Drop the drive belt over the drive clutch and pull back the slack. The belt cord line should be flush with, or slightly above, the outer circumference of the driven clutch sheaves. The belt will seat itself in the driven clutch during the break- in period. -
Page 110: Track Replacement
Track Replacement When replacing the track, always install a track having the lug size recommended for your model. See your POLARIS dealer. NOTICE: Installing tracks with larger lugs on machines equipped with coolers will result in damage to the cooler or tunnel. Always install a track having the lug size recommended for your model. -
Page 111: Track Lubrication
MAINTENANCE Track Lubrication WARNING! Operating with insufficient lubrication between the rail slide and track guide clips can cause track failure, loss of vehicle control and loss of braking ability, which can result in serious injury or death. Avoid operating for extended periods on ice and other surfaces that have little or no snow for lubrication. - Page 112 MAINTENANCE Track Tension WARNING! Moving parts can cut and crush body parts. When performing the checks and adjustments recommended on the following pages, stay clear of all moving parts. Never perform track measurement or adjustments with the engine running. Track adjustment is critical for proper handling. Always maintain correct tension and alignment.
- Page 113 MAINTENANCE Track Tension 4. Check for specified slack between the wear surface of the track clip and the plastic rail slide. If the track needs adjustment: 5. Loosen the rear idler shaft bolt. 6. Loosen the lock nuts. Adjusting Screw Slack Measurement Lock Nut Shaft...
-
Page 114: Track Alignment
35 ft. lbs. (47.5 Nm). 5. Repeat steps 2 and 3 to verify proper alignment. Rail Slide Wear For ease of inspection, all Minimum POLARIS rail slides have a Thickness wear limit indicator groove to indicate the minimum permissible slide thickness. - Page 115 MAINTENANCE Steering System Steering Inspection and Adjustment Check all steering system fasteners weekly and before a long ride. Tighten any loose fasteners.
-
Page 116: Ski Alignment
WARNING! Improper ski alignment or adjustment may cause loss of steering control, resulting in serious injury or death. Do not attempt to change the ski alignment or toe adjustment. See your POLARIS dealer. If the steering feels heavy, or if the snowmobile seems to pull or dart to the side, ski alignment may need adjustment. -
Page 117: Ski Skags
MAINTENANCE Steering System Ski Skags WARNING! Worn skis and/or skags will adversely affect handling. Loss of vehicle control may result, causing serious injury or death. See your dealer's studding chart for recommended skags. If you install longer or more aggressive carbide skags than the original equipment, it may also be necessary to add track studs to maintain proper vehicle control while turning on hard-packed snow or ice. -
Page 118: Battery Removal
Check battery voltage each month during storage and recharge as needed to maintain a full charge. Tip: Battery charge can be maintained by using a POLARIS Battery Tender charger or by charging about once a month to make up for normal self- discharge. -
Page 119: Battery Charging
MAINTENANCE Battery Battery Charging The following battery charging instructions apply only to the installation of a sealed battery. Read all instructions before proceeding with the installation of this battery. The sealed battery is already filled with electrolyte and has been sealed and fully charged at the factory. -
Page 120: Cleaning And Preservation
Extended Storage Off-season or extended storage of your snowmobile requires preventive measures to aid against deterioration and to prolong the useful life of many components. See page 122 for the part numbers of POLARIS products. Cleaning and Preservation Proper storage starts with cleaning, washing, and waxing the hood, chassis, and plastic parts. -
Page 121: Engine Protection
MAINTENANCE Extended Storage Engine Protection Proper preparation of the engine and fuel system is vital to the prevention of rust and corrosion on precision engine parts during storage. Whenever the machine is stored for a period of more than 60 days, the engine must be fogged with fogging oil. -
Page 122: Specifications
SPECIFICATIONS Capacities and Dimensions Body Style Rider Capacity Coolant Capacity 7 qts. (6.6 l) Fuel Capacity 11.4 gal. (43.2 l) Oil Capacity 3.4 qts. (3.2 l) Chaincase Oil Capacity 9 oz. (266.2 ml) Length 127 in. (323 cm) Width 47.25 in. (120 cm) Height 52 in. - Page 123 SPECIFICATIONS Clutching Chart ALTITUDE Drive Clutch Drive Clutch Driven Clutch Driven Chaincase Meters Shift Weight Spring Spring Helix Gearing/ (Feet) Pitch *Shaded cells indicate factory settings. 0-600 10-64 Black/Green LH, RED/BLK 56/42/36 22:43 (0-2000) (1321585) (7042083) (7043058) LWER 78 Pitch (5135403) 600-1200 10-62...
-
Page 124: Polaris Products
POLARIS PRODUCTS Description Part No. Engine Lubricants 2870791 Fogging Oil (12 oz. Aerosol) 2875035 Premium Blue 2-Cycle Oil (qt./.95 l) (break-in only) 2875036 Premium Blue 2-Cycle Oil (gal./3.8 l) (break-in only) 2877882 VES 2-Cycle Oil (qt./.95 l) 2877953 VES 2-Cycle Engine Oil (2 qt./1.9 l) 2877883 VES 2-Cycle Engine Oil (gal./3.8 l) -
Page 125: Troubleshooting
TROUBLESHOOTING Engine Troubleshooting Unless you have experience and training in two-cycle engine repair, see your dealer if technical problems arise. Problem Probable Cause Solution Erratic engine oper- Drive clutch binding • SEE YOUR DEALER. ating RPM during Driven clutch mal- •... - Page 126 TROUBLESHOOTING Engine Troubleshooting Problem Probable Cause Solution Noise in drive sys- Broken drive clutch • SEE YOUR DEALER. components Bearing failure/ • SEE YOUR DEALER. chaincase, jackshaft, or front drive shaft Drive belt surface • Inspect and replace as needed. flat spots Drive chain loose •...
- Page 127 TROUBLESHOOTING Engine Troubleshooting Problem Probable Cause Solution Engine turns but fails Faulty ignition • Install new spark plug(s). If engine to start still fails to start, check for spark. If there's no spark, SEE YOUR DEALER. No fuel to engine •...
- Page 128 TROUBLESHOOTING IQ Comfort Suspension Troubleshooting Problem Solution Rear suspension bot- • Adjust torsion spring preload to achieve proper static sag toms too easily (see page 54). • Change torsion spring to stiffer optional spring (see your dealer). • Rotate RRSS to higher position (see page 59). Rides too stiff in rear •...
- Page 129 TROUBLESHOOTING Drive Belt Wear/Burn Cause Solution Driving at low RPM Drive at higher RPM. Gear the machine down. Check belt deflection. Insufficient warm-up Warm the engine at least five minutes. Take the drive belt off the machine in extremely cold weather and warm it up.
-
Page 130: Warranty
Service and Warranty Information Obtaining Service and Warranty Assistance Read and understand the service data and the POLARIS warranty information contained in this manual. Contact your POLARIS dealer for replacement parts, service or warranty. Your dealer receives frequent updates on changes, modifications and tips on snowmobile maintenance, which may supersede information contained in this manual. -
Page 131: Limited Warranty
This warranty is transferable to another owner during the warranty period through a POLARIS dealer, but any such transfer will not extend the original term of the warranty. The duration of this warranty may vary by international region based upon local laws and regulations. - Page 132 Warranty Coverage and Exclusions Limitations of Warranties and Remedies This POLARIS Limited Warranty excludes any failures that are not caused by a defect in material or workmanship. THIS WARRANTY DOES NOT COVER CLAIMS OF DEFECTIVE DESIGN. This warranty also does not cover acts of God, accidental damage, normal wear and tear, abuse or improper handling.
- Page 133 MATERIALS, COMPONENTS, OR PRODUCTS. THE REMEDIES SET FORTH IN THIS WARRANTY ARE THE ONLY REMEDIES AVAILABLE TO ANY PERSON FOR BREACH OF THIS WARRANTY. POLARIS SHALL HAVE NO LIABILITY TO ANY PERSON FOR INCIDENTAL, CONSEQUENTIAL OR SPECIAL DAMAGES OF ANY DESCRIPTION, WHETHER ARISING OUT OF EXPRESS OR IMPLIED WARRANTY OR ANY OTHER CONTRACT, NEGLIGENCE, OR OTHER TORT OR OTHERWISE.
- Page 134 If you purchase from a private party: If you purchase a POLARIS product from a private party, to be kept and used outside of the country in which the product was originally purchased, all warranty coverage will be denied.
- Page 135 SOLD OUTSIDE THE COUNTRY OF THE SELLING DEALER’S AUTHORIZED LOCATION. This policy does not apply to products that have received authorization for export from POLARIS. Dealers may not give authorization for export. You should consult an authorized dealer to determine this product’s warranty or service coverage if you have any questions.
- Page 136 U.S.A. EPA Emissions Limited Warranty This Emissions Limited Warranty is in addition to the POLARIS standard Limited Warranty for your vehicle. POLARIS Industries Inc. warrants that at the time it is first purchased, this emissions-certified vehicle is designed, built and equipped so it conforms with applicable U.S.
- Page 137 POLARIS dealer to perform any service that may be necessary for your vehicle. POLARIS also recommends that you use only POLARIS parts. It is a potential violation of the Clean Air Act if a part supplied by an aftermarket parts manufacturer reduces the effectiveness of the vehicle’s emission controls.
-
Page 138: Maintenance Log
MAINTENANCE LOG Present this section of your manual to your dealer each time your snowmobile is serviced. This will provide you and future owners with an accurate log of maintenance and services performed on the snowmobile. DATE MILES TECHNICIAN SERVICE PERFORMED / COMMENTS (KM) 150 mi. - Page 139 MAINTENANCE LOG DATE MILES TECHNICIAN SERVICE PERFORMED / COMMENTS (KM)
- Page 140 MAINTENANCE LOG DATE MILES TECHNICIAN SERVICE PERFORMED / COMMENTS (KM)
-
Page 141: Index
INDEX Access Panel, Radiator Compartment 31 DET ......35 Accessories ....61 Detonation Elimination Technology 35 Adjustable Steering System . - Page 142 Ice and Snow Build-up ..18 Polaris Products....122 IFS ......50 Pre-Ride Checklist .
- Page 143 INDEX Ski Toe Settings ....114 Throttle Cable Lubrication ..89 Slide Rail and Track Cooling ..74 Throttle Lever.
- Page 144 For your nearest Polaris dealer, call 1-800-POLARIS (765-2747) or visit www.polaris.com Polaris Industries Inc., 2100 Hwy. 55, Medina, MN 55340 Part No. 9925099 Rev 01 Printed in USA...