Table of Contents
Advertisement
Available languages
Available languages
opERAtoR'S MANuAl
MANuAl DEl opERADoR
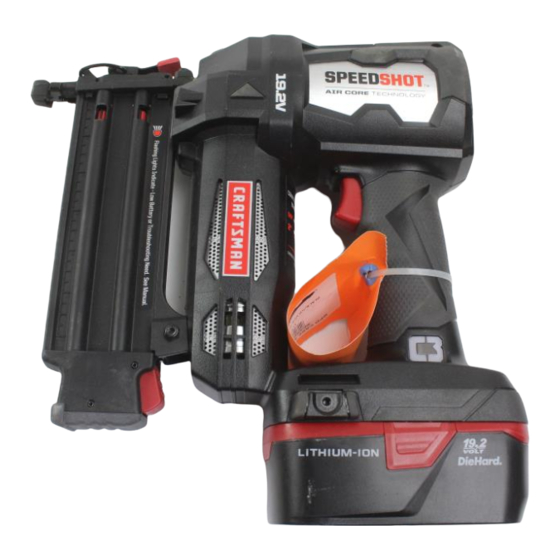
19.2 volt BRAD NAIlER
clAvADoRA DE puNtIllAS cAlIBRE
Model No. / Número de modelo
315.FS2000
WARNING:
To reduce the risk of injury,
the user must read and understand the
operator's manual before using this
product.
ADvERtENcIA:
Para reducir el
riesgo de lesiones, el usuario debe leer
y comprender el manual del operador
antes de usar este producto.
Customer Help Line: 1-800-932-3188
Teléfono de atención al consumidor: 1-800-932-3188
Sears Brands Management Corporation, 3333 Beverly Rd., Hoffman Estates, IL 60179 USA
Visit the Craftsman web page: www.sears.com/craftsman
Visite el sitio web de Craftsman: www.sears.com/craftsman
990000779
11-21-13 (REV:01)
Save this manual for future reference
Guarde este manual para futuras consulta
DE 19,2 v
Advertisement
Table of Contents

Related Manuals for Craftsman 315.FS2000


Summary of Contents for Craftsman 315.FS2000
- Page 1 Teléfono de atención al consumidor: 1-800-932-3188 Sears Brands Management Corporation, 3333 Beverly Rd., Hoffman Estates, IL 60179 USA Visit the Craftsman web page: www.sears.com/craftsman Visite el sitio web de Craftsman: www.sears.com/craftsman Save this manual for future reference Guarde este manual para futuras consulta...
-
Page 2: Table Of Contents
With proof of purchase, defective product will be replaced free of charge. For warranty coverage details to obtain free replacement, visit the web site: www.craftsman.com This warranty does not cover nails, which are expendable parts that can wear out from normal use within the warranty period. -
Page 3: General Power Tool Safety Warnings
GENERAl poWER tool SAFEtY WARNINGS pERSoNAl SAFEtY WARNING Read all safety warnings and all Stay alert, watch what you are doing and use instructions. Failure to follow the warnings and common sense when operating a power tool. Do instructions may result in electric shock, fire and/or not use a power tool while you are tired or under the serious injury. -
Page 4: General Power Tool Safety Warnings
GENERAl poWER tool SAFEtY WARNINGS Disconnect the plug from the power source and/or use power tools only with specifically designated the battery pack from the power tool before making battery packs. Use of any other battery packs may any adjustments, changing accessories, or storing create a risk of injury and fire. -
Page 5: Nailer Safety Warnings
NAIlER SAFEtY WARNINGS Always assume that the tool contains nails. Careless environments will require the use of head protection handling of the nailer can result in unexpected firing of equipment. When required, the employer and user must nails and personal injury. ensure that head protection conforming to ANSI Z89.1- 1997 is used. - Page 6 NAIlER SAFEtY WARNINGS opERAtIoN Always ensure that the workpiece contact is fully positioned above the workpiece. Positioning the Do not use tool if trigger does not actuate properly. workpiece contact only partially above the workpiece Any tool that cannot be controlled with the trigger is could cause the nail to miss the workpiece completely dangerous and must be repaired.
-
Page 7: Symbols
SYMBolS The following signal words and meanings are intended to explain the levels of risk associated with this product. SYMBol SIGNAl MEANING Indicates an imminently hazardous situation, which, if not avoided, will result DANGER: in death or serious injury. Indicates a potentially hazardous situation, which, if not avoided, could result WARNING: in death or serious injury. -
Page 8: Glossary
GloSSARY Activate (operating controls) Fastener To move an operating control so that it is in a position A staple, pin, brad, nail, or other fastening device which is that allows the tool to be actuated or that satisifes one designed and manufactured for use in the tools within the requirement for the tool to be actuated. -
Page 9: Operation
opERAtIoN Make sure the latches on each side of the battery pack WARNING: Do not allow familiarity with tools to snap into place and battery pack is secured in tool make you careless. Remember that a careless before beginning operation. fraction of a second is sufficient to inflict serious NotE: Squeeze LED light grip switch to activate nailer. - Page 10 opERAtIoN REMovING NAIlS FRoM tHE tool DRIvING BRAD NAIlS See Figures 8 - 9, page ii. Remove the battery pack. Depress the magazine release button. WARNING: Never wedge or hold back the Remove nails and close the magazine. workpiece contact mechanism during operation of the tool.
- Page 11 opERAtIoN DRY-FIRE locKout REMovING A JAMMED BRAD NAIl See Figure 11, page ii. The dry-fire lockout feature keeps the tool from operating when fasteners are low in the magazine. WARNING: Remove the battery pack before remov- The low nail indicator window in the magazine shows how ing nails or clearing a jammed nail.
-
Page 12: Maintenance
MAINtENANcE GENERAl MAINtENANcE WARNING: When servicing, use only identical re- Avoid using solvents when cleaning plastic parts. Most placement parts. Use of any other parts could create plastics are susceptible to damage from various types of a hazard or cause product damage. commercial solvents and may be damaged by their use. -
Page 13: Parts List
19.2 volt coRDlESS NAIlER – MoDEl No. 315.FS2000 The model number will be found on a label attached to the motor housing. Always mention the model number in all correspondence regarding your 19.2 volt coRDlESS NAIlER or when ordering repair parts. -
Page 14: Introducción
FS2000 Fig. 3 A - No-mar pad (almohadilla protectora) Fig. 4 A - Air pressure dial (cuadrante de presión de H - Scale (escala) aire) I - Low nail indicator windows (ventanas que indican poca cantidad de clavos) B - Mode selector (selector de modo) J - No-mar pad (almohadilla protectora) C - Belt hook (gancho de la correa) K - Workpiece contact (disparador de contacto) - Page 15 Fig. 8 Fig. 10 Fig. 6 A - Air pressure dial (cuadrante de presión de aire) A - Mode selector (selector de modo) B - Index arrow (flecha indicadora) B - Single sequential mode (accionamiento por C - Decrease pressure (disminuir la presión) contacto) D - Increase pressure (aumentar la presión) C - Contact actuation mode (para disminuir la...
-
Page 16: Seguridad Personal
REGLAS DE SEGURIDAD GENERALES ADVERTENCIAS DE SEGURIDAD PARA HERRAMIENTAS ELÉCTRICAS Si debe operar una herramienta en lugares ADVERTENCIA Lea todas las advertencias de húmedos, use un suministro protegido por un seguridad y las instrucciones. El incumplimiento interruptor de circuito con pérdida a tierra (GFCI). de las advertencias e instrucciones puede ocasionar El uso de un GFCI reduce el riesgo de descargas descarga eléctrica, fuego o lesiones graves. -
Page 17: Advertencias De Seguridad Para Herramientas Eléctricas
ADVERTENCIAS DE SEGURIDAD PARA HERRAMIENTAS ELÉCTRICAS No vista ropas holgadas ni joyas. Recójase el Utilice la herramienta eléctrica, los accesorios cabello si está largo. Las ropas holgadas y las joyas, y brocas, hojas y cuchillas de corte, ruedas así... -
Page 18: Advertencias De Seguridad Clavadora
adVertenCiaS de Seguridad Para ClaVadora Siempre suponga que la herramienta contiene a un nivel de ruido que puede dañar el oído. El patrón sujetadores (clavos o grapas, según sea el caso). El y el operador deben asegurarse de contar con toda la manejo descuidado de la clavadora puede hacer que protección auditiva necesaria y de que sea usada por el se accione el gatillo inesperadamente y que se disparen... - Page 19 adVertenCiaS de Seguridad Para ClaVadora FunCionaMiento Siempre asegúrese de que el elemento de contacto con la pieza de trabajo esté totalmente coloca encima No utilice la herramienta si no funciona correctamente de ella. Colocar el elemento de contacto con la pieza el gatillo.
-
Page 20: Símbolos
SíMboloS Las siguientes palabras de señalización y sus significados tienen el objeto de explicar los niveles de riesgo relacionados con este producto. SíMbolo SEÑAL SigniFiCado Indica una situación peligrosa inminente, la cual, si no se evita, causará Peligro: la muerte o lesiones serias. Indica una situación peligrosa posible, la cual, si no se evita, podría causar ADVERTENCIA: la muerte o lesiones serias. -
Page 21: Características
gloSario de tÉrMinoS Activar (los controles de accionamiento) la herramienta. Puede ocurrir un accionamiento adicional cuando cualquier control de accionamiento Es mover un control de accionamiento de manera se suelta y se vuelve a activar. que quede en una posición en la cual se accione la herramienta o cumpla con un requisito necesario para Sujetador accionar la misma. -
Page 22: Funcionamiento
FunCionaMiento inStalar/deSMontaje del PaQuete de ADVERTENCIA: No permita que su familarización bateríaS con las herramientas lo vuelva descuidado. Tenga Vea la figura 2, página i. presente que un descuido de un instante es suficiente Para instalar el paquete de baterías: para causar una lesión grave. - Page 23 FunCionaMiento Coloque clavos de puntilla en el canal con las puntas de Retire de la herramienta el paquete de baterías, de los clavos hacia abajo y apoyadas sobre la parte inferior estar instalado. del canal. Gire el control del ajuste de la profundidad de Coloque clavos de puntilla en el canal con las puntas de penetración hacia la izquierda o la derecha para los clavos hacia abajo y apoyadas sobre la parte inferior...
- Page 24 FunCionaMiento Modo de accionamiento por contacto: luCeS de trabajo de diodoS luMiniSCenteS (led)/ El accionamiento por contacto permite la colocación repetitiva de sujetadores a velocidad muy rápida. leCturaS de diagnóStiCo Vea la figura 10, página ii. Retire de la herramienta el paquete de baterías. Las luces de trabajo LED sirven de lecturas para indicar Deslice el selector a la posición ( si el paquete de baterías tiene suficiente carga y si la...
-
Page 25: Mantenimiento
ManteniMiento ManteniMiento general ADVERTENCIA: Al dar servicio a la herramienta, Evite el empleo de solventes al limpiar piezas de plástico. utilice solamente piezas de repuesto idénticas. El La mayor parte de los plásticos son susceptibles a empleo de piezas diferentes puede implicar peligro o diferentes tipos de solventes comerciales y pueden causar daños al producto. - Page 26 notaS 13 – Español...
- Page 27 notaS 14 – Español...