
Related Manuals for Leviton PICCOLO SCAN


Summary of Contents for Leviton PICCOLO SCAN
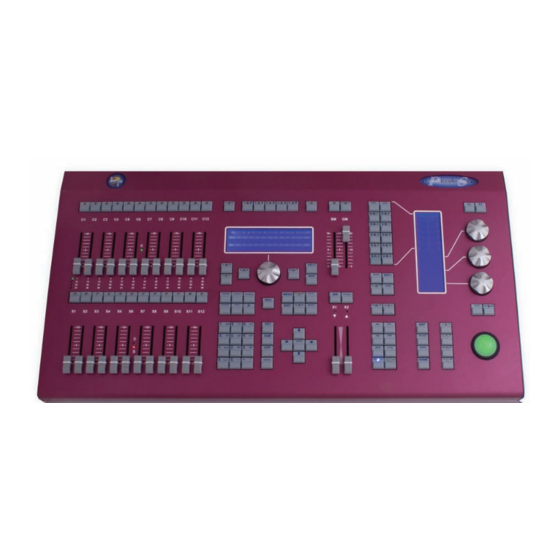
- Page 1 User Manual PICCOLO SCAN (Piccolo Scan 12 model shown) Document Release July 2010 Revision A Software v1.70...
- Page 2 F.O.B. factory. Leviton is not responsible for removing or replacing equipment on the job site, and will not honor charges for such work. Leviton will not be responsible for any loss of use time or subsequent damages should any of the equipment fail during the warranty period, but agrees only to repair or replace defective equipment returned to its plant in Tualatin, Oregon.
-
Page 3: Table Of Contents
Table of Contents Table of Contents 1. Introduction ..........................1 1.1. Features ............................2 2. Specifications..........................3 2.1. Top Panel ............................4 2.2. Rear Panel ............................4 2.2.1. DMX In / Out Connections ......................4 2.2.2. MIDI In / Out Connections......................5 2.2.3. - Page 4 Leviton Piccolo Scan 9.3.1. Selecting Channels........................16 9.3.2. Editing Channel Levels ......................17 9.3.3. De-Selecting (Releasing) Channels ................... 17 9.3.4. Other Editing Commands......................17 9.4. Channel Editing Examples ......................18 9.4.1. Using Channel Faders......................18 9.4.2. Using the Keypad........................18 9.4.3.
- Page 5 Table of Contents 15.3. Fixture Commands........................31 15.3.1. [PARAM] ..........................31 15.3.2. [HOME]..........................32 15.3.3. [PALs] Palettes ........................32 Applying Palettes ......................... 32 15.3.4. [LIBs] Libraries ........................32 Applying Libraries......................... 32 Recording Libraries........................33 Modifying Library Values ....................... 33 Modifying Library Names....................... 33 Examining Libraries ........................
- Page 6 22.2. IPX Configuration ........................56 22.3. Capture / CITP Configuration......................57 22.4. Coolux / ArtNet Configuration ....................... 58 22.5. Leviton LT NPC 2D/4D Configuration ..................... 60 23. Using MIDI, Time Code, External Triggers & Sound..............61 23.1. MIDI ............................61 23.1.1.
-
Page 7: Introduction
Introduction 1. Introduction The Leviton Piccolo Scan is a conventional and automated lighting console with advanced functions normally not found on consoles of similar size. It is very simple to use, yet offers many functions for complex procedures as demanded in the lighting entertainment field. -
Page 8: Features
Leviton Piccolo Scan 1.1. Features • Four modes allow for versatile operation: Single Mode: All console faders operate as direct access control channels. Double Mode: Upper faders control the same channels as the lower faders, thus allowing for manual crossfades between upper and lower fader rows. -
Page 9: Specifications
Specifications 2. Specifications Console Model: Piccolo Scan 12 Piccolo Scan 24 Channel Faders Total Channels (Dimmers and 304 (512 Patch) 352 (512 Patch) Fixtures) Submasters Fixture Attributes Cues 999.9 (D) 999.9 (D) Effects 999 (S) 999 (S) Pages 999 (S) -
Page 10: Top Panel
Leviton Piccolo Scan 2.1. Top Panel 2.2. Rear Panel 2.2.1. DMX In / Out Connections DMX-512 output connector (opto-isolated): XLR-5 female. DMX-512 input connector (opto-isolated): XLR-5 male. Pin Out: Pin 1: Ground. 5 pin XLR Pin 2: Data – Pin 3: Data +... -
Page 11: Midi In / Out Connections
Specifications • Use 120 ohm termination between pin 2 & 3 on the last DMX device. • Use DMX splitters to connect additional DMX users or for longer cable runs. The console transmits DMX 512 with the following parameters: Parameter Value DMX512 (1990) NORM Break Length... -
Page 12: Lt-Link Connection
Leviton Piccolo Scan 2.2.5. LT-Link Connection SUBD-9 connector, standard RS485: Connector for devices such as remote controls, expansion boxes, etc. 2.2.6. External Trigger Input for 3 external triggers. Connector: XLR-4 female. Pin Out: 4 pin XLR Pin 1 – EXT 1 Pin 2 –... -
Page 13: About This Manual (Text Conventions)
About this Manual 3. About this Manual (Text Conventions) • Function keys appear as [KEY]. • A numeric key appears as [#]. • A general number is represented with the symbol “#”. • Encoder indicates that the encoder wheel is to be turned. •... -
Page 14: Installation And Start Up
There are no user serviceable parts inside. Do not attempt any repairs yourself, as doing so will void the warranty. Please contact Leviton Technical Support if the console is not functioning properly. 4.2. Power On If you observe any irregularity while unpacking the console (due to transportation damage, humidity, etc.) -
Page 15: Getting Help
You can also call us during regular business hours at 1-800-959-6004. Please have the console model number and serial number available when you call. Contact Information: Leviton Lighting Management Systems Division 20497 SW Teton, Tualatin, OR 97062 Mailing Address: PO Box 2210... -
Page 16: Base & Auxiliary Lcd Displays / Base Screen
Leviton Piccolo Scan 6. Base & Auxiliary LCD Displays / Base Screen 6.1. Base LCD Display The Base LCD Display is located on the front panel beneath softkeys [1_B] to [5_B]: Use the up/down arrow keys [ ][ ] for paging and viewing information about console status and items (channels, fixtures, cues, groups, grandmaster, submasters, crossfaders, page #, current time, etc.) -
Page 17: Base Screen
Base & Auxiliary LCD Displays / Base Screen 6.3. Base Screen Console information can also be viewed on a PC monitor. Use the up/down arrow keys [ ][ ] for paging and viewing information about console status and items (channels, fixtures, cues, groups, grandmaster, submasters, crossfaders, page #, current time, etc.) Use the left/right arrow keys [ ][ ] to view additional information about each item. -
Page 18: Navigation
Leviton Piccolo Scan 7. Navigation To exit data tables and menus, press [EXIT]. To clear items in the command line, press [C]. To close options windows, make a selection or press [C]. 7.1. Data Tables Areas where data can be viewed and edited are known as “Data Tables”, for example: To view the channel or fixture patch table, press [CHANNEL][CHANNEL] or [FIXTURE][ FIXTURE]. -
Page 19: Using Option Windows
Navigation 7.1.2. Using Option Windows The console provides option lists or windows that are used for selectable commands. For example, pressing [LOAD] will open the following window in which group load options can be selected: To close options windows, make desired selection or press [C]. Numeric Selection Select the desired option by entering the index number, for example, [#][ENTER]. -
Page 20: Operating Modes
Leviton Piccolo Scan 8. Operating Modes The console offers four operating modes: Single, Double, Theatre and Manual. 8.1. Single Mode All faders (C# & S# ) operate as individual channel faders. This mode is ideal for cue creation and working with static scenes. Single mode is useful for editing because all channels are accessible using all faders. -
Page 21: Mode Change And Channel Access
SINGLE Mode: DOUBLE Mode: THEATRE/MANUAL Mode: 2 Banks 4 Banks 4 Banks Piccolo Scan 12/48 [1-24] & [25-48] [1-12], [13-24], [25-36] & [37-48] Piccolo Scan 24/96 [1-48] & [49-96] [1-24], [25-48], [49-72] & [73-96] Press the [CH.MD] key to change channel banks. The active bank is marked with an LED (in example below, the first bank is selected): •... -
Page 22: Editing Channels
Leviton Piccolo Scan 9. Editing Channels The console offers 48 or 96 control channels (depending on model) that are accessible from the channel faders or numeric keypad. 9.1. Grand Master / Blackout Key The grand master and its blackout key control the total scene output of all channel and fixture levels. -
Page 23: Editing Channel Levels
Editing Channels 9.3.2. Editing Channel Levels Methods for editing levels of selected channels: [CHANNEL][#][@][#][#]: Level is entered with 2 digits (00 to 99). [CHANNEL][#][@][@]: Level at 100% (FF). [CHANNEL][#] Encoder : Level adjusted in continuous mode. Channel levels and parameter values are usually edited using a scale of 0-100 (%). However, the console also provides “precision editing”... -
Page 24: Channel Editing Examples
Leviton Piccolo Scan 9.4. Channel Editing Examples See above channel sections before proceeding. Edit channels 1, 2, 11 & 12 to 100% and channels 3 & 10 to 30%. Make sure GM is at 100% and [BLK.OUT] key is off. -
Page 25: Recording And Modifying Groups
Recording and Modifying Groups 10. Recording and Modifying Groups A group is a combination of channel levels and fixture parameters that can be recalled for editing when building cues. Groups can also be loaded for playback in submasters or effects, see section 12.1. -
Page 26: Modifying Groups
Leviton Piccolo Scan 10.3. Modifying Groups Use the [MD.FY] key to edit previously recorded groups. Groups can be modified live or “in blind” (no output on stage) To modify a group in blind, press [RST][RST][2_B]BLIND [GRP][#][MD.FY]. To modify a previously recorded group: 1. -
Page 27: Recording And Modifying Cues
Recording and Modifying Cues 11. Recording and Modifying Cues A cue is a combination of channel levels and fixture parameters that can be recorded and used for playback in submasters and the crossfader. For information on loading cues to submasters, see section 12.1. -
Page 28: Using The Options Key
Leviton Piccolo Scan 11.2.1. Using the Options Key The [OPTIONS] key can be used to quickly edit individual attributes (such as fade times and text) of a single cue. For example, pressing [CUE][1][REC][OPTIONS] will open up an option line at the top of the screen where attributes can be entered “on the fly”. -
Page 29: Using Submasters (Theatre & Manual Modes)
Using Submasters 12. Using Submasters (Theatre & Manual Modes) Submasters can be loaded with groups and cues for playback. Playback is executed manually with a submaster fader or automatically by pressing the [S#] key located above the fader. The output level of all submasters is controlled by the grandmaster GM and its blackout key. -
Page 30: Cue Lists In Submasters
Leviton Piccolo Scan 12.1.1. Cue Lists in Submasters A sequence of cues (cue list) can be executed in a submaster. The cues can be executed manually with the submaster fader or automatically by pressing the [S#] key located above the fader. -
Page 31: Deleting Submasters
Using Submasters 12.3. Deleting Submasters To empty a single submaster, press [DELETE][S#]. The submaster’s LED turned will turn off. To empty all submasters at the same time, press [DELETE][FL.MT]. 12.4. Rate and Level Submasters A submaster’s rate and/or level may be controlled by another submaster that has been configured as a rate or level submaster. -
Page 32: Loading Effects
Leviton Piccolo Scan 12.5.2. Loading Effects Before executing an effect, the effect must be loaded to a submaster. Press [EFFECT][#][LOAD][S#] to load effect with speed control. Press [EFFECT][#][LOAD][LOAD][S#] to load effect with level control. 12.5.3. Executing Effects Press [S#] to start or stop an effect in automatic mode. -
Page 33: Using The Crossfader (Theatre, Manual & Simple Modes)
Using the CrossFader 13. Using the CrossFader (Theatre, Manual & Simple Modes) The X1/X2 crossfader is used to execute cues in sequential order. Cues can be played back manually by moving the X1/X2 crossfader, or automatically by pressing the [GO] button. When played back, the next cue (X2) crossfades to the current cue (X1). -
Page 34: Crossfader Playback
Leviton Piccolo Scan 13.2. CrossFader Playback Cues can be played back manually by moving the X1/X2 faders or automatically by pressing the [GO] button. Crossfader Playback Methods: X1/X2 The X1/X2 faders have inverted scales and are used for manual crossfades. Each new crossfade... -
Page 35: Using Pages (Theatre & Manual Modes)
Using Pages 14. Using Pages (Theatre & Manual Modes) A page can record the content of submasters and the crossfader. For example, complete songs or acts can be recorded on different pages. The pages can then be loaded as needed during the show. •... -
Page 36: Using Fixtures
Leviton Piccolo Scan 15. Using Fixtures Located on the right side of the console is the fixture editing and programming section. The section includes dedicated fixture function keys, the banks keys, a LCD display for fixture data, three encoders and one trackball. -
Page 37: Fixture Commands
Using Fixtures [TB]: Press to select one of three modes: Normal (LED off): Trackball controls Pan and Tilt parameters simultaneously. Deactivate (LED on): Trackball is inactive. Orthogonal (LED blinking): Trackball controls Pan and Tilt parameters independently (the axis with largest movement will be the axis edited). [FLIP]: Press to change Pan and Tilt values (inverse direction) while maintaining the same focus point on stage, for example to ensure that a moving head fixture takes the most direct route during a change of position. -
Page 38: Home]
Leviton Piccolo Scan 15.3.2. [HOME] This key is used to set parameters of selected fixtures to their home values. For example: To set all parameters of selected fixtures to their home values, press [FIXTURE][#][THRU][#][HOME]. To set an individual parameter of selected fixtures to its home value, press [FIXTURE][#][THRU][#] [PARAM][#][HOME]. -
Page 39: Recording Libraries
Using Fixtures POS is a Particular or Position library. These libraries can include position parameter values of one, several, or all fixtures. They are recorded by selecting and editing the position of each fixture that will be included in the library. Position data is not extrapolated from one fixture to another. To apply a library, select fixtures and follow below. -
Page 40: Examining Libraries
Leviton Piccolo Scan Examining Libraries Useful to see what fixtures and values are in each library. In the example below [POS] is used. 1. Press [LIBs] (LED is lit). 2. Press [POS][#][EXAM]. 3. Press [EXIT] to return to the main screen. -
Page 41: Banks], [Bnk-] & [Bnk+]
Using Fixtures 15.3.6. [BANKS], [BNK-] & [BNK+] The console has 10 programmable Banks keys, located to the left of the Auxiliary LCD Display, that can be used for quick access to Macros, Groups, Palettes and Libraries. The keys can be configured to operate in “Auto”... -
Page 42: Using Shapes
Leviton Piccolo Scan 16. Using Shapes 16.1. Shape Basics Shapes are dynamic values for use with channels and fixtures. Using the shape engine greatly decreases programming time for simple or complex effects (for example, pan/tilt movement or CYM color changes). -
Page 43: Using Shapes In Playbacks
Using Shapes 16.2.3. Using Shapes in Playbacks To access the list of shapes during playback execution and perform some basic functions for each playback (Stop, Play, Pause, Call to Editor): Press [Shape][3]. 16.2.4. Examine Shapes List To view the pre-programmed shapes list, press [Shape][4]. 16.2.5. -
Page 44: Individual Groups And Cues
Leviton Piccolo Scan 16.3.2. Individual Groups and Cues Shape Base ~(Free) and -(Fixed) behaviors can be defined for individual groups and cues: For groups, press [GROUP][GROUP] or [GROUP][#][OPTIONS], then move to the last cell of the group and select desired behavior:... -
Page 45: Functions
Functions 17. Functions 17.1. Exam and Modify Functions The Exam and Modify Functions allow any item (cues, groups, etc.) to be viewed or edited: Exam Commands Result Channel: Opens a table containing cues and groups where channel is stored and its [CHANNEL][#][EXAM] level in each group or cue. -
Page 46: Test And Next Functions
Leviton Piccolo Scan 17.2. Test and Next Functions These functions are used for testing and selecting various items (channels, fixtures, groups and cues). 17.2.1. [Test] [CHANNEL][#][TEST]: Used to test individual channels. The test channel will fade in and any active channels (from channel faders or keypad entry) will be forced to zero. -
Page 47: Deleting Cues And Groups
Functions 17.4.2. Deleting Cues and Groups To delete a cue or a group from the data memory: Press [CUE][#][DELETE] or [GRP][#][DELETE]. To delete a range of cues or groups from the data memory: Press [CUE][#][THRU][#][DELETE] or [GRP][#][THRU][#][DELETE]. To delete all cues or groups from the data memory: Press [CUE][DELETE] or [GRP][DELETE]. 17.4.3. -
Page 48: Macro Functions
Leviton Piccolo Scan 17.6. Macro Functions Macros can be used to automate keystroke processes while in playback mode and repeat keystroke entries while editing. 17.6.1. Recording Macros To record a macro: 1. Press [3_B]MACRO [#] (if a # is not entered, macro will be recorded at next available number). -
Page 49: Patching
Patching 18. Patching 18.1. Patching Dimmers The console’s channels are associated (patched) to the dimmer outputs of the DMX line. Channel to dimmer patching is performed in the dimmer patch table. To open the dimmer patch table, press [CHANNEL][CHANNEL] or [MENU][0][2]. -
Page 50: Pre-Programmed Curves
Leviton Piccolo Scan 18.1.2. Pre-Programmed Curves Below is a diagram of five pre-programmed response curves that are available. The vertical axis represents the power output and the horizontal axis represents the control level: A curve is selected in the Cu column of the dimmer patch table. See above. -
Page 51: Patch Tools
Patching 18.1.4. Patch Tools Patch tools allow you to copy, delete, or exchange dimmer assignments and set 1 to 1 DMX patches. To access the patch tools, press [OPTIONS] while in the dimmer patch screen. Dimmer number and DMX universe number are shown as #.#. For example, 24.1 = dimmer 24, universe 1. -
Page 52: Scroller Definition
Leviton Piccolo Scan 18.2.1. Scroller Definition To edit a scroller, move the cursor to the “+” cell in the fixture patch table then press [ENTER] to open the scroller definition table: In the scroller definition table, patched scroller types can been viewed and their color names, palette assignments and gel positions (0-255) edited. -
Page 53: Cache List Configuration
4. Select 0: Load. This will open the fixture library on the USB stick. 5. Select the Manuf cell to search for fixture manufacturer. 6. Select the desired fixture Id. 7. Select 0: Load. Transferring of fixtures from the USB stick may take a few minutes. New fixtures can be requested from lmstechsupport@leviton.com. -
Page 54: Fixture Definition
Control is a special parameter that contains control commands of the fixture (LampOn, LampOff, reset, etc.). If you want to create your own fixtures, you can use the Leviton 8700 OLE simulator. Created fixtures will be compatible with Piccolo. More information can be found in the 8700 user manual. -
Page 55: Saving And Loading Show Data
Saving and Loading Show Data 19. Saving and Loading Show Data Show data files can be transferred to and from a USB memory stick (folder name - SHOWS). 1. Connect the USB stick to the USB Host 1 port of the console. 2. -
Page 56: Console Updating
(ltusb.mht) or execute CleanLtUsbDriver.exe (located in same driver folder). 3. Execute the Piccolo Scan update program (piccoloscan170.exe from the PC) and follow the on screen instructions (File menu / Update Console). -
Page 57: Menus
Menus 21. Menus Press [MENU] to open the console’s menu list. Select the desired menu by entering its index number (or select with arrow keys) then press [ENTER]. 21.1. Patches 21.1.1. Dimmers (Menu 02) & Fixtures (Menu 04) Please see section 21.1.2. -
Page 58: Setup
Leviton Piccolo Scan 21.4. Setup 21.4.1. Editor & Times (Menu 30) In this menu, the following items can be configured: Level: Incremental level values of softkeys [2.B] [3.B] Editor Time: Default fade time for editor. Cue/Group: Default fade time for cues and groups. -
Page 59: System (Menu 32)
Menus Return Track: Enabled - When a group or cue is deactivated from a submaster, its LTP parameters return to their initial value with their corresponding fade times. In general, if you are storing colors, positions, etc. in several submasters, and then you combine them, use this option. Disabled - When a group or cue is deactivated from a submaster, its LTP parameters remain in scene until the submaster reaches 0%. -
Page 60: Remote And Pocketpc (Menu 35)
Leviton Piccolo Scan 21.4.6. Remote and PocketPC (Menu 35) Two types of remote control are available for use with the console via cable or wireless DMX, Remote & Pocket PC: For more information about using remote controls, please see their user manuals. -
Page 61: Delete Console Show (Menu 72)
Menus 21.6.3. Delete Console Show (Menu 72) Use this command to delete all stored show data in the console but maintain setup configurations. Also see section Deletes: • All groups, cues, effects, pages and macros. • User shapes and libraries. •... -
Page 62: Using Ethernet
Leviton Piccolo Scan 22. Using Ethernet The console offers Ethernet capabilities for distribution of DMX data over an Ethernet network and for connection to the OLE and 3D visualizers such as Capture. Ethernet protocols include IPX, ArtNet and CIPT. 22.1. Ethernet Configuration Proper Ethernet cables (RJ45) must be used: cross-over type for direct connection between units or straight type for connection to an Ethernet hub or switch. -
Page 63: Capture / Citp Configuration
Using Ethernet 22.3. Capture / CITP Configuration Use Capture with CITP protocol to: • Simulate all DMX universes of a show in a virtual 3D environment. • Select items (channels and fixtures) in the console and see same selections in Capture. •... -
Page 64: Coolux / Artnet Configuration
Leviton Piccolo Scan 22.4. Coolux / ArtNet Configuration Coolux Pandoras Box Media Servers and Players are based on layers, cameras and sequences. Each layer, camera and sequence can be controlled with the console by configuring them as fixtures. Consult chart below or Coolux DMX tables. - Page 65 Using Ethernet d. To select files and folders for Media and Mesh contents in layers, and for Mesh in cameras, configure the media contents inside the project: e. In Pandoras Box, select Configuration menu and press Run ArtNet button:...
-
Page 66: Leviton Lt Npc 2D/4D Configuration
Leviton Piccolo Scan 22.5. Leviton LT NPC 2D/4D Configuration NPC 2D/4D converters allow for Ethernet data to be converted to DMX-XLR5 (the converter outputs two physical DMX universes from one of the console’s Ethernet universes). The DMX signal can be converted anywhere in the Ethernet network where the consoles, dimmers or fixtures are connected. -
Page 67: Using Midi, Time Code, External Triggers & Sound
Using Midi. Time Code, External Triggers & Sound 23. Using MIDI, Time Code, External Triggers & Sound 23.1. MIDI MIDI (Musical Instrument Digital Interface) is a digital protocol that was development in the musical instrument world and is used for synchronization between digital instruments, devices and computers. The console can communicate with any MIDI device, including other MIDI capable lighting consoles. -
Page 68: Events List Execution
Leviton Piccolo Scan TC is a time value that uses a hh:mm:ss:ff format: Hour (0 to 23) mm: Minute (0 to 59) Second (0 to 59) Frame (parts of second, 0 to 29). Time precision is 1/30 per second. To configure the console’s time code options, press [MENU][23] to open the Time Code table. -
Page 69: External Triggers & Sound Inputs
Using Midi. Time Code, External Triggers & Sound 23.3. External Triggers & Sound Inputs An Expansion Box is required which connects to the console via the LT-Link port. Each external trigger input on the Expansion Box (Ext1, Ext2 & Ext3) can be associated to one key. When the input is activated, its associated key is “pressed”. -
Page 70: Off Line Editor (Ole)
24. Off Line Editor (OLE) 24.1. Introduction A PC-based console software simulator (OLE) is available at www.leviton.com. The OLE can be used to study the console, program or modify shows, and function as a backup console. The OLE is needed for certain functions such as show printing and reading/writing a show in ASCII format. -
Page 71: Pc Keyboard Hotkeys
Off Line Editor (OLE) 24.6. PC KeyBoard HotKeys For a quick way to use the OLE (in addition to using a mouse), corresponding hotkey functions are available via a PC keyboard:... - Page 72 Leviton Piccolo Scan...
- Page 74 Copyright © 2010 Leviton Manufacturing Company Incorporated. All Rights Reserved. Information contained herein is subject to change without notice. Document Release July 2010. Rev. A Part # DI-000-PPICS-04A Software v1.70 Leviton Lighting Management Systems Division 20497 SW Teton, Tualatin, OR 97062...
Need help?
Do you have a question about the PICCOLO SCAN and is the answer not in the manual?
Questions and answers