Advertisement
Advertisement
Table of Contents

Summary of Contents for Franke OMNI 4in1
- Page 1 FRANKE OMNI 4in1 BOILING WATER SYSTEM Installation instructions...
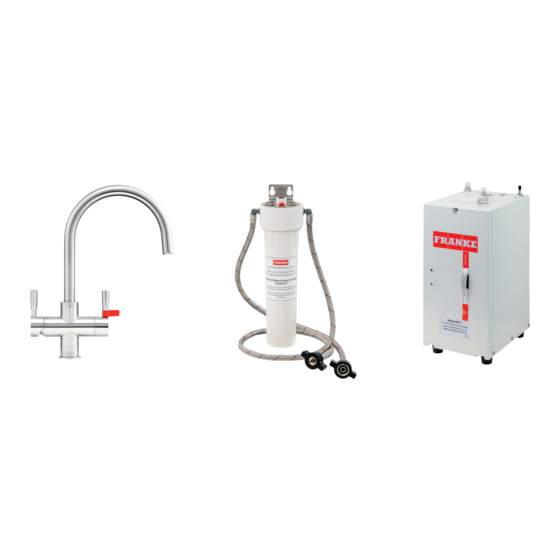
- Page 2 Introduction This guide explains how to install a new Franke Omni 4in1® The Franke Omni System must be installed using only the Boiling Water System. genuine Franke items listed below. Substituting any of the above 3 items for non-Franke manufactured alternatives, or Thank you for purchasing a Franke Omni Tap System.
-
Page 3: Before You Begin
Safety Remember: Boiling water is potentially dangerous and great Description Value Unit care should be exercised when using the Franke Omni tap. Dimensions 230 x 182 x 354 The installation must be carried out by a suitably qualified Load Amps... -
Page 4: Component List
17. Saddle clamp Supplied in box with filter system 18. Vent hose 19. Vent assembly elbow 20. Pipe cutter G1/2" 21. Water filter housing assembly 22. Franke 08 water filter cartridge G1/4" 23. Stop valve 24. Water filter retaining screws... -
Page 5: The Installation Procedure
THE INSTALLATION PROCEDURE Install the Franke Omni 4in1 kitchen tap Carrying out this operation first will make it easier to plan the layout inside the cabinet. For safety, it is advisable to locate the tap at, or towards, the back of the sink out of reach of smaller children. -
Page 6: Pressure Relief
The plumbing Install the filter unit Provide a hot and cold water supply for the tap. (We Important note: The filter unit must be installed inside a recommend that service stop-valves are fitted in both the hot cupboard. Long term exposure to direct light can degrade the and cold water supplies to the tap). - Page 7 Install the plastic vent assembly Option 1 Option 2 Important note: The vent pipe must be installed vertically with the air-gap at the top. The vent pipe conforms to the building regulations and on no account should be shortened or modified in any way. Choose a convenient position to fit the saddle clamp (17) preferably on a vertical section (Option 1) of the waste pipe, or alternatively on a horizontal section (Option 2).
- Page 8 Install the boiler Install the filter change indicator module Important note: Do not plug the boiler into the power supply Install the 2x AA batteries (4) in the module (2). A “bleep” at this stage. will confirm that they are correctly installed. For ease of installation the boiler connections and the flexible 2.
-
Page 9: Commissioning The System
Commissioning the system Install the filter cartridge into the filter housing. (Refer to the separate Cartridge Change Instructions in the filter system box). Top LED indicates Top LED indicates 2. Turn on the water supply. power on/off power on/off Operate the boiling water function for 3 minutes to flush the system. -
Page 10: Care And Maintenance
- Franke offer a micro-fibre cloth for this purpose that can be purchased on line at www.frankefilterflow.co.uk—... - Page 11 6. The standard replacement filter cartridge for the Franke for a moment to release any trapped air. Omni system is the Franke 08. The Franke 08 will remove sediment, chlorine and other chemicals as well Turn the boiler power supply back on.
-
Page 12: Frequently Asked Questions
The boiling water flow is agitated and noisy The flow of boiling water splutters more than shown in the video Please bear in mind that your Franke Omni system is dispensing boiling water, rather than very hot water, and as a •... - Page 13 2- 3 months. The The filtered cold and boiling water flow from the life of the Franke 06 is dependent on the hardness of the tap is slow water supply and the volume of water passed through it, so •...
-
Page 14: Warranty
Omni system. • The guarantee is valid for the UK and Republic of Ireland. How do I make a claim under my Franke 3 year guarantee? • The guarantee becomes effective at the date of purchase or at the date of delivery if this is later. Proof of purchase •... -
Page 15: Declaration Of Conformity
The Franke Omni 4-in-1 system is a product designed in conjunction with Greg Rowe Ltd, England, and is protected by the following patent applications GB1515295.2, GB1515293.7, EP15182884.5, US14/837,640,... - Page 16 Franke UK Limited After Sales Service West Park, MIOC Franke FilterFlow Styal Road, Old Winery Business Park Manchester Chapel Street M22 5WB Cawston, Norfolk NR10 4FE Phone: +44 (0)161 436 6280 Fax: +44 (0) 161 436 2180 Phone: +44 (0)1603 875 468 Email: info.uk@franke.com...


Need help?
Do you have a question about the OMNI 4in1 and is the answer not in the manual?
Questions and answers