Table of Contents
Advertisement
BEDIENUNGSANLEITUNG
USER MANUAL
MODE D'EMPLOI
MANUAL DEL USUARIO
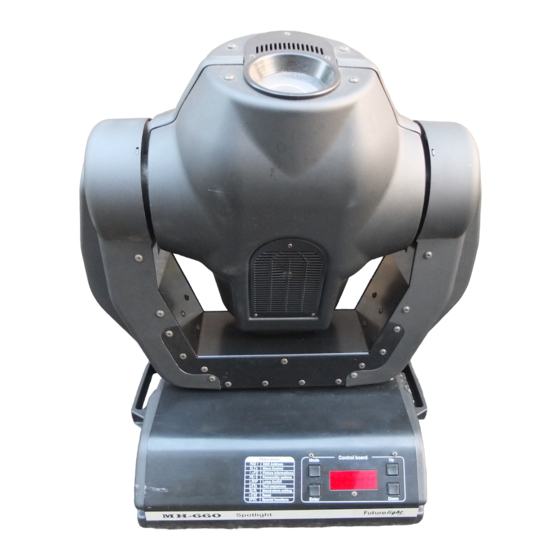
MH - 660
Spotlight
Version 1.0
© Copyright
Für weiteren Gebrauch aufbewahren!
Keep this manual for future needs!
Nachdruck verboten!
Gardez ce mode d'emploi pour des
Reproduction prohibited!
utilisations ultérieures!
Réproduction interdit!
Guarde este manual para posteriores
Prohibida toda reproducción
usos.
total o parcial.
Advertisement
Table of Contents

Related Manuals for Future light Spotlight MH-660

Summary of Contents for Future light Spotlight MH-660
- Page 1 BEDIENUNGSANLEITUNG USER MANUAL MODE D'EMPLOI MANUAL DEL USUARIO MH - 660 Spotlight Version 1.0 © Copyright Für weiteren Gebrauch aufbewahren! Keep this manual for future needs! Nachdruck verboten! Gardez ce mode d’emploi pour des Reproduction prohibited! utilisations ultérieures! Réproduction interdit! Guarde este manual para posteriores Prohibida toda reproducción usos.
- Page 2 Weitere Produkte aus dem FUTURELIGHT-Sortiment: Further products from the FUTURELIGHT-range: Autres produits de l’assortiment de FUTURELIGHT: Otros productos del surtido FUTURELIGHT: Artikelbeschreibung Best.-Nr. Article designation www.futurelight.com Description d’article N° d’art. Descripción del artículo Referencia FUTURELIGHT LICHTEFFEKTE FUTURELIGHT LIGHTING EFFECTS FUTURELIGHT EFFETS LUMINEUX FUTURELIGHT EFECTOS LUMINOSOS FUTURELIGHT RT-150 lighting-effect ..........
-
Page 3: Table Of Contents
User manual MH-660 Spotlight Table of contents 1. Safety ..........................24 1.1 Safety instructions ....................24 1.2 Operating determinations ..................25 2. Introduction ........................25 2.1 Features ........................25 2.2 Description of the fixture ................... 26 2.3 Beampath ........................ 27 3. -
Page 4: Safety
CAUTION! Keep this device away from rain and moisture! Unplug mains lead before opening the housing! FOR YOUR OWN SAFETY, PLEASE READ THIS USER MANUAL CAREFULLY BEFORE YOU INITIAL START - UP! 1. Safety 1.1 Safety instructions Every person involved with the installation, operation and maintenance of this device have to: - be qualilfied - follow the instructions of this manual Caution ! Be careful with your operations. -
Page 5: Operating Determinations
1.2 Operating determinations This fixture is only allowed to be operated with an alternating current of 230 V/50 Hz. If the device has been exposed to drastic temperature fluctuation (e.g. after transportation), do not switch it on immediately. The arising condensation water might damage your device. Leave the device switched off until it has reached room temperature. -
Page 6: Description Of The Fixture
digit LED display • Readout fixture and lamp usage, receiving DMX values, temperature, etc • Built-in analyzer for easy fault finding, error messages • Remotely switching of the lamp • Built-in test sequence • Preprogrammed variable/random strobe and dimmer pulse-effects • Macro-function for rotating gobos/rotating prism combinations •... -
Page 7: Beampath
2.3 Beampath Standard 15° objective Optional narrow 12°objective Distance (m) Distance (m) Diameter (m) Diameter (m) Optional wide 18°objective Distance (m) Diameter (m) 3. Installation 3.1 Fitting the lamp DANGER ! Install the lamps with the device switched off only. Unplug from mains before ! To insert the lamp MSD 230 V/250 W or MSD 230 V/200 W open the top cover of the head (see the drawings to identify which cover is top) by loosening the 4 Phillips screws on the front and rear sides of the top cover. -
Page 8: Rigging The Fixture
Lamp cover Before striking the lamp, reset the "LAti" counter in the main menu of the Control Board, by pressing the "Up" and "Down" buttons in one time and then confirming with the Enter-button. Do not operate the fixture with opened housing-cover! 3 fastening screws Lamp adjustment... -
Page 9: Connection To The Mains
The MH - 660 can be placed directly on the stage floor or rigged in any orientation on a truss without altering its operation characteristics (see the drawing). The fixture’s base enables to be mounted in two ways. Use the clamps with screws M10 or M8 - check the base bottom. -
Page 10: Dmx-512 Connection / Connection Between Fixtures
3.4 DMX-512 connection / connection between fixtures The wires must not come into contact with each other, otherwise the fixtures will not work at all, or will not work properly. Only use a stereo shielded cable and 3-pin XLR-plugs and connectors in order to connect the controller with the fixture or one fixture with another. -
Page 11: Dmx-Protocol
4. DMX-Protocol 4.1 Function of the control channels - 16 bit protocol 4.1.1 Channel 1 - Horizontal movement (Pan) Push slider up in order to move head horizontally (PAN). Gradual head adjustment from one end of the slider to the other (0-255, 128-center). - Page 12 4.1.6 Channel 6 - Switch on / off the lamp, reset, speed control of cooling fan Open, max. speed of fan Open, min. speed of fan (silent operation) from 0 to 127 - decreasing speed of fan 128 - 139 Switch on the lamp, reset, open position 140 - 239 No function...
-
Page 13: Function Of The Control Channels - 8 Bit Protocol
4.1.11 Channel 11 - Rotating gobos, cont. rotation 0 - 31 Open 32 - 63 Rot. gobo 1 (multicolor dichroic) 64 - 95 Rot. gobo 2 (glass) 96 - 127 Rot. gobo 3 (metal) 128 - 159 Rot. gobo 4 (metal) 160 - 191 Rot. -
Page 14: Remotely Controllable Functions
For address setting follow this procedure: 1. Switch on the MH-660 and wait until the fixture reset has finished ("rSt" is flashing at the display). 2. Press the [Mode] key in order to access the main menu. Browse through the menu by pressing the [Up] and [Down] keys until the display shows "A001". -
Page 15: Dimmer / Shutter / Strobe
6.7 Dimmer / Shutter / Strobe Smooth 0 - 100 % dimming is provided by the combined mechanical dimmer / shutter unit. This unit may also be used for strobe-effects (1 - 10 flashes per second) 6.8 Fan The MH - 660 is cooled by two axial fans - one each in the projector head and one in the base. The speed of the fan (and of course the noise) can be continuously reduced if very quiet performance is required. -
Page 16: Spec -Special Functions
LAMP - Switch on / off the lamp Use the [Up] and [Down] keys to select "On" if you wish the switch on the lamp or "Off" if you wish switch off the lamp and press [Enter] to confirm or [Mode] to cancel and return to the main menu. dEMo - Demo sequences This function allows you to run a special demo-test sequences without an external controller, which will show you some possibilities of using MH - 660. - Page 17 dMIn - DMX values Readout DMX values of each channel received by the fixture. Use the [Up] and [Down] keys to select desired channel and press [Enter] to read its value coming to the fixture or [Mode] to cancel and return to the menu. dISP - Automatic blackout of Display This function allows you to keep the display on or to turn off automatically 2 minutes after last pressing any key on the control board.
- Page 18 - Default settings Press [Enter] to reset all fixture personalities (not the adjusting functions) to the default values. On the display will appear „rSt” meaning that the fixture makes the reset. See the table of personality setting and their default positions.
-
Page 19: Error And Information Messages
DMX Calibration protocol: Channel Function COL. EFEC. RGOB GROT COLOURS CALIBRATION CALIBRATION CALIBRATION CALIBRATION STANDARD 0 - 255 0 - 255 0 - 255 0 - 255 PROTOCOL SMOOTH MICROSTEP MOVEMENT EFFECT PRISM ROTATING GOBO FOCUS STROBO DIMMER (PRISM) ROTATION GOBOS ROTATION STANDARD... -
Page 20: Technical Specifications
SnEr This message appears if the lamp lighting sensor is failed. Please contact your dealer. PoEr This message will appear if the fixture was shortly disconnect from the mains. FrEr This message will appear if the frequency of the mains is not standard 50 or 60 Hz. 9. -
Page 21: Maintenance And Cleaning
Channel 16: Dimmer Pan/Tilt Pan movement range 530° Tilt movement range 280° 8/16 bit movement resolution Automatic Pan / Tilt position correction Rigging Stands directly on the floor Mounts horizontally or vertically with 2 clamps 2 truss orientation Safety chain/cord attachment point Dimensions and weight: Length of base (including handles): 372 mm Width of yoke: 426 mm... -
Page 22: Appendix
11. Appendix We hope you will enjoy your MH-660. We can assure you that you will enjoy this device for years if you follow the instructions given in this manual. Should you have further questions, do not hesitate to contact your local dealer. Please note: errors and omissions for every information given in this manual excepted.
Need help?
Do you have a question about the Spotlight MH-660 and is the answer not in the manual?
Questions and answers