Advertisement
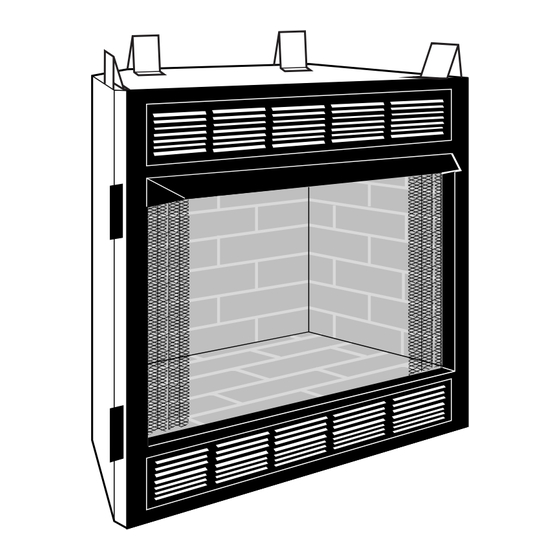
UNVENTED (VENT-FREE) UNIVERSAL FIREBOX
OWNER'S OPERATION AND INSTALLATION MANUAL
PFS
®
US
CIRCULATING MODELS:
CUVF36C AND CUVF42C
WARNING: If the information in this manual is not
followed exactly, a fire or explosion may result causing
property damage, personal injury or loss of life.
FOR USE ONLY WITH A LISTED GAS-FIRED UNVENTED
DECORATIVE ROOM HEATER NOT TO EXCEED 40,000
BTU/HR. DO NOT BUILD A WOOD FIRE.
Carefully review the instructions supplied with the
decorative type unvented room heater for the minimum
fireplace size requirement.
DO NOT INSTALL AN APPLIANCE IN THIS FIREBOX
UNLESS THIS FIREBOX MEETS THE MINIMUM DIMEN-
SIONS REQUIRED FOR THE INSTALLATION.
This firebox has been tested and approved under ANSI
Z21.91 for use with any ANSI Z21.11.2 approved gas logs.
INSTALLER: Leave this manual with the appliance.
CONSUMER: Retain this manual for future reference.
For more information, visit www.fmiproducts.com
Advertisement
Table of Contents

Related Manuals for Comfort Flame CUVF36C


Summary of Contents for Comfort Flame CUVF36C
- Page 1 UNVENTED (VENT-FREE) UNIVERSAL FIREBOX OWNER’S OPERATION AND INSTALLATION MANUAL ® CIRCULATING MODELS: CUVF36C AND CUVF42C WARNING: If the information in this manual is not followed exactly, a fire or explosion may result causing property damage, personal injury or loss of life.
-
Page 2: Table Of Contents
TABLE OF CONTENTS Safety ..............2 Installation ............9 Local Codes............3 Replacement Parts ..........19 Product Features ..........4 Technical Service..........19 Locating Firebox ..........4 Parts ..............20 Product Specifications ......... 5 Accessories ............22 Air For Combustion and Ventilation ..... 7 Warranty ..........Back Cover SAFETY IMPORTANT: Read this owner’s... -
Page 3: Local Codes
SAFETY Continued 1. Do not use this firebox as a wood-burning Firebox front and screen become fireplace. Use only decorative unvented very hot when running heater. room heaters (log sets). Keep children and adults away 2. Do not add extra logs or ornaments such from hot surface to avoid burns as pine cones, vermiculite or rock wool. -
Page 4: Product Features
PRODUCT FEATURES OPERATION REFRACTORY BRICK LINER This firebox is designed for use with approved Your firebox may feature a concrete refractory ANSI Z21.11.2 decorative type unvented room brick liner. As with all concrete liners, this liner heaters. (Physical size limitations apply. Refer may develop slight cracks when exposed to to minimum firebox requirements supplied heat. -
Page 5: Product Specifications
PRODUCT SPECIFICATIONS Continued 36" MODELS Figure 1 - Product Specifications 36'' Models www.fmiproducts.com 126330-01A... - Page 6 PRODUCT SPECIFICATIONS Continued 42" MODELS Figure 3 - Product Specifications 42'' Models www.fmiproducts.com 126330-01A...
-
Page 7: Air For Combustion And Ventilation
AIR FOR COMBUSTION AND VENTILATION Unusually Tight Construction WARNING: This heater shall The air that leaks around doors and windows not be installed in a room or may provide enough fresh air for combustion space unless the required vol- and ventilation. However, in buildings of un- usually tight construction, you must provide ume of indoor combustion air additional fresh air. - Page 8 AIR FOR COMBUSTION AND VENTILATION Continued DETERMINING FRESH-AIR FLOW 4. Compare the maximum Btu/Hr the space can support with the actual amount of Btu/ FOR HEATER LOCATION Hr used. Determining if You Have a Confined or _________ Btu/Hr (maximum the space Unconfined Space can support) Use this work sheet to determine if you have...
-
Page 9: Installation
AIR FOR COMBUSTION AND VENTILATION Continued VENTILATION AIR Ventilation Air From Outdoors Provide extra fresh air by using ventilation Ventilation Air From Inside Building grills or ducts. You must provide two perma- This fresh air would come from an adjoining nent openings: one within 12"... - Page 10 INSTALLATION Continued IMPORTANT: Vent-free gas log heaters add optional cabinet mantels (see Accessories, moisture to the air. Although this is beneficial, page 22) or as a built-in unit. Clearances are the installing firebox in rooms without enough same for either installation method. ventilation air may cause mildew to form from CAUTION: Do not install too much moisture.
- Page 11 INSTALLATION Table 1 NOTICE: If your installation does Rough Opening Dimensions for not meet the minimum clear- Built-in Installation ances shown, you must do one Front Width Depth of the following: Model (Inside to Inside) Height (Min.) 36" " " "...
- Page 12 INSTALLATION Continued IMPORTANT: If installing blower accessory, IMPORTANT: Noncombustible materials such see page 13. as brick, tile, etc. may overlap the front facing, but should never cover any necessary open- 3. Carefully set firebox in front of rough open- ings like louvered slots. ing with back of firebox inside wall open- ing.
- Page 13 INSTALLATION Continued INSTALLING GAS LINE INSTALLING OPTIONAL BLOWER ACCESSORIES NOTICE: A qualified service per- son must connect heater to gas NOTICE: The firebox identifica- supply. Follow all local codes. tion label (including model num- ber, serial number, clearances, IMPORTANT: See Connecting to Gas Supply etc.) is located in the right side in your log set owner’s manual for details on screen pocket area on the front...
- Page 14 INSTALLATION Continued Sheet Front Refractory Panel Metal Control Screws Access Cover Electrical Rocker Electrical Cover Switch Bushing Plate Outer Wrapper Wire Nut (3x) Electrical of Fireplace (Not Supplied) Housing ON/OFF Power Source Wiring Lower (Not Supplied) Rocker Louver Panel Switch To Power Source Figure 12 - Accessing Blower Compartment...
- Page 15 INSTALLATION Continued Model BK Installation 5. Remove ON/OFF switch from louver 1. Be certain that all wire terminals are panel by pressing top and bottom retain- securely attached to terminals on blower ing clips (see Figure 12, page 14). motor and that the screw retaining the 6.
- Page 16 INSTALLATION Continued 13. Peel off backing paper and stick supplied Model BK3 Installation wiring diagram decal on firebox bottom 1. Place BK3 fan assembly between two leg approximately 12" in from of blower (see stands with fan blades pointing toward Figure 16).
- Page 17 INSTALLATION Continued OPTIONAL OUTSIDE AIR KIT (MODEL AK4/AK4F) Switch Installation of outside air kit should be per- Terminals formed during rough framing of fireplace due ON/OFF to the nature of it's location. Outside combus- Rocker tion air is accessed through a vented crawl Switch space (AK4F) or through a sidewall (AK4).
- Page 18 INSTALLATION Continued INSTALLING FIREPLACE HOOD Top View of Rod Layout AND SCREEN 1. Attach hood to firebox using screws pro- Rear Hole vided (see Figure 21). 2. Insert each rod through all rings located Identification Front at top of screen. Label Location Hole 3.
-
Page 19: Replacement Parts
REPLACEMENT PARTS TECHNICAL SERVICE Note: Use only original replacement parts. You may have further questions about installa- This will protect your warranty coverage for tion, operation, or troubleshooting. If so, contact parts replaced under warranty. FMI PRODUCTS, LLC at 1-866-328-4537. When calling please have your model and serial Contact authorized dealers of this product. -
Page 20: Parts
PARTS MODELS CUVF36C AND CUVF42C 23/24 www.fmiproducts.com 126330-01A... - Page 21 PARTS This list contains replaceable parts used in your firebox. When ordering parts, follow the instructions listed under Replacement Parts on page 19 of this manual. PART NUMBER CUVF36C CUVF42C DESCRIPTION QTY. 12116 107981-01 Screen 106691-01 107839-01 Screen Rod 11418...
-
Page 22: Accessories
ACCESSORIES 36'' WALL MANTELS NOTICE: All accessories may W36TU - 36" Unfinished, Traditional not be available for all fireplace W36TO - 36" Oak Stain, Traditional models. 36" Corner Mantels C36TU - 36" Unfinished, Traditional Purchase these accessories from your local C36TO - 36"... - Page 23 NOTES _____________________________________________________ ______________________________________________________ ______________________________________________________ ______________________________________________________ ______________________________________________________ ______________________________________________________ ______________________________________________________ ______________________________________________________ ______________________________________________________ ______________________________________________________ ______________________________________________________ ______________________________________________________ ______________________________________________________ _____________________________________________________ ______________________________________________________ ______________________________________________________ ______________________________________________________ ______________________________________________________ ______________________________________________________ ______________________________________________________ ______________________________________________________ ______________________________________________________ ______________________________________________________ ______________________________________________________ ______________________________________________________ ______________________________________________________ _____________________________________________________ ______________________________________________________ ______________________________________________________ ______________________________________________________ ______________________________________________________ ______________________________________________________ ______________________________________________________ ______________________________________________________ ______________________________________________________ www.fmiproducts.com 126330-01A...
-
Page 24: Warranty
WARRANTY KEEP THIS WARRANTY Model (located on product or identification tag) _____________________________ Serial No. (located on product or identification tag) __________________________ Date Purchased __________________________ Keep receipt for warranty verification. FMI PRODUCTS, LLC LIMITED WARRANTIES New Products Standard Warranty: FMI PRODUCTS, LLC warrants this new product and any parts thereof to be free from defects in material and workmanship for a period of two (2) years from the date of first purchase from an authorized dealer provided the product has been installed, maintained and operated in accordance with FMI PRODUCTS, LLC’s warnings and instructions.
Need help?
Do you have a question about the CUVF36C and is the answer not in the manual?
Questions and answers