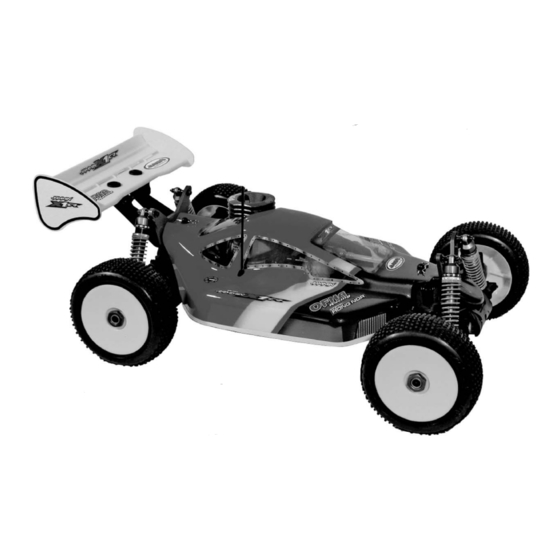

Summary of Contents for Jammin X1CR
- Page 1 CHECK OUT THESE WEB SITES JAMMINPRODUCTS.COM • OFNA.COM •TEAMJAMMIN.COM OFNA RACING 7 VANDERBILT, IRVINE, CA. 92618 • PH: 949.586.2910 FX: 949.586.8812...
- Page 2 READ THIS BEFORE RUNNING Running a nitro kit is fun and easy, but to make this a safe • Clear oil and dirt from chassis with a electronic safe and good experience you must observe a few rules. This degreaser. kit is extremely fast, easily over 40MPH, and can seriously Precautions injure someone if you are not careful.
-
Page 3: Required For Operation
REQUIRED FOR OPERATION THINGS NEED BESIDES THE KIT 3.5 cc (21 Class) ENGINE REAR EXHAUST OFNA/Picco P-7R #51218 Glow Plug Heat with Battery & Charger Glow Fuel # 10227..$$19.95 (please note OFNA Glow Heats available) Bottle’s with spout # 10160 - large 500cc # 10161 - large 500 ccAuto Stop # 10162 - small 250cc # 10164 - CNC spout 500CC... - Page 4 PLASTIC PARTS FOR USE #40538 #40536 #40533 DIFF. CASE FRONT C HUB FRONT AND REAR GEAR BOX 40040 #40535 CENTER DIFF. MOUNT PLASTIC PARTS FRONT AND REAR LOWER ARM 30801 Throttle Linkage #40537 Plastic FRONT UPPER ARM #40534 #40540 #40542 ARM HOLDER TREE REAR UPPER RIGHT/FRONT BUMPER TREE WING MOUNT TREE...
- Page 5 ASSEMBLY OF THE FRONT AND REAR DIFF. Builds two differentials for front and rear. Step 1 Step 2 40010 ..X2 94034 2.5x13.8mm Pin 4x4mm Set Screw 94034 ..X1 40010 Set Screw 40010 2.5x13.8mm 36053 2.5x13.8mm 8x16mm Ball bearing 40513 Diff. Gear 40538 40009 (Large)
- Page 6 ASSEMBLY OF THE CENTER DIFF. 94020 3x12mm 94020 Flat Head 3x12mm Hex Screw Flat Head Step 1 Step 2 Hex Screw 30779 4x10mm 30799 ..X4 Washer 4x10mm 40513 Washer Diff. Gear (Small) 94020 ..X4 3x12mm 30779 40011 Flat Head 4x10mm Diff.
- Page 7 ASSEMBL OF THE FRONT SHOCK STAY Step 1 Step 2 40565 40531 7075 CNC Front ..X2 Shock Ball Shock Stay 90018 (Hard-coated) End Post 3x25mm Cap Screw 94003 ..X2 3x10mm 90018 Hex Screw 3x25mm Cap Screw 94009 ..X4 4x10mm Hex Screw 94009 40531 4x10mm...
- Page 8 ASSEMBL OF THE FRONT UPPER ARMS Assembly for both right and left side 11 ¡ G 8 mm 36850 ..X2 40537 Ball and Socket 36860 Front Upper 5x35mm Turnbuckle 36690 36690 Front Upper ..X2 Front Upper Arm Ball End Arm Ball End 36850 Ball and Socket 36860...
- Page 9 ASSEMBL OF THE FRONT STABILIZER 94033 M3x3 Set Screw 94033 M3x3 Set Screw 94033 ..X4 M3x3 Set Screw 94002 ..X4 3x8mm Hex Screw 40533 40529 Stabilizer Front Stabilizer Mount Plastic ..X2 94033 40533 94002 M3x3 Stabilizer 3x8mm Set Screw Mount Plastic Hex Screw ASSEMBL OF THE SERVO SAVER Take the 4x8mm plastic flange bushing from...
- Page 10 ASSEMBL OF THE STEERING TIE-ROD Step 1 Step 2 Makes two steering rods for left and right hand-side. Assembly both right and left side 40548 40039 36700 ..X2 M3 Nylock Nut 3mm Tapper 7mm Steering (Thin Type) Washer(Alum.) Ball End 40038 40038 ..X2...
- Page 11 ASSEMBL OF THE REAR GEAR CASE 4x12mm Hex Screw Step 1 Step 2 #40539 Center bracer Mount 5x4mm Set Screw #40572 Universal Joint Conter (Rear/Long) 5x4mm ..X1 Set Screw #40562 4x12mm ..X4 Rear Lower Arm Hex Screw 4x12mm Holder (Hard-coated) Hex Screw ASSEMBLY OF THE REAR SHOCK STAY Step 1...
- Page 12 ASSEMBLY OF THE WING STAY Step 1 Step 2 4x10mm Hex Screw 4x10mm ..X1 Hex Screw 4x16mm #40576 4x16mm Hex Screw CNC Center Hex Screw Bracer (Rear) 4x16mm Hex Screw 4x16mm ..X5 Hex Screw ASSEMBLY OF THE REAR UPPER RIGHT Assembly for both right and left side Step 2 Step 1...
- Page 13 ASSEMBLY OF THE REAR SUSPENSION ARMS Assembly for both right and left side 94041 Nylock Nut 36860 36850 5x35 36850 ..X4 7mm Ball Turnbuckle 7mm Ball 40540 Upper arm Plastic Rod End 94041 ..X2 Nylock Nut 40540 Upper arm Plastic Rod End 36850 94005 7mm Ball...
- Page 14 ASSEMBL OF THE BRAKE PADS AND CENTER DIFF. MOUNT Make brake pads for each side as shown. 36661 Brake Pad * Remove the double-side Linings tape before assembly. double-side tape 36661 Brake Pad 36660 Linings Brake Pad Step 1 Step 2 40040 Center Diff.
- Page 15 ASSEMBL OF THE CENTER DIFF. MOUNT Step 2 Step 1 94033 Approx. 4mm 40569 3x10mm 94033 Graphite 3x3mm Hex Screw Center Diff. Set Screw 94033 Mount Plate 3x10mm Hex Screw 30211 30171 5x8mm Brake Lever Fiange Bushing 40547 30211 Brake Cam 5x8mm Fiange Bushing...
- Page 16 ASSEMBL OF THE FRONT AND REAR GEAR CASE ONTO CHASSIS 94041 Nylock Nut 94041 ..X2 Nylock Nut 94033 ..X1 3x10mm Hex Screw 94020 ..X2 3x12mm 94033 Flat Head 3x10mm Hex Screw Hex Screw 40540 Front Bumper 94026 ..X2 4x12mm Flat Head Hex Screw 94027 4x16mm...
- Page 17 ASSEMBLY OF THE RADIO TRAY 94004 2X8mm 3x12mm Step 1 Step 2 Screw Hex Screw 40541 Receiver Box Put the protection rubber Switch onto your servo. 10280 Switch Cover ..X4 94002 2X8mm 3x8mm Hex Screw Hex Screw 94002 X1-41 ..X4 2X8mm 40541 Hex Screw...
- Page 18 ASSEMBL OF THE FUEL TANK Step 1 Step 2 94003 3x10mm Hex Screw 40543 Fuel Tank 94033 3x10mm Hex Screw Pressure Nipple 94019 ..X2 3x10mm Flat Head Hex Screw 40539 Fuel Tank Post * Take the fuel tank ..X2 94033 post from 3x10mm #40539 plastic...
- Page 19 ASSEMBLY OF THE ENGINE ONTO CHASSIS Use note book paper to set gear backlash between spur gear and clutch bell gear, applying pressure while retightening the Spur Gear engine. If the space is notcorrect the spur gear will be damaged. Clutch Bell 90 degree Loose or tighten 3x20mm cap screw...
- Page 20 ASSEMBLY OF THE THROTTLE LINKAGES (TypeA) Step 1 Step 2 94033 3x3mm 94033 Set Screw 3x3mm 94003 Set Screw 3x10mm 30801 Hex Screw 30801 Throttle Place a 8mm fuel tube as picture shown. Alum Ball End 94033 Stopper 30801 3x3mm 30801 Alum Set Screw...
- Page 21 ASSEMBLY OF THE BRAKE LINKAGE INTO BRAKE LEAVE (TypeB) USING BREAK ADJUST NUT Loose Tighten or loose the adjuster nut will change the brake. Tighten More Brake Less Brake 94033 3x3mm Set Screw 10300 Alum Stopper Fuel Tube 30800 2X8mm Hex Screw Snap On.
- Page 22 ASSEMBLY OF THE FRONT SHOCKS Step 2 Fit the o-ring into groove before assembly. 3. Pull down piston, 1. Pull down piston and * Make 2 for Shocks. attach top loosely pour oil into shock Step 1 40059 shock oil will cylinder.
- Page 23 ASSEMBLY OF THE FRONT SHOCK ABSORBER Assembly both right and left side. 10099 3x8mm Washer 94041 94041 ..X2 Nylock Nut Nylock Nut 10099 ..X2 3x8mm Washer 94007 94007 ..X2 3x20mm 3x20mm Hex Screw Hex Screw ASSEMBLY OF THE REAR SHOCK ABSORBER Assembly both right and left side.
-
Page 24: Assembly Of The Wing
ASSEMBLY OF THE WING 94004 3x12mm Hex Screw 40542 Drill two 7mm holes for Countersunk mounting. Plastic Washer 40083 Wing 94041 Nylock Nut * Insert the 3mm nylon nut before assembly the wing...X2 94041 Nylock Nut 94001 ..X2 3x12mm Hex Screw ASSEMBLY OF THE BACK MIRROR 40544... - Page 25 ASSEMBLY OF THE FUEL TUBE 10166 Connect to fuel tank nipple. 10179 Fuel Tube Connect to carbulater. Connect to pressure nipple. Connect to fuel nipple. ASSEMBLY OF THE TIRES AND WHEELS Step 2 Step 1 Make two tires right-side . Apply instant glue into the groove of the wheel.
- Page 27 JAMMIN X1-CR Set-Up Sheet Date:________________ Driver:_________________ Track:_______________/_______ Air Temp:____________ Surface Dsc. ______WATERED ____ DRY_______ Avg. Lap Time:_______"______ Front Suspension Steering Ackerman Location Shock Spring: _________________ Shock Piston: __________________ Shock Oil wt: __________________ Shock Length Front Sway Bar Preload ( Center to Center) _____________mm...
- Page 29 JAMMIN X1-CR Set-Up Sheet Date:________________ Driver:_________________ Track:_______________/_______ Air Temp:____________ Surface Dsc. ______WATERED ____ DRY_______ Avg. Lap Time:_______"______ Front Suspension Steering Ackerman Location Shock Spring: _________________ Shock Piston: __________________ Shock Oil wt: __________________ Shock Length Front Sway Bar Preload ( Center to Center) _____________mm...
- Page 31 JAMMIN X1-CR Set-Up Sheet Date:________________ Driver:_________________ Track:_______________/_______ Air Temp:____________ Surface Dsc. ______WATERED ____ DRY_______ Avg. Lap Time:_______"______ Front Suspension Steering Ackerman Location Shock Spring: _________________ Shock Piston: __________________ Shock Oil wt: __________________ Shock Length Front Sway Bar Preload ( Center to Center) _____________mm...
- Page 33 Jammin X-1 CR Parts List JAMMIN X-1CR - COMPETITION RACER 10010 SHOES, 3 SHOE TYPE, BLACK, 3 PCS. 12.95 10011 SHOES, 3 SHOE TYPE, ALUM. CNC BLUE, LITE WEIGHT, 3 PCS. 24.95 10012 SHOES, 3 SHOE TYPE, ALUM. CNC PURPLE, MED. WEIGHT, 3 PCS.
- Page 34 40037 SCREWS, SERVO PLATE 5.95 40038 BALLS, 7mm 4 PCS. 9.95 40039 WASHERS, ALUM. 3MM BLUE, 4 PCS. 3.95 40040 CENTER DIFF MOUNT 4.95 40042 BRAKE DISCS, STEEL 4 PCS. 10.95 40044 SPRING, BRAKE SEPARATORS, 8 PCS. 5.95 40045 SCREWSM BRAKE PADS, 4 PCS. 4.95 40046 STONE GUARDS, CHASSIS...
- Page 35 40547 Brake Cam 8.95 40548 M3 Nylon (Thin Type) 1.95 40549 Muffler Stay 4.95 40564 7075 CNC Chassis 174.95 40565 7075 CNC 4mm Front Shock Stay 31.95 40566 7075 CNC 4mm Rear Shock Stay 31.95 40567 Graphite Radio Tray 36.95 40568 Graphite Front Plate 31.95...
-
Page 36: Trouble Shooting Guide
• TROUBLE SHOOTING GUIDE PROBLEM CAUSE SOLUTION Fuel line not primed Fill fuel tank and pressurize tank by capping exhaust ENGINE WILL NOT START Glow plug will not heat(lite) Check glow plug battery heater or replace plug. Engine flooded, too much fuel Check carb. -
Page 38: Owner's Registration Card
OWNER’S REGISTRATION CARD OFNA Racing congratulates you on your purchase of our fine OFNA Product. With proper maintenance and han- dling this kit will provide many hours of enjoyment. The registration card should be filled out and mailed to OFNA Racing within 10 days of purchase date. In the event that the kit is incomplete or component parts are broken due to error in manufacturer, contact your dealer from which you purchased the kit for replacement part or call OFNA at (949) 586-2910 for your nearest dealer location.
Need help?
Do you have a question about the X1CR and is the answer not in the manual?
Questions and answers