Advertisement
Available languages
Available languages
Quick Install Guide
RECOMMENDATION: Please read this manual thoroughly before installation.
AC Power Cable
Ethernet Cable
Copyright 2010 IOCELL Networks Corporation,
IOCELL Networks, NDAS®and NetDISK® are trademarks or registered trademarksof IOCELL Networks
Corporation or one of its affiliates.
All other trademarks or registered trademarks are the property of their respective owners.
IOCELL Networks reserves the right to change, without notice, product offerings or specifications.
HDD Installation
Remove the screws from the bottom.
Press down the side cover.
Slide the side cover towards the bottom.
Insert HDD all the way into the caddy and
align the mounting holes.
To close case:
1. Insert steel guide
2. Slide caddy into place.
3. Replace the mounting screws. Take care not to strip the screws in the plastic.
4. Slide side cover back into place.
5. Check that the side is sealed up all around the enclosure.
6. Replace the screws to secure the cover. Do not over tighten.
Software Installation (351UNE)
Windows 7/Vista/XP/Server 2003/2000
Insert the included NetDISK Installation CD to your CD-ROM Drive. Follow the easy
and simple instructions through the installation.
1
2
Insert "NetDISK®
Welcome Screen
fig 3.a
installation CD"
appears
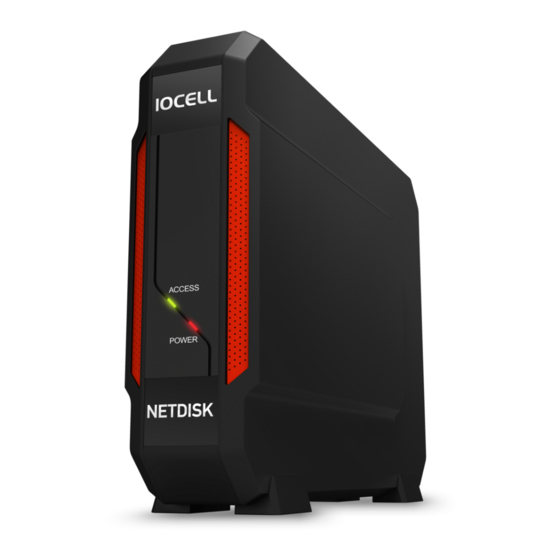
Model: 351UNE
USB Cable
eSATA Cable
Install & Manual CD
fig 2.a
Remove the screws from the HDD caddy.
Slide HDD caddy to unlock.
Lift and remove HDD caddy.
fig 2.c
Secure HDD on both sides of the caddy with
the screws. DO NOT OVER-TIGHTEN
3
4
Select your Language
Choose Installation
fig 3.b
fig 3.c
for the appropriate
product
Precautions
! User Precautions
Please read this installation guide carefully before using this product. Improper configuration, setup or operation, the presence of
static electricity, defective components, magnetic fields, etc. may cause the loss of data. Please carefully inspect all components
and all areas of operation prior to assembling, installing or storing data on the product. The manufacturer will not be responsible
for lost data. To prevent the loss of your important data, please back up all sources regularly.
! Safety Precautions
Do not attempt to modify or service the product, serious damage may occur.
Take extra care when installing the hard disk drive(s).
Damaged components may cause electronic shock or fire. Please carefully inspect all power cords and electrical connections
before using. Do not touch any electronic components if your hands are wet.
Do not move the product while operating, it may cause damage to the hard disk(s) or other parts. If you must move the product,
please turn off the power and wait until the hard disk(s) spin down completely.
Please allow the internal hard disk(s) to cool completely before handling.
Do not drop or shock the product, this may cause fatal damage to the product and/or the hard disk(s).
Do not use the product in dusty or moisture prone conditions.
Operating in areas subject to rain or other wet circumstances will damage your device.
Do not operate the product in a hot place or leave it in direct sunlight, it may cause damage.
Keep the product out of the reach of children.
! Installation and Assembly Precautions
Prepare a clear workspace for assembly and a clear space where the product will operate.
Install hard disk(s) only when the power cord is disconnected.
Do not apply too much pressure or force to any parts during installation, product damage or personal injury may occur.
Handle the hard disk drive carefully to avoid shock by force or static electricity (operator ground wire suggested).
Hardware Installation
NDAS
®
Mode
Connect NetDISK® to your router
with included Ethernet cable.
For wireless users - Connect
NetDISK® to your wireless router
or switch with the included
Ethernet cable.
Make sure the power cord is
connected firmly and press
the ON/OFF switch to the ON
position.
Software Installation (351UNE) - continued
When software installation is complete, you will find the NDAS Device Management tool icon in the system tray in the
bottom right corner of your Desktop.
5
Register the NetDISK
• Click the NDAS Device Management tool located in
the task bar on the bottom right corner of your screen
• Choose "Register a New Device.
6
Follow The Screen Instructions
• NetDISK® ID and Write Key can be found underneath the NetDISK® case.
fig 2.b
• The NetDISK® ID and Write Key do not contain the letter "O"or the letter "I".
• Please use numeric "1" or "0" for all occurrences of these characters.
7
Click Finish
8
Repeat installation process 1-7 on
all systems on your network that you
would like to have share this drive.
Found New Hardware Wizard
• This window may or may not appear.
• If the window appears, follow the instructions and install the new NetDISK®.
Windows XP
fig 2.d
Click "No, not this time. "
Found New Hardware Wizard
• Click "NetDISK® Administrator Tool" to see the registered NetDISK®
Read/Write Mode
Windows® 98 / MAC OS X
• For the latest software and drivers, visit "www.iocellnetworks.com"
Installation Notes:
1) If your computer is not equipped with a CD/DVD-ROM, simply visit www.iocellnetworks.com to download the
latest NDAS connection software for your OS.
2) The USB and eSATA connections do not require any special software to operate.
3) If using the NDAS RAID setup on the 352UN, read the full user manual carefully to understand the limitations
fig 3.d
when accessing by USB.
MAC Users
Open the CD and browse to the MAC folder to find Network connection software. Open the README file for basic
installation and short troubleshooting instructions. Consult the full User Manual for more complete help.
English
eSATA Mode
fig 1.a
fig 1.b
Connect NetDISK® directly to your
computer's eSATA port using the
included eSATA cable.
Note: Try directly connecting the NetDISK to a
gigabit Ethernet port for the fastest transfer speeds.
Windows Vista
Check "Always trust software from Ximeta, Inc. "
Read Only Mode
USB Mode
fig 1c
Connect NetDISK® directly to your
computer's USB port using the
included USB cable.
Advertisement
Table of Contents

Related Manuals for IOCELL netdisk 351une


Summary of Contents for IOCELL netdisk 351une
- Page 1 ON/OFF switch to the ON All other trademarks or registered trademarks are the property of their respective owners. position. IOCELL Networks reserves the right to change, without notice, product offerings or specifications. HDD Installation Software Installation (351UNE) - continued When software installation is complete, you will find the NDAS Device Management tool icon in the system tray in the bottom right corner of your Desktop.
- Page 2 - Consult the dealer or an experience radio TV technician for help 1. Legen Sie die Stahlführung ein. 2. Schieben Sie die Stahlführung an ihren Platz zurück. IOCELL Networks Corporation 3. Schrauben Sie die Schrauben ein, um die Stahlführung zu sichern. 5 Market Street, Suite 520, Plainsboro, 4.
- Page 3 ON/OFF switch to the ON position. All other trademarks or registered trademarks are the property of their respective owners. IOCELL Networks reserves the right to change, without notice, product offerings or specifications. HDD Installation Software Installation (352UN) - continued When software installation is complete, you will find the NDAS Device Management tool icon on the system tray in the bottom right corner of your Desktop.
- Page 4 - Connect the equipment into an outlet on a circuit different from that to which the receiver is connected - Consult the dealer or an experience radio TV technician for help IOCELL Networks Corporation 5 Market Street, Suite 520, Plainsboro, NJ 08536, U.S.A.
Need help?
Do you have a question about the netdisk 351une and is the answer not in the manual?
Questions and answers