Table of Contents
Advertisement
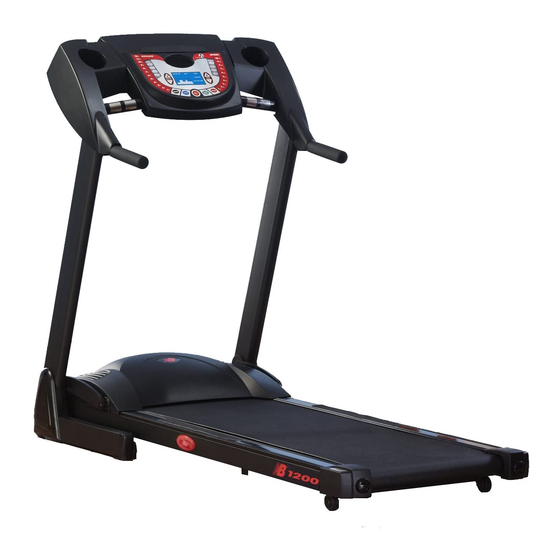
1200/1400
and 1500
Treadmills
Serial No: _______________________
Date of Purchase: ___ _________
Write the serial number in the
space above for reference.
For Service or Parts call:
1-800-497-5831
Serial Number
Decal
OWNER'S MANUAL
F
M
E
OR
AXIMUM
FFECTIVENESS
S
, P
AND
AFETY
LEASE
O
'
M
B
WNER
S
ANUAL
U
Y
N
B
SING
OUR
EW
ALANCE
1200/1400/1500 T
READMILL
R
T
EAD
HIS
EFORE
.
Advertisement
Table of Contents

Related Manuals for New Balance 1200, 1400, 1500


Summary of Contents for New Balance 1200, 1400, 1500
- Page 1 1200/1400 and 1500 Treadmills Serial No: _______________________ Date of Purchase: ___ _________ Write the serial number in the space above for reference. Serial Number Decal For Service or Parts call: 1-800-497-5831 OWNER’S MANUAL AXIMUM FFECTIVENESS AFETY LEASE ’ WNER ANUAL EFORE SING ALANCE...
-
Page 2: Table Of Contents
New Balance Athletic Shoe Inc. ® Fitness Quest Inc. is the exclusive licensee of New Balance Athletic Shoe Inc. No part of this booklet may be reproduced or utilized in any form or by any means electronic, mechanical or otherwise without the express written consent of the copyright holder. -
Page 3: Important Safety Instructions
22) Have plenty of clearance behind and in front of your Treadmill. It is important to keep children, pets, furniture and other objects out of the way when using your Treadmill. You... -
Page 4: Ordering Replacement Parts
Using the treadmill will help in reducing body fat and increasing cardiovascular endurance. Be sure to read through this Owner’s Manual carefully. It is the authoritative source of information about your New Balance Treadmill. Retain this manual for future reference. -
Page 5: Unit Warning/Caution Labels And Specifications & Parts
UNIT WARNING/CAUTION LABELS AND SPECIFICATIONS & PARTS Important: See below for placement of the following warning/caution labels on your Treadmill. WARNING LABEL 1 WARNING LABEL 2 WARNING WARNING FAILURE TO READ AND FOLLOW THE SAFETY INSTRUCTIONS STATED IN THE OWNER’S MANUAL... -
Page 6: Power Cord
CAUTION LABEL CAUTION BEFORE FOLDING THE TREADMILL, DECREASE INCLINE TO "0" LEVEL. FAILURE TO DO SO MAY RESULT IN SERIOUS DAMAGE TO TREADMILL AND VOID WARRANTY. CAUTION LABEL WARNING CRUSH HAZARD. KEEP HANDS AND FEET CLEAR DURING FOLDING. FAILURE TO DO SO COULD RESULT IN CRUSHED HANDS AND FEET. -
Page 7: Assembly/Setup Instructions
For Maximum Effectiveness and Safety, Please Read This Owner’s Manual Before Assembling or Using Your New Balance 1200/1400/1500 Treadmill. NOTE: All location references, such as front, rear, left or right, made in these instructions are from the user position – on the Treadmill facing the Console. - Page 8 Note: We recommend setting up the unit in the area where it will be used. Remove Box Top. Collapse Box Bottom and leave unit in box to assemble. STEP 1 - Upright Assembly a) Stand on Walking Belt and grip the uprights and slowly raise them into the assembled position.
- Page 9 M4 x 6mm phillips screws side cap Assembly is now complete. IMPORTANT: Follow the “Setting Up Treadmill for Use” instructions on the next two pages to move the treadmill off the shipping carton so you may begin your workout.
- Page 10 After assembly is complete, you must fold and move the Treadmill to remove the box. To fold the Treadmill , raise the deck. Secure the Deck in the upright position by lowering the latch. It will snap on the handle, and prevent the Deck from lowering itself.
- Page 11 STEP 3 Continued 1500 UNIT Lowering the Walking Deck Once the Treadmill is in the desired place, lift the Latch from the Hand Grip of the Treadmill. Then lightly press down to activate the lowering action of the Treadmill. NOTICE: This Treadmill has a built-in safety feature to help the Deck lower slowly when unfolding.
-
Page 12: Folding And Moving Your Treadmill For Storage
AND VOID WARRANTY. TURN OFF AND UNPLUG FIRST! To fold the Treadmill, raise the Deck. Secure the Deck in the upright position by pushing the Knob in while rotating it clockwise until the Locking Indicator is fully visible. -
Page 13: To Move The Treadmill
TO MOVE THE TREADMILL Always make sure the Treadmill is turned off and unplugged first! Hold the Hand Grips to move the Treadmill forward or back- ward. The Treadmill comes with Wheels for easy portability. DO NOT TIP the Treadmill. -
Page 14: Walking Belt Centering
If the Treadmill is not level, the belt will continuously slip to the low side of the Treadmill. CAUTION: DO NOT USE Treadmill if it is not on a level surface. Have plenty of clearance behind and in front of your Treadmill. -
Page 15: Walking Belt And Deck Lubrication
2. Insert the Applicator Wand into the lubrication motor cover screw (2) LEFT SIDE 3. Start the Treadmill Belt and set the speed at motor cover 4. Place Applicator Wand in plastic sleeve to screw (2 each side) 5+ hours per week... -
Page 16: Electronics Operating Instructions For Your Treadmill
Treadmill will stop if the user accidentally walks off the Treadmill. • If the user falls off the Treadmill, the Safety Key will come off the Computer and the Treadmill will stop at once to avoid further injury. 1200 •... -
Page 17: Quick Reference Guide
1200... - Page 18 1400/1500...
-
Page 19: Display Functions & Program Functions - 1200
Time window for one second when the Safety Key is placed on the Computer. Time-Out: If the Treadmill is turned on, and the Belt is not moving, the Computer will shut-off after five minutes. DISPLAY FUNCTION Please read carefully before using the Treadmill. - Page 20 1200 PROGRAMS MANUAL MODE: If you elect to operate the Treadmill in Manual Mode, press START. The Treadmill will start at 0.5mph after a 3,2,1 countdown. PROGRAM MODE: After pressing POWER, press the desired program using the program Quick Keys or press SELECT to choose one of the programs.
-
Page 21: Operation Instructions
Time window for one second when the Safety Key is placed on the Computer. Time-Out: If the Treadmill is turned on, and the Belt is not moving, the Computer will shut-off after five minutes. OPERATION INSTRUCTIONS Please read carefully before using the Treadmill. - Page 22 1400/1500 PROGRAMS MANUAL MODE: If you elect to operate the Treadmill in Manual Mode, press START. The Treadmill will start at 0.5mph after a 3,2,1 countdown. PROGRAM MODE: After pressing POWER, press the desired program using the program Quick Keys or press SELECT to choose one of the programs.
-
Page 23: Using The Pulse Function
1200 The Pulse Window on your Computer works in conjunction with the Pulse Sensors found on the Console. When you are ready to read your pulse: 1. Place both hands firmly on the Pulse Sensors. For the most accurate reading, it is important to use both hands. -
Page 24: Exercise Guidelines
Using your Treadmill will improve this. MUSCULAR STRENGTH – the ability of a muscle to exert force for a brief period of time. Upper-body strength, for example, can be measured by various weight-lifting exercises. -
Page 25: Aerobic Exercise: How Much? How Often
You can do different types of aerobic activities, say walking one day, and use your Treadmill the next. Make sure you choose an activity that can be done regularly, and is enjoyable for you. The... -
Page 26: Clothing
Count pulse for 10 seconds and multiply by six to get the per-minute rate. Remember, your New Balance Treadmill also comes with pulse sensors located on the Console. When used properly, the unit pulse sensors can help you to determine your estimated heart rate. -
Page 27: Heart Rate Target Zone Chart
FOR CARDIOVASCULAR FITNESS TABLE 1 Heart Rate (Beats/ Min) TABLE 2 Exercise Warm Up Week Period 1 & 2 5 min 3 & 4 5 min 5 & 6 5 min 7 & 8 5 min 9 & 10 5 min 11 &... -
Page 28: Warm Up & Cool Down Stretches
WARM UP & COOL DOWN STRETCHES Stretches can help improve flexibility and relieve the tightness in muscles that results from repetitive sport movements that require a limited range of motion. 10 to 12 minutes of daily stretching is recommended. This can be done when warming up or cooling down. - Page 29 4. Back Stretch Stand with your legs shoulder width apart and your knees slightly bent. Bend forward from your waist with your arms extending loosely in front of your body. Gently bend from the waist flexing your body as far forward as it will go. Hold for 20 to 30 seconds.
-
Page 30: Troubleshooting Guide
CAUSE in miles – 0.8 calibrated in Kilometers CAUTION The Treadmill will shut off when the electricity load is above it’s capacity (example: power surge or storm). To restart the Treadmill, please follow the procedure below: A. Unplug the power cord from the Treadmill’s socket. -
Page 31: Workout Progress Charts
Use the charts below to keep track of your progress over time. Before writing on them, make as many copies as you think you’ll need. We suggest you keep these in a notebook. You will find it both informative and motivational to look back at what you’ve done, and this data will help you to chart future fitness goals as you progress. -
Page 32: Parts List 1200/1400 And 1500
ITEM # PART NAME ARC BRACKET SAFETY KEY LEFT CONSOLE RIGHT CONSOLE BOOK RACK TOP & BOTTOM PULSE SENSOR W/WIRE HAND GRIP FRONT MOTOR COVER (1200) FRONT MOTOR COVER (1400) HANDLEBAR WIRE MOTOR COVER BRACKET SPEED SENSOR WIRE BELT GUIDE POWER CORD RIGHT ARC BRACKET COVER LEFT ARC BRACKET COVER... -
Page 33: Exploded View 1200/1400
1200/1400 EXPLODED VIEW... - Page 34 1500 EXPLODED VIEW 81 108 62 86 88 69...
- Page 35 ® Dedication to Quality We warrant this product to be free from all defects in material and workmanship when used according to the manufacturer’s instructions. See Limited Warranty Card for details. Save your sales receipt. (You may wish to staple it into this manual.) 8/22/06...
Need help?
Do you have a question about the 1200, 1400, 1500 and is the answer not in the manual?
Questions and answers