
Related Manuals for SkyLine 28207RF


Summary of Contents for SkyLine 28207RF
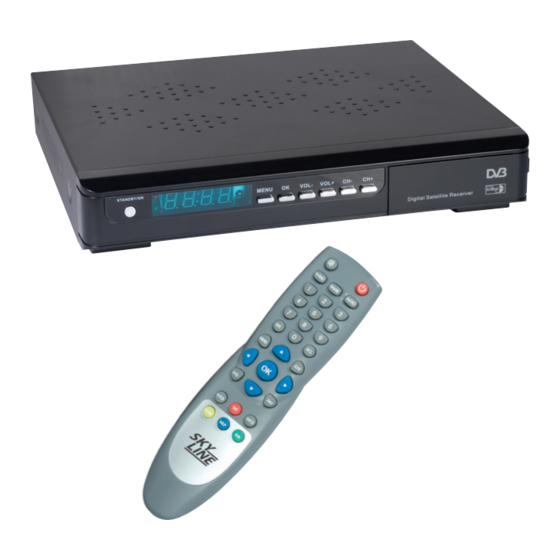
- Page 1 FREE - TO - AIR SATELLITE RECEIVER 28207RF Customer Careline 0901 293 0038* *Careline calls are charged at £1 per minute from a BT landline. Call charges from other networks may vary.
-
Page 2: Table Of Contents
Contents Safety Instructions 1. General Information 1.1 Main Features 1.2 Satellite Receiver Accessories 1.3 General Operation of Receiver 1.4 Front Panel 1.5 Rear Panel 1.6 Remote Control Unit 2 . Installation of Receiver 2.1 Connection to Dish and TV via SCART 2.2 VCR SCART Connection 2.3 Connecting to TV using RF support 3. Menu Information 4. System Installation 4.1 Antenna Setting 4.2 Automatic Search 4.3 Manual Search 4.4 Blind Search 4.5 Motor Setting 4.6 Factory Default 5. Preferences 5.1 System Options 5.2 AV/RF Setting 5.3 Video Adjust 5.4 Time Setting 5.5 Timer 5.6 Parental Control 5.7 About Receiver 6. Channel Manager 6.1 Channel Manager 6.2 Set Favorites Customer Careline: 0901 293 0038 Technical Support: http://technical.philex.com Calls are charged at £1 per minute from a BT landline. - Page 3 Contents 7. General Viewing Function 7.1 Channel List 7.2 Select Channel 7.3 Previous Channel Recall 7.4 TV/Radio Mode 7.5 DTV/TV Mode 7.6 Channel Information 7.7 Favorite LIST 7.8 Volume/Audio Control 7.9 Sat (list programs by sat) 7.10 Zoom function 7.11 PIP (Multi-screen preview) 7.12 SUB 7.13 TXT 7.14 Pause Function 8. Games 9. EPG (Electronic Program Guide) 10. Technical Specification 10. Technical Specification 11. Trouble Shooting 12. Satellite Dish Alignment settings 12. Satellite Dish Alignment settings 12. Satellite Dish Alignment settings Customer Careline: 0901 293 0038 Technical Support: http://technical.philex.com Calls are charged at £1 per minute from a BT landline. Call charges from other networks may vary...
-
Page 4: Important Safety Instructions
Important Safety Instructions Before installation please make sure you read these instructions carefully and observe the safety guidelines set out below Avoid exposing your equipment to harsh conditions such as wet or damp places, high humidity, strong vibration, extremely high or low temperatures, strong sunlight and places that are very dusty. Do not cover or place heavy objects on the receiver unit. Make sure there is sufficient clearance around the unit to allow adequate ventilation. Never push objects into holes or ventilation slots. To save power, switch off mains power or pull out the mains power plug when you are not using the equipment. Don’t continue to use this equipment if you have spilt liquids in it, if it is damaged in any way or if it does not work normally. Immediately unplug the equipment and get expert advice. Pull the mains plug out of the wall socket during thunderstorms and disconnect the satellite antenna. Cleaning: disconnect the mains supply and use only a lightly dampened soft cloth. Do not use chemical solvents or strong detergents as these may damage the cosmetic finish. • To prevent electric shock, do not remove any cover. • If anything goes wrong, don’t try and fix it yourself, get a qualified engineer to look at it • Do not expose this equipment to dripping or splashing • Never put a naked flame source on or near the equipment • This product is not a toy. Do not let young children play with the equipment. Customer Careline: 0901 293 0038 Technical Support: http://technical.philex.com Calls are charged at £1 per minute from a BT landline. Call charges from other networks may vary... -
Page 5: Customer Careline: 0901 293 0038 Calls Are Charged At £1 Per Minute From A Bt Landline
General Information Your digital satellite receiver allows you to view digital satellite programs when connected to a properly aligned satellite dish and LNB. This user’s manual covers the installation of the receiver and the necessary steps to operate various features. It also explains in detail the special features built in to this receiver. 1.1 Main Features • Conexant CX24303 single chip solution • MPEG-II & DVB-S compliant • Supports 10 OSD languages (English, Arabic, Turkish, German, French, Italian, Russia, Greek, Spanish, Dutch) • RF modulator with RF IN and RF OUT • Channel search in automatic, manual, network search and blind Search Max. 4000 channels receivable • DiSEqC control version 1.0 and 1.2 compatible for multi-satellites (63 satellites max) • Dish alignment help feature • Channel list organizer supports Lock, Favorite, Move, Rename and Delete • Timer function, automatically switches On/Off once, daily, weekly, monthly or one time • Multi-picture browsing (supports 9,12 & 16 pictures) • Video picture zooming function • Auto detect program video format (PAL/NTSC/SECAM) • User-friendly EPG and information plate • Teletext supports both OSD and VBI mode • Supports 256 color On-Screen-Display • Games included • Easy and fast software upgrade through RS-232 port 1.2 Satellite Receiver Accessories Your satellite receiver is supplied with remote control unit (RCU) and SCART lead. -
Page 6: General Information
General Information 1.4 Front Panel FUNCTION MENU Show the main menu and back to previous menu Confirm the selection, or jump back to last menu Power on/off the receiver CH+/- Channel change(up/down) VOL+/- Volume control(left/right) 1.5 Back Panel CONNECTION FUNCTION DISH IN Connect to satellite antenna cable RF loop through output to another receiver LOOP OUT Connects to PC for software updates RS-232 Phono socket digital stereo output to TV or HiFi audio COAXIAL VCR SCART Connect to recording device (VCR/DVD) using SCART cable TV SCART Connect to TV using SCART cable AERIAL IN Signal input from local CATV network or outdoor TV antenna TO TV UHF RF output to TV set’s antenna in POWER ON/OFF Power on/off the receiver Customer Careline: 0901 293 0038... - Page 7 General Information 1.6 Remote Control Unit FUNCTION Power ON/OFF Mutes the sound TV/RAD Switches between TV and Radio mode PAUSE Freeze frame Display the favuorite channel list Display satellite list TV/VCR Switch between TV and VCR mode (Scart) Keys to select channel INFO Shows current channel information Channel change, or move cursor up/down Volume up/down, or more cursor left/right Return to previous channel viewed Confirm the selected item in a menu screen or show the Channel list Show main menu, or return to previous MENU menu from sub-menu Show EPG (Electronic Program Guide) AUDIO Enter audio setting menu 9, 12 or 16 pictures for preview Teletext Key Subtitle Key Zoom Zoom in/out of selected picture EXIT Exits current menu Customer Careline: 0901 293 0038 Technical Support: http://technical.philex.com Calls are charged at £1 per minute from a BT landline.
-
Page 8: Connection To Dish And Tv Via Scart
Receiver Installation Before connecting equipment to your satellite receiver please check the instruction manual for each device. The downlead from your satellite dish is connected via the F connector on the back of your receiver marked Dish In .. There are two options for connecting your satellite receiver to your TV shown below and opposite. 2.1 Connection to Dish and TV via SCART Connect the SCART lead supplied to the SCART socket on back of receiver marked TV and to either of the SCART sockets on the back of the TV marked AV1 or AV2 2.2 VCR SCART Connection Connect the TV to the receiver as shown in 2.1 and connect the VCR SCART socket to your recording device using a SCART lead. Customer Careline: 0901 293 0038 Technical Support: http://technical.philex.com Calls are charged at £1 per minute from a BT landline. Call charges from other networks may vary... -
Page 9: Connecting To Tv Using Rf Support
Receiver Installation - Menu 2.3 Connecting to TV using RF support 3. Menu Information After completing all your connections switch on the receiver, the main menu will be displayed, which consists of the 4 menu items listed below. • Channel Manager • Installation • Preferences • Game During installation the OK Keys confirms a selection and the / Keys shows the menu options. You can also use the numeric Keys on the RCU to select a channel while watching TV. Use the / Keys to move up or down from one line to another line. Use the / Keys to move the cursor up or down in the sub-menu. To quit the menu system at anytime, press the EXIT Key on the RCU. Customer Careline: 0901 293 0038 Technical Support: http://technical.philex.com Calls are charged at £1 per minute from a BT landline. Call charges from other networks may vary... -
Page 10: System Installation
System Installation Menu This menu consists of 6 sub-menus. • Antenna Setting • Automatic Search • Manual Search • Blind Search • Motor Setting • Factory Default Use the / Keys to move up or down from one sub-menu to another. Use the OK Key to open the sub-menu selected. 4.1 Antenna Settings 1. Satellite Name: Choose the satellite you want to view 2. Transponder: Set to TP search - this only needs to be altered if you need to view new transponders, see www.lyngsat.com LNB Type: Select Universal 4. LNB Freq. - Low Freq. MHz this should be already set to 9750 (use the RCU number Keys to reset if necessary). 5. LNB Freq. - High Freq. MHz this should be already set to 10600 (use the RCU number Keys to reset if necessary). 6. 22k - should be set to Off 7. 0/12V - this should be set to 0 V DisEqC Switch Setting - should be set to NONE LNB Power - should be set to AUTO After selecting your antenna settings, you can enter the Automatic Search Menu by pressing the Red (TTX) Key, or press the Green (Sub) Key to enter the Manual Search Menu. - Page 11 System Installation Menu - Searches 4.3 Manual Search 1. Satellite Name: Press the / Keys to select the satellite you want to search, for the UK (English Language Channels) normally Astra 2. 2. Transponder: Press the / Keys to select a transponder to search, or press the OK Key to activate a transponder list, settings for the transponder can be found on www.lyngsat.com or www.satcodx.com 3 & 4. Frequency and Symbol Rate: Enter the Frequency and Symbol rate of the Transponder with the number Keys on the RCU. 5. Polarization: Enter the correct polarization for transponder HOR for Horizontal Polarization, VER for Vertical polarization, if you select the wrong polarization the Signal Quality will show Zero. 6. Search Type allows you to choose the type of channels to search for: FREE : Only searches for the Free to air (Unencrypted) TV and Radio Channels CAS : Only searches for the Conditional Access Channels/Encrypted Channels (not available on this receiver). ALL : Includes both of the above. We advise you to set the Search Type to FREE . 7. Select NIT On or NIT Off . NIT stands for Network Information Table and is a table of service information included in the data stream from the transponder if you wish to search this information set the NIT search to On, usually we would advise you to leave this set to NIT Off . When you have made all your settings press the Blue Function Key to start the channel search. Red Function Key: To switch to the LNB Settings. Green Function Key: To Delete an Unwanted or Inactive TP (Transponder) from the default TP list. Yellow Function Key: Allows the user to input the Audio, Video and PCR PID’s with the numeric Keys on the RCU these can again be found in the channel information at www.lyngsat.com or www.satcodx.com Blue Function Key: To start the Search function. 4.4 Blind Search If you do not know the channels or transponders that are available on a particular satellite then you can use this function to scan the satellite for all the active transponders and channels, this will also find TV, Radio and Data feeds which you may not want. Satellite: Press the OK Key to activate the satellite list then use the or Keys to select the Satellite you wish to search, for the UK (English Language Channels) this will normally be Astra 2. Use the numeric Keys on the RCU to set the following: Start Frequency: set to 10700 for a Universal LNB. End Frequency: set to 12750 for a Universal LNB.
- Page 12 System Installation Menu - Searches 4.5 Motor Setting Satellite Name Press the / Keys to select the satellite you want to set. Motor Setting Disabled: This is the default setting and will only need to be changed if you are using a motorized dish system DiSEqC 1.2: Consult the manual which came with the DiSEqC Motor on installation. USALS: Consult the manual which came with the USALS Motor on installation. Transponder Press the / Keys to select the transponder you want to set, you can also press the OK Key to activate a transponder list, the parameters (settings) of the transponder can be found on www.lyngsat.com or www.satcodx.com, some dish motor manuals come with a preferred transponder setting for each satellite this is usually the strongest transponder on the Satellite. Move Use the Keys to turn the dish further West or the Key to turn the dish further East. Save position This saves the position of the Dish for the satellite selected above. Recalculate position This function automatically calculates and sets all the pre-programmed satellites positions with reference to the position of a single satellite. Go to Reference This function positions the dish motor at the 0 degree (Due South) position and resets the internal counter of the dish motor, all the position settings in the memory are calculated from this position Limit Setting This function allows limits to be set in cases of obstructions which may cause damage to the dish to be avoided, (See the Manual for your Dish motor for further information) USAL (Universal Satellite Automatic Location System) calculates the position of the satellites from a geographical position. Use the numeric Keys on the remote control to set the following which can be found at www.dishpointer.com or www.multimap.com Local Longitude: Degrees, East or West of Greenwich Meridian use / Keys to toggle between East and West.
-
Page 13: Preferences
Preferences 5. Preferences Preferences consists of 7 sub-menus, as follows: • System Options • AV Setting • Video Adjust • Time Settings • Timer • Parental Control • About Receiver 5.1 System Options You can change the following options by pressing the OK Key to activate a list and then using the / or alternatively / Keys. OSD Language This changes the On Screen Display Language to the most convenient language. OSD Transparance This alters the transparency of the On Screen Display so a picture can easily be seen underneath the display. OSD Timeout This alters the time that the On Screen Display is shown on screen. Audio Language This changes the audio to a more convenient language if available. 5.2 AV/RF Setting Screen Ratio Set this to the aspect ratio of your screen most older CRT Screens are 4:3, more modern LCD Screens are 16:9. Screen Mode If you are watching a wide screen picture, Pan Scan removes part of the width of the picture; Letterbox shows the entire picture with reduced height. Monitor Type Different monitor’s types can be used, Default should be Auto. Video Output Set to RGB (Red, Green, Blue) if your display allows it, otherwise set to CVBS (Composite Video). -
Page 14: Channel Manager
Preferences 5.5 Timer If you want to automatically switch the satellite channel at a specific time so you do not miss an important program, you can use the Timer function. Using the cursor / / and OK Keys, set the Timer event number and then set the Channel Type (TV or Radio), next enter the Channel from the channel list by pressing the OK Key and use the / Keys to select the channel then press the OK Key. Enter the Date (see Time Setting) and then use the numeric Keys to enter the HOUR (start time) and the Duration Time finally set the Status to either Once, Daily, Weekly or Off. 5.6 Parental control If you want to prevent access to certain channels by children for instance then you can set a password (Default 0000), (See Section 6 Channel Manager, Lock for details). To change the password 1. Enter the Current Password 2. Set the Parental Lock to On 3. If you want to prevent unauthorised installation, set the Install Lock to On 4. Enter your new password with the numeric Keys in the New Password Box 5. Re enter you new password in the Confirm Password Box 6. Press MENU or EXIT 5.7 About Receiver Hardware and Software revision information for the receiver can be found here. Customer Careline: 0901 293 0038 Technical Support: http://technical.philex.com Calls are charged at £1 per minute from a BT landline. - Page 15 Channel Manager 6.1 Edit Channels Press the Recall Key (RCL) to choose Delete , Lock , Move , Rename and Sort functions. To manage the existing channels. Delete To delete selected channels from channel list. Press OK to select a channel for deletion, press OK again to deselect. An X symbol will appear in front of selected channel names which are selected for deletion. Use the Red function Key to delete all channels. Use the Green function Key to delete unwanted transponder. Use the Yellow function Key to delete whole satellite. If you want to delete the selected channels press EXIT , a message will appear - “Do you want to delete” - choose Yes or No to execute or cancel the deletion. Note: The deleted channels cannot be recovered unless you search again Lock Lock the channel to be accessed by password. The parental Lock must be set up in advance before using this function. Move You can move channels to a better or more logical place in the channel list. Select the channel(s) you wish to move by using the / Keys and then the OK Key if you wish to move a block of channels then repeat this step for all of the channels, then press the Red Function Key to confirm the selection, use the / Keys to move your selection to the required place in the channel list and then press the OK Key to confirm. Rename Choose the channel you want to rename some channels are listed as TV Ch in the channel list these can be renamed to make identification easier. Press the OK Key, a Keyboard will be displayed on the screen use the / / Keys to edit the channel name when you have finished move the cursor to the OK Icon and then press the OK Key. Sort You can sort the channels by Alphabet, Satellite, FTA/CAS Channels or Favorite channels. Press TV/Radio Key to change between TV and Radio channels. Radio channel management is the same operation as TV channels.
-
Page 16: General Viewing Function
General Viewing Functions The following describes the basic functions of your satellite receiver while watching satellite TV or listening to satellite radio. While watching, the current channel information will be shown on the bottom of the screen if you press the INFO button on the remote control. 7.1 Channel list In channel display mode, press the OK key to view the channel list. The list of existing channels will be shown. RED function Key to go to advanced Channel list mode. (List by Alphabet, Satellite, FAV, CAS). BLUE function Key to switch channel list Mode between FTA, CA and All Channel. TV/RAD Key switch between TV/Radio Channels list. 7.2 Select Channel To select a Radio or TV channel use the / Keys on the front panel of the receiver or the / Keys or the numeric keys on the remote control unit (RCU). Also while listening to a Radio Channel or Watching a TV channel press the OK key this will display a channel list on the right hand side of the screen to select a channel use the / on the RCU when you have selected the desired channel press the OK key to watch or listen. Pressing the EXIT key removes the channel list from the screen. 7.3 Recall Press RCL Key on the RCU to move to the channel you watched previously. 7.4 T V/Radio Mode Press the TV/Radio key on the RCU to toggle between TV and Radio channel modes 7.5 TV/VCR Mode The TV/VCR Key on the RCU lets you change the Scart control between VCR and TV. Press once tomove to the TV mode, Press twice to come back to the VCR mode. 7.6 Channel Information Everytime you change channels, you will receive program information for a few seconds.While watching the channel you can see the current channel information at anytime by pressing the INFO Key on the RCU. Note: Channel information will be displayed for 5 seconds by default and will disappear. You can adjust the display time interval from 1 to 10 seconds. (see section 5.1.3) 7.7 Favourite List To select a favourite group list press the FAV Key on the RCU. You can access the next favourite group by pressing the FAV Key again Customer Careline: 0901 293 0038... -
Page 17: Volume/Audio Control
Channel Manager 7.8 Volume & Audio Control Volume Control To increase or decrease volume, use the / Keys on the RCU. Mute To mute the sound, press the Key on the RCU. To restore volume press the Key again. Audio Control You can change the Audio language and Audio output modes, by pressing the AUDIO Key, if more than one language is shown then use the / Keys to select the required language, pressing the / Keys toggles the Audio output between Stereo, Left, Right or Swap. The current audio setting is displayed in the channel information screen. 7.9 Sat If you have a motorised system or multiple LNB’s fitted to your system, you can select the required Satellite by pressing the SAT Key on the RCU (Remote control unit) a satellite list will be displayed use the / Keys to select the required satellite then press the OK Key 7.10 ZOOM function The Zoom function allows you to enlarge part of the picture, press the ZOOM (Yellow) Key and use the / / Keys to select the area to be enlarged then press the OK Key, the selected area will be enlarged on the screen. 7.11 PIP (Multi-screen preview) Press the MLP (Blue) Key to go into the multi-picture preview mode, use the / Keys to select 9, 12 or 16 pictures for previewing then press the OK Key, pictures will start to appear on the screen this may take a while, one of the pictures will be highlighted in orange this will is the live picture and sound, use the the / / Keys to move the highlighted picture, press the Exit key to view full screen. -
Page 18: Games
General Viewing Functions 8. Games There are four games programmed into the receiver. They can be played using the remote control. Tetris Box Man Canvas Gobang 9.EPG(ElectronicProgramGuide) The receiver provides an EPG function this provides the information from the channel or network like program titles, times, Satellite, Transponder etc, some European satellite networks provide a 7/10/14 day guide, while others only provide Now and Next program information Red Function Key Shows yesterdays guide Green Function Key Shows tomorrows guide Blue Function Key Shows a more detailed guide to the program information Press the OK to activate the Timer function; use the / / Keys to change the Timer number as required and Timer Status to either Once, Daily, Weekly or Off, then select either OK or cancel and then press the OK Key (see also 5.5 Timer Setting) Customer Careline: 0901 293 0038 Technical Support: http://technical.philex.com Calls are charged at £1 per minute from a BT landline. Call charges from other networks may vary... -
Page 19: Technical Specification
10. Technical Specification TRANSMISSION STANDARDS DVB, MPEG-2 INPUT/ DEMODULATION Connector Type 2x F Type, 3/8-32UNEF-2A (1 input/1 loop through) Input Frequency 950 to 2150 MHz Signal Input level -65 to - 2 5 dBm Band Switch control 22 KHz LNB Supply 13.0V + 0.5V / 18V + 0.7V, max 400mA Demodulation Type QPSK / FEC Coding (DVB ETS 300 421) Symbol Rate 2 < Rs < 45 Mbaud (SCPC/MCPC) TV SCART Video output CVBS/75Ω unbalanced RGB bandwidth 5MHz Fast blanking 0V to 3V 6V - 16:9 aspect ratio image (AV Mode) Function switch 12V - 4:3 aspect ratio image (AV Mode) Audio output “Left, Right”/ 600Ω unbalanced Level 1.0V rms ± 2dB into 10kΩ VCR SCART Video output CVBS/75Ω unbalanced/5MHz Video input... - Page 20 10. Technical Specification DATA SERVICE PORT Connector 9-pin D-sub female RS232C interface. The DVB-DSR is seen as the Data Communication Data protocol Equipment (DCE) and the PC (or other terminal) is seen as the DataTerminal Equipment (DTE). Data rate Maximum of 625K bits/s POWER SUPPLY Main input voltage 2 3 0 VA C Nominal power consumption SAFETY Insulation resistance More than 10MΩ @500VDC Ambient conditions of 28 ± 2% & 70% RH Withstand Voltage (Hi-Pot) I/p to O/p: 3kV(1 min) Temperature Rise < 75°C on winding & core < 50°C on casting At 264Vac @ 50Hz Safety Standard Designed to meet IEC 9 MICROPROCESSOR Microprocessor CONEXTANT Clock frequency 130MHz SDRAM Memory Flash memory PHYSICAL CHARACTERSTICS Front panel Keys 7 Keys...
-
Page 21: Troubleshooting
Troubleshooting PROBLEM POSSIBLE CAUSES WhAT TO DO No display on front panel Powercord is not plugged in Check powercord is plugged properly into power socket No sound or picture, but the The unit is in standby mode Press the standby button front panel red light is ON The satellite dish is not Adjust the dish No sound or picture pointing at the satellite Check the Signal Level in the Antenna Setup menu Check the cable connections, LNB and No signal or weak signal other equipment connected between the LNB and receiver, and/or adjust the dish The satellite dish is not Adjust the dish pointing at the satellite Signal is too strong Connect a signal attenuator to the LNB Bad picture/Blocking error Satellite dish is too small Change to a larger dish LNB noise factor too high Change to an LNB with lower noise factor The LNB is faulty Change the LNB The system is connected by Select AV/ EXT mode on the TV No picture (Video) SCART cable and TV is not in Consult the manufactures instruction AV/EXT mode... -
Page 22: Satellite Dish Alignment Settings
12. Satellite dish alignment settings Satellite dish alignment settings for Astra 2A, 2B, 2D and Eurobird 1 28.2 Degrees East for the UK and Eire (English Language Channels) For other satellite settings see www.dishpointer.com Town County Elevation Azimuth Polarization Aberdeen Aberdeenshire 19.76 145.17 -10.55 Abergavenny Gwent 23.96 142.37 -14.66 Aberystwyth Dyfed 23.05 141.46 -14.84 Alnwick Northumberland 21.39 145.06 -11.48 Ampthill Bedfordshire 24.77 145.24 -13.03 Athlone West Meath 20.62 137.71 -16.14... - Page 23 12. Satellite dish alignment settings Town County Elevation Azimuth Polarization Felixstowe Suffolk 25.51 147.27 -11.96 Fishguard Dyfed 23.02 140.32 -15.65 Folkestone Kent 26.24 146.76 -12.64 Fort William Highland 19.00 141.86 -12.26 Gairloch Highland 18.08 141.56 -11.90 Galway/Gaillimh Galway 20.28 136.52 -16.80 Glasgow Lanarkshire 20.09...
- Page 24 12. Satellite dish alignment settings Town County Elevation Azimuth Polarization Oxford Oxfordshire 24.75 144.27 -13.71 Peebles Borders 20.69 143.56 -12.09 Pembroke Pembrokeshire 23.30 140.27 -15.84 Penrith Cumbria 21.68 143.70 -12.53 Perth Perth & Kinross 19.94 143.52 -11.71 Peterborough Cambridgeshire 24.40 145.70 -12.54 Peterhead Aberdeenshire 19.54...
Need help?
Do you have a question about the 28207RF and is the answer not in the manual?
Questions and answers