Vonets vap11g Step-By-Step Manual
Hide thumbs
Also See for vap11g:
- User manual (15 pages) ,
- User manual (11 pages) ,
- User manual (11 pages)

Related Manuals for Vonets vap11g


Summary of Contents for Vonets vap11g
- Page 1 A Step-by-step Guide to Installing and Configuring your Vonets VAP11G Wifi Bridge (c) 2011 Zarar Iqbal D 0 0 3 3 2 1 / 6 / 2 0 1 1...
-
Page 2: About This Guide
About this guide he main aim of this guide is to guide you through putting your wireless network ID onto your wifi bridge. The configuration program which comes on the disk included with your wifi bridge takes you through three simple steps, after which your wifi bridge is ready to To configure your wifi bridge , you first plug it into a... - Page 3 A STEP-BY-STEP GUIDE TO INSTALLING - & - CONFIGURING YOUR WIFI BRIDGE...
- Page 4 What the bridge does The wifi bridge takes signals from your wired device, e.g . Satellite box, game console, and turns them into wireless signals your wireless router understands. N O N E E D F O R M E T R E S O F C A B L E S It acts as a bridge between your chosen device and your wireless network.
- Page 5 Range of transmission The wifi bridge works up to a range of 30 metres, and its signal strength is the same as any other wireless device you might use, such as a laptop computer, which may vary according to physical conditions, such as metal structures, walls the atmosphere, and time of day.
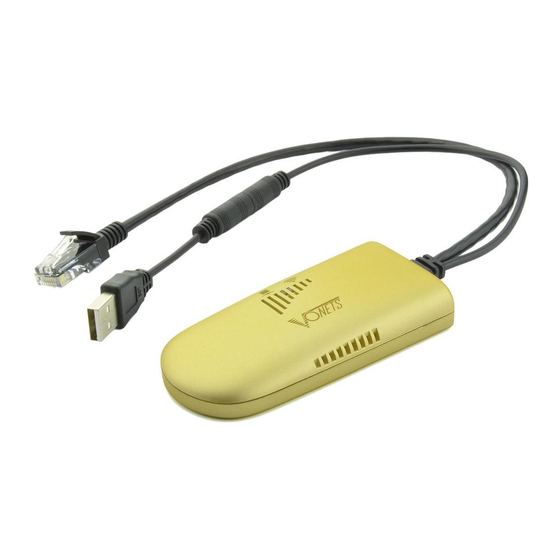
- Page 6 The power adapter socket At the end of the wifi bridge are two wires. At the side of the base of the wires is a small hole. This is the power adapter socket. This socket takes a power adapter connector and can be used to power the wifi bridge if the device to which it is connected doesn’t have enough power.
- Page 7 The USB connector The USB connector on the wifi bridge provides the wifi bridge with electricity. The wifi bridge does use the USB connector to send data. The wifi bridge’s USB connector fits onto the end of a power connector. You can pull off the USB connector to reveal the power connector.
- Page 8 The yellow/orange light This lights up when the wifi bridge is receiving power. If the wifi bridge has nor been configured, the light will be solid, i.e. not flashing . If the wifi bridge has been paired successfully with your PC, the light will flash on and off.
-
Page 9: Installation Requirements
4. A wireless router with an active internet connec- tion (which can be secured or unsecured) You’ll also need: 5. A Vonets 11g wifi bridge 6. A Vonets installation disk 7. The target device that you want to make wire- less, e.g . - Page 10 Check for ports and power Your PC and target device must have the correct ports, sockets and electricity supply. In some cases, de- vices don’t have what is needed to make your wifi bridge work. To make sure all devices have what is needed, you are now going to perform some simple checks.
- Page 11 Installing the disk software What’s on the disk supplied with the wifi bridge The software on the mini CD disk comes in four parts: the autorun menu, a user manual which is in PDF format and which you can view and print out, a program installer for the configuration utility and a program installer for the drivers required to allow the wifi bridge to communicate with your PC.
- Page 12 First use of the disk The installation menu Put the CD into the PC’s CD player. A menu should appear (see picture below) on your screen shortly after the disk has been inserted. > If a menu does not appear , access the files on the disk (see below) from the Computer icon on your desk- top and click on the application called, ‘autorun’...
- Page 13 The installation onscreen menu There are two menu options at the top of the menu. Each option is for a different version of Windows. > To check which version Windows you are using , right click on the ‘My Computer ’/ ‘Computer ’...
-
Page 14: Installing The Software
The installer program box Once you have selected an option from the on- screen menu, the installer program brings up a box which reads, ‘Welcome to the VAP11G configure 5.0.17.0 for WIN7/VISTA/WINXP Setup.’ Click Next> Accepting the licence agreement Accept the licence agreement to proceed with the installation. - Page 15 The software will ask you for a name for the folder that will appear in the Start menu Programs folder. By default this is set to VONETS VAP11G. You can leave this as it is or change it. When you’re done, click Next>...
- Page 16 Phew! Well done! You’ve almost completed the in- stallation of the configuration software! Just a little further to go!
- Page 17 Installing WinCap Your PC also needs a program called WinCap configure the wifi bridge, so we are now going to in- stall this. The WinCap program details box When the WinCap installer program runs, a box ap- pears with the details of the WinCap program, such as the version and software producers.
- Page 18 Software installation The installer software then installs the WinCap con- figuration software. This takes about ten seconds. After installation of the configuration software After installation, a confirmation message appears to confirm that the WinCap software has been installed onto your PC. Click Finish. Installation takes about 10 seconds You can now remove the disk.
- Page 19 Now you’ve installed the configuration software, you must use that software and your PC to put your wire- less network ID onto your wifi bridge. That’s what we’re going to do next!
- Page 20 PC and that your wifi bridge is receiving power. Run the configuration program Locate the VONETS VAP11G folder in the Start Menu (if you chose a different folder name, then locate this folder in the start menu).
- Page 21 wifi bridge, it will display a list of the wifi bridges it has found. > This information is displayed in two columns. One column is for the name of the wifi bridge and the second column is for the MAC address (unique ID number) of the wifi bridge.
- Page 22 > Once the wifi bridge has found all the net- works in range, these will be listed in the two columns displayed. > Use your mouse move the cursor to the network you want to select and click on that network.
- Page 23 Going back to step configuration, there is a column in the configuration ta- ble titled, ‘Security ’. If a detected wireless network has no secu- rity code associated with word, ‘None, appears in this column. If a network is secure, the word, ’WEP ’...
- Page 24 If the network you have selected is se- cure, you will be presented with box in which to in- sert your WEP key*. If you have the WEP key for the wireless network which you selected at step 2, enter the WEP key in the ‘Key 1’...
- Page 25 At this point, the configuration program brings up a message congratulating you on configuring your wifi bridge:...
- Page 26 Connecting your wifi bridge to a power source Once you have configured the device, i.e. You have put your wireless network’s information onto the wifi bridge, you are ready to connect the wifi bridge to your chosen device, e.g ., game console, satellite receiver, printer, etc. Step 1: Powering the wifi bridge Plug the usb con-...
- Page 27 Step Making data connection Insert the RJ45 connec- tor of the wifi bridge into the RJ45 socket of your chosen device. Step 3: Switch on your chosen device. Step 4: After several seconds, the wifi bridge lights will start flashing . This means that your wifi bridge is receiving and transmitting information and is working properly.
- Page 28 FAQ’s Here are some customers questions regarding the wifi bridge. Note that we test each bridge before we send it out to make sure that it works. 1. Will the wifi bridge work with my..? > If your device has an RJ45 connection socket, which it uses to connect to the internet, then YES wifi bridge will work with it.
- Page 29 The other connector is a USB connector which de- > rives power from the device to which the wifi bridge is connected. Underneath the USB connec- tor is a regular power adapter connector, in case you do not have a USB port on your device. 4.
- Page 30 message. 7. The yellow light comes on, but the configuration programme cannot detect the wifi bridge. > Sometimes Windows needs a refresh of connec- tions that are already active. When this happens, deactivate your wired connection and then reacti- vate it. After you have done this. Remove the wifi bridge from your PC and reconnect it.
- Page 33 Abdul Majeed I Want 1 Too Lyons of Bradford Florence Street Greenhill Mills Bradford Yorkshire BD3 8EX Ebay ID: zarariqbal Phone: 07865 700056 Email: zalzalahbuttsaab@gmail.com...
Need help?
Do you have a question about the vap11g and is the answer not in the manual?
Questions and answers