Table of Contents
Advertisement
Advertisement
Table of Contents

Related Manuals for InFocus X2


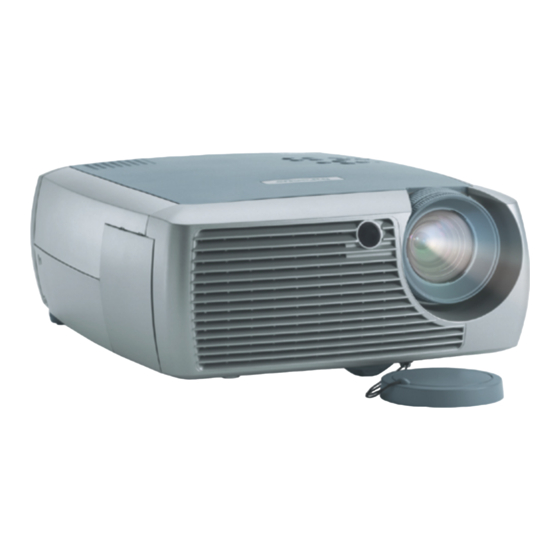
Summary of Contents for InFocus X2
- Page 1 X2 Service Manual...
-
Page 2: Table Of Contents
Remote Problems .......................58 Audio Problems........................59 Power Up with Top Case Removed ..................60 Check the Thermal Switch ....................63 Check fan operation ......................64 Parts Lists........................65 Parts Exploded View ......................65 FRUs by alphabetic listing....................66 Label kit contents & locations....................67 X2 Service Guide... -
Page 3: Safety Precautions
SAFETY PRECAUTIONS WARNING: TO REDUCE THE RISK OF FIRE OR ELECTRIC SHOCK, DO NOT EXPOSE THIS APPLIANCE TO RAIN OR MOISTURE. DANGEROUS HIGH VOLTAGES ARE PRESENT INSIDETHE ENCLOSURE. DO NOT OPEN THE CABINET. REFER SERVICING TO QUALIRED PERSONNEL ONLY. CAUTION: Laser beam is emitted when the laser button of the remote control is pressed. -
Page 4: Important Safety Instructions
IMPORTANT SAFETY INSTRUCTIONS CAUTION: PLEASE READ AND OBSERVE 1. Read Owner's Manual 3. Source of Light ALLWARNINGS AND After unpacking this product, read the Do not look into the lens while the lamp INSTRUCTIONS GIVEN IN THIS owner's manual carefully, and follow all is on. -
Page 5: Parts Replacement
Parts Replacement Removable Parts Hierarchy X2 Service Manual... -
Page 6: Bottom Case
Do not lose the serial number label. It is not a replaceable part. Remove the rubber foot from the old bottom case. The rubber foot is not a replaceable part. X2 Service Manual... - Page 7 ♦ Adhere the old rubber foot to the recess at the rear of the bottom case. ♦ Replace the parts in the bottom case reversing the order you used to remove them. X2 Service Manual...
-
Page 8: Chassis
Power supply and AC filter ECAs (page 32) Remove the six M3x10 Plastite Phillips screws that fasten the chassis to the bottom case. Remove the four #4-40 jack screws that fasten the chassis around the 15-pin D-sub connectors on the I/O panel. X2 Service Manual... - Page 9 Position the chassis over the two 15-pin D-sub connectors on the I/O panel. Replace the four jack screws and torque them to 2 in-lbs (.226 Nm). ♦ Replace and tighten the seven M3x10 Plastite Phillips screws securely. Do not over tighten the screws. X2 Service Manual...
-
Page 10: Controller Eca
Unplug the safety switch cable, the two fan cables, the color wheel ribbon cable, and the photodiode cable from the controller ECA. Remove the two M3x10 Plastite Phillips screws (circled). NOTE The controller/power supply and keypad cables are permanently attached to the controller ECA. Do not attempt to remove them. X2 Service Manual... - Page 11 Before installing the two screws, make sure that the pins in the bottom case (circled below) fit into the alignment holes in the controller ECA. Gently press down on the controller ECA to ensure that it is in proper position over the pins on the bottom case. X2 Service Manual...
-
Page 12: Cooling Fans
Position the fan against the lamp housing with fan label facing the lamp housing and the cable recess at the left lower side. The cables should exit the fan at the recess on the side opposite the label. X2 Service Manual... - Page 13 Position the fan against the lamp housing with fan label facing the lamp housing and the cable recess at the bottom right side. The cables should exit the fan at the recess on the side opposite the label. X2 Service Manual...
- Page 14 ♦ Replace and tighten the two M3x30 Plastite Phillips screws. Do not over tighten the screws. ♦ Make sure that the cables are clear of the fan blades. X2 Service Manual...
-
Page 15: Elevator
This allows the elevator shaft to pass through the housing and out of the bottom case. Depress the elevator actuator as you pull the elevator shaft out from the bottom side of the projector. If you are replacing the elevator shaft, install the rubber foot on the new shaft. X2 Service Manual... - Page 16 When you install the elevator shaft, make sure that the grooves on the elevator shaft face the lamp housing. Then depress the elevator actuator and insert the shaft into the elevator housing. Make sure the teeth on the shaft engage the actuator. X2 Service Manual...
-
Page 17: Focus And Zoom Rings
♦ Press the focus ring onto the lens. Then rotate the ring to ensure that the retainer tabs engage to lock it in place on the inner lens barrel. X2 Service Manual... -
Page 18: Front Bezel
Remove the following: Focus and zoom rings (page 17) Lamp door (page 24) Place the projector upside down on a soft work surface. Remove the two M3x10 Plastite Phillips screws that fasten the front bezel to the bottom case. X2 Service Manual... - Page 19 If you are replacing the front bezel, go to the next step. Otherwise, set the bezel aside and continue with the tear down. Remove the two M3x8 Plastite Phillips screws that fasten the inner grill to the front bezel, then separate the two parts. X2 Service Manual...
- Page 20 Align the front bezel against the front of the projector. Press the bezel into position to lock the two tabs and slotted receiver against the top case. ♦ Tighten the two M3x10 Plastite Phillips screws securely. Do not over tighten the screws. X2 Service Manual...
-
Page 21: Keypad, Front Ir Eca And Speaker
Remove the three Plastite screws with washers that fasten the speaker to the top case. Then lift the speaker out of the top case. If you are replacing the top case, remove the gasket and grill and install them in the new case. X2 Service Manual... - Page 22 Phillips Plastite screw that fastens the IR ECA to the case. Note the cable routing before you remove the two ECAs If you are replacing the top case with a new one, follow the directions below to remove and replace the keypad parts. Otherwise reinstall the two ECAs. X2 Service Manual...
- Page 23 The keypad ECA, the front IR receiver ECA, the key set and the LED cover fit only one way in the top case. ♦ Make sure that the alignment holes in the LED cover fit over the pins in the top case. X2 Service Manual...
-
Page 24: Lamp And Lamp Door
Gently pry the top of the door away from the projector. The door detaches from the projector. Squeeze the locking tab on the lamp cable connector and unplug it from the connector inside the lamp housing. X2 Service Manual... - Page 25 After you reset the lamp timer, read the timer value to make sure it was reset. Navigate to the About screen from the Main Menu. In the About screen, the Lamp Hour value should show 0 hours. X2 Service Manual...
-
Page 26: Lamp Housing And Safety Switch Assembly
Controller ECA (page 10) Remove the color wheel shield. To do this, remove the two M3x10 Plastite Phillips screws (circled below). Then lift the shield straight up to remove it. Avoid scraping it against the color wheel. X2 Service Manual... - Page 27 Remove the fan cables from their retainers in the bottom case. Remove the two M3x10 Plastite Phillips screws (circled below) that fasten the lamp housing to the bottom case. X2 Service Manual...
- Page 28 As you lower the lamp housing into the projector, route the photodiode and color wheel ribbon cables through the retainer guide. Make sure that the lamp housing aligns properly with the two pins (circled below) on the bottom case. X2 Service Manual...
-
Page 29: Leveling Foot
♦ Replace the retainer in the groove at the top of the leveling foot shaft. Make sure the retainer fully seats. ♦ Adjust the leveling foot so that it is level with the bottom of the projector. X2 Service Manual... -
Page 30: Optical Engine
Top case (page 39) Power supply and AC filter ECA (page 6) Chassis (page 8) Controller ECA (page 10) Lamp housing (page 26) Remove the two M3x10 Plastite Phillips screws that fasten the optical engine to the bottom case. X2 Service Manual... - Page 31 CAUTION Avoid touching or damaging the color wheel. ♦ Place the engine on a soft, static-free surface or in an ESD-protected container. X2 Service Manual...
-
Page 32: Power Supply And Ac Filter Eca
The AC filter ECA connects to the power supply ECA. The power supply ECA includes both the ballast and power supply circuitry in the X2. A fuse on the AC filter ECA protects against internal shorts or supply surges. The fuses are not available as FRU parts as a blown fuse usually indicates circuit damage and the need for ECA replacement. - Page 33 Detach the lamp cable connector from the side of the lamp housing. Squeeze the two tabs on the side of the connector and slide it rearward through the retainer on the lamp housing. Unplug the power supply/controller ECA cable from the power supply Disconnect the AC filter ECA/power supply cable. X2 Service Manual...
- Page 34 Remove the four screws that fasten the power supply to the chassis. Squeeze the tabs on the retainer stud that secures the power supply to the chassis. Then lift the ECA away from the chassis. X2 Service Manual...
- Page 35 Disconnect the AC filter ECA/power supply cable (if necessary), then remove the M4x6 Phillips screw that fastens the ground terminal to the chassis. Remove the four M3x12 Plastite Phillips screws that fasten the power supply to the chassis. X2 Service Manual...
- Page 36 ECA. Press down on the ECAs to lock the retainers into the slots. • Tighten the seven M3x12 Plastite Phillips screws securely. Do not over tighten the screws. • Connect the ground terminal to the chassis. Tighten the M4x6 Phillips screw securely. X2 Service Manual...
-
Page 37: Rear Bezel
Place the projector upside down on a soft work surface. Remove the two M3x10 Plastite Phillips screws that fasten the rear bezel to the bottom case. Remove the M2.6x10 Plastite Phillips screw that fastens the rear bezel to the chassis. X2 Service Manual... - Page 38 Tighten the two M3x10 and the M2.6x10 Plastite Phillips screws securely. Do not over tighten the screws. ♦ When you install a new rear bezel, adhere a new I/O panel label to the outside of the bezel. X2 Service Manual...
-
Page 39: Top Case
Place the projector upside down on a soft work surface. Remove the four M4x18 Plastite Phillips screws from the bottom case. Holding the top case against the bottom case, turn the projector over and place it right side up on the work surface. X2 Service Manual... - Page 40 Connect the keypad cable at the keypad ECA and the speaker cable at the power supply ECA. ♦ Tighten the four M4x18 Plastite Phillips screws securely. Do not over tighten the screws. ♦ Adhere a new nameplate to the top case. X2 Service Manual...
-
Page 41: Functional Tests
S-video capability player should also have a Composite video output port (RCA). InFocus strongly suggests you use a DVD player to test the video quality. DVD players reproduce colors better and project sharper images. The least preferable is a VCR. If you must use a VCR, make sure you use a commercially produced recording, not one recorded from a broadcast source. -
Page 42: Before Beginning
2. Disconnect any other video sources. S-Video from DVD player Verify that the video automatically synchronizes. 1. Disconnect any other Verify there is no distortion, noise or other video abnormalities. video sources. 2. Connect the S-video cable to the projector. X2 Service Manual... - Page 43 Verify that the white space is visible on all 5 bar/line icon areas (between green). Verify that the image focuses through the full zoom range. Verify that the image remains in focus when the Image Shift knob is turned. X2 Service Manual...
- Page 44 Verify that the image synchronizes. On the Display menu, select Reset All. Power Down Verify unit is powered off before disconnecting cables. After all tests are complete, turn the power off and disconnect all cables. Attach the lens cap. X2 Service Manual...
-
Page 45: Troubleshooting
Image problems, including no image, bad color, dim image and other picture distortions (page Keypad problems (page 57) Remote problems (page 58 Audio problems (page 59) Check Internal Voltages and Signals In addition to the troubleshooting flowcharts, you can also check internal voltages and signals to diagnose a defective part. X2 Service Manual... -
Page 46: Power And Startup Problems
The lamp has more than 3,000 hours of use. Requires replacement. LED flashes red two times Projector shuts down. LED flashes red three times Lamp failure. Projector shuts down. LED is solid red Undiagnosed error. Projector shuts down. X2 Service Manual... - Page 47 Power Diagnostics X2 Service Manual...
- Page 48 Power Diagnostics, Error Codes X2 Service Manual...
- Page 49 LED flashes single red X2 Service Manual...
- Page 50 LED repeats 3 flash sequence X2 Service Manual...
- Page 51 LED repeats 5 flash sequence X2 Service Manual...
- Page 52 LED is solid red X2 Service Manual...
-
Page 53: Image Problems
Image Problems X2 Service Manual... - Page 54 No image X2 Service Manual...
- Page 55 Bad image X2 Service Manual...
- Page 56 Dim image X2 Service Manual...
-
Page 57: Keypad Problems
Keypad Problems X2 Service Manual... -
Page 58: Remote Problems
Remote Problems X2 Service Manual... -
Page 59: Audio Problems
Audio Problems X2 Service Manual... -
Page 60: Power Up With Top Case Removed
ECA with measurement probes. Make sure to connect the AC filter ECA to the power supply. Connect the lamp to the lamp cable connector at the side of the lamp housing. Make sure the connector fully engages the connector on the lamp module. X2 Service Manual... - Page 61 Power up the projector, and check the voltages using the illustration on the next page. CAUTION When you start the projector, there is voltage present on the controller ECA and power supply. Be very careful where you probe and where you touch. X2 Service Manual...
- Page 62 Use measurement equipment to check the controller ECA for voltages and signals. X2 Service Manual...
-
Page 63: Check The Thermal Switch
You can also check the continuity of the safety switch, which fastens to the lamp housing next to the thermal switch. When the switch is closed, it should measure zero ohms. If the resistance is infinite (Ω), replace the lamp housing, which includes the thermal switch. X2 Service Manual... -
Page 64: Check Fan Operation
If a fan fails to operate, check the voltage at the connector on the controller ECA (page 60) to verify that the fan is receiving power. If a fan has failed, remove the fan and replace it (page 12). X2 Service Manual... -
Page 65: Parts Lists
Parts Lists Parts Exploded View X2 Service Manual... -
Page 66: Frus By Alphabetic Listing
FRUs by alphabetic listing Part Name Part Number Parts List Name Bottom case 505-1839-xx BOTTOM CASE, X2 Controller ECA 510-1907-xx ECA, CONTROLLER BD (MMA PCB ASSY) Elevator kit 505-1848-xx ELEVATOR KIT, X2 Fan, 60 mm 526-0193-xx FAN, 60MM EZL12NM002 Fan, 80 mm... -
Page 67: Label Kit Contents & Locations
Label kit contents & locations Part Name Location Certification label Nameplate I/O label X2 Service Manual...
Need help?
Do you have a question about the X2 and is the answer not in the manual?
Questions and answers