NEC DLP CINEMA NC1600C User Manual
Nec projector user manual
Hide thumbs
Also See for DLP CINEMA NC1600C:
- Specifications (2 pages) ,
- Service manual (382 pages) ,
- Important information manual (72 pages)
Table of Contents
Advertisement
Advertisement
Table of Contents

Related Manuals for NEC DLP CINEMA NC1600C


Summary of Contents for NEC DLP CINEMA NC1600C
- Page 1 ® DLP Cinema Projector NC1600C User’s Manual...
-
Page 2: Important Information
- When the power cable or plug is damaged or frayed. - If liquid has been spilled into the projector, or if it has been exposed to rain or water. - If the projector does not operate normally when you follow the instructions described in this user’s manual. - Page 3 Only service personnel should open the lamp door. Refer Servicing to Qualified Service Personnel. • Do not look into the lens while the projector is on. Serious damage to your eyes could result. • Do not touch the projector during a thunder storm. Doing so can cause electrical shock or fire •...
- Page 4 Contact your dealer or the following support branches for questions relating to unclear points, malfunctions and repairs of the product. In Europe NEC Europe, Ltd. / European Technical Centre Address: Unit G, Stafford Park 12, Telford TF3 3BJ, U.K. Telephone: +44 1952 237000...
-
Page 5: Table Of Contents
Table of Contents Table of Contents ... 5 1.What’s in the Box? and the Names of the Projector Parts ... 6 1-1. Features ... 6 1-2. What’s in the Box? ... 8 1-3. Names of the Projector Parts ... 9 1-4. -
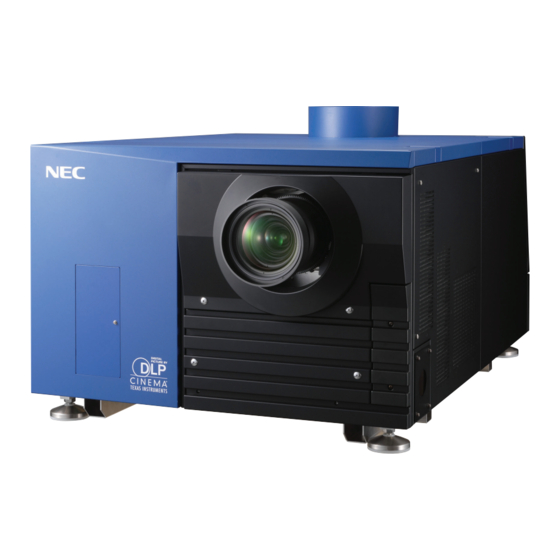
Page 6: What's In The Box? And The Names Of The Projector Parts
• DLP Cinema dedicated projector that supports large screen needs NEC has applied its mounting technology and leading imaging technology to newly develop lamp and optical systems as well as a cooling system to support large screen needs. • Equipped with easy to use functions... - Page 7 Texas Instruments Incorporated. (1) CineLink : Security management This function supports encryption of the local link between server and projector, adds a “watermark” to enable the tracing of pirated films (illegal copying), and provides other functions. (2) CineCanvas : Image management This function enables insertion of subtitles and captions, correction of distortion, changing of resolution, etc.
-
Page 8: What's In The Box
1. What’s in the Box? and the Names of the Projector Parts 1-2. What’s in the Box? Check the content of the accessories. NC1600C projector Remote control (RD-371E) UM-3 AA size battery (for the remote control) x 2 Remote cable (16 m) x 1... -
Page 9: Names Of The Projector Parts
Connects to an exhaust device to exhaust heat from the lamp. Please contact your dealer/distributor to install the exhaust device. 2. Control panel On the control panel, power to your projector is turned on or off, titles are selected, and various adjustments are made of projected screen. (See page 12) 3. Connection terminals Various image signal cable are to be connected here. -
Page 10: Rear Of The Projector
1-3-2. Rear of the projector 1. AC power cable This is the cable that supplies AC power to the projector head. The AC power cable is not an accessory. Consult with your dealer/distributor about the AC power cable. 2. Level adjusters (in four positions on bottom) In the ordinary installation, you can adjust the projector inclination at 4 positions. -
Page 11: Connection Terminals
8. PC control terminal (RS-232C) (D-Sub 9P) This is used when the service personnel sets the data for the projector or operates the projector from PC via RS-232C. Use a commercially available RS-232C straight cable to connect the projector to the PC. -
Page 12: Control Panel
Press this button to turn on or off (standby) the power to your projector. Press this for more than three seconds. When turning on the power to the projector, first set the main power switch to the main unit to ON, thereby setting the projector in a standby state. - Page 13 Press the 1 to 8 buttons while depressing the CTL (MACRO) button to select titles (input signals) assigned to each button. To this projector, 100 titles at most can be registered (input signal registration). Among the registered titles, any 8 titles can be assigned to the buttons <1>...
-
Page 14: Names On The Remote Control
1. What’s in the Box? and the Names of the Projector Parts 1-4. Names on the Remote Control 6. AMPLITUDE / G button Press the AMPLITUDE (G) button while depressing the CTL button, then the green (G signal) of the test pattern will be turned off temporarily. - Page 15 Thereafter, it will light again when the remote control buttons are operated. • When using the remote control connected to the remote control cable The back light will constantly light when the power to the projector is turned on and when the projector is in standby status. NOTE The following buttons cannot be used with this projector: WHITE BAL., ADJUST PICTURE, IMAGE, INFO., PIXEL., MUTE SOUND, MUTE OSD, HELP, AUTO, UNDO...
- Page 16 • Be sure to use the remote control in a place free from heat or dampness as far as is practicable. • The remote cable is connected first to the remote control, then to the projector head. The leading end of the remote cable is the power supply unit, so be careful not to touch the other end of the remote cable to the projector head or other devices while only the remote cable is connected to the projector.
-
Page 17: Installation And Connection
2-1. Steps for setting up and connecting Use the following steps for setting up your projector: • Step 1 Setup the screen and projector. (Contact your dealer to carry out the setup.) • Step 2 Connect cables to the image input terminals. (See page 18) -
Page 18: Connecting The Image Input Terminals
2. Installation and Connection 2-2. Connecting the image input terminals Your projector has four image input terminals, namely, the HDSDI A input terminal, the HDSDI B input terminal, the DVI-D A input terminal, and the DVI-D B input terminal. • HDSDI A/B input terminal (SDI A/SDI B) ------------ Inputs serial digital images from a Video Server or Video source. -
Page 19: Connecting The Various Control Terminal
For control, your projector comes with such ports as the PC control terminal and the Ethernet port (RJ-45). • PC control terminal (PC CONTROL) ----- Use this terminal when controlling the projector in serial connection from a PC. • Ethernet port (LAN 1/LAN 2) --------------- Use this port when controlling the projector in LAN connection from a PC. -
Page 20: Projection Of Images (Basic Operation)
Projection of Images (Basic Operation) 3-1. Steps of projecting images • Step 1 Turn on the power to the projector. (See page 21) • Step 2 Select the title of input signal. (See page 23) • Step 3 Adjust the position and size of the projected screen. (See page 24) •... -
Page 21: Turning Your Projector On
If power is supplied or cut while the main power switch is turned on, the projector will be damaged. • Be sure to turn your projector on or off in two steps of operation with the “main power switch” and the “POWER button”... - Page 22 3. Projection of Images (Basic Operation) Press the POWER button on the control panel of your projector three seconds or longer. Your projector is turn on, and the screen glows light about 30 seconds later. The POWER indicator of the projector lights up green.
-
Page 23: Selecting The Title Of Input Signal
3-3. Selecting the title of input signal This projector allows you to select pre-registered signals using the signal selection buttons on the control panel (up to 8 signals). Request your dealer/distributor for details on registering and changing titles. This section explains the steps for selecting registered signals. -
Page 24: Adjusting The Position And The Size Of Projected Screen
3-4-2. Adjusting the position of the projected screen (Lens shift) Press the [LENS CTL] UP/DOWN/LEFT/RIGHT buttons while depressing the CTL (LENS) button, on the control panel of your projector as required. The position of the projected screen will move upward, downward, left or right. - Page 25 3-4-4. Focusing the projected screen (Focus) Press the FOCUS +/- buttons while depressing the CTL (LENS) button, on the control panel of your projector as required. • When controlling with the remote control, press the FOCUS +/- button while depressing the CTL (LENS) button.
-
Page 26: Turning On/Off The Lamp With The Projector Turned On
3. Projection of Images (Basic Operation) 3-5. Turning on/off the lamp with the projector turned on 3-5-1. Turning off the lamp Press the LAMP OFF button while depressing the CTL (LAMP) button, on the control panel of your projector as required. -
Page 27: Turning Your Projector Off
3-6. Turning your projector off Press the POWER button on the projector control panel for three seconds or longer. The power to the projector is turned off. The POWER indicator and rear STATUS indicator will blink in orange (cooling state). -
Page 28: Using Menus
Using Menus 4-1. Basic operation with adjustment menus To adjust the projector, display the menu on the LCD screen of the projector control panel. 4-1-1. Screen display The menu display screen is composed of a menu display field (the upper two lines) and a setting item display field (the bottom two lines). -
Page 29: Operating Menus
When the power is turned on, the following is displayed. When the power is turned off The amount of time remaining for cooling is displayed as shown below, when the power to the projector head is turned off. 4-1-2. Operating menus Preparation: Turn your projector on. - Page 30 4. Using Menus Press the [MENU CTL] DOWN button. The submenu “Lamp” of “Information” is displayed. The menu item can be selected by pressing the ENTER button instead of the SELECT DOWN button To return to the previous state, press the [MENU CTL] UP button, or the CANCEL button. Press the [MENU CTL] LEFT/RIGHT button to select the submenu “Version.”...
-
Page 31: How To Enter Alphanumeric Characters
Alphanumeric characters are entered for items, such as the title of input signal. With this projector, the characters are inputted by pressing numeric buttons on the remote control. By pressing the numeric buttons, the characters can be inputted as shown in the table below. -
Page 32: Table Of Adjustment Menus
Resets the lamp bulb usage time and selects or edits new entries (only when the projector is in standby mode). (Bulb Warning) Sets the lamp bulb warning time (only when the projector is in standby mode). (New Lamp House) Resets the lamp house usage time, and makes settings or selects modes (only when the projector is in standby mode). -
Page 33: Title Select
Selects the title of the signal to be projected. You can register up to 100 titles. You can also assign registered titles to the Macro keys of 1 to 8 on the projector’s control panel and call them up directly using those buttons. -
Page 34: Configuration
4. Using Menus 4-4. Configuration Please request your dealer/distributor to perform the settings. 4-4-1. Lamp Setup Adjust Adjusts the lamp output (brightness). Control the output at 10 W increments. Feedback Sets the lamp brightness constant mode that uses a brightness sensor. Disable Enable 4-5. -
Page 35: Information
Displays the registered name and the lamp bulb warning time (Bulb Warning Time) and setting of the currently used lamp bulb. 4-6-2. Macro Key Displays the titles assigned to the macro keys of 1 to 8 on the projector’s control panel. ← Displays the set current (A). -
Page 36: Error Code
4. Using Menus 4-6-3. Usage Displays the hours of projector head, lamp, and lamp house usage, and warning display time of the lamp bulb. Projector Bulb Lamphouse BulbWarning 4-6-4. Error Code Displays the error code when an error occurs. See the “Error Code List” in the Appendix for details on error codes. - Page 37 MMS (Built-in) Displays the version of the multi-media switcher (MMS) connected to the projector head. BIOS Displays the BIOS version of the built-in multi-media switcher (MMS). Firmware Displays the firmware version of the built-in multi-media switcher (MMS). Data Displays the data version of the built-in multi-media switcher (MMS).
-
Page 38: Maintenance Of Your Projector
Please request your dealer to perform lamp replacement, filter replacement and cleaning of the projector inside. 5-1. Cleaning the Cabinet Be sure to always check that the AC power supply of the projector head is disconnected before carrying out maintenance of your projector. • Wipe with a dry, soft cloth without nap. -
Page 39: Appendix
Is the temperature inside the projector too high? When the inside temperature is too high, the protective function does not allow your projector to be turned on. Wait some time and then turn it on. Check to see if the connected input has been selected. - Page 40 An error code is displayed. Check these items Make sure the remote control transmission unit is facing the light reception unit on the projector. Check whether the batteries are still good. Replace with new batteries. Check whether there is any obstructing object between the remote control and the light reception unit on the projector.
-
Page 41: Indicator Display List
6-2. Indicator display list See the descriptions below when the blinking or lighting of the two indicators on the projector’s control panel and the rear STATUS indicator on the backside of the projector is observed. The projector also has a warning function that uses a buzzer. - Page 42 Red (Without buzzer) Steady light Green Orange Projector condition Main power is off. The projector is getting ready to turn on. The douser is closed. The projector is cooling down. Safety problem, error Error with possible image project under certain conditions.
-
Page 43: Error Code List
6-3. Error code list Please inquire your dealer/distributor about action to be taken for each error code. Description is omitted for error codes 20 to 92. Error code Error message Lamp Door Open Lamp OverTemp GPSU Fail Lamp Unlit House OverTime LPSU OverTemp DLP PGOOD Fail E2PROM R Fail... - Page 44 6. Appendix Error code PB FPGA Reg R/W Fail PB Serial-ID Chip Fail PB CLUT-SRAM Fail PB OvFS-SDRAM Fail PB Resizer FIR Fail PB Resizer FIFO Fail PB Other Fail FB Red RDRAM Signature Fail FB Green RDRAM Signature Fail FB Blue RDRAM Signature Fail Bulb OverTime LPSU Fail...
-
Page 45: Operation Using An Http Browser
Regarding the actual address that is entered for the address or entered to the URL column when operation of the projector is via a browser, the host name can be used as it is with the host name corresponding to the IP address of the projector has been registered in the domain name server by a network administrator, or the host name corresponding to the IP address of the projector has been set in the “HOSTS”... -
Page 46: Structure Of The Http Server
Controls the power to your projector. • On: Turns the power on. • Off: Turns the power off. Displays titles set in the projector (such as input port, screen type, and title). Check, and the title will be changed. Displays the basic control items. -
Page 47: Outline Drawing
6. Appendix 6-5. Outline Drawing Units: mm... -
Page 48: Specifications
Environment Regulations (Note) Using any lamp other than NEC’s optional lamps will result in lower brightness compared to NEC optional lamps. If brightness is important to you, it is recommended that you use NEC’s optional lamps. NEC will post information on its homepage regarding installable lamps, other than NEC’s optional lamps. Note that NEC does not guarantee performance and reliability when lamps other than NEC’s optional lamps are installed. -
Page 49: Pin Assignment And Functions Of Terminal
6-7. Pin Assignment and Functions of Terminal 6-7-1. PC CONTROL connector (D-Sub 9 pin) This is an RS-232C interface for controlling the projector head from a PC. The projector operates as a DCE (Data Communication Equipment), so use a straight cable when connecting to a PC. - Page 50 • PC 6-7-4. PC card slot Set a wireless LAN card to control the projector from a PC using wireless LAN. When you use wireless LAN, pay attention to the following points: • Connection cannot be established with an NIC (Network Interface Card) of the same network group.
- Page 51 6-7-5. External control connector (GPI/O) (D-Sub 37 pin) It is possible to control the projector with an external device and to control the external device from the projector using an external control connector (GPIO: General Purpose I/O Ports). Each pin is electrically separated from the projector internal circuits by a photo-coupler.
- Page 52 Pin No.: • Using GPIO Control Momentary “ON” pulse enables you to control projector. To enable “ON” pulse, hold it for at least 500 ms. Hold “OFF” for at least 500 ms before “ON”. (See page 53) Here is function list to control projector by using GPIO port.
- Page 53 • Timing chart of GPIO control Example of Select Macro 3-22 4-23/5-24/6-25 Example of Image doused/un-doused 4-23/5-24 3-22 Example of Lamp On/Off 1-20/2-21 Off at least 500 ms at least 500 ms approx. 200 ms Execute Select Macro Off at least 500 ms at least 500 ms approx.
- Page 54 6. Appendix Output Connector Ext_GPOUT_P Ext_PROJ_GOOD_P Pin No.: Absolute Maximum Rating: 50 mA Ext_GPOUT_N Ext_PROJ_GOOD_N Pin No.: 28 29 30 31 32 33 34 35 GP I/O Connector Inside Projector 10 11 12 13 14 15 16 Photo-coupler...
- Page 55 This is a single link DVI input connector that is compliant with hot plug detect (HPD). Use a single link cable. Noise may be generated in the video if you use a dual link cable. EDID is available even when the projector is switched off. Pin view of female connector Signal Pin No.
-
Page 56: Related Products List
6. Appendix 6-8. Related products list Product name Lens Anamorphic lens Anamorphic lens motorized turret Lamp Power cable kit Dedicated base Wireless LAN card Touch panel Holder arm for touch panel Replacement air filter Built-in type multi-media switcher Interface board (DVI) Interface board (SDI) Interface board (RGB) Interface board (VIDEO) - Page 57 © NEC Display Solutions, Ltd. 2007 Ver.1 06/07...