NComputing X550 User Manual
Desktop virtualization kit with vspace
Hide thumbs
Also See for X550:
- Quick installation manual (2 pages) ,
- User manual (53 pages) ,
- Installation (3 pages)
Table of Contents

Related Manuals for NComputing X550


Summary of Contents for NComputing X550
- Page 1 X550 Desktop Virtualization Kit X550 Desktop Virtualization Kit X550 X550 Desktop Virtualization Kit Desktop Virtualization Kit with vSpace with vSpace with vSpace with vSpace User Guide User Guide User Guide User Guide www.ncomputing.com R9.19.08...
- Page 2 Information contained in this document may have been obtained from internal testing or from a third party. NComputing shall not be liable for any direct, indirect, special, incidental or consequential damages in connection with the use of this material.
-
Page 3: Table Of Contents
Product Overview...7 Minimum System Requirements ...8 Host PC...8 Access Devices ...8 Connection Cables ...8 Install the Hardware ...9 Install the X550 PCI Card...9 Connect Peripheral Devices ...11 Install the NComputing vSpace Software...12 Product Registration ...18 Online Registration...20 Offline Registration...21 Uninstallation and Reinstallation ...24 Updating the vSpace Software ...25... -
Page 4: Safety Information
Please disconnect the Cat 5e or Cat 6 cable from the product when it is not in • use for a long period of time. Page 4 X550 User Guide... -
Page 5: Regulatory Compliance
Changes or modifications not expressly approved by the party responsible for compliance could void the user’s authority to operate the equipment. For enhancing performance and reliability, we recommend using FTP or STP cable between the X550 PCI card and the XD2 devices. -
Page 6: Mic Certification Information
MIC Certification Information X550 PCI Card ): NComputing X-series(X550) NCC-X550(B) XD2 Access Device ): NComputing X-series(XD2) NCC-XD2(B) (B ) STP Cable X550 PCI Card XD2 Access Device Page 6 X550 User Guide... -
Page 7: Product Overview
One Kit Enables Six Users to Share a PC One X550 kit adds five users to a PC. Including the first user that works directly on the PC, this means that six users can share a single PC with one kit. With two X550 kits, you can add ten users to a PC for a total of eleven users sharing one PC. -
Page 8: Minimum System Requirements
1 GB RAM • One free full-height PCI slot • For two X550 PCI cards, a host PC should have at least the following: A 3.5 GHz processor or an equivalent dual-core processor • 2 or 3 GB RAM •... -
Page 9: Install The Hardware
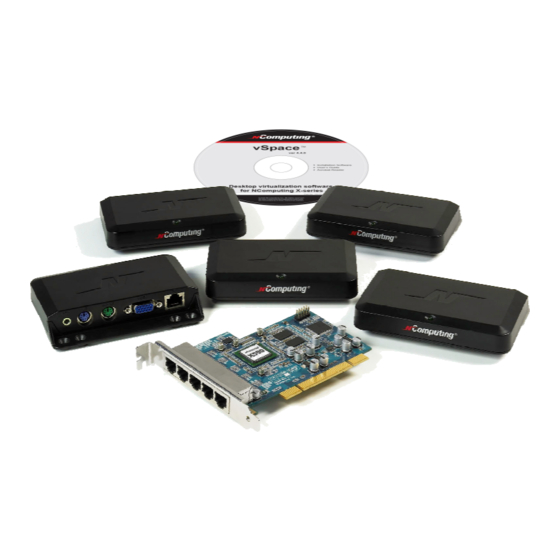
Install the Hardware Before attempting to install the X550 Kit, verify that your Windows or Linux OS is supported by vSpace, and that the OS is properly installed, updated and all devices viewable in the OS device manager are working properly. Also, check to be sure your package includes one X550 PCI card, five XD2 devices, the vSpace installation CD, and ten monitor mounting screws. - Page 10 Optional installation of a second X550 card If the system has a second available PCI slot and you wish to use a second X550 kit, insert the second card into the available slot and secure the card to the chassis.
-
Page 11: Connect Peripheral Devices
X550 PCI card to the XD2 device are NOT Ethernet. Connect the desired peripheral devices to each X550 access device. If you plan to use any USB devices, connect these directly to the host PC – these can then be assigned to each station with the vSpace software. -
Page 12: Install The Ncomputing Vspace Software
NComputing website and enter “Linux” into the knowledge base for the latest information on installation in Linux). Do not install anything from Windows Update for the X550 PCI card. Simply click “Cancel” on this screen. Now insert the software installation CD into the host PC's CD drive. - Page 13 X550 User Guide At the installation "Welcome" screen, close all running programs, and click on the "Next" button. Read the antivirus and firewall warning screen, follow the applicable instructions, and click on the "Next" button. At the software license screen, read the vSpace software end user license agreement (EULA) and optionally print it out.
- Page 14 X550 User Guide At the product terms of use screen, read the terms of use document and optionally print it out. When you are finished, click the "I agree" checkbox, and then click "Next." From the "Choose Destination Location" screen, you can choose to install vSpace in the the default location, or you can navigate to a different location and install vSpace there.
- Page 15 Note: This password only applies to the vSpace software installed on this PC. Resetting a forgotten password with require reinstalling the vSpace software. Note: The NComputing Administration Console allows you to administer vSpace software and parameters associated with the access devices on this PC. It will automatically be installed on this system.
- Page 16 X550 User Guide Note: It is recommended that all users have their own user accounts to enable control of their own settings. If you click on the “Yes” button, the screen shot below shows the “Local Users and Groups” Windows utility that will be displayed on an otherwise blank overlay screen.
- Page 17 X550 User Guide Note: You must reboot the computer before you can use the vSpace software or the access devices connected to the host PC. Page 17...
-
Page 18: Product Registration
Until you register, a reminder screen like the one shown below will be displayed at least once a day on every user station. If you fail to register the X550 card with NComputing (online or offline) within the 30-day trial period, the PCI card will cease to function. - Page 19 X550 User Guide At any time during the registration process, you can use the "Back" button to return to a previous screen to change your entries, and you can also click on the "Cancel" button to cancel the process at that point.
-
Page 20: Online Registration
When you select to register online, the screen presented allows you to select what serial number(s) to register. The window provides a list of X550 PCI card number(s) read directly from the card(s). For each serial number, the window shows if it is registered or not yet registered. -
Page 21: Offline Registration
When you select to register offline, the screen presented allows you to select the serial number(s) to register. The window provides a list of X550 PCI card number(s) read directly from the card(s). For each serial number, the window shows if it is registered or not yet registered. - Page 22 "Next" button to complete the process. In the next screen, you select where to store the file that must be emailed to NComputing.and click the “Next” button. The offline registration file is then created and stored in the location specified.
- Page 23 NComputing. If the registration system determines that the file is valid and that the X550 is entitled to be activated, you will receive an email within the next 2 or 3 minutes with an attached license file specific to that X550 card(s) and the PC in which it was installed.
-
Page 24: Uninstallation And Reinstallation
You may reassign your vSpace software license to another computer to which you have moved and installed the X550 hardware, but only a limited number of times. Refer to Section 3 of the End User License Agreement that was presented during the install process for details. -
Page 25: Updating The Vspace Software
X550 User Guide Updating the vSpace Software Once you have successfully completed the registration process, you can update the software directly over the Internet by selecting “Update vSpace” from the “Start” menu (provided you are within 12 months of the initial purchase or have signed up for extended maintenance). - Page 26 X550 User Guide If there is a new version available, click on the “Download” button to start the update process. When the download is complete: 1) if you previously used the options button to select “save update program to disk,” the update will be saved to disk for you to apply later;...
-
Page 27: Using The Vspace Console
Start the management console from the Windows Start menu. The application is called, "vSpace Console." You can also start the management console by right-clicking on the NComputing icon in the system tray and selecting "vSpace Management Console" or by simply double- clicking on the NComputing icon in the system tray. - Page 28 X550 User Guide Example of message received from another vSpace user Disable (or Enable) vSpace A left-click on the Disable (or Enable – if already disabled) option from the system tray icon brings up this “do you want to reboot” screen. Select “No”...
-
Page 29: Local Settings
(if any) are logged-in to each station at a point in time. X550 PCI Card The "X550 PCI Card" item shows information about all the vSpace sessions currently possible on that PCI card. Page 29... - Page 30 By right-clicking on the “X550 PCI Card,” you can: Display or modify the properties defined for that particular PCI Card. NOTE: All stations attached to the same X550 PCI card will use the same resolution and color depth. Right clicking on the Properties option brings up a new window that allows setting the common monitor resolution and color depth.
- Page 31 From this window, you can only send messages to stations attached to this PC, unlike the “send message” to any network user that can be done via the window accessed by right clicking on the NComputing system tray icon. Page 31...
- Page 32 Hardware Id: the virtual hardware “name” for the station’s access device • Keyboard Id: what type of keyboard interface is used (always PS/2) • Pointer Id: what type of pointer interface (i.e., mouse) is used (always PS/2) • Page 32 X550 User Guide...
- Page 33 X550 User Guide The “Station Settings” tab shows parameters that can be set for each station. The parameters configurable from this window are: Station name: The “provisioned name” of the station. • Page 33...
- Page 34 This drop down sets the amount of time the station can be idle before the X550 puts the monitor into a sleep state. Moving the mouse or hitting a key on the keyboard attached to the corresponding access device will wake the monitor back up.
-
Page 35: Information & Settings
X550 User Guide Information & Settings The "Product Information" item shows information about the installed terminal services software, such as product name, build date, version string and vendor information. (You cannot modify these values.) The "User information" item shows the information entered during the registration process, and double clicking an item brings up a window allowing you to change the value. - Page 36 • the option to shutdown or reboot the host PC. You can set this either on or off. X550 card video mode settings: The video mode settings for the X550 stations. • You can set this to either 800x600 or 1024x768.
- Page 37 For each serial number, it shows the number of licenses required for that terminal, the station number (if available), whether or not it is registered, and the location of the serial number record. Page 37 X550 User Guide...
-
Page 38: Usb-Device Assignment(S)
A check box for "Allow all users access to every USB port". When this is selected, all stations are connected, as if on one hub. When it is not checked, there is a list “station IDs” and you select which one(s) can connect to the device. Page 38 X550 User Guide... - Page 39 X550 User Guide Page 39...
- Page 40 X550 User Guide When you click on the "Apply" button, changes to the USB-Device assignments are saved. To discard changes, simply navigate to another tree item or close the console without clicking on the "Apply" button, but you will be reminded that you may wish to save the settings you made.
-
Page 41: Warranty And Troubleshooting
Make sure the access device’s cable is connected to the host PC, the host PC is running and the X550 card has been registered. Checking that the X550 PCI Card and software is installed correctly Open the control panel and then open the “System” item. Select the “Hardware” tab and open the “Multifunction adapters”... -
Page 42: Glossary
Access device (XD2): a multi-user computing station using NComputing patented technology. It doesn't use a CPU, VGA, or main chipsets. It shares resources of the Host PC using NComputing vSpace software and a PCI card containing a system on chip (SoC).
Need help?
Do you have a question about the X550 and is the answer not in the manual?
Questions and answers