
Related Manuals for Primera CX1000


Summary of Contents for Primera CX1000
- Page 1 Introduction Unpack and Assemble Install Software Load Label Stock Printing Toner Monitoring & Supply Management Media Recommendations Maintenance and Troubleshooting Specifications © 2011 All rights reserved...
- Page 2 Warning: Warning means that a potential safety hazard exists and indicates procedures that must be followed exactly to avoid serious personal injury. Caution You must use only 8.5 inch wide label stock in the CX1000. Failure to use specified label stock will result in damage to your printer and excessive build up of toner inside the printer.
-
Page 3: Table Of Contents
Print Head Alignment ....................... 38 Cut Alignment/Stretch Factor ....................40 Stop/Cut Button ......................... 42 Error Messages ........................... 42 Replacing the Fuser ........................43 Replacing an Image Transfer Unit ................... 44 Section 10. Specifications ..........................47 Index................................... 49 CX1000 Color Label Printer iii... - Page 4 CX1000 Color Label Printer...
-
Page 5: Introduction
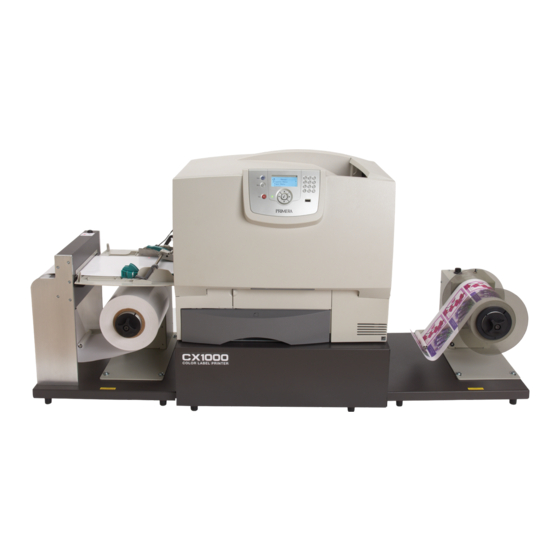
Thank you for purchasing the CX1000 Color Label Printer. The CX1000 Color Label Printer may also be labeled as the CX1000 Color Label Press or as the Color Label Press in PTPrint software, the status monitor software or the printer driver. Hereafter in the manual the CX1000 Color Label Printer will be referred to as the "CX1000". -
Page 6: Unpack And Assemble
INDEX Section 2: Unpack and Assemble You will receive three boxes. The printer portion of the CX1000 will be packaged inside a separate box on top of a pallet. Set aside the printer box for now. Open the two remaining boxes. - Page 7 INDEX Remove all packing tape from the components. There is one piece securing the dancer on the unwinder and rewinder. Locate the left/unwinder chuck, the 3mm allen wrench, the Loctite and the unwinder. See Figure 2-2. • The unwinder has a shorter dancer arm, dancer stops and two 6-pin ports on the back. •...
- Page 8 INDEX Locate the rewinder (right side) chuck, the label guide disc with the three interior holes, the rewinder, the loctite and the 3mm allen wrench. The rewinder has a longer dancer arm and no 6-pin ports on the back. Figure 2-4. Three Interior Holes Loctite Rewinder...
- Page 9 INDEX Locate the unwinder stand and printer stand. Orient the printer stand so that the CX1000 logo faces forward. Attach the unwinder stand to the left side of the printer stand. Align the hooks on the unwinder stand to the slots on the printer stand.
- Page 10 INDEX 9. Locate the rewinder stand. Attach it to the right side of the printer base. Align the hooks on the rewinder stand to the slots on the printer stand. Figure 2-8. Locator Pegs 10. Locate the rewinder. The rewinder has a longer dancer arm and no 6-pin ports on the back. Attach it to the stand using the #2 Phillips screws and the washers found in the hardware bag.
- Page 11 48 Kg. 105 lbs. 12. Place the printer on the printer base. Primera recommends three people to lift the printer on top of the base. Two people are required to lift the printer and one person to guide the printer onto the mounting pegs.
- Page 12 Pull the cartridge straight out and use the handle to lift it off the guides. c. Place the cartridges on a clean, flat surface out of direct light. Figure 2-13. Note: The CX1000 comes with 4 starter cartridges. These cartridges can only...
- Page 13 INDEX 15. Remove the Image Transfer Unit (ITU) protection sheet. Pull up on the plastic piece on the right side of the ITU to remove the sheet. The protection sheet is attached to the plastic piece. Important Note: Do not touch the exposed ITU. Figure 2-14.
- Page 14 INDEX 17. Close the front cover by first lifting the door to its maximum height, then disengaging the cover prop latch, and then finally close the door until you hear a click from both sides of the door. Figure 2-17. 18.
- Page 15 INDEX 20. Connect the other end of this cable to the connector port on the right side or farthest away from the printer. Figure 2-20. 21. Connect the remaining 6-pin round cable to the back of the cutter mechanism and to the remaining port on the unwinder closest to the printer.
- Page 16 INDEX 22. Locate the power converters and the printer power cord. Connect power to the printer and switch on the power. Connect the power to the back of the rewinder and unwinder. Switch on the power. Figure 2-22. Rewinder Unwinder Printer 12 Unpack and Assemble...
- Page 17 To test for proper configuration press the Stop/Cut button. If you hear it cut, everything is setup properly. Note: Remove and replace these screws to attach grounding straps. Congratulations! Your CX1000 is setup! Unpack and Assemble 13...
-
Page 18: Install Software
2. Follow the prompts in the software installer to complete the installation of the software. Note: If you connect your PC to the CX1000 using a yellow crossover cable it may be necessary to disable or modify the settings of your antivirus/firewall program. -
Page 19: Load Label Stock (Includes Attaching Stock To Rewinder)
Figure 4-2. Stop Disc Note: You must use only 8.5 inch wide label stock in the CX1000. Failure to use specified label stock will result in damage to your printer and excessive build up of toner and adhesive inside the printer. - Page 20 INDEX 3. The loose stock should fall on the right side of the roll. Turn the tension knob clockwise to secure the roll to the chuck. Turn the knob as as tight as you can! Feed the stock under the dancer arm and through the cutter.
- Page 21 INDEX 5. Continue feeding the stock over the roller and through the cutter. Feed the stock throught the cutter at an angle. Figure 4-5. Continue feeding the stock into the printer feeder tray. Feed the stock under the sensor guard, under the green guides and under the paper feed roller.
- Page 22 INDEX 7. Place an empty label core on the rewinder chuck. Push the core all the way back until it touches the back label guide disc. Figure 4-7. Important Note: Use only 3" I.D. Cores! 8. Place the outer label guide disc on to the rewinder chuck. Push the guide until it touches the rewinder core.
- Page 23 INDEX 10. As the printer is preparing to print, get a piece of tape ready. It is best to stand to the right side of printer with your arms above the rewinder roll. As the stock is ejected from the printer, place the tape on the middle of the end of the stock.
-
Page 24: Printing
INDEX Section 5: Printing BarTender is the label layout software included with the CX1000 that will allow you to properly format images. With this software and the layout wizard you can easily import a variety of file formats, step and repeat them across a page to correspond with your pre-diecut label stock and print them to the CX1000. -
Page 25: Create A Custom
INDEX 5.2 Create a Custom Page Size For each label size you will need to create a custom page size. 1. In Windows 7, go to Start – Devices and Printers. In Windows 8, press the Windows key to access the metro screen. Now search for “Printers”. Choose “Devices and Printers” from the list that appears. -
Page 26: Create A Bartender Template
INDEX 5.3 Create a BarTender Template Open BarTender UltraLite. Go to File – New. Select “Blank Template.” Click “Next”. Select “Color Label Press” as the Printer. Click “Next”. Select “Specify Custom Settings” for stock selection. Click Next. Select “Multiple columns and/or rows of items per page” on the Items Per Page screen Two Columns Enter the number of rows and columns on each page. - Page 27 INDEX 7. Enter the unused area. Use the Margin measurement from Section 5.1. Click Next. 8. Select the custom page size that you created in Section 5.2. If you do not see your custom page size go back to step 3 and make sure you have selected “Color Label Press”. Click Next. Printing 23...
- Page 28 INDEX 9. Choose the shape of the label. Click Next. Rectangle should be chosen for a square corner labels. Rounded Rectangle should be chosen for labels that have any corner radius. The default corner radius is .125. If your corner radius is different, choose this option anyway. You can change it later in the File-Page Setup menu after the setup wizard is complete.
- Page 29 (Optional) Set your size method. If your image is not the same size as your label choose Stretch to expand it to fill the space. d. Set the bleed by entering an Overhang Template value. Primera recommends at least a 1/16 inch (.0625”) overbleed.
- Page 30 INDEX 14. You may now click File – Print to print the label. If you would like to add other components such as barcodes or text to your label see the next section. Note: The number of copies on the print screen refers to the total number of labels printed and NOT the number of pages that will be printed.
-
Page 31: Add Text, Barcodes And Graphics To A Bartender Label
INDEX 5.4. Add Text, Barcodes and Graphics to a BarTender Label Once you have created your label size you will need to add text, a barcode and graphics. This can be done using one of buttons on the button bar at the top of the screen. Add Text. -
Page 32: Toner Monitoring And Supply Management
INDEX Section 6: Toner Monitoring and Supplies Management The status monitor will start automatically when you print a label for the first time. You may also start it manually by going to Start - All Programs - PTPrint - Status Monitor. The status monitor can be used for the following tasks. -
Page 33: Printing A Proof Print
INDEX Click the Quote Tool Tab (fourth tab down with the coin icon). Your total cost per label including stock will be displayed based on default toner cartridge and stock costs. Adjust these values to reflect the actual cost of your toner and label stock. Once you set the stock and toner cost values you will not have to change them again unless you make another purchase of stock or toner at a different cost. -
Page 34: Managing Used Toner Cartridges
INDEX How do I Print a Proof Print? A proof print is simply a one page print job using the same PTPrint file that you created using the instructions in Section 5. Go to File - Print. Set your number of copies to 1. -
Page 35: Enter Supply Roll Length
INDEX How to use a Toner Library Based on the proof print, before your job is sent to the printer the software estimates the amount of toner required from each cartridge to finish the job. It then checks this amount against the cartridges in the printer. -
Page 36: Other Functions Of The Status Monitor
INDEX Print Reduced Amount. If you choose to print a reduced amount the CX1000 will print only the amount that it is able to based on the current supply levels. For example, if the job calls for 1500 labels but the cyan toner cartridge only had enough toner for 1200 labels and the supply roll only had enough paper for 900 prints, the software would give you the option to print only 900 labels. -
Page 37: Media Recommendations
INDEX Section 7: Media Recommendations You must print on media sold by Primera or approved by Primera. Check our website or call our sales number to purchase Primera media. • http://www.primerastore.com • Sales Phone: 1-800-797-2772 Please search for article 366122 on the Primera Knowledgebase for an updated list of compatible stocks. - Page 38 INDEX When testing other media consider the following additional criteria: Print Quality / Poor Transfer - See Note 1. Color Accuracy 3. Solid Color Saturation 4. Label Feed (Requires minimum 100 feet of test paper) 5. Label Wrap 6. Fuser Heat Tolerance - wrinkling, bubbling, burning, breaking, curling 7.
-
Page 39: Section 8: Replace Toner Cartridges
INDEX Section 8: Replace Toner Cartridges Remove the print cartridge(s). Pull up slightly on the cartridge handhold. b. Pull the cartridge straight out and use the handle to lift it off the guides. Place the cartridges on a clean, flat surface out of direct light. Figure 8-1. -
Page 40: Maintenance And Troubleshooting
Important Note: PANTONE® to CMYK Bridge documents/files are available on the installation disc in the Pantone Folder. These documents/files allow you to look up a Pantone Color number and find the corresponding CMYK value to use in the file that will be printed on the CX1000. See below for more explantation. - Page 41 This means that the designer will need to create a separate image file for each print process. For example, you can not use the same image file for the CX1000 that you use on a flexo press and expect the colors to print correctly. The designer will need to design a label specifically for the CX1000.
-
Page 42: Color/Alignment Calibration
INDEX 5. Type the printers IP address in the address bar. To find the printer’s IP address, navigate the printer's control panel - Network/Ports - TCP/IP - Address. 6. A printer settings page will appear. Go to the Configuration Menu. 7. - Page 43 INDEX Open the Toner door to disengage the feeder path switch so the paper feeds out the top of the printer. Turn off the printer. Access the diagnostic menu by holding the Right and Bottom arrow buttons on the control panel while switching on the unit.
-
Page 44: Cut Alignment/Stretch Factor
INDEX 8. To Adjust the Top Margin, Left Margin and Right Margin - Select the Alignment Menu - Choose the Color you want to Align - Select each area on the menu. A value will be displayed. Press the right or the left arrow to adjust the value positively or negatively. Press the check button to set the value. - Page 45 INDEX The following calibration print will print to the Printer. Tip: Use a clear acrylic Stretch Factor Calibration Print ruler to measure the lines. Measure the lines to the left. Circle the letter below the line which measures closest to 10.00 inches. (Each line differs in length by .01 inch) A B C D E F G H I J K L M N O...
-
Page 46: Stop/Cut Button
• A slower network will cause a delayed print. Try connecting directly to PC with crossover cable or reevaluate cabling from computer to CX1000. • Change the IP address of the printer or look for any IP address conflicts on the network. -
Page 47: Replacing The Fuser
The printed colors do not match the screen. The colors of the label shown in PTPrint may not match the original design program, other print programs or the printed output of the CX1000. There are no ICC profiles available to make colors shown in PTPrint match the printed output or other programs. -
Page 48: Replacing The Image Transfer Unit
INDEX 9.8 Replacing the Image Transfer Unit 1. Turn the printer off. Open the front cover. Figure 9-4. 2. Remove all the print cartridges. Pull up slightly on the cartridge handhold. b. Pull the cartridge straight out and use the handle to lift it off the guides. Place the cartridges on a clean, flat surface out of direct light. - Page 49 INDEX Remove the image transfer unit. Raise the lever to unlock the image transfer unit. Figure 9-6. b. Pull down on the handle. Figure 9-7. Slide the image transfer unit out and place it on a clean, flat surface. Caution: Do not touch the transfer belt. Touching the belt will damage the image transfer unit. Figure 9-8.
- Page 50 5. Close the printer door. 6. Turn the printer on. The printer returns to a Ready state. 9.9 Technical Support If you have difficulties operating your CX1000, the following additional resources are available. • Primera Knowledge Base www.primera.com/kb • Email Support www.primera.com/contactsupport • Phone Support 763-475-6979 (Mon - Fri 8 a.m.
-
Page 51: Section 10. Specifications
15,000 page extra high yield cartridges (Rated according to ISO/IEC 19798 guidelines) Software: PTPrint™ 8.0 Software for Windows®, easy to use graphical user interface, Primera Color System, Pantone® Input System: Input roll maximum diameter: 8" (204mm) Core inside diameter: 3" (76.2mm) - Page 52 INDEX Dimensions: 58.9"W x 28.2"H x 21.5"D (150cm W x 71.6cm H x 54.6cm D) Weight: Approximately 200 lbs. (90 kg) Operating Environment: Temperature: 20° to 23°C (68 to 74°F) Humidity: 40 to 55% relative humidity Altitude: 0 – 2000 meters (6,560 feet) Certifications: CSA, ICES Class A, FCC Class A, UL 60950-1, IEC 60320-1, CE Class A, CB IEC 60950-1, IEC 60825-1, GS (TÜV), C-tick mark Class A...
-
Page 53: Index
Index Barcodes................................26 Bleed ..................................25 Color Calibration ..............................38 Color Matching ..............................36 Cost Estimate ...............................29 Cut Alignment ..............................40 Cutter ..................................11 Dancer Arm ................................3 Default Settings ..............................43 Eyemark ................................1, 16 Footer ..................................42 Fuser, Replacing..............................43 Header ..................................42 ICC Profile ................................43 Image Transfer Unit (ITU) ..........................9, 44 Label Guide Discs ..............................2 Leader ...................................42 Manually Array Image ............................29... - Page 54 P/N 511301 - 010314...
Need help?
Do you have a question about the CX1000 and is the answer not in the manual?
Questions and answers