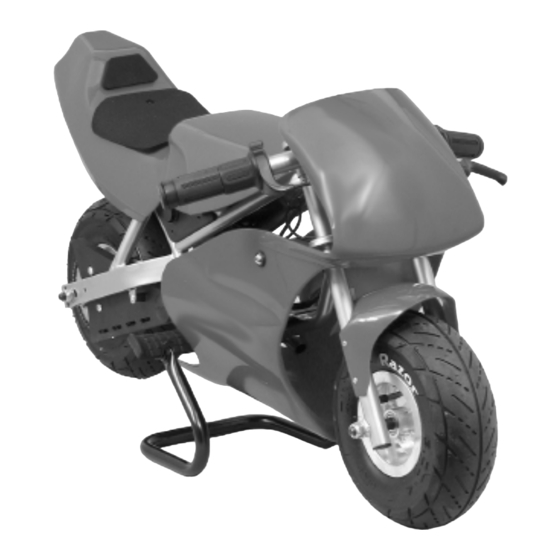
Razor Pocket Rocket Owner's Manual
Hide thumbs
Also See for Pocket Rocket:
- Owner's manual (13 pages) ,
- Battery installation instructions (3 pages) ,
- Installation manual (2 pages)
Summary of Contents for Razor Pocket Rocket
- Page 1 Pocket Rocket Read and understand this entire manual before riding. (Specifications subject to change without notice.) O w n e r ’ s M a n u a l...
-
Page 2: Table Of Contents
The Pocket Rocket is meant to be used only in controlled environments free of potential traffic hazards, and not on public streets or sidewalks. Do not try to ride your Pocket Rocket on public streets or in any areas where pedestrian or vehicle traffic may present a risk of collision or injury to yourself or others. -
Page 3: Key Parts Of The Pocket Rocket
Always wear shoes, never ride barefooted or in sandals, and keep shoelaces tied and out of the way of the wheels, motor and drive system. • The electric motor in your Pocket Rocket can become hot when in use. Do not touch the motor and handle the Pocket Rocket carefully. -
Page 4: Preparing For First-Time Use
WARNING: CHECK LOCAL LAWS REGARDING USE. Check local laws and regulations to see where and how you may use your Razor Pocket Rocket legally. In many states and local areas, riders are required BY LAW to wear a helmet. Check local laws and regulations regarding laws governing helmet use, age and vehicle operation in your area. -
Page 5: Attach The Fairing
Figures 2a and 2b. Positioning the handlebars. Tighten securely. Using a 5mm hex key wrench, tighten both the left and right side handlebar clamps by turning the screws clockwise as shown in Figure 3. Tighten securely. When properly tightened, the handlebars cannot be twisted out of alignment. -
Page 6: Inflating The Tires
Figure 4b. NOTE: Although we make every effort to keep our manual up-to- date, if your Pocket Rocket does not look exactly this, then we’ve made improvements since this document was printed. Check out the Razor website: www.razor.com for technical updates on the latest service and adjustment procedures. -
Page 7: The Brake
If you inadvertently over-inflate the tire, release the excess pressure immediately. 2E. The brake. The Pocket Rocket is fitted with a hand-operated brake. To use the brake, squeeze the lever to increase the pressure on the brake until so you come to a smooth and controlled stop. The brake lever is fitted with a cable adjuster to compensate for cable stretch and/or to fine tune the lever movement to brake engagement. -
Page 8: Charging Prior To Use
2F. Charging the battery prior to use. Your Pocket Rocket may not have a fully charged battery at the time of purchase. Therefore it is a good idea to charge the battery prior to use. -
Page 9: Circuit Breaker
Figure 10. 3. Safety Check Before Riding 3A. Loose parts. While straddling the Pocket Rocket, lift the front up one or two inches and let go so it can bounce on the ground. Does everything sound tight? There should not be any unusual rattles or... -
Page 10: Maintenance And Repairs
NOTE: Tires are subject to normal wear and tear. It is the responsibility of the user to periodically inspect the tires for excess wear. Check out the Razor website: www.razor.com for updates on the latest maintenance, repair and trouble-shooting procedures. ADJUSTING THE CHAIN NOTE: Turn power switch off before maintenance procedures. - Page 11 4. Once the tension is good, tighten the axle and brake anchor bolt. Test run the Pocket Rocket. Re-adjust as needed. Fig 11a. Loosen rear axle by turning nuts counter-clockwise.
- Page 12 Tighten when completed in direction shown. Fig 11b. Loosen the brake anchor screw. Fig 11c and 11d. Tighten both axle adjusters equally, 1/8 to 1/4 turn until the chain is properly tensioned.
- Page 13 WHEEL REMOVAL PROCEDURE Fig. 12. Loosen brake cable anchor and disconnect. Fig. 13. Loosen brake housing anchor and the cable.
- Page 14 Fig. 14. Loosen axle by turning nuts counter- clockwise. Tighten as shown by arrows. Fig. 15. Loosen adjusters. Occasionally the rear wheel may need to be removed to replace a worn tire, chain or fix a punctured inner tube. Tools required: (2) 17mm open end or socket wrenches, (2) 8mm box wrenches, a 10mm box wrench.
-
Page 15: Safety
WARNING TO PARENTS: Kids need to be taught and be frequently reinforced of the importance of safe riding, the rules of the road and the importance of avoiding using the Pocket Rocket on streets due to dangers and hazards of traffic, especially motor vehicle traffic. -
Page 16: Illustrated Parts Breakdown
Wiring assembly (not shown) 1 ea Frame 1 ea Motor 4 ea motor mounting screws (not shown) 1 ea Chain, Pocket Rocket length 3 ea Nut, nylock self locking 3 ea Washer, flat 10mm 1 ea Sprocket 1 ea Freewheel mechanism (attachment screws and nuts not shown) - Page 17 Fig. 16. Illustrated parts breakdown...
- Page 18 Warranty does not cover normal wear and tear, tires, tubes or cables, nor any damage, failure or loss caused by improper assembly, maintenance, storage or use of the Razor Pocket Rocket. This Limited Warranty will be void if the product is ever: •...
-
Page 19: Limited Warranty And Owner Registration
SB 1918 (California) declaration: YOUR INSURANCE POLICIES MAY NOT PROVIDE COVERAGE FOR ACCIDENTS INVOLVING THE USE OF THIS SCOOTER/ELECTRIC VEHICLE. TO DETERMINE IF COVERAGE IS PROVIDED, YOU SHOULD CONTACT YOUR INSURANCE COMPANY OR AGENT. - Page 20 Spare tires, tubes and batteries are available! Keep your Razor Pocket Rocket running for years with these and other genuine Razor parts. Visit our website and e-mail us for more information on spare part availability .


Need help?
Do you have a question about the Pocket Rocket and is the answer not in the manual?
Questions and answers