
Related Manuals for Nikon Coolpix P610


Summary of Contents for Nikon Coolpix P610
-
Page 1: Table Of Contents
DIGITAL CAMERA Quick Start Guide Introduction Parts of the Camera Preparing for Shooting Basic Shooting and Playback Operations Other Functions Technical Notes... -
Page 2: Introduction
Introduction Read This First To get the most from this Nikon product, be sure to read “For Your Safety” (A39-41), “<Important> Notes About Location Data Functions (GPS/ GLONASS)” (A43) and “Wi-Fi (Wireless LAN Network)” (A44), and all other instructions thoroughly and keep them where they will be read by all who use the camera. -
Page 3: Confirming The Package Contents
“memory cards” in this manual. Information and Precautions Life-Long Learning As part of Nikon’s “Life-Long Learning” commitment to ongoing product support and education, continually updated information is available online at the following websites: • For users in the U.S.A.: http://www.nikonusa.com/ •... - Page 4 Before taking pictures on important occasions (such as at weddings or before taking the camera on a trip), take a test shot to ensure that the camera is functioning normally. Nikon will not be held liable for damages or lost profits that may result from product malfunction.
- Page 5 For the COOLPIX P610, the log data saved on the memory card is handled in the same way as other data. To erase the log data that is obtained but not stored on the memory card, select Create log ➝...
-
Page 6: Parts Of The Camera
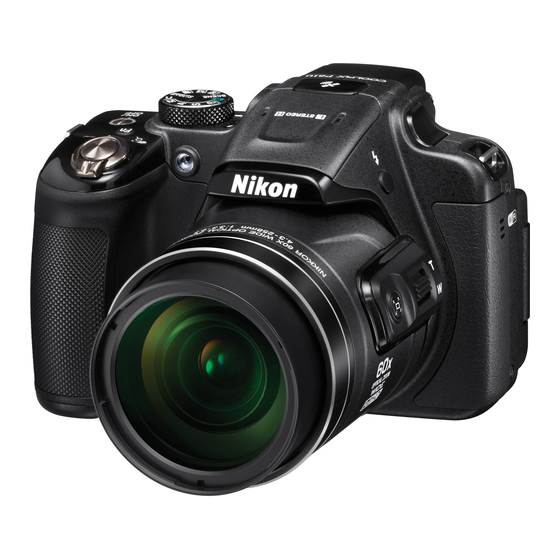
Parts of the Camera The Camera Body 21 22 23 24 12 Electronic viewfinder Power switch/power-on lamp (charge lamp) 13 Eye sensor w (function) button 14 x (monitor) button Mode dial 15 s (display) button Flash 16 b (e movie-record) button N-Mark (NFC antenna) 17 Command dial Shutter-release button... -
Page 7: Preparing For Shooting
Preparing for Shooting How to Attach the Camera Strap and Lens Attach the Lens Cap LC-CP29 to the strap, and then attach the strap to the camera. Attach the strap at two places. Lens Cap • At times when you are not shooting images, attach the lens cap to the lens to protect it. -
Page 8: Insert The Battery And Memory Card
Insert the Battery and Memory Card Memory card slot Battery latch • With the battery’s positive and negative terminals oriented correctly, move the orange battery latch (3), and fully insert the battery (4). • Slide the memory card in until it clicks into place (5). •... -
Page 9: Charge The Battery
Charge the Battery With the battery installed, connect the camera to an electrical outlet. Charging AC Adapter Electrical outlet Power-on lamp (charge lamp) USB cable (included) If a plug adapter* is included with your camera, securely connect it to the Charging AC Adapter. - Page 10 Notes About the USB Cable • Do not use a USB cable other than the UC-E21. Using a USB cable other than the UC-E21 could result in overheating, fire or electric shock. • Make sure that the plugs are properly oriented. Do not insert or remove the plugs at an angle when connecting or disconnecting them.
- Page 11 Opening and Adjusting the Angle of the Monitor Changing the orientation of the monitor is useful when shooting with the camera in a high or a low position, or when taking selfies. For normal shooting, fold the monitor against the camera body with the screen facing out (3).
-
Page 12: Turn On The Camera
Turn the Camera On and Set the Display Language, Date, and Time When the camera is turned on for the first time, the language-selection screen and the date and time setting screen for the camera clock are displayed. Press the power switch to turn on the camera. - Page 13 Set the date and time, and press Date and time the k button. • Use J K to select a field and then use HI to set the date and time. 11 15 2015 • Select the minute field and press the k button to confirm the setting.
-
Page 14: Basic Shooting And Playback Operations
Basic Shooting and Playback Operations Shooting with A (Auto) Mode Rotate the mode dial to A. • The camera is set to A (auto) mode and general shooting can be performed. • Press the s (display) button to switch the information displayed in the monitor during shooting and play back. - Page 15 Frame the picture. • Move the zoom control or the side zoom control to change the zoom lens position. • When the subject is lost at the telephoto zoom position, press the p (snap- back zoom) button to temporarily widen the angle of view so that you can frame the subject more easily.
-
Page 16: Using The Flash
Notes About Saving Images or Movies The indicator showing the number of exposures remaining or the indicator showing the remaining recording time flashes while images or movies are being saved. Do not open the battery-chamber/memory card slot cover or remove the battery or memory card while an indicator is flashing. -
Page 17: Recording Movies
Switching Between the Monitor and Viewfinder You can use the viewfinder when bright Viewfinder light under the open sky makes it difficult to see the monitor. x button • When you bring your face close to the viewfinder, the eye sensor responds to it and the viewfinder turns on while the monitor turns off (default setting). -
Page 18: Play Back Images
Play Back Images Press the c (playback) button to enter playback mode. • If you press and hold down the c button while the camera is turned off, the camera turns on in playback mode. Use the multi selector to select Display the previous image an image to display. -
Page 19: Delete Images
Delete Images Press the l (delete) button to delete the image currently displayed in the monitor. Use the multi selector HI to select the desired deletion Delete method and press the k button. Current image • To exit without deleting, press the d Erase selected images All images button. -
Page 20: Changing The Shooting Mode
Changing the Shooting Mode You can change to the following shooting modes by rotating the mode dial. • A (Auto) mode Used for general shooting. • y, X, s, c (Scene) modes Camera settings are optimized according to the scene that you select. - y: Press the d button and select a scene. - Page 21 Functions That Can Be Set Using the Multi Selector (for Shooting) When the shooting screen is displayed, you can press the multi selector H (m) J (n) I (p) K (o) to set the functions described below. • m Flash mode When the flash is raised, the flash mode can be set according to shooting conditions.
-
Page 22: Other Functions
Other Functions Functions That Can Be Set with the Fn (Function) Button The settings such as image quality can be also set by pressing the w (function) button instead of displaying the corresponding menu by pressing the d (menu) button. •... - Page 23 Press the d (menu) button. • The menu is displayed. 25m 0s 25m 0s 1/250 1/250 F5.6 F5.6 F5.6 Press the multi selector Shooting menu Image quality Image size • The current menu icon is Picture Control displayed in yellow. Custom Picture Control White balance Metering...
-
Page 24: Using Location Data Functions
Using Location Data Functions When Record location data in Location data options of the z (location data options) menu (A22) is set to On, the camera starts receiving signals from the positioning satellites. Location data reception can be checked on the shooting screen. •... -
Page 25: Take Photos
Using the Wi-Fi (Wireless LAN) Function You can perform the following functions if you install the dedicated software “Wireless Mobile Utility” on your smart device that runs on Android OS or iOS, and connect it to the camera. Take Photos You can save images to a smart device by pressing the shutter-release button of the camera or remotely releasing the camera shutter from the smart device. -
Page 26: Technical Notes
Technical Notes Caring for the Product Observe the precautions described below in addition to the warnings in “For Your Safety” (A39-41) when using or storing the device. The Camera Do Not Apply Strong Impact to the Camera The product may malfunction if subjected to strong shock or vibration. In addition, do not touch or apply force to the lens or lens cover. -
Page 27: The Battery
• If you notice any abnormalities such as excessive heat, smoke, or an unusual smell coming from the battery, immediately discontinue use and consult your retailer or Nikon-authorized service representative. • After removing the battery from the camera or optional battery charger, put the battery in a plastic bag, etc. -
Page 28: Storing The Battery
Using the Battery When Cold On cold days, the capacity of batteries tends to decrease. If an exhausted battery is used at a low temperature, the camera may not turn on. Keep spare batteries in a warm place and exchange as necessary. Once warmed, a cold battery may recover some of its charge. Battery Terminals Dirt on the battery terminals may prevent the camera from functioning. -
Page 29: Cleaning And Storage
Cleaning and Storage Cleaning Do not use alcohol, thinner, or other volatile chemicals. Avoid touching glass parts with your fingers. Remove dust or lint with a blower (typically a small device with a rubber bulb attached to one end that is pumped to produce a stream of air out the other end). To Lens/ remove fingerprints or other stains that cannot be removed with a viewfinder... -
Page 30: Troubleshooting
Troubleshooting If the camera fails to function as expected, check the list of common problems below before consulting your retailer or Nikon-authorized service representative. Also, refer to the Reference Manual (PDF format) for further details on how to use this camera (A2). -
Page 31: Approved Memory Cards
• The N-Mark is a trademark or registered trademark of NFC Forum, Inc. in the United States and in other countries. • All other trade names mentioned in this manual or the other documentation provided with your Nikon product are trademarks or registered trademarks of their respective holders. Technical Notes... - Page 32 AVC Patent Portfolio License This product is licensed under the AVC Patent Portfolio License for the personal and non-commercial use of a consumer to (i) encode video in compliance with the AVC standard (“AVC video”) and/or (ii) decode AVC video that was encoded by a consumer engaged in a personal and non-commercial activity and/or was obtained from a video provider licensed to provide AVC video.
- Page 33 Data, and may not transfer or distribute it in any form, for any purpose, except to the extent permitted by mandatory laws. Restrictions. Except where you have been specifically licensed to do so by Nikon, and without limiting the preceding paragraph, you may not (a) use this Data with any...
- Page 34 YOUR USE OF OR INABILITY TO USE THIS INFORMATION, ANY DEFECT IN THE INFORMATION, OR THE BREACH OF THESE TERMS OR CONDITIONS, WHETHER IN AN ACTION IN CONTRACT OR TORT OR BASED ON A WARRANTY, EVEN IF NIKON OR ITS LICENSORS HAVE BEEN ADVISED OF THE POSSIBILITY OF SUCH DAMAGES. Some States, Territories and Countries do not allow certain liability exclusions or damages limitations, so to that extent the above may not apply to you.
- Page 35 Government End Users. If the Data supplied by HERE is being acquired by or on behalf of the United States government or any other entity seeking or applying rights similar to those customarily claimed by the United States government, the Data is a “commercial item”...
- Page 36 Notices related to licensed software copyright holders. • Location name data for Japan © 2013 ZENRIN CO., LTD. All rights reserved. This service uses POI data of ZENRIN CO., LTD. “ZENRIN” is a registered trademark of ZENRIN CO., LTD. • Location name data except for Japan ©...
- Page 37 Italy: La Banca Dati Italiana è stata prodotta usando quale riferimento anche cartografia numerica ed al tratto prodotta e fornita dalla Regione Toscana. Contains data from Trasporto Passeggeri Emilia-Romagna- S.p.A. Includes content of Comune di Bologna licensed under h ttp://creativecommons.org/licenses/by/ 3.0/legalcode) and updated by licensee July 1, 2013.
- Page 38 Canada: This data includes information taken with permission from Canadian authorities, including © Her Majesty, Queen's Printer for Ontario, Canada Post, GeoBase, Department of Natural Resources Canada. All rights reserved. Mexico: Fuente: INEGI (Instituto Nacional de Estadística y Geografía.) United States: ©United States Postal Service...
-
Page 39: For Your Safety
For Your Safety To prevent damage to your Nikon product or injury to yourself or to others, read the following safety precautions in their entirety before using this equipment. Keep these safety instructions where all those who use the product will read them. - Page 40 • Do not damage, modify, forcibly tug or bend the USB cable, place it under heavy objects, or expose it to heat or flames. Should the insulation be damaged and the wires become exposed, take it to a Nikon-authorized service representative for inspection. Failure to observe these precautions could result in fire or electric shock.
- Page 41 Use the appropriate power supply (battery, Charging AC Adapter, AC adapter, USB cable) Using a power supply other than those provided or sold by Nikon could result in damage or malfunction. Use appropriate cables...
- Page 42 CAUTIONS Modifications The FCC requires the user to be notified that any changes or modifications made to this device that are not expressly approved by Nikon Corporation may void the user’s authority to operate the equipment. Interface Cables Use the interface cables sold or provided by Nikon for your equipment. Using other interface cables may exceed the limits of Class B Part 15 of the FCC rules.
- Page 43 • The location name information (Points of Interest: POI) of the People’s Republic of China (“China”) and the Republic of Korea are not provided for the COOLPIX P610. bNotes about record location data functions and log recording • Use information measured by the camera as a guideline only.
- Page 44 EU or EFTA can be used anywhere within the EU and EFTA). Nikon does not accept liability for use in other countries. Users who are unsure as to the original country of sale should consult with their local Nikon service center or Nikon-authorized service representative.
- Page 45 Precautions when Using Radio Transmissions Always keep in mind that radio transmission or reception of data is subject to interception by third parties. Note that Nikon is not responsible for data or information leaks that may occur during data transfer.
- Page 48 No reproduction in any form of this manual, in whole or in part (except for brief quotation in critical articles or reviews), may be made without written authorization from NIKON CORPORATION. FX5A02(11) 6MN50411-02 © 2015 Nikon Corporation...
Need help?
Do you have a question about the Coolpix P610 and is the answer not in the manual?
Questions and answers