
Related Manuals for NAD C660


Summary of Contents for NAD C660
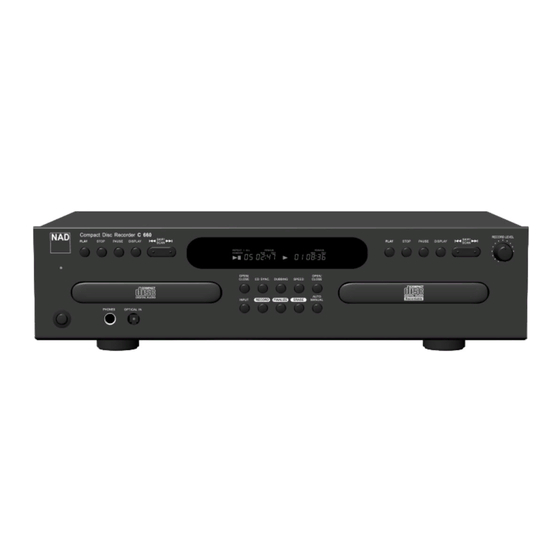
- Page 1 C660 Compact Disc Recorder Owner’s Manual Manuel d’Installation Bedienungsanleitung Manual del Usuario Manuale delle Istruzioni Manual do Proprietário Bruksanvisning...
-
Page 2: Introduction Chapter
Introduction Chapter 1 SAFETY INFORMATION EXPLANATION OF GRAPHICAL SYMBOLS The lightning flash with arrowhead symbol, within an equilateral triangle, is intended to alert the user to the presence of uninsulated “dangerous voltage” within the product’s enclosure that may be of sufficient magnitude to constitute a risk of electric shock to persons. The exclamation point within an equilateral triangle is intended to alert the user to the presence of important operating and maintenance (servicing) instructions in the literature accompanying the appliance. -
Page 3: Safety Information
ELECTRIC POWER 1 Power Sources - Connect this unit only to power sources specified in the Operating Instructions, and as marked on the unit. 2 Polarization - As a safety feature, some units are equipped with polarized AC power plugs which can only be inserted one way into a power outlet. -
Page 4: Table Of Contents
Introduction Chapter 1 TABLE OF CONTENTS FEATURES • Dual deck CD player and CD- R/CD-RW recorder. • Dual play capability. • 4x dubbing speed for both CD-R and CD-RW discs. • Built in 32 to 96 kHz sampling converter • Optical and coaxial digital inputs and outputs. -
Page 5: Before Operation
TYPES OF DISCS CD-R AND CD-RW DISCS For recording and playback you can use the CD-R and CD-RW discs with the logos shown below. With a CD-R disc, you can add recordings until the disc is full, but you cannot erase any of them. With a CD-RW disc, you can add and erase recordings as needed. -
Page 6: Cleaning The Cabinet
Introduction Chapter 1 BEFORE OPERATION CLEANING CABINET Use a soft, dry cloth. If the surfaces are extremely dirty, use a soft cloth lightly moistened with a mild detergent solution. Do not use strong solvents, such as alcohol, benzine or thinner, as these might damage the surface of the unit. -
Page 7: Identification Of Controls
FRONT PANEL 1 PLAY (play deck) Press to play a CD in the play deck. 2 STOP (play deck) Press to stop the CD in the play deck. 3 PAUSE (play deck) Press to pause or restart the disc. 4 DISPLAY(play deck) Press to cycle through the time display options for the play deck. -
Page 8: Information Display
Introduction Chapter 1 IDENTIFICATION OF CONTROLS INFORMATION DISPLAY DUAL SCAN RANDOM PROG REPEAT SINGLE 1 ANALOG Lights when signal from analog jacks is selected as source. 2 COAXIAL Lights when signal from coaxial jacks is selected as the source. 3 OPTICAL Lights when signal from optical jack (on the front panel or rear panel) is selected as the source. -
Page 9: Rear Panel
REAR PANEL 1 ANALOG CD PLAY OUT These jacks carry the analog audio output signal from the play deck. 2 COAXIAL CD PLAY OUT This jack carries the digital audio output signal from the play deck. 3 AC power cord Connect this plug to an AC outlet. 4 OPTICAL CD REC DIGITAL OUT This jack carries the digital audio output signal from the record deck. -
Page 10: Buttons On The Remote Control
12 PROGRAM CHECK Press to check or edit a programmed playback sequence. 13 CD SYNC Press to make sync recording from an external CD player when a digital connection is used. 14 INPUT Press to select the input source (analog, digital-coaxial, or digital-optical) for recording. -
Page 11: Chapter 2: Connections
CONNECTION DIAGRAM To prevent possible damage to your speakers or other components in your audio system, all system components, including this unit, should be turned off and unplugged from their AC power source when any connections are made or a new component is installed. PRECAUTIONS WHEN OPERATING THIS UNIT Never move or tilt this unit or subject it to mechanical shock when recording or play-back is in progress. -
Page 12: Play Deck Connections
CD REC DIGITAL IN jacks on the unit directly to the coaxial/ optical rec/out jacks on your CD player or other digital devices. • If the CD player has both types of outputs, you may connect one to the input of your receiver and the other directly to the unit. -
Page 13: Chapter 3 Recordings
1 Press ON on the remote control or POWER button on the front panel. STANDBY/ON will turn green, indicating that the unit is on and functioning. 2 Press appropriate OPEN/CLOSE on the front panel or remote control to open the desired deck. - Page 14 Recordings Chapter 3 LOADING DISCS “MP3” lights TRACK TOTAL COAXIAL SINGLE Total number of tracks “HDCD” lights HDCD TRACK TOTAL TIME COAXIAL SINGLE Total number of Total time of tracks all tracks. COAXIAL SINGLE CDR R LOADING A MIXED DISC MP3 off mode: Total Track number and Total Time.
-
Page 15: Recording
Chapter 3 Recordings RECORDING PRECAUTIONS ON RECORDING PROGRAMMED PLAY Do not attempt to record a sequence of tracks, as programmed on your DAT, DCC or other digital sources. Those tracks would not be numbered continuously. If you want to record a sequence of tracks, record them one by one. -
Page 16: Disc Dubbing
Recordings Chapter 3 RECORDING “CD-R” or “CD-RW” lights TRACK TOTAL TIME CDR R Total number Total time of all of tracks tracks Real-time 2x speed 4x speed “CD” lights TRACK TOTAL TIME COAXIAL SINGLE Total number of Total time of all tracks tracks TRACK... -
Page 17: Cd Sync Recording
CD SYNC RECORDING (FROM CD, MD OR DVD PLAYER) CD sync recording allows you to make an automatic digital recording from an external CD, MD or DVD player. During CD sync recording, the record deck starts in sync with the source, and tracks are automatically numbered. -
Page 18: Manual Recording
Recordings Chapter 3 RECORDING COAXIAL REAR OPTICAL REAR (optical on the rear panel) OPTICAL FRONT (optical on the front panel) ANALOG CDR R TRACK TIME CDR R MANUAL RECORDING (FROM EXTERNAL SOURCE) The recording can be started and paused at will. 1 Press INPUT on the front panel or the remote control repeatedly until the desired input is displayed With each press of the button, the input changes as shown in the diagram on the left. -
Page 19: Numbering Tracks
NUMBERING TRACKS The tracks can be numbered automatically (auto mode) or manually (manual mode). AUTO MODE Auto mode can be used with either digital or analog recording. The auto mode will add track numbers automatically, in one of two ways. •... -
Page 20: Finalization
Recordings Chapter 3 FINALIZATION CDR R TRACK TOTAL TIME “CD” lights CDR R CDR R CDR R Finalization completes the recording of a disc so that it can be played in other machines. PRECAUTION • Once a CD-R disc is finalized, the disc cannot be unfinalized. •... -
Page 21: Erasing An Entire Cd-Rw Disc
ERASING AN ENTIRE CD-RW DISC An entire disc erase facility is available for both finalized and unfinalized CD-RW disc. 1 Load the CD-RW disc to be erased on the record tray. 2 Press ERASE on the front panel or remote control repeatedly until “ALL” is displayed. “ALL” and “ERASE”... -
Page 22: Playback
Playback Chapter 4 PLAYBACK TRACK TIME COAXIAL SINGLE Track number Elapsed time of being played the current track BASIC OPERATION 1 Turn on the power and load a disc See page 13 for details. 2 Press PLAY on the front panel for the appropriate deck. Alternatively, press CD PLAY or CD REC for the desired deck and then PLAY on the remote control. -
Page 23: Random Playback
RANDOM PLAYBACK All of the tracks can be played in random order. In stop mode or during playback, press CD PLAY or CD REC for the desired deck, and then press RANDOM “RANDOM” will light. • When RANDOM is pressed in stop mode, random playback will start automatically. •... -
Page 24: Programmed Playback
Playback Chapter 4 PLAYBACK TRACK COAXIAL PROG SINGLE “PROGRAM” lights TRACK COAXIAL PROG SINGLE Programmed track Program number number TRACK TOTAL TIME COAXIAL PROG SINGLE Last track Total playing time programmed of programmed tracks TRACK COAXIAL PROG SINGLE Programmed track Program number number NOTE... -
Page 25: Mp3, Hdcd And Cd-Text Disc Playback
When a disc with the HDCD logo is played, this unit is able to take advantage of the special recording process that is used in the creation of HDCD discs. Although HDCD discs are playable on any CD player, when they are used in a unit such as this unit, the special circuitry delivers audio with extraordinary fidelity, stunning resolution and the highest possible overall quality. -
Page 26: Dual Play Mode
Playback Chapter 4 PLAYBACK COAXIAL DUAL “DUAL” lights TRACK TOTAL TIME COAXIAL SINGLE Total number of Total time of all tracks tracks. TRACK TIME COAXIAL SINGLE Track number Elapsed time of being played the current track TRACK REMAIN TIME COAXIAL SINGLE Track number Remaining time of... -
Page 27: Chapter 5 Additional Information
Dead batteries Disc cannot be erased CD-R disc is in use Recorded CD-R/RW disc does CD-R/RW disc not finalized not play in another CD player or “ERROR” appears in play deck display Recording suddenly stops Input source stopped or paused... -
Page 28: Alert Messages
Additional Information Chapter 5 ALERT MESSAGES ERROR MESSAGE EXPLANATION CHECK DISC A record-related button has been pressed when a finalized disc is in the record deck A record-related button has been pressed when a standard CD is in the record deck DATA DISC A non-audio CD-ROM or a Video CD disc has been placed... -
Page 29: Restrictions On Digital Recording
The Serial Copy Management System (SCMS) is implemented in this unit to protect the rights of copyright holders. SCMS allows you to make a “first-generation” digital copy-a digital copy of the original source-, but not a copy of this copy. The SCMS copy restriction does not apply to analog recordings. Recording from digital sources with copy prohibition code. - Page 30 WWW.NADELECTRONICS.COM ©2001 NAD ELECTRONICS All rights reserved. No part of this publication may be reproduced, stored or transmitted in any form without the written permission of NAD Electronics International C660 Manual 01/01 Printed in Korea...