
Related Manuals for Russell Hobbs RHSLDW2


Summary of Contents for Russell Hobbs RHSLDW2
- Page 1 技术要求: 所有印刷颜色为 PANTONE BLACK C 该用户手册内页的彩色 也按黑白制作 要求按 规格输出菲林及印刷 RHSLDW2,S,B(9259A) 6710007213 Russell Hobbs 105g...
- Page 2 Dishwasher USER’S GUIDE Model No: RHSLDW2, RHSLDW2B & RHSLDW2S For Customer Services & Spare Parts please call 0845 209 7461 Opening times: Monday - Friday 8am – 6pm & Saturday 9am – 1pm or visit us at www.productcareuk.com IMPORTANT: RETAIN FOR FUTURE...
-
Page 3: Table Of Contents
Contents Page Safety instructions …………….……………….… Product overview …………….……………….… Unpacking the dishwasher …………….……………….… Water Hardness & setting the salt …………….……………….… Loading the salt into the container …………….……………….… Rinse aid dispenser …………….……………….… Detergent …………….……………….… Loading the dishwasher …………….……………….… Washing programs …………….……………….… Washing cycles …………….……………….…... -
Page 4: Safety Instructions
Safety instructions IMPORTANT SAFETY INSTRUCTIONS READ CAREFULLY AND KEEP FOR FUTURE REFERENCE WARNING: This appliance can be used by children aged from 8 years and above and persons with reduced physical, sensory or mental capabilities or lack of experience and knowledge if they have been given supervision or instruction concerning use of the appliance in a safe way and understand the hazards involved. - Page 5 Safety instructions Do not allow the control panel to become wet. Clean with a soft, damp cloth. Do not use detergents, abrasives or spray-on cleaners on the control panel. Keep children away from detergent and rinse aid, keep children away from the open door of the dishwasher, there could still be some detergent left inside.
- Page 6 Safety instructions Use the dishwasher only for its intended function. During installation, the power supply cable must not be excessively or dangerously bent or flattened. Do not tamper with the controls. The appliance is to be connected to the water mains using new hose sets and old hose- sets should not be reused.
- Page 7 Safety instructions Do not place any heavy objects on or stand on the door when it is open. The appliance could tip forward. When loading items to be washed, position sharp items so that they are not likely t o damage the door seal. Warning : Knives and other utensils with sharp points must be loaded in the basket with their points down or place them in a horizontal position.
- Page 8 Safety instructions Dispose of the packing materials properly. Packaging material could be dangerous for children! To dispose of the package and the appliance, please go to a recycling centre. Cardboard packaging is manufactured from recycled paper and should be disposed in the waste paper collection for recycling.
-
Page 9: Product Overview
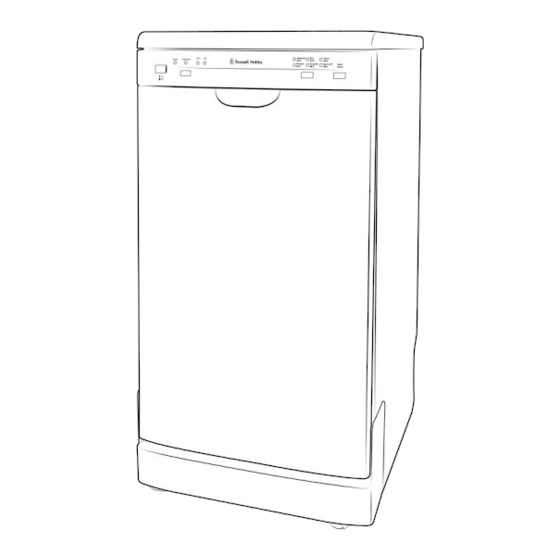
Product overview Intensive Glass Power Half load 65 C 50 C 40 C Normal Daily 60' Quick 30' Star t/ 55 C 60 C 40 C Reset Of f 1 On/Off Key-press: To turn On/Off the power supply. 2 Power Light : To come on when the ON/OFF Button is Pressed down. 3 Half washing Button: To select the half washing.(Option) 4 Half washing Light : To come on when half washing(Option). -
Page 10: Unpacking The Dishwasher
Unpacking the dishwasher Before you use your dishwasher Remove all the packaging. 2. Check the dishwasher after unpacking for any visual damage such as: ● A misaligned door ● Damage to the door ● Dents or holes in side panels and the top panel. ●... -
Page 11: Water Hardness & Setting The Salt
Water Hardness & setting the salt The wat er softener must be set manually, using the water hard ness dial. The wat er softener is designed to remove minerals and salts from t he water, which woul d have a detrimental or adverse effect on the operation of the appliance. -
Page 12: Loading The Salt Into The Container
Loading the salt into the container Always use the salt intended for use with dishwasher. The salt container is located beneath the lower basket and should be filled as explained in the following: Attention! Only use salt specifically designed for use in dishwashers! Every other type of salt not specifically designed for use in a dishwasher, especially table salt, will damage the water softener. -
Page 13: Rinse Aid Dispenser
Rinse aid dispenser Rinse Aid dispenser The rinse aid is released during the final rinse to prevent water from forming droplets on your dishes, which can leave spots and streaks. It also improves drying by allowing water to roll off the dishes. - Page 14 Rinse aid dispenser To open the dispenser, turn the cap to the "open" (left) arrow and lift it out. Pour the rinse aid into the dispenser, being careful not to overfill. Replace the cap by inserting it aligned with "open" arrow and turning it to the closed (right) arrow. Clean up any rinse aid spilled while during filling with an absorbent cloth to avoid excessive foaming during the next wash.
-
Page 15: Detergent
Detergent Detergent with its chemical ingredients are necessary to remove dirt, crush dirt and transport it out of the dishwasher. Use only detergent specifically made for use in dishwashers. Keep your detergent fresh and dry. Don't put powder detergent into the dispenser until you're ready to wash dishes. Detergents There are 3 sorts of detergents 1.With phosphate and with chlorine... - Page 16 Detergent The Amount of detergent to use If the lid is closed: press release button. T he lid will sp ring open. Always add the detergent just before starting each wash cycle. Only use branded detergent aid for dishwasher. Dishwasher detergent is corrosive! Take care to keep it out of reach of c hildren. Prop er Use of De terg ent Use only deterge nt specifically made for the use in dishwashers.
-
Page 17: Loading The Dishwasher
Loading the dishwasher Recommendation Consider buying utensils which are identified as dishwasher-proof. Use a mild detergent that is described as 'kind to dishes'. If necessary, seek further information from the detergent manufacturers. For particular items, select a program with as low a temperature as possible. To prevent damage, take glass and cutlery out of the dishwasher as soon as possible after the program has ended. - Page 18 Loading the dishwasher Load hollow items such as cups, glasses, pans etc. with the opening facing downwards so that water cannot collect in the container or a deep base. Dishes and items of cutlery must not lie inside one another, or cover each other. To avoid damage to glasses, they must not touch.
- Page 19 Loading the dishwasher Loading the Lower Basket We suggest that you place large items and the most difficult to clean items into the lower basket: such as pots, pans, lids, serving dishes and bowls, as shown in the figure below. It is preferable to place serving dishes and lids on the side of the racks in order to avoid blocking the rotation of the top spray arm.
- Page 20 Loading the dishwasher For Customer Services & Spare Parts please call 0845 209 7461 Opening times: Monday - Friday 8am – 6pm & Saturday 9am – 1pm or visit us at www.productcareuk.com...
- Page 21 Loading the dishwasher The height of the upper basket can be adjusted in order to create more space for large utensils both for the upper/lower basket. The height of the upper basket can be adjusted by placing the wheels on different height of the rails.
- Page 22 Loading the dishwasher 1 Forks 2 Soup spoons 3 Dessert spoons 4 Teaspoons 5 Knives 6 Serving spoons 7 Serving spoon 8 Gravy ladel Do no t let any item extend th rough th e bottom. Always load sh arp utensils with the sharp point down! For personal safety and a top quality cleaning, place the silverware in the basket making sure that: They do not nest together.
-
Page 23: Washing Programs
Washing programs Means: need to fill rinse into the Rinse-Aid Dispenser. ℃ Pre-wash(50 ) ℃ Wash (65 For heaviest soiled crockery, and Rinse Intensive 、 、 normally soiled pots pans 4/23g 1.13 16.0 Rinse dishes etc with dried on soiling; ℃... -
Page 24: Washing Cycles
Washing cycles Turning on the appliance Starting the wash cycle Draw out the lower and upper basket, load the dishes and push them back. It is commended to load the lower basket first, then the upper one (see the section entitled Loading the Dishwasher ). -
Page 25: Unloading The Dishwasher
Washing cycles Adding a dish during a cycle A forgotten dish can be added at any time before the detergent cup opens. 1. Open the door a little to stop the washing. 2. After the spray arms stop working, you can open the door completely. 3. -
Page 26: Maintenance & Cleaning
Maintenance & Cleaning The filter prevents larger remnants of food or other objects from getting inside the pump. The residue may block the filter, in this case they must be removed. The filter system consists of a coarse filter, a flat (Main filter) and a microfilter (Fine filter). - Page 27 Maintenance & Cleaning Step 1 Turn the filter in anti-clockwise direction, then lift it up. Step 2 Lift the main filter up Step 3: lift the Fine filter up When following this procedure from step1 to step 3, the filter system will be removed; when following it from Step 3 to Step 1, the filter system will be installed.
- Page 28 Maintenance & Cleaning Cleaning The control panel and exterior can be cleaned by using a lightly dampened cloth. After cleaning, make sure to dry it thoroughly. Never use sharp objects, scouring pads or harsh cleaners on any part of the dishwasher. To clean the edge around the door, you should use only a soft warm, damp cloth.
-
Page 29: Moving The Appliance
Maintenance & Cleaning Cleaning the Spray Arms It is necessary to clean the spray arms regularly for hard water chemicals will clog the spray arm jets and bearings. To remove the upper spray arm, screw off the nut clockwise then remove the arm. To remove the lower spray arm, pull the spray arm upwards. -
Page 30: Positioning The Appliance
Positioning the appliance Position the appliance in the desired location. The back should rest against the wall behind it, and the sides, along the adjacent cabinets or walls. The dishwasher is equipped with water supply and drain hoses that can be positioned either to the right or the left sides to facilitate proper installation. -
Page 31: Water Connection
Water connection Connect the cold water supply hose to a threaded 3/4(inch) connector and make sure that it is fastened tightly in place. If the water pipes are new or have not been used for an extended period of time, let the water run to make sure that the water is clear. -
Page 32: Water Outlet
Water connection How to Drain Excess Water From Hoses If the sink is 100cm higher from the floor, the excess water in hoses cannot be drained directly into the sink. It will be necessary to drain excess water from hoses into a bowl or suitable container that is held outside and lower than the sink. -
Page 33: Connection To The Mains Supply
Connection to the mains supply WARNING- THIS APPLIANCE MUST BE EARTHED This appliance is designed to operate from a mains supply of AC230V ~ 50HZ. Check that the voltage marked on the product corresponds with your supply voltage. This product is fitted with a 13A plug complying with BS1363. If this plug is unsuitable or needs to be replaced, please note the following: Important: The wires in the mains lead are coloured in accordance with the following code:... - Page 34 Connection to the mains supply For UK use only – Plug fitting details (where applicable): As the colours of the wires in the mains lead of this appliance may not correspond with the coloured markings identifying the terminals in your plug, proceed as follows: The GREEN/YELLOW wire is the EARTH and must be connected to the terminal which is marked with the letter E or by the earth symbol or...
-
Page 35: Troubleshooting
Trouble shooting Fuse blown, or the Replace fuse or reset circuit breaker. Remove any other circuit breaker acted appliances sharing the same circuit with the dishwasher Power supply is not Make sure the dishwasher is turned on and the door is turned on closed securely. -
Page 36: Trouble Shooting
Trouble shooting The dishes were not See notes in " Loading the Dishwasher Baskets ". loaded correctly. The programme was Select a more intensive programme. not powerful enough. See" Wash Cycle Table . " Not enough detergent Use more detergent, or change your detergent. was dispensed. -
Page 37: Technical Specification
Technical specification Dimensions Height : 850mm Width : 450 mm Depth : 580mm Water pressure: 0.04-1.0MPa Power supply: see rating label Capacity: 9 place settings Plug If your appliance is supplied with a non-rewireable plug fitted to the mains lead you will find that it incorporates a fuse, the value of which is indicated either on the base of the plug or on the fuse carrier. - Page 38 Technical specification Sheet of household dishwasher according to EU Directive 1059/2010: Manufacturer RUSSELL HOBBS Type / Description RHSLDW2,RHSLDW2S,RHSLDW2 Standard place settings Energy efficiency class Annual energy consumption 222 kWh Energy consumption of the standard cleaning cycle 0.77 kWh Power consumption of off-mode Power consumption of left-on mode 0.4 W...
- Page 39 Technical specification Notes on the previous energy table A + + + (highest efficiency) to D (lowest efficiency) Energy consumption kWh per year, based on 280 standard cleaning cycles using cold water fill and “ ” the consumption of the low power modes. Actual energy consumption will depend on how the appliance is used. Water consumption 2940 litres per year, based on 280 standard cleaning cycles.
-
Page 40: Guarantee
Guarantee This product is guaranteed for 12 months from the date of the original purchase. If any defect arises due to faulty materials or workmanship the faulty product must be returned to the place of purchase. Refund or replacement is at the discretion of the store. The following conditions apply: •... - Page 41 Customer support For Customer Services & Spare Parts please call 0845 209 7461 Opening times: Monday - Friday 8am – 6pm & Saturday 9am – 1pm or visit us at www.productcareuk.com Produced for; G2S Limited Bolton BL6 5HY Disposal information This symbol is known as the 'Crossed-out wheelie bin Symbol'.
- Page 42 For Customer Services & Spare Parts please call 0845 209 7461 Opening times: Monday - Friday 8am – 6pm & Saturday 9am – 1pm or visit us at www.productcareuk.com...
- Page 43 For Customer Services & Spare Parts please call 0845 209 7461 Opening times: Monday - Friday 8am – 6pm & Saturday 9am – 1pm or visit us at www.productcareuk.com...
- Page 44 For Customer Services & Spare Parts please call 0845 209 7461 Opening times: Monday - Friday 8am – 6pm & Saturday 9am – 1pm or visit us at www.productcareuk.com...
- Page 45 For Customer Services & Spare Parts please call 0845 209 7461 Opening times: Monday - Friday 8am – 6pm & Saturday 9am –1pm or visit us at www.productcareuk.com Revision 1 This symbol is known as the 'Crossed-out wheelie bin Symbol'. When this symbol is marked on a product/batteries, it means that the product/batteries should not be disposed of with your general household waste.
Need help?
Do you have a question about the RHSLDW2 and is the answer not in the manual?
Questions and answers
All display lights are red and unable to start any of the wash cycles