Table of Contents
Advertisement
Advertisement
Table of Contents

Related Manuals for Mvix MX-760HD

Summary of Contents for Mvix MX-760HD
-
Page 2: User Guide
MVIX Wireless Hi-Def Multimedia Player User Guide www.mvixusa.com www.mvix.co.kr © Mvix(USA), Inc. Unicorn Information System... - Page 3 We’ll do everything in our power to keep you happy with your purchase for many years to come. You can count on our uncompromising commitment to your total satisfaction. All of this is our way of saying welcome – and thanks for investing in Mvix® - a brand that cares about customer satisfaction.
-
Page 4: Table Of Contents
Table of Contents Chapter 1 Safety & Precautions Do’s and Don’ts Limitations and Usage Precautions Chapter 2 Introduction Introducing the Wireless MVIX Hi-Def Multimedia Player Technical Specifications Package Contents Getting Familiar with your Unit Chapter 3 Basic Setup Connections 3.11 Audio and Video Connection Setup Installing an Internal Hard Disk Drive 3.21 Inserting the Hard Disk... - Page 5 Unicorn Information System...
-
Page 6: Do's And Don'ts
Do read all safety information and follow all instructions in this user manual. When cleaning the Mvix product, disconnect the power and then wipe the unit with a soft piece of dry cloth. Do not use any chemicals or sprays for cleaning. -
Page 7: Limitations And Usage Precautions Page.6
Place your Mvix player away from magnetic sources. Mvix supports 3.5” Hard Disk Drives only. Kindly ensure that the jumper setting on your Hard-disk Drive (HDD) is set to MASTER or SINGLE before installing it in the Mvix Player. Some HDDs (depending on the manufacturer) may work with the SLAVE or CABLE SELECT (CS) jumper combination. -
Page 8: Chapter 2: Introduction
Chapter 2: Introduction 2.1 Introducing the Wireless MVIX Hi-Def Multimedia Player HD Playback: The Mvix player supports a max resolution of 1920 x 1080 Progressive Scan video output providing Hi-Definition display of clear and crisp picture quality. Video / Movie File Player: Supports various video file formats, including DivX® (3/4/5), Xvid, MPEG, WMV-9, ASF(WMV9), DAT, DVD(IFO, VOB), ISO as well as HD-level TP, TS, TRP etc. -
Page 9: Technical Specifications Page.8
Chapter 2: Introduction 2.2 Technical Specifications Product Name Mvix MX-760HD Wireless Hi-Definition Media Player Processor SEM8621L (By Sigma Designs) Memory 64MB (RAM), 8MB (Flash) Operating System ucLinux DivX® (3/4/5), AVI, Xvid, MPEG, MPG, VCD(DAT), DVD(VOB, IFO), WMV(WMV-9), Video ASF(WMV-9), TP, TS, TRP Supported Files &... -
Page 10: Package Contents Page.9
Chapter 2: Introduction 2.3 Package Contents MX-760HD Remote Control Stand 5dBi Antenna A/V Cable Power Adaptor Power Cable USB Cable User Manual Driver CD Unicorn Information System... -
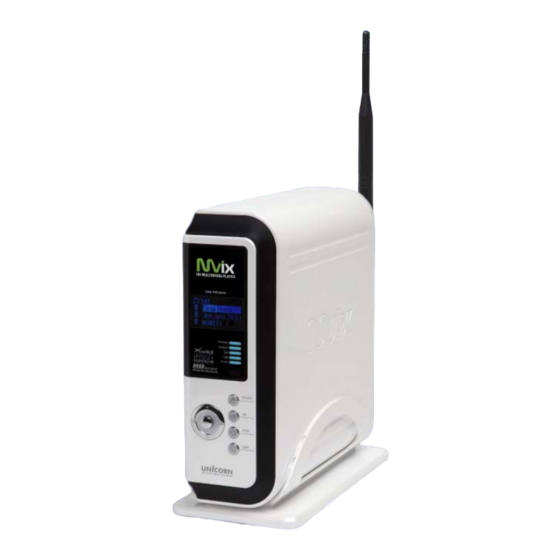
Page 11: Getting Familiar With Your Unit Page.10
Chapter 2: Introduction 2.3 Getting Familiar with your unit Front View Navigation / Toggle Switch Power Button Select / OK Button Stop Button Setup Button LCD Screen Unicorn Information System... -
Page 12: Rear View
Chapter 2: Introduction Wireless Antennae Jack Optical (Audio) Port 10/100 Mbps (RJ45) LAN USB 2.0 Host A-Type 2 Stereo RCA Port Component Port Composite Port Coaxial Cable Jack Rear View S-video Port DVI Port High Velocity Fan USB 2.0 Slot External Infra-Red Jack Power Case Clamp Screw... - Page 13 Chapter 2: Introduction Mvix Remote Control POWER Toggle Unit Power (ON / OFF) SETUP Enter Setup Menu, Apply/Confirm Setup Settings TVOUT Toggle Video Output Modes FUNC Display Control Options (Vol, Contrast, Subtitle etc..) MUTE Stop Audio Output from the Player...
-
Page 14: Audio And Video Connection Setup
3.11 Audio & Video Connection Setup MX-760HD Back Panel MX-760HD to TV : Video Connections MX760HD Y/Pb/Pr Y/Pb/Pr Video Video S-Video S-Video MX-760HD to Home Theater : Audio Connections MX760HD Home Theater Coaxial Coaxial Optical Optical Audio Connection Options Video Connection Options Unicorn Information System... -
Page 15: 3.2 Installing An Internal Hard Disk Drive
NOTE: Before Installing, ensure that the jumpers on your HDD are set to MASTER or SINGLE. Hard Disks with CABLE SELECT jumper settings may not work in Mvix Hi-Def Multimedia Player. 1. Locate the casing screw and turn it in clockwise direction. -
Page 16: Formatting The Hard Disk Page.15
Under “Storage”, choose the “Disk Management” folder. 2. The disk list will appear on the right side of the “Computer Management” windows. Right click the Mvix HDD (marked as “Unallocated HDD”) from the list and from the pop up menu choose “New Partition” to make partitions on the chosen disk. - Page 17 6. Select the Driver letter. This allows you to select the drive letter for this partition. This will be the identification label of your Mvix HDD on your PC. We recommend that you do not change anything on this screen and simply press “Next”.
- Page 18 There is no limit on the number of folders / sub-folders that can be created within the Mvix-HDD. The access or seek-time increases significantly if number of folders > 6400.
-
Page 19: Transferring Files To The Hard Disk Through Usb Page.18
Multimedia Player. It works exactly like any other external storage device. ** If your PC fails to recognize the Mvix Media Player when connected via USB, check the jumper settings on the installed HDD. Try and test the jumpers in the following order:... -
Page 20: The Setup Menu Page.19
( Select Wire Apply or Wireless Apply to apply settings or Press SETUP on Mvix Remote to Apply these settings.) Use the navigation button on the Mvix Remote to select the TV icon/option. This option allows you to configure your video-out settings. - Page 21 WEP Key: If using WEP encryption (above), manually enter WEP key. Apply: Displays Wireless Network status : Success versus Fail ( Select Apply to apply settings or Press SETUP on Mvix Remote to Apply these settings.) Use the left-arrow button on the Mvix Remote to navigate back to the left-side column.
- Page 22 Admin Password is also required for Factory Reset operation. Perform a Hardware Reboot if Admin Password is lost In order to password-protect individual folders: 1. Using navigation button on the Mvix Remote, select the folder to protect. 2. Press LOCK button on your Mvix Remote 3.
- Page 23 Chapter 3: Basic Setup To access a password-protected folder: 1. Using the arrow-buttons on the Mvix Remote, navigate to the folder and press ENTER / SELECT. 2. An Enter-Password prompt will popup. Enter the folder password to access the folder contents.
- Page 24 A Hardware Reboot may be required if the player fails to perform reliably. Hardware Reboot may also be needed if the Admin Password is forgotten, lost or misplaced. 1. Power off the Mvix Player completely. Remove the power cord from the player. 2. Simultaneously press the STOP and OK buttons on the unit (not on the Remote). Wait for 10-seconds 3.
-
Page 25: Setting Up Network Sharing Using Windows Xp On Your Pc Page.24
Chapter 4: Connecting Mvix to a Network 4.1 Setting Network Sharing using Windows XP on your PC In order to connect your Mvix Player to your local area network or to an individual PC, we need to configure the Internet Protocol on your PC: On your Win-XP PC, Click START. - Page 26 Chapter 4: Connecting Mvix to a Network Select Network Protocol Window opens up as shown here. Click the NWLink IPX/SPX/NetBIOS Compatible Transport Protocol and click OK. Two NWLink items are added to the connection's Properties Click / Select PROTOCOL and Select ADD As shown, two NWLink items are added to the connection's Properties.
- Page 27 Chapter 4: Connecting Mvix to a Network Setting Up Folder / Drive Sharing on Win-XP PC: Right-click the folder or drive that you want to share, and then click SHARING AND SECURITY. Tip: If you want to share your entire My Documents folder, open My Documents, and then click the UP button on the toolbar.
- Page 28 In Windows XP Pro, you may also need to define the users who can have access to these shared folders and files. In order to use folder sharing with Mvix, it is recommended to provide guest access to the shared folders.
- Page 29 Internet Connection Firewall (ICF). ICF is automatically turned on in Win-XP (SP2). If the ICF is turned on on your PC, your Mvix player may not be able to access files residing on your PC. Follow this procedure to disable it: Click the START menu button, and click CONTROL PANEL.
- Page 30 Chapter 4: Connecting Mvix to a Network Installing NETBEUI Protocol As in the previous Protocol installation procedure, open the NETWORK COMPONENT TYPE window. (START -> Right Click on MY NETWORK PLACES, Select PROPERTIES. In LOCAL AREA CONNECTIONS window, Select INTERNET PROTOCOL (TCP/IP) and click INSTALL).
- Page 31 Switch / Hub / Router to share the media files residing within folders or drives on your (wired-networked) PC. Use the left -arrow button on the Mvix Remote to navigate back to the left-side column. From the left-side navigation column, use the arrow keys and select “NETWORK”...
-
Page 32: Wireless Network Page.31
Chapter 4: Connecting Mvix to a Network 4.3 Wireless Network Mvix player is equipped to be connected to your Wireless Network and is capable of streaming media files directly from your PC. Upon completing the setup as described below, the Mvix player will acquire the IP address automatically from your router. - Page 33 Once done, navigate to OK and press ENTER / SELECT. ENTERING WEP KEY: Using the Mvix Remote, navigate to WEP and press ENTER/SELECT. A Key-Panel Window pops up on the TV Screen. On the Key Panel Window, navigate and SELECT each alphanumeric character to manually enter the WEP accurately.
-
Page 34: Media Playback
Chapter 5: Media Playback 5.1 Video Playback When the Mvix player boots up, a list of all recently-played video files is displayed on the main panel. The displayed list (icons) consists of the last SIX recently-played video files. Using the Remote, navigate to one of these files and press ENTER / SELECT. - Page 35 Synchronizing Subtitle Playback Modifying Brightness Settings Changing Saturation Settings MVIX REMOTE TIPS: Press the INFO button to display video file info such as Video/Audio Format, File Size, Subtitle, Time etc. Press the GOTO button and enter the time to jump to a desired time-stamp of the video file.
- Page 36 Chapter 5: Media Playback Changing Subtitle Display Position Choosing Subtitle Language Choosing Subtitle File INFO BUTTON: Display Basic File Information GOTO BUTTON: Jump to desired time stamp. Unicorn Information System...
-
Page 37: Audio Playback Page.36
To playback JUKEBOX files, simply, use the PREV / NEXT buttons. If you press the AUDIO button on the Mvix remote, a list of all available audio files will be displayed. Once the audio files are visible on the display screen (e.g. TV), navigate (using the Remote) to the desired file and press PLAY (Sequential playback) or ENTER/SELECT (play selected file only). - Page 38 Chapter 5: Media Playback Use the RND / SEQ button on the Mvix Remote Control to toggle between Random vs Sequential playback of Audio files in JUKEBOX list. This feature can also be used for IMAGE playback. Use the REPEAT button on the Mvix Remote Control to play an audio (music) file repeatedly.
-
Page 39: Image Playback Page.38
Chapter 5: Media Playback 5.3 Image Playback Mvix provides playback of digital image files residing on your PC (via network streaming), external storage device (via USB-Host) or local IDE-HDD (installed inside the Mvix player) A list of available devices is as depicted in this image. -
Page 40: Mixed-Media Playback Page.39
MIXED media mode: It is a convenient and efficient to move between folders and select and play the desired media files. REMEMBER: Use PLAY button on Mvix remote to play all files in a folder continuously and sequentially. Use ENTER button on Mvix remote to play the individually-selected file only. -
Page 41: Using My List For Media Playback Page.40
Mvix Remote Control. Select the file(s) and/or folder(s) that you will like to include in MY LIST and press the ADD button on the Mvix Remote. The file / folder will be added to MY LIST. The ADD icon will be visible on the main panel to confirm addition of an item to MY LIST. -
Page 42: Play Music Files Randomly Or In Shuffle Mode
6.6 … backup and play a DVD? A movie DVD consists of a bunch of VOB and IFO files. These files can be transferred to the Mvix Player via the USB2.0 or USB-Host Port. The files can be transferred from a PC, an external storage device, a USB flash drive or even an external DVD-ROM. -
Page 43: Chapter 7: Firmware Upgrade
1) Connect your Mvix Hi-Def Multimedia Player to your TV and power-on the player. 2) Press the SETUP button on the Remote Control. Using the Mvix Remote, navigate (arrow buttons), scroll down and Select ‘MISC’. Then use the RIGHT ARROW button on the Mvix Remote to scroll down and select “SHOW FIRMWARE VER”... -
Page 44: Troubleshooting
WARNING: To reduce the risk of fire or electric shock, do not expose your Mvix Media player to rain or moisture. For any further assistance please visit our support site at www.mvixusa.com/support or call costumer service at (866) 310 4923. -
Page 45: Limited Warranty
This includes, but is not limited to, prerecorded material, whether copyrighted or not.) Unicorn Information Systems Co. Ltd., Mvix(USA), Inc. and its other partners and distributors DO NOT assume any responsibility in any way for how you choose to use this product, associated firmware and this manual. -
Page 46: Copyright And Legal Attributions Page.45
Federal law provides severe civil and criminal penalties for the unauthorized reproduction, distribution, rental or digital transmission of copyrighted video and audio files. (Title 17, United States Code, Sections 501 and 506). Mvix players are designed to assist you in backing up, storing and reproducing material which you own the copyright for or for which you have obtained permission from the copyright owner. -
Page 47: Contact Information
Tel. 82 2 420 2713 Fax. 82 2 420 2723 sales@eunicorn.co.kr USA: Marketed and Distributed by: Mvix(USA), Inc. www.mvixusa.com Tel. (866) 310 4923 [Toll Free] Fax (866) 614 3880 [Toll Free] sales@mvixusa.com Technical Support: http://support.mvixusa.com Unicorn Information System... -
Page 48: Glossary
(HDTV) NTSC, would allow. MVIX(USA), Inc. MAKES THIS DOCUMENT AVAILABLE ON AN "AS IS" BASIS AND MAKES NO WARRANTY, EXPRESS OR IMPLIED, AS TO THE ACCURACY, CAPABILITY, EFFICIENCY, MERCHANTABILITY, OR FUNCTIONING OF THIS DOCUMENT. IN NO EVENT WILL MVIX(USA), Inc. BE LIABLE FOR ANY GENERAL, CONSEQUENTIAL, INDIRECT, INCIDENTAL, EXEMPLARY, OR SPECIAL DAMAGES, EVEN IF MVIX(USA), Inc. - Page 50 Unicorn Information System...
- Page 51 Unicorn Information System...
- Page 52 Unicorn Information System...
- Page 53 Product Name Mvix MX-760HD Wireless Hi-Definition Media Player Processor SEM8621L (By Sigma Designs) Memory 64MB (RAM), 8MB (Flash) Operating System ucLinux DivX® (3/4/5), AVI, Xvid, MPEG, MPG, VCD(DAT), DVD(VOB, IFO), WMV(WMV-9), Video ASF(WMV-9), TP, TS, TRP Supported Files & Audio...
- Page 54 MX-760HD 5dBi Power Power Unicorn Information System...
- Page 55 Unicorn Information System...
- Page 56 Unicorn Information System...
- Page 57 Unicorn Information System...
- Page 58 Unicorn Information System...
- Page 59 Unicorn Information System...
- Page 60 Unicorn Information System...
- Page 61 (Vol, Contrast, Subtitle Media (Video / Audio / Photo / Mixed) DVD / VCD Unicorn Information System...
- Page 62 Unicorn Information System...
- Page 63 Unicorn Information System...
- Page 64 Unicorn Information System...
- Page 65 Unicorn Information System...
- Page 66 Unicorn Information System...
- Page 67 Unicorn Information System...
- Page 68 Unicorn Information System...
- Page 69 Unicorn Information System...
- Page 70 Unicorn Information System...
- Page 71 Unicorn Information System...
- Page 72 Unicorn Information System...
- Page 73 Unicorn Information System...
- Page 74 Unicorn Information System...
- Page 75 Unicorn Information System...
- Page 76 Unicorn Information System...
- Page 77 Unicorn Information System...
- Page 78 Unicorn Information System...
- Page 79 Unicorn Information System...
- Page 80 Unicorn Information System...
- Page 81 Unicorn Information System...
- Page 82 Unicorn Information System...
- Page 83 Unicorn Information System...
- Page 84 Unicorn Information System...
- Page 85 Unicorn Information System...
- Page 86 Unicorn Information System...
- Page 87 Unicorn Information System...
- Page 88 Unicorn Information System...
- Page 89 Unicorn Information System...
- Page 90 Unicorn Information System...
- Page 91 Unicorn Information System...
- Page 92 Unicorn Information System...
- Page 93 Unicorn Information System...
- Page 94 Unicorn Information System...
- Page 95 Unicorn Information System...
- Page 96 Unicorn Information System...
- Page 97 Unicorn Information System...
- Page 98 Unicorn Information System...
- Page 99 Unicorn Information System...
- Page 100 Unicorn Information System...
- Page 101 Unicorn Information System...
Need help?
Do you have a question about the MX-760HD and is the answer not in the manual?
Questions and answers