Table of Contents
Advertisement
Available languages
Available languages
Safety Instructions ......................... 2-4
Owner's Manual
Operating Instructions
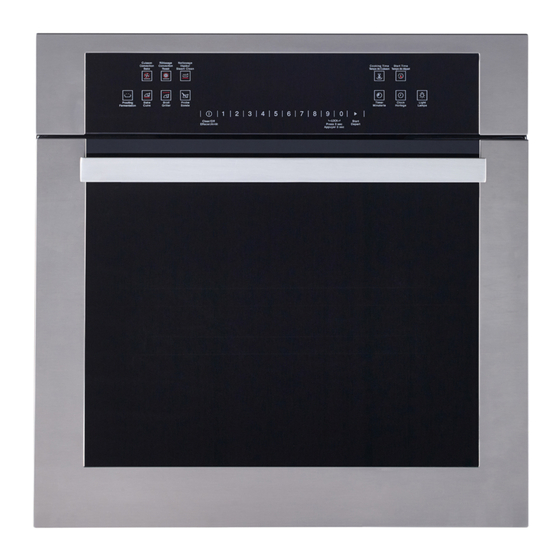
MCRS20SFSS
Clock and Timer ................................. 8
Convection ....................................... 15
Oven Controls ............................... 5-19
Sabbath Feature ................................ 12
Steam Clean ...................................... 21
Special Features .......................... 10, 11
Thermostat ........................................ 20
Timed Baking and Roasting ............... 9
Timed Convection ....................... 18-19
Using the Probe ................................ 14
Care and Cleaning
Control Panel .................................... 24
Glass Surfaces .................................. 24
Heating Element ............................... 24
Lift-Off Oven Door .......................... 22
Light ................................................. 25
Oven Interior .................................... 25
Painted Surfaces ............................... 24
Racks ................................................ 23
Stainless Steel Surfaces .................... 24
Troubleshooting Tips ................. 26-28
Consumer Support
Accessories ....................................... 31
Consumer Support ............. Back Cover
Warranty ........................................... 35
Write the model and serial
numbers here:
Model #
Serial #
You can find them on a label on the
front of the oven behind the oven door.
Pub. No. 29-5929
222D9114P001
1
Advertisement
Table of Contents

Related Manuals for Moffat MCRS20SFSS


Summary of Contents for Moffat MCRS20SFSS
- Page 1 Safety Instructions ......2-4 Owner's Manual Operating Instructions MCRS20SFSS Clock and Timer ......... 8 Convection ........15 Oven Controls ....... 5-19 Sabbath Feature ........ 12 Steam Clean ........21 Special Features ......10, 11 Thermostat ........20 Timed Baking and Roasting ....9 Timed Convection .......
- Page 2 IMPORTANT SAFETY INFORMATION. READ ALL INSTRUCTIONS BEFORE USING. WARNING! For your safety, the information in this manual must be followed to minimize the risk of fire or explosion, electric shock, or to prevent property damage, personal injury, or loss of life. SAFETY PRECAUTIONS When using electrical appliances, basic safety precautions should be followed, including the following: Use this appliance only for its intended purpose...
- Page 3 WARNING! SAFETY PRECAUTIONS Do not store flammable materials in an Stand away from the oven when opening the oven. oven door. Hot air or steam which escapes can cause burns to hands, face and/or eyes. PRECAUTION: Items of interest to children Do not heat unopened food containers.
-
Page 4: Save These Instructions
IMPORTANT SAFETY INFORMATION. READ ALL INSTRUCTIONS BEFORE USING. WARNING! SAFETY PRECAUTIONS Pulling out the rack to the stop-lock is a After broiling, always take any broiler pan out convenience in lifting heavy foods. It is also a of the oven and clean it. Leftover grease in a precaution against burns from touching hot broiler pan can catch fire next time you use the surfaces of the door or oven walls. -
Page 5: Using The Oven Controls
Using the oven controls. Throughout this manual, features and appearance may vary from your model. Oven Control, Clock and Timer Features and Settings BAKE Pad COOKING TIME Pad Touch to select the bake function. Touch and then touch the number pads to set the amount of time you want your food to BROIL Pad cook. -
Page 6: Aluminum Foil
Using the oven controls. To avoid possible burns, place the racks in the desired position before you turn the oven on. Before you begin... The racks have stop-locks, so that when To remove a rack, pull it toward you, tilt placed correctly on the supports, they will the front end up and pull it out. - Page 7 How to Set the Oven for Broiling 4 Touch the START pad. Place the meat or fish on a broiler grid in a broiler pan designed for broiling. When broiling is finished, touch the If your oven is connected to 208 volts, rare steaks CLEAR/OFF pad.
-
Page 8: Clock And Timer
Using the clock and timer. To Set the Clock The clock must be set to the correct time of Touch the CLOCK pad. day for the automatic oven timing functions Touch the number pads. to work properly. The time of day cannot be Touch the START pad. -
Page 9: Timed Baking And Roasting
Using the timed baking and roasting features. NOTE: Foods that spoil easily -such as milk, eggs, fish, stuffings, poultry and pork- should not be allowed to sit for more than 1 hour before or after cooking. Room temperature promotes the growth of harmful bacteria. 8e sure that the oven light is off because heat from the bulb will speed harmful bacteria growth. -
Page 10: Special Features Of Your Oven Control
Special features of your oven control. Your new touch pad control has additional features that you may choose to use. The following are the features and how you may activate them. The special feature modes can only be activated while the display is showing the time of day. They remain in the control's memory until the steps are repeated. - Page 11 12-Hour, 24-Hour or Clock Blackout Your control is set to use a 12-hour clock. Touch the CLOCK pad again to change to the 24 hour military time clock. The If you would prefer to have a 24-hour display will show 24 hr. If this is the military time clock or black out the clock choice you want, touch the START pad.
-
Page 12: Sabbath Feature
Using the Sabbath feature. (Designed for use on the Jewish Sabbath and Holidays) The Sabbath feature can be used for baking/roasting only. It cannot be used for convection, broiling or Delay Start cooking. NOTE: The oven light comes on automatically when the door is opened and goes off when the door is closed. The bulb may be removed. - Page 13 How to Set for Timed Baking/Roasting-Immediate Start and Automatic Stop Make sure the clock shows the correct time of day and the oven is off. Touch and hold both the BROIL and Using the number pads, enter the desired BAKE pads at the same time, until the temperature.
-
Page 14: Using The Probe
Using the probe. To prevent burns, do not unplug the probe from the oven outlet until the oven has cooled. Do not store the probe in the oven. For many foods, especially roasts and poultry, internal food temperature is the best test for doneness. The temperature probe takes the guesswork out of cooking foods to the exact doneness you want. -
Page 15: Convection
Using the convection oven. The convection oven fan shuts off when the oven door is opened. DO NOT leave the door open for long periods of time while using convection cooking. Roasts or poultry should be cooked on rack To help you understand the difference between convection bake and roast and position (A). - Page 16 Using the convection oven. Cookware for Convection Cooking Metal and Glass Before using your convection oven, check to see if your cookware leaves room for air Any type of cookware will work in your circulation in the oven. If you are baking convection oven.
- Page 17 How to Setthe Oven for Convection Roasting When Using the Probe The display will flash PROBE and the oven control will signal if the probe is inserted For best results when roasting large into the outlet, and you have not set a probe To prevent burns, do not unplug the probe from turkeys and roasts, we recommend temperature and touched the Start pad.
- Page 18 Using the oven timed convection baking features. You will hear a fan while cooking with this feature. The fan will stop when the door is opened but the heat will not turn off. NOTE: Foods that spoil easily-such as milk, eggs, fish, stuffings, poultry and pork-should not be allowed to sit for more than 1 hour before or after cooking.
- Page 19 Using the oven timed convection baking features. How to Set a Delayed Start and Automatic Stop NOTE: If you would like to check the times you The oven will turn on at the time of day you have set, touch the Start Time pad to check the set, cook for a specific length of time and start time you have set or touch the Cooking then turn off automatically.
-
Page 20: Thermostat
Adjust the oven thermostat - Do it yourself You may find that your new oven cooks differently than the one it replaced. Use your new oven for a few weeks to become more familiar with it. If you still think your new oven is too hot or too cold, you can adjust the thermostat yourself. Do not use thermometers, such as those found in grocery stores, to check the temperature setting of your oven. -
Page 21: Steam Clean
Using Steam Clean During the steam clean cycle, the The wall oven should be at room temperature before CAUTION oven bottom becomes hot beginning the Steam Clean cycle. If the oven is too hot, enough to cause burns. Wait "hot" will appear on the display and the cycle will not until the cycle is over (30 minutes) before wiping the inside activate until the oven cools down. -
Page 22: Lift-Off Oven Door
Care and cleaning of the oven. Be sure electrical power is off before cleaning any part of the oven. How to Remove Protective Shipping Film and Packaging Tape Carefully grasp a corner of the protective To assure no damage is done to the finish of shipping film with your fingers and slowly the product, the safest way to remove the peel it from the appliance surface. -
Page 23: Racks
Oven Rack and Accessories. Removing and Installing Oven Racks Oven Racks Locate broiler pan The flat conventional rack (fig. 1) and the The wall oven has a broiler pan for purposes full-extension rack (fig. 2) can be installed at of put food on the role of "roasting". any level position into cavity. -
Page 24: Glass Surfaces
Care and cleaning of the oven. Be sure electrical power is off and all surfaces are cool into cavity before cleaning any part of the oven. Oven Racks Clean the oven racks with an abrasive To make the racks slide more easily; apply a cleanser or steel wool. -
Page 25: Light
Non-Self-Clean Oven Interior With proper care, the porcelain enamel The ammonia fumes will help loosen the finish on the inside of the oven —top, burned-on grease and food. bottom, sides, back and inside of the If necessary, you may use an oven cleaner. doorwill stay new—looking for years. -
Page 26: Troubleshooting Tips
Before you call for service... Troubleshooting Tips Save time and money! Review the charts on the following pages first and you may not need to call for service. Problem Posible Causes What To Do Control signals after • Touch the BAKE pad and desired temperature. You forgot to enter a bale entering cooking time temperature or cleaning time. - Page 27 Problem Posible Causes What To Do Oven temperature too • See the Adjust the oven thermostat section—Do it Oven thermostat needs adjustment. hot or too cold yourself!. Oven will not work • Replace the fuse or reset the circuit breaker. A fuse in your home may be blown or the circuit breaker tripped.
- Page 28 Problem Posible Causes What To Do "F- and a number or • Touch the CLEAR/OFF pad. Allow the oven to cool You have a function error code. letter" flash in the for one hour. Put the oven back into operation. display •...
- Page 29 Accessories Looking for something more? You can find these accessories and many more at GEAppliances.com (US) or www.GEAppliances.ca (Canada), or call 800.626.2002 (U.S.) or 800.661.1616 (Canada) (during normal business hours.) Have your model number ready. Oven racks Light Bulbs Experience these other great products to keep your kitchen looking great! Ceramic Cooktop Ceramic Cooktop Stainless Steel...
- Page 30 Notes...
- Page 31 Notes...
- Page 32 Notes...
- Page 33 Please place in envelope and mail to: Veuillez mettre dans une enveloppe et envoyez à: OWNERSHIP REGISTRATION P.O. BOX 1780 MISSISSAUGA, ONTARIO L4Y 4G1 (FOR CANADIAN CONSUMERS ONLY - POUR RÉSIDENTS CANADIENS SEULEMENT)
- Page 34 OWNERSHIP REGISTRATION CERTIFICATE – FICHE D’INSCRIPTION DU PROPRIÉTAIRE Please register your product to enable us to contact you in the Veuillez enregistrer votre produit afin de nous permettre de remote event a safety notice is issued for this product and to allow communiquer avec vous si jamais un avis de sécurité...
- Page 35 GE Built-In Electric Oven Warranty. All warranty service provided by our Factory Service Centers, or an Staple your receipt here. authorized Customer Care® technician. To schedule service 24 hours a Proof of the original purchase date is day, call 1.800.361.3400. Please have serial number and model needed to obtain service under the warranty.
-
Page 36: Consumer Support
Consumer Support Schedule Service Expert repair service is only one step away from your door. Call 1-800-361-3400, 24 hours a day, 7 days a week. Parts and Accessories To inquire about purchasing a part or an accessory for your appliance, call our National Parts Center at 1-800-661-1616. -
Page 37: Table Of Contents
Sécurité ..........38 à 40 Manuel de l'utilisateur Utilisation Commandes du four ...... 41 à 55 MCRS20SFSS Convection .............51 Convection minutée ......54, 55 Cuisson et rôtissage minutés ....45 Horloge et minuterie .........44 Fonctions spéciales ......46, 47 Mode sabbat ..........48 Nettoyage à... -
Page 38: Sécurité
CONSIGNES DE SÉCURITÉ IMPORTANTES. LISEZ TOUTES LES INSTRUCTIONS AVANT D’UTILISER VOTRE APPAREIL. AVERTISSEMENT! Pour votre sécurité et pour réduire les risques d’incendie, d'explosion, de choc électrique, de dommages matériels, de blessures ou même d'accident mortel, vous devez vous conformer aux instructions contenues dans ce manuel. - Page 39 AVERTISSEMENT! MESURES DE SÉCURITÉ Éloignez-vous du four lorsque vous en ouvrez la porte. De l'air chaud ou de la vapeur s'échappant dans le four. du four pourrait brûler vos mains, votre visage et/ ATTENTION : ou vos yeux. Les articles pouvant susciter l'intérêt des enfants ne devraient pas Ne faites pas chauffer de récipient fermé.
- Page 40 CONSIGNES DE SÉCURITÉ IMPORTANTES. LISEZ TOUTES LES INSTRUCTIONS AVANT D’UTILISER VOTRE APPAREIL. AVERTISSEMENT! MESURES DE SÉCURITÉ Tirer la grille jusqu'au cran d'arrêt permet de Après avoir utilisé le gril, retirez toujours la soulever plus facilement les plats les plus lourds. lèchefrite du four pour la laver.
-
Page 41: Utilisation Des Commandes Du Four
Utilisation des commandes du four Les caractéristiques et l'apparence de l'appareil montré dans ce manuel peuvent varier selon le modèle. Caractéristiques et réglage des commandes, de l'horloge et de la minuterie du four CUIRE TEMPS DE DÉPART Appuyez sur cette touche pour sélectionner la Utilisez cette touche avec la touche TEMPS DE CUISSON pour programmer le départ et l'arrêt fonction de cuisson au four. -
Page 42: Avant De Commencer
Utilisation des commandes du four Pour éviter les brûlures, placez la ou les grilles à l'emplacement désiré avant d'allumer le four. Avant de commencer... Les grilles possèdent des crans d'arrêt. Ainsi, Pour retirer une grille, tirez-la vers vous, si elles sont placées correctement, elles soulevez-en l'avant et sortez-la. - Page 43 Pour programmer le gril Placez la viande ou le poisson sur la grille Appuyez sur la touche DÉPART. d'une lèchefrite conçue pour la cuisson au gril. touche EFFACER/ARRÊT. Si votre four est connecté sur du 208 volts, vous pouvez cuire les biftecks crus au gril en préchauffant le gril et en positionnant la grille un cran plus haut.
- Page 44 Utilisation de l'horloge et de la minuterie Pour régler l'horloge L'horloge doit être réglée à l'heure exacte Appuyez sur la touche HORLOGE. pour que les fonctions minutées fonctionnent Appuyez sur les touches numériques. correctement. L'heure ne peut être changée Appuyez sur la touche DÉPART. lors d'un programme minuté...
- Page 45 Utilisation des fonctions minutées : cuisson et rôtissage REMARQUE : Les aliments rapidement périssables – comme le lait, les œufs, le poisson, la farce, la volaille ou le porc – ne doivent pas être laissés à température ambiante pendant plus d’une heure avant ou après la cuisson. Les bactéries nocives prolifèrent rapidement à...
-
Page 46: Fonctions Spéciales
Fonctions spéciales des commandes de votre four Votre nouveau tableau de commande tactile possède des fonctions supplémentaires que vous pouvez décider d'utiliser. Vous trouverez ci-dessous une liste de ces fonctions avec une explication de leur mode d'activation. Les fonctions spéciales ne peuvent être activées que lorsque l'heure du jour est indiquée sur l'af cheur. Elles restent en mémoire jusqu'à... - Page 47 Horloge en mode 12 heures, 24 heures ou éteinte Votre tableau de commande est réglé pour Appuyez de nouveau sur la touche af cher une horloge en mode 12 heures. HORLOGE de l'heure en mode 24 heures. « 24 hr » mode 24 heures de type militaire ou éteindre convient, appuyez sur la touche DÉPART.
-
Page 48: Mode Sabbat
Utilisation du mode sabbat (Conçu pour être utilisé lors du sabbat et des fêtes juives) Le mode sabbat ne peut être utilisé que pour la cuisson au four traditionnelle ou le rôtissage. Il ne peut pas être utilisé pour la cuisson à... - Page 49 Programmer la cuisson ou le rôtissage minutés – Départ immédiat et arrêt automatique Assurez-vous que l'horloge af che l'heure exacte et que le four est arrêté. Appuyez simultanément sur les touches Entrez la température désirée à l'aide des GRILLER et CUIRE, et maintenez-les touches numériques.
- Page 50 Utlisation de la sonde Pour éviter les brûlures, ne débranchez pas la sonde de la prise avant que le four n'ait refroidi. Ne ATTENTION rangez pas la sonde dans le four. Pour plusieurs types d'aliments, plus particulièrement les rôtis et la volaille, la température interne constitue la meilleure indication de cuisson.
-
Page 51: Grilles
Utilisation du four à convection Le ventilateur de convection s'arrête lorsque la porte du four est ouverte. NE LAISSEZ PAS la porte ouverte longtemps pendant la cuisson à convection. Pour vous aider à comprendre la différence Les rôtis et la volaille doivent être cuits sur une entre la cuisson et le rôtissage traditionnels et grille à... - Page 52 Utilisation du four à convection Ustensiles pour la cuisson à convection Métal et verre Ce type d'ustensile de cuisson est compatible d'espace pour que l'air circule dans le four. avec votre four à convection. Néanmoins, Si vous cuisinez avec plusieurs ustensiles, les ustensiles métalliques chauffent plus laissez de l'espace entre eux.
- Page 53 Pour programmer le rôtissage à convection avec sonde « PROBE » (sonde) clignote et le tableau ATTENTION de commande émet un signal sonore si la sonde est branchée dans la prise, mais que Pour de meilleurs résultats lorsque vous cuisez de grosses Pour éviter les brûlures, ne débranchez pas la vous n'avez ni programmé...
- Page 54 Utilisation des fonctions minutées de cuisson à convection Vous pouvez entendre le ventilateur lors de l'utilisation de la cuisson à convection. Le ventilateur s'arrête lorsque vous ouvrez la porte, mais pas le brûleur. REMARQUE : Les aliments rapidement périssables – comme le lait, les œufs, le poisson, la farce, la volaille ou le porc – ne doivent pas être laissés à...
- Page 55 Utilisation des fonctions minutées de cuisson à convection Programmer un départ différé et un arrêt automatique Le four se met en marche à l'heure qui a été REMARQUE : Si vous voulez véri er les heures programmées, appuyez sur la touche TEMPS puis s'éteint automatiquement.
- Page 56 Réglage du thermostat du four – Faites-le vous-même! Il se peut que vous trouviez que votre nouveau four cuit différemment que votre ancien four. Utilisez votre nouveau four pendant quelques semaines pour vous y familiariser. Si vous pensez toujours que votre four chauffe trop ou ne chauffe pas assez, vous pouvez régler le thermostat vous-même.
- Page 57 Utilisation du nettoyage à la vapeur Lors du cycle de nettoyage à la Le four encastré doit être à la température de la pièce avant ATTENTION vapeur, le fond du four devient d'entamer le cycle de nettoyage à la vapeur. Si le four est assez chaud pour causer des trop chaud, «...
-
Page 58: Porte De Four Amovible
Entretien et nettoyage du four Assurez-vous que l'alimentation électrique du four est coupée avant de le nettoyer. Pour retirer la pellicule protectrice et le ruban adhésif d'emballage Attrapez soigneusement un des coins de la pellicule protectrice avec vos doigts et soit pas endommagé... - Page 59 Grilles et accessoires de four Retrait et installation des grilles du four Grilles de four Repérez la lèchefrite Le four est doté d'une lèchefrite à utiliser en cas de rôtissage d'aliments. tout niveau de la cavité. Fig. 1 Installation de la grille traditionnelle AVERTISSEMENT! Insérez les guides en forme de C dans les Placez toujours la lèchefrite sur la grille du four.
-
Page 60: Surfaces En Acier Inoxydable
Entretien et nettoyage du four Assurez-vous que l'alimentation électrique est coupée et que toutes les surfaces sont froides dans la cavité avant de nettoyer l'une ou l'autre des parties du four. Grilles de four Nettoyez les grilles du four à l'aide d'un Pour que les grilles glissent plus facilement, nettoyant abrasif ou d'une laine d'acier. - Page 61 Intérieur de four sans autonettoyage Les vapeurs d’ammoniaque aideront à désincruster les aliments et les graisses brûlés. arrière du four et intérieur de la porte) gardera Vous pouvez vous servir d’un nettoyant pour son aspect neuf pendant de nombreuses années. four, si nécessaire.
-
Page 62: Dépannage
Avant de contacter le service de dépannage... Dépannage Économisez du temps et de l’argent! Reportez-vous au tableau suivant pour éviter tout appel de service qui ne serait pas nécessaire. Problème Causes possibles Solutions Un signal sonore est émis Vous avez oublié d'entrer la température de CUIRE et entrez la température désirée. - Page 63 Problème Causes possibles Solutions Température du four trop Le thermostat du four doit être réglé. chaude ou trop froide vous-même! ». Le four ne fonctionne pas Un fusible de votre domicile peut être grillé ou le disjoncteur s’est déclenché. Les commandes du four sont mal réglées. Bruits de crépitement ou Ces sons proviennent du métal qui chauffe et de craquement...
- Page 64 Problème Causes possibles Solutions La lettre « F– » et un Il s'agit d'un code d'erreur de fonction. EFFACER/ARRÊT. Laissez le four refroidir chiffre ou une lettre pendant une heure. Rallumez le four. Si le code de fonction réapparaît. rétablissez-la. Si le code d'erreur de fonction réapparaît, contactez un service de réparation.
-
Page 65: Accessoires
Accessoires Vous manquez de quelque chose? Vous pouvez trouver ces accessoires et bien d'autres encore sur GEAppliances.com (É.-U.) ou www.electromenagersge.ca (Canada), ou en appelant le 1-800-626-2002 (É.-U.) ou le 1-800-661-1616 (Canada) (pendant les heures normales de bureau). Ayez le numéro de modèle de votre appareil à portée de main. Grilles de four Ampoules Ensemble de nettoyage... - Page 66 Remarques...
- Page 67 Remarques...
- Page 68 Remarques...
- Page 69 Please place in envelope and mail to: Veuillez mettre dans une enveloppe et envoyez à : OWNERSHIP REGISTRATION P.O. BOX 1780 MISSISSAUGA, ONTARIO L4Y 4G1 (FOR CANADIAN CONSUMERS ONLY - POUR RÉSIDENTS CANADIENS SEULEMENT)
- Page 70 OWNERSHIP REGISTRATION CERTIFICATE – FICHE D’INSCRIPTION DU PROPRIÉTAIRE Please register your product to enable us to contact you in Veuillez enregistrer votre produit afin de nous permettre de the remote event a safety notice is issued for this product communiquer avec vous si jamais un avis de sécurité concernant and to allow for efficient communication under the terms of ce produit était émis et de communiquer facilement avec vous en our warranty, should the need arise.
-
Page 71: Garantie
Garantie du four électrique encastré GE Toutes les réparations sous garantie sont effectuées par nos Centres de Agrafez votre facture ici. réparation ou par nos réparateurs agréés Customer Care®. Pour Une preuve de la date d’achat faire la demande d'une réparation, 24 heures sur 24, téléphonez au d’origine est requise pour 1-800-361-3400. -
Page 72: Service À La Clientèle
Service à la clientèle Demande de réparation Le service de réparation expert n'est qu'à un pas de chez vous. Appelez le 1-800-361-3400, 24 heures sur 24, 7 jours sur 7. Pièces et accessoires Pour toute question concernant l'achat d'une pièce ou d'un accessoire pour votre appareil, appelez notre Centre national des pièces au 1-800-661-1616.
Need help?
Do you have a question about the MCRS20SFSS and is the answer not in the manual?
Questions and answers