Table of Contents
Advertisement
Advertisement
Table of Contents

Related Manuals for Digno Keitai


Summary of Contents for Digno Keitai
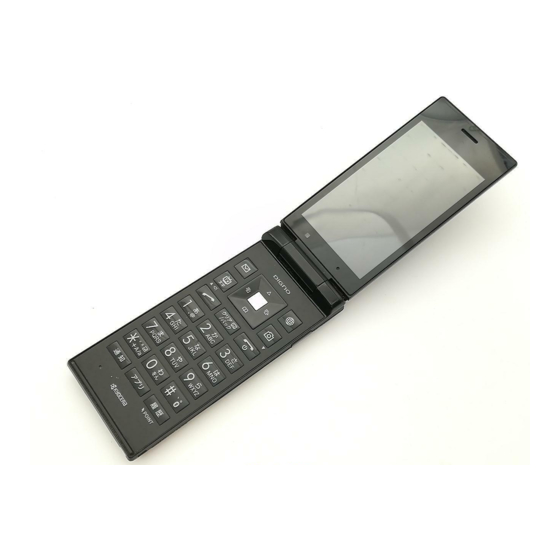
- Page 1 DIGNO ケータイ ® User Guide...
-
Page 3: Table Of Contents
About the User Guide............3 Getting Started Package Contents............... 6 Parts & Functions.............. 6 USIM Card Installation............9 Handset Memory/SD Card..........11 Inserting/Removing Battery..........14 DIGNO ケータイ ® Charging Battery.............. 15 User Guide Contents Power On/Off..............17 Importing Data from Other Mobile Phones....18 Display................ - Page 4 Data Broadcast (Japanese)..........63 Camera/Image Editing Capturing Photos/Recording Videos....... 66 Music/Videos Music Files.................70 Viewing Videos..............70 Data Folder Handling Data (Data Folder)..........72 Connectivity & File Backup Using Infrared Transmission..........76 Settings in Common Wallpaper & Display Settings..........80 Sound/Notification Settings..........80 Lock & Security Settings..........81 Network Settings.............
-
Page 5: About The User Guide
Display. Key labels in the User Guide are simplified for description purposes and differ with actual Display. Other Notations In the User Guide, the product is referred to as "handset." microSD™/microSDHC™ Card is referred to as "SD Card." "501KC" here refers to this mobile phone "DIGNO ケータイ ® (Keitai)."... -
Page 7: Getting Started
Getting Started Package Contents............... 6 Parts & Functions.............. 6 USIM Card Installation............9 Handset Memory/SD Card..........11 Inserting/Removing Battery..........14 Charging Battery.............. 15 Power On/Off..............17 Importing Data from Other Mobile Phones....18 Display................20 Display-Top (Status Bar) Indicators....... 20 Checking Handset Status & Notifications (Notifications/ Settings Window)............. -
Page 8: Package Contents
Package Contents Parts & Functions Package Contents Handset Parts ・Handset (DIGNO ケータイ(Keitai)) ® ・Battery (KYBAH1) ・クイックスタート (Japanese) ・お願いとご注意 (Japanese) ・Warranty (Japanese) Name Description Earpiece Hear other party's voice through this. Screens appear here. Display Brightness Detects surrounding brightness. Sensor Maintain handset performance. Do not cover with sticker, etc. - Page 9 Handset Opens and Closes Handset Closed Be sure to close handset before carrying with you. Handset Opened Open handset to operate keys or call. Name Description Illuminates while charging or for Incoming/ notifications (missed calls, new messages, Charging LED etc.). Clock and Notification Indicators for new Sub-display calls, mail, etc.
- Page 10 Handset Keys Open Answer Memo List. Long Press to (Clear/Back toggle Auto answering on/off. Key) Show/hide information in Standby. Long (Power/End Press for Power Off screen. Key) Activate Write now . Long Press to toggle Bluetooth on/off. Key) ® Open application history. (History Key) 1 Operates when setting enabled.
-
Page 11: Usim Card Installation
USIM Card Installation Slide USIM Card in direction shown into USIM Card Slot Cover USIM Card is an IC card containing customer and authentication information, including handset number. Inserting USIM Card Always power off beforehand. ・Note location of notch. Remove Back Cover Lock USIM Card Slot Cover ・Gently lift Back Cover by notch in direction shown with finger. -
Page 12: Removing Usim Card
Removing USIM Card Lock USIM Card Slot Cover Always power off beforehand. Remove Back Cover ・ Lower USIM Card Slot Cover in direction , and slide with pad of finger in direction until it clicks locked. ・Gently lift Back Cover by notch in direction shown with finger. -
Page 13: Handset Memory/Sd Card
Handset Memory/SD Card Remove Battery Handset supports SD Card up to 32 GB. Some SD Cards may not operate properly. Handset memory is available for saving system data, applications, captured photos and movies, and other data. Handset Memory/SD Card Cautions ・Gently lift Battery by bottom in direction shown. - Page 14 Removing SD Card Insert Battery Always power off beforehand. Remove Back Cover ・ Slide Battery in direction onto metal terminals in handset, and press into handset in direction ・Gently lift Back Cover by notch in direction shown with Fit Back Cover on handset, and press Back Cover in directions finger.
- Page 15 Formatting SD Card Lock SD Card Slot Cover When using a new SD Card for the first time, always format (initialize) it on handset. ・Formatting deletes all SD Card files. Format SD Card with caution. ・When formatting, keep handset charged or charge it adequately beforehand.
-
Page 16: Inserting/Removing Battery
Inserting/Removing Battery Erase everything Inserting Remove Back Cover All SD Card files are deleted. ・If Lock screen is "PIN" or "Password", a screen appears for entering the PIN/password. ・Gently lift Back Cover by notch in direction shown with finger. Insert Battery ・... -
Page 17: Charging Battery
Charging Battery Removing Charge Battery inserted in handset. Always power off beforehand. Incoming/Charging LED Remove Back Cover Lights red during charging, and goes out once charging completes. ・Incoming/Charging LED flashing while charging indicates an abnormality with Charger, Battery, or that equipment has reached the end of its service life, and that Battery is not charging properly. - Page 18 Charging with Desktop Holder Open External Device Port Cover and insert Micro USB plug on Desktop Holder and AC Charger are optional accessories. Use AC Charger SoftBank-specified Desktop Holder/AC Charger. For details on Desktop Holders/AC Chargers and other peripheral equipment, see SoftBank Website. Charging with Desktop Holder KYEAH1 and AC Charger SB- AC12-HDQC is described here.
-
Page 19: Power On/Off
Power On/Off After charging, remove handset from Desktop Holder, and then unplug AC Charger and retract blades Power On Remove AC Charger from Desktop Holder Long Press until SoftBank logo appears Handset powers on, and Standby appears after a while. ・If confirmation appears, follow onscreen prompts. -
Page 20: Importing Data From Other Mobile Phones
Importing Data from Other Mobile Enabling Bluetooth ® Phones Settings More settings Bluetooth Receiving Data by Infrared Align infrared ports on handset and sending device. ・Operation may differ depending on type of data being received. Tool Infrared Bluetooth settings open. ®... - Page 21 Receiving Data by Bluetooth ® Select file Handset receives a data receive request when data is sent from a paired device. To receive data: Follow onscreen prompts File is saved. ・If confirmation appears, follow onscreen prompts. Notifications Window opens. Select notification File is received.
-
Page 22: Display
Display Display-Top (Status Bar) Indicators Standby Indicators (new message notification, handset status, etc.) appear on Status Bar. Standby appears as follows. Add widgets and applications with Standby settings. Status Bar Layout Status Bar Notifications, warnings, etc. appear here. (Notification Date/time Indicators) Widgets/applications Handset status and other information appear here. -
Page 23: Status Indicators
Notification Indicators Status Indicators Notification Indicators appear on the left. Status Indicators appear on the right. Indicator Description Indicator Description Urgent News Battery Strength Call Arriving/Calling/in Progress/Call on Charging Hold Signal Strength Missed Call No Signal New Answer Memo No USIM Card New Voicemail 4G Data Connectable New S! Mail/SMS... -
Page 24: Checking Handset Status & Notifications (Notifications/Settings Window)
Checking Handset Status & Using Settings Window Notifications (Notifications/ Settings Window) Use Settings Window to toggle Airplane mode, Bluetooth , etc. ® on/off and to set a Manner mode. Open notifications and check handset status. ・ To make detailed settings, from Standby, Settings Using Notifications Window (Long Press) -
Page 25: Sub-Display
Sub-display Information on Sub-display View signal, battery, and time as well as missed calls, and new Information appears for voice call, mail, and other mail. Information appears for missed voice calls, new mail, etc. notifications. Appearing information: Using Sub-display Information Description Call/S! Mail/SMS from caller/sender in Saved name... -
Page 26: Security Codes
Security Codes Setting Operation Password Set a four- to eight-digit code. Code Types The following codes are required for handset use. Operation Settings Lock/Security Operation Password can be user-set and changed on handset. password setting Code Description Code for applications and functions Operation requiring a security setting. -
Page 27: Usim Pin
USIM PIN Resetting Operation Password Settings All reset Reset phone USIM PIN and USIM Card Lock Password Reset Follow onscreen prompts ・My SoftBank authentication is required to reset When USIM card lock is enabled, PIN (a code for USIM Card) Operation Password. - Page 28 Enabling USIM PIN Changing USIM PIN When PIN (a code for USIM Card) is enabled, PIN entry is Lock USIM Card to change PIN. See "Enabling USIM PIN" for required for handset use each time handset is powered on details. with USIM Card installed.
-
Page 29: Basic Operations
Basic Operations Basic Operations with this Handset....... 28 Key Operation..............28 How to Use Touch Pointer..........29 Main Menu................. 30 Accessing Applications............. 31 Using Manner Mode............33 Using Airplane Mode............34 Other Basic Operations............35... -
Page 30: Basic Operations With This Handset
Basic Operations with this Key Operation Handset Cursor Operation with Keys Handset Keys Operate cursor in screen with Almost all operations can be performed by pressing the keys. Touch Pointer Operation Softkeys Operate Touch Area to use the onscreen pointer. Function/operation labels appear at bottom of Display;... -
Page 31: How To Use Touch Pointer
How to Use Touch Pointer Operate LINE, Browser, and OfficeSuite with Touch Area using Lightly Tap Touch Area without Pressing keys. To Double-Tap, your fingers. Tap the same position twice. Turn Touch Pointer on in a Touch Pointer-capable application to use the onscreen (pointer). -
Page 32: Main Menu
Main Menu Pinch/Spread Spread two fingers apart or pinch them together on Touch Using Main Menu Area without Pressing keys. Use the following applications and services. Item Description Mail Exchange S! Mail, SMS, and PC Mail. Access the Internet. Browser is a Touch Browser Pointer-capable application. -
Page 33: Accessing Applications
Accessing Applications Select item Access applications in one of several ways. Use as convenient. Custom Menu Access applications from application list saved to Custom Menu. Function activates/opens. (Custom) ・ Menu items are assigned to Dial Keys ( ). Press keys to activate/access applications and functions. - Page 34 Key Long Press From Current Function Long Press keys to access the following pre-saved applications Access applications from history of recent applications. and functions. Activate several applications and operate while switching between applications. ・Functions may not be available depending on handset usage when accessed.
-
Page 35: Using Manner Mode
Using Manner Mode Editing Original Mode Mute ringtones and other handset sounds to avoid disturbing Customize Manner mode volume, etc. per each application. others around you. Activating Manner Mode ・Ringtones, operation tones, etc. do not sound in Manner mode. Place handset in Silent mode/Drive mode to also stop handset from vibrating for new calls or mail. -
Page 36: Using Airplane Mode
Using Airplane Mode Setting Auto Manner Mode Leaving power on, suspend signal-transmitting functions. Set Manner mode to change automatically at a set time. Activating Airplane Mode (Long Press) Screen for selecting a Manner mode appears. (AutoMode) Settings Window opens. Airplane mode Auto manner mode screen opens. -
Page 37: Other Basic Operations
Other Basic Operations Checking Your Phone Number Handset phone number appears in profile window. Capturing Screenshots Long Press at the same time to capture a screenshot of the current screen. ・Available for all but some applications. ・ View captured screenshots in Pictures in Data Folder. -
Page 39: Operations In Common
Operations in Common Customizing Fonts............38 Changing Handset Response to Calls/Mail......38 Text Entry.................39 Phone Book................ 41... -
Page 40: Customizing Fonts
Customizing Fonts Changing Handset Response to Calls/Mail Changing Text Size Set ringtone, vibration, Incoming LED etc. for each function. Change the size of text in menus, when entering text, etc. Making Settings for New Calls Settings Wallpaper/Display Font size Settings Sound/Notification Phone ringtone... -
Page 41: Text Entry
Text Entry Making Settings for New Mail Use keys to enter text. Text entry descriptions are for (default input method). Settings Sound/Notification Notification sound Text Entry Basics Use Dial Keys to enter characters. Multiple characters are assigned to each key. Press a key to toggle character options for that key. -
Page 42: Entering Letters
Entering Letters Using Wildcard Input In 12-key Keyboard, to enter Mail: In a text entry window, enter hiragana Select conversion candidate ・Entry in 1-byte Alphabet is described. ・ Available when Wildcard input is set. ・Replace end of a text string with "○" (wildcard) to narrow down prediction conversion candidates. -
Page 43: Phone Book
Phone Book In Email fields, Mail address Enter email address Save phone numbers and email addresses. In addition, save birthdays and other information. Set ringtones for incoming calls/messages for each contact. Phone Book Caution Contacts may be altered/lost if handset is left uncharged or without a Battery, or due to accidents malfunctions, repairs, handset upgrade/replacement, mishandling, etc. -
Page 45: Phone
Phone Calling................44 Placing International Calls..........45 Optional Services..............46 Global Services..............50... -
Page 46: Calling
Calling Emergency Location Report How to place calls, answer calls, and options available when a Making emergency calls (110, 119 or 118) automatically call is arriving or in progress are described. reports handset location to corresponding agency (police, etc.). This system is referred to as Emergency Location Report, and notifies location based on positioning from Placing Calls base stations. -
Page 47: Placing International Calls
Placing International Calls Using VoLTE VoLTE (Voice over LTE) is an LTE-based voice call system. Calling to Countries Outside Japan Compared to voice calls with conventional 3G networks, higher-quality sound and shorter time until ringback tones sound are benefits (requires separate VoLTE subscription). ・Handset must be in a SoftBank 4G LTE (FDD-LTE) service Dial number area and both "VoLTE voice call"... -
Page 48: Optional Services
Optional Services Optional Services Use these SoftBank Optional Services: ・Call Forwarding and Voicemail cannot be used at the same time. Service Description Notify Caller Send or hide your number when placing Handset dials number. calls. Restrict incoming/outgoing calls by Call Barring conditions. -
Page 49: Troubleshooting
Troubleshooting Call Barring Calling is not barred. Restrict outgoing/incoming calls and SMS messages. Are you using Call Forwarding or Voicemail? Calling ・When attempting to place/send a call/SMS while calling is may not be barred even if All outgoing calls and restricted, a message appears. - Page 50 When New Message is Recorded Voicemail A tone sounds and appears on Status Bar. To play message, navigate Auto answering in Notifications Phone Call Settings Call service settings Window Press , then follow voice guidance. Voicemail/Call forwarding Voicemail/Call forwarding window opens. Always forward When Busy When unanswered...
-
Page 51: Call Forwarding
Call Forwarding Number Enter number (Done) Phone Call Settings Call service settings Voicemail/Call forwarding Number for forwarding calls to is set. ・ Select Phone Book to quote a number from Phone Book. Voicemail/Call forwarding window opens. Changing Call Waiting Settings Requires separate subscription. -
Page 52: Global Services
Global Services Group Calling Handset is Global Roaming Service eligible. Use the same Requires separate subscription. handset number outside Japan. Calling Japan During a call, enter number of another party ・Print out roaming area/rate information to carry while traveling abroad as needed. Dial number When call answered, (Menu) - Page 53 Changing Data Roaming Setting Change setting for data communication outside Japan. Settings Network Cellular networks Handset dials number. ・ Alternatively, Call ・To dial other countries, select other party's country instead Japan(JPN) Cellular network settings open. To end call, Data roaming Call ends.
-
Page 55: Messaging
Messaging Messaging................54 Customizing Handset Address......... 54 Sending S! Mail..............55 Sending SMS..............56 Using PC Mail..............57... -
Page 56: Messaging
Messaging Customizing Handset Address Changing and saving a mail address for exchanging S! Mail is S! Mail described. Exchange long text messages with S! Mail-compatible SoftBank Changing Address handsets, other mobile providers' terminals, computers/other email-compatible devices. Attach media files for multimedia messaging. -
Page 57: Sending S! Mail
Sending S! Mail Select Subject field Enter subject Sending S! Mail (Long Press) Select Message field Enter message Window for creating S! Mail opens. Select Recipient field Address book Receive history Send history Profile Direct input (Send) ・ Select Address book Receive history Send history to select a recipient from Phone Book or receive and send... -
Page 58: Sending Sms
Sending SMS (Send) Sending SMS Create New SMS SMS is sent. If More than the Sendable Number of Characters are Entered Window for creating SMS opens. Prompt appears indicating limit is exceeded. Switch to S! Mail. Select Recipient field Address book Receive history Send history... -
Page 59: Using Pc Mail
Using PC Mail Creating an Account Confirm your PC Mail user name (user ID), password, server name, etc. beforehand. Mail PC Mail ・If no account is set, a setup window opens. ・If confirmation appears, follow onscreen instructions. Follow onscreen instructions to set up account PC Mail is set up. -
Page 61: Internet Services
Internet Services Browser................60... -
Page 62: Browser
Browser Opening New Tabs Enter search words or a URL to use the Internet. Browser is a Open multiple webpages in different tabs to switch between Touch Pointer-capable application. them easily. SSL & TLS Secure Sockets Layer (SSL) and Transport Layer Security (TLS) are encryption protocols that secure Internet transmissions of important/sensitive information such as credit card numbers and corporate secrets, providing... - Page 63 TV..................62 Watching TV..............63 Data Broadcast (Japanese)..........63...
-
Page 64: Tv Tv
Setting Channels View One Seg service for mobiles (only in Japan). Viewing Environments Viewing may not be possible where signal reception is poor, such as indoors, underground, and in tunnels. Viewing may be interrupted when moving to where signal reception is poor. -
Page 65: Watching Tv
Watching TV Data Broadcast (Japanese) Watching TV Data Broadcast (Japanese) Viewing is described for handset after channels have been set. Data broadcast with program information appears at bottom of Display in TV screen (vertical). ・Not available in widescreen TV. TV screen (vertical) appears. Press to select channel (Data) -
Page 67: Camera/Image Editing
Camera/Image Editing Capturing Photos/Recording Videos....... 66... -
Page 68: Capturing Photos/Recording Videos
Capturing Photos/Recording Videos Aim Camera at subject Capture photos and videos in portrait or landscape views. Unless described otherwise, capture in portrait view is described for photos, and in landscape view for videos. Camera Cautions When Using Camera ・ Press to zoom in or out. -
Page 69: Recording Videos
Recording Videos Video Viewfinder opens. Aim Camera at subject (Record) Tone sounds and recording starts. ・ Press to zoom in or out. ・ Press (Shoot)/ during video recording to capture a photo. ・ Press to view guide. (Stop) Tone sounds and recording stops; video is saved to handset memory. -
Page 71: Music/Videos
Music/Videos Music Files.................70 Viewing Videos..............70... -
Page 72: Music Files
Music Files Viewing Videos Play back music files and create playlists of favorite songs. Play back videos. Playing Music Playing Videos Selecting and playing back a music file in Data Folder is described as an example. (Long Press) Videos Movies (Long Press) Music Folder list opens. -
Page 73: Data Folder
Data Folder Handling Data (Data Folder)..........72... -
Page 74: Handling Data (Data Folder)
Handling Data (Data Folder) Checking Files Handset files are managed in Data Folder. Files created with Apps or received with mail or from the Internet are automatically saved to the appropriate folder. (Long Press) Data Folder The following folder types appear in Data Folder. Folder type Files contained Photos... - Page 75 Using File Manager (Long Press) Data Folder opens. File manager File manager opens. Select folder File/folder list opens. Select file File opens. ・If confirmation appears, follow onscreen instructions.
-
Page 77: Connectivity & File Backup
Connectivity & File Backup Using Infrared Transmission..........76... -
Page 78: Using Infrared Transmission
Using Infrared Transmission Sending Profile (Phone Number, Etc.) Exchange data (profile, Phone Book entries, Notepad entries, With handset and other device close together, align their photos, videos, music, etc.) with mobile phones and other infrared ports in a straight line. devices. - Page 79 Commence receiving on other device File is sent.
-
Page 81: Settings In Common
Settings in Common Wallpaper & Display Settings..........80 Sound/Notification Settings..........80 Lock & Security Settings..........81 Network Settings............. 82 Data Communication Settings......... 82 Eco Mode/Battery Settings..........84 Reset Settings..............87 Device Info & Settings............ 87 More Settings..............88... -
Page 82: Wallpaper & Display Settings
Wallpaper & Display Settings Sound/Notification Settings Wallpaper & Display Settings Sound/Notification Settings Set Wallpaper, Display brightness, etc. Settable items are the Set Manner mode as well as make settings for ringtone, following. operation tones, etc. Settable items are the following. Item Description Item... -
Page 83: Lock & Security Settings
Lock & Security Settings Set each item Lock & Security Settings Make security settings including Screen lock and security codes. Settable items are the following. Item Description Set Operation Password for using Operation applications and functions. Setting is complete. password For details, see "Setting Operation setting... -
Page 84: Network Settings
Network Settings Data Communication Settings Check your amount of cellular data usage (per month) and Network Settings restrict usage. Data usage is only as tracked by handset, and may differ from actual data usage statement. Set network functions such as Airplane mode. Settable items are the following. - Page 85 Data Usage Window Layout Limiting/Alerting Data Usage Set an upper limit and alert position on data usage beforehand to receive alerts and notifications of limited usage when the upper limit is approached. Settings Network Cellular data enabled/disabled Set cellular data limit Shown when cellular data enabled.
-
Page 86: Eco Mode/Battery Settings
Eco Mode/Battery Settings Restricting Data Communication for Individual Applications Using Eco Mode Settings Limit the data communication possible per application. Change Display settings automatically depending on battery level and time of day, to use handset more ecologically. Settings Network Settings Eco/Battery Network window opens. - Page 87 Switching Eco Mode Settings According Switching Eco Mode Settings with the to Battery Level Time of Day Set Eco Mode settings to automatically switch on/off at Enable Eco Mode automatically when battery level falls preset times. below a certain level. Settings Eco/Battery Settings...
- Page 88 Checking Battery Use Enter the time zone (Done) Check Eco Mode settings and battery use. Settings Eco/Battery (Set) Battery Battery window opens. Select item Battery use details open. Setting is complete, and Eco Mode is set to AutoON (TimeZone)
-
Page 89: Reset Settings
Reset Settings Device Info & Settings Resetting Handset (Reset All) Device Info & Settings Erase all files on handset. Check handset status. Settings All reset Settings About phone All reset window opens. Device info window opens. ・See "Updating Software" for details on software updates. Reset phone ・... -
Page 90: More Settings
More Settings Custom Key Settings Set action when are Long Pressed. More Settings Make settings for other functions. Settable items are the Settings More settings following. Item Description Bluetooth Make Bluetooth settings. ® Set action when are Long Custom key Pressed. -
Page 91: Storage Settings
Storage Settings Application Settings Check handset and SD Card memory space, mount or unmount Check information for installed and running applications. SD Card, erase SD Card files, and use other options. Settable items are the following. Settings More settings Item Description Check total handset memory/SD Card Total space... - Page 92 Location Information Settings Language & Input Settings Enable location information. Make settings for language and character entry. Settable items are the following. Item Description Item Description Location Set usage of location information. Language(言 Set the mode for obtaining location Set the user language. Mode 語)...
-
Page 93: Accessibility Settings
Date & Time Settings Accessibility Settings Make settings for date and time. Settable items are the Make settings for user accessibility such as captions. following. Item Description Item Description Large text Enlarge Display text. Automatic Set whether to use the time provided by Speak Set whether to read out passwords. -
Page 95: Appendix
Appendix Updating Software............94 Specifications..............95 Materials................95 Customer Service.............. 96... -
Page 96: Updating Software
Updating Software Updating Software Manually Operate handset where signal reception is good and without Software Updates changing location. Also operate with adequate battery charge. Signal becoming weak or Battery becoming low during an update may cause an update failure. At specified time, handset automatically checks for and downloads firmware updates as required. -
Page 97: Specifications
Specifications Materials DIGNO ケータイ(Keitai) DIGNO ケータイ(Keitai) ® ® Handset specifications are as follows. Where used Material/Finishing ・Times in the table vary with location, status, settings, etc. Outer Case PA + GF resin/UV cured acrylic coating ・Display employs precision technology; however, some pixels (LCD Case) may remain on/off. -
Page 98: Customer Service
Customer Service For SoftBank handset or service information, call General Information. For repairs, call Customer Assistance. SoftBank Customer Support General Information From a SoftBank handset, dial toll free at 157 From a landline/IP phone, dial toll free at 0800-919-0157 Customer Assistance (Repairs/Lost Handsets) From a SoftBank handset, dial toll free at 113 From a landline/IP phone, dial toll free at 0800-919-0113... -
Page 99: Safety Precautions
Safety Precautions Safety Precautions............98 General Notes..............109 Water/Dust/Shock Resistance........114... -
Page 100: Safety Precautions
Safety Precautions Handset, Battery, USIM Card, AC Charger (Sold Separately), Desktop Holder (Sold Separately) (Common) For proper handset use, carefully read Safety Precautions beforehand. Keep this guide for future reference. Observe these safety precautions to prevent injury or damage to property. Labels Do not use, store, or leave handset or Risks of injury or damage from improper use are categorized... - Page 101 Do not charge while handset or related hardware are wet with water, etc. Do not drop, step on, throw, or otherwise subject to strong force or impact, or to May cause fire, burns, injury, electric shock, etc. vibration. For details on water resistance, see "Water/Dust/Shock Resistance."...
- Page 102 Do not charge when handset is wetted. Do not use damaged. May cause electric shock or short circuit leading to malfunction or fire. Malfunction due to charging while May cause fire, burns, injury, etc. wetted is not covered under warranty. Do not place on an uneven or unstable surface.
- Page 103 Do not leave in presence of corrosive chemicals or gases. Do not look into Infrared Port when sending data by infrared. May cause malfunction, resulting in loss of internal data. May affect eyesight. Do not use in high humidity. When using infrared transfer, do not point Humidity when worn on body may cause malfunction.
- Page 104 Before boarding an aircraft, power off handset Keep handset power off near high precision or place handset in Airplane mode. electronic devices or devices using weak signals. Restrictions are in place for use aboard aircraft; follow airline instructions. May cause devices to misoperate, etc. May affect aircraft instrumentation.
- Page 105 For details on materials used in handset, see "DIGNO ケー ® タイ(Keitai)." When opening or closing handset, be careful not to let a part of yourself (fingers, etc.) get caught in it. Failing to do so may cause injury, etc.
- Page 106 Battery Read battery label to confirm battery type; use/dispose of Handset Speaker uses magnetic components; Battery accordingly. check that metal objects (cutter blades, staples, etc.) are not attached to it. Symbol Battery Type on Label Attached objects may cause injury, etc. Li-ion00 Lithium-ion When viewing Display, view in a sufficiently...
- Page 107 Do not insert Battery in handset with (+) and (-) reversed. Do not dispose of with ordinary refuse. May cause Battery to rupture, ignite, or overheat. If there May cause Battery to ignite, resulting in fire, burns, injury, is trouble inserting Battery, do not force Battery and etc., and is also destructive to the environment.
- Page 108 AC Charger (Sold Separately), Desktop Holder (Sold Separately) Do not apply excessive force to where AC Charger is connected to handset or Desktop Holder. May cause fire, burns, injury, electric shock, etc. Do not use AC Charger if cord is damaged. May cause fire, burns, electric shock, etc.
- Page 109 If Charging Terminals are bent or otherwise Do not use in way that exceeds the rating for deformed, immediately discontinue use. Do not outlets or wiring. try to return to original shape and resume use. Exceeding rating such as with a power bar may cause AC Short-circuiting of Charging Terminals may cause fire, Charger to ignite, overheat, or a fire.
- Page 110 USIM Card Handset Use & Electronic Medical Equipment When handling USIM Card, be careful not to scratch fingers, etc. on cut surfaces. When carrying handset, keep a minimum of 15 cm from implanted cardiac pacemaker, May cause injury, etc. implanted defibrillator, etc. Radio waves may interfere with the operation of electric medical devices.
-
Page 111: General Notes
PC or other media (FD, MO, CD-RW, etc.). SoftBank Corp. handset after reading carefully. is not liable for any damages resulting from loss of content 【501KC】 here refers to this mobile phone 【DIGNO ケータ ® due to SD Card (commercially available) breakage or other イ】. - Page 112 ・Malfunction due to inserting USIM Card in another IC Card between 36˚C – 40˚C). reader/writer, etc. is at your own risk. -DIGNO ケータイ(Keitai) ® ・Keep IC (metal) portion clean for use. -Battery ・Do not adhere labels, etc. on USIM Card.
- Page 113 Music/Video/TV Functions Bluetooth ® ・Do not listen to music or watch videos/TV while driving ・Frequencies a vehicle or riding a motorcycle or bicycle. Such use of Handset Bluetooth function uses 2.402 GHz – 2.480 GHz ® a mobile phone is prohibited by law (use while riding frequencies in the 2.4 GHz band.
-
Page 114: Ce Declaration Of Conformity
CE Declaration of Conformity Specific Absorption Rate (SAR) for This Product (for Japan) This mobile phone【501KC】meets Japanese technical KYOCERA Corporation hereby declares that 501KC is in regulations* and international guidelines for exposure to radio compliance with the essential requirements and other relevant waves. -
Page 115: European Rf Exposure Information
European RF Exposure Information FCC RF Exposure Information Your mobile device is a radio transmitter and receiver. It is Your handset is a radio transmitter and receiver. It is designed not to exceed the limits for exposure to radio waves designed and manufactured not to exceed the emission limits recommended by international guidelines. -
Page 116: Water/Dust/Shock Resistance
Water/Dust/Shock Resistance FCC Notice Handset has IPX5-equivalent and IPX8-equivalent water This device complies with part 15 of the FCC Rules. Operation resistance as well as IP5X-equivalent dust resistance with is subject to the following two conditions: (1) This device Back Cover and External Device Port Cover completely may not cause harmful interference, and (2) this device must attached. - Page 117 Shared Precautions ・Close External Device Port Cover firmly after confirming rubber seal is correct location. Also attach Back Cover firmly. Lodged particles (lint, hair, sand, etc.) may allow water intrusion. ・Do not insert pointed object between External Device Port In Various Environments Cover and handset.
- Page 118 if pressed forcefully, and does not indicate a problem with If Exposed to Water functionality or performance. ・Handset will not float. If handset is used while wet, water may collect in Mic, ・Do not immerse in hot water, use in a sauna, or subject to Earpiece, Speaker, Air Pressure Holes, or hinge, and may hot air from a hair dryer, etc.
- Page 119 When Charging Accessories are not waterproof. Check the following before and after charging. ・Check that handset is not wet. If wet, drain water and then wipe with a lint-free dry, clean cloth before opening External Device Port Cover, etc. ・If charging after becoming wet, drain well and then wipe with a lint-free dry, clean cloth before opening External Device Port Cover, etc.
- Page 121 A About the User Guide............3 Accessing Applications............. 31 B Basic Operations with this Handset....... 28 Browser................60 DIGNO ケータイ ® User Guide Index C Calling................44 Capturing Photos/Recording Videos........66 Changing Handset Response to Calls/Mail......38 Charging Battery.............. 15 Checking Handset Status & Notifications (Notifications/ Settings Window).............
- Page 122 Using PC Mail..............57 L Lock & Security Settings..........81 V Viewing Videos..............70 M Main Menu................. 30 W Materials................95 Messaging................54 Wallpaper & Display Settings..........80 More Settings..............88 Watching TV..............63 Music Files.................70 Water/Dust/Shock Resistance........114 N Network Settings............. 82 O Optional Services..............46 Other Basic Operations............35 P...
- Page 124 DIGNO ケータイ User Guide ® April 2016, First Edition SoftBank Corp. Visit SoftBank Shop for assistance Model : DIGNO ケータイ ® Manufacturer : KYOCERA Corporation...
Need help?
Do you have a question about the Keitai and is the answer not in the manual?
Questions and answers