Koden CVS-126 Operation Manual
Color echo sounder
Hide thumbs
Also See for CVS-126:
- Operation manual (73 pages) ,
- Quick reference (2 pages) ,
- Quick reference (2 pages)
Table of Contents
Advertisement
Quick Links
Advertisement
Table of Contents

Related Manuals for Koden CVS-126


Summary of Contents for Koden CVS-126
-
Page 2: Declaration Of Conformity
Declaration of Conformity (As required by Article 7 (1) of Directive 89/336/EEC) Declares under his sole responsibility that the produced Echo Sounder manufactured by Koden Electronics Co., Ltd. 5278 Uenohara Uenohara-Shi Yamanashi-Ken 409-0112, Japan Telephone +81 554 20 5865 Telefax +81 554 20 5880... - Page 3 Disclaimer The specifications and technical issues described in this manual are subject to change without notice. Koden Electronics Co., Ltd. has no responsibility for any human and physical damage or failure caused by the interpretive error of this manual. 0093132702-02...
-
Page 4: Important Notice
Important Notice CVS-126 Important Notice • The re-use and transcription of Instruction Manual (hereafter called this manual) needs permission of our company. Our company prohibits the un-authorized re-use and transcription. • If this manual is lost or damaged, consult our dealer or our company. -
Page 5: For Your Safe Operation
CVS-126 For Your Safe Operation For Your Safe Operation Pictorial used in this Instruction Manual This Instruction Manual uses the following pictorials. Understand the meaning of each pictorial and implement the maintenance and inspection. Symbol Meaning Mark for warning This symbol denotes that there is a risk of death or serious injury when not dealing with it correctly. - Page 6 For Your Safe Operation CVS-126 Use the specified fuse. If un-specified fuse is used, it may cause a fire, smoke or damage. Whenever transmitting, be sure to submerge the transducer in water first. If transmitted without submerging the transducer, it may be damaged.
-
Page 7: Table Of Contents
How to use the 【FUNC】 key1-12 How to remove the hard cover... 1-2 Preset of 【FUNC】 key ..1-12 When removing the CVS-126 Operation of VRM ....1-13 Display unit ........ 1-2 Chapter 2 How to use the Menu .....2-1 Power On/Off ...... - Page 8 Chapter 5 Installation ......5-1 Add the comment to the stored Item of Caution on Installation..5-1 image........2-10 Installation of CVS-126 Display 2.15 Selection of Zoom ....2-10 unit ..........5-2 2.16 Selection of NAV Display ..2-11 Installation of Transducer ... 5-5 Type of NAV Display....
-
Page 9: Introduction
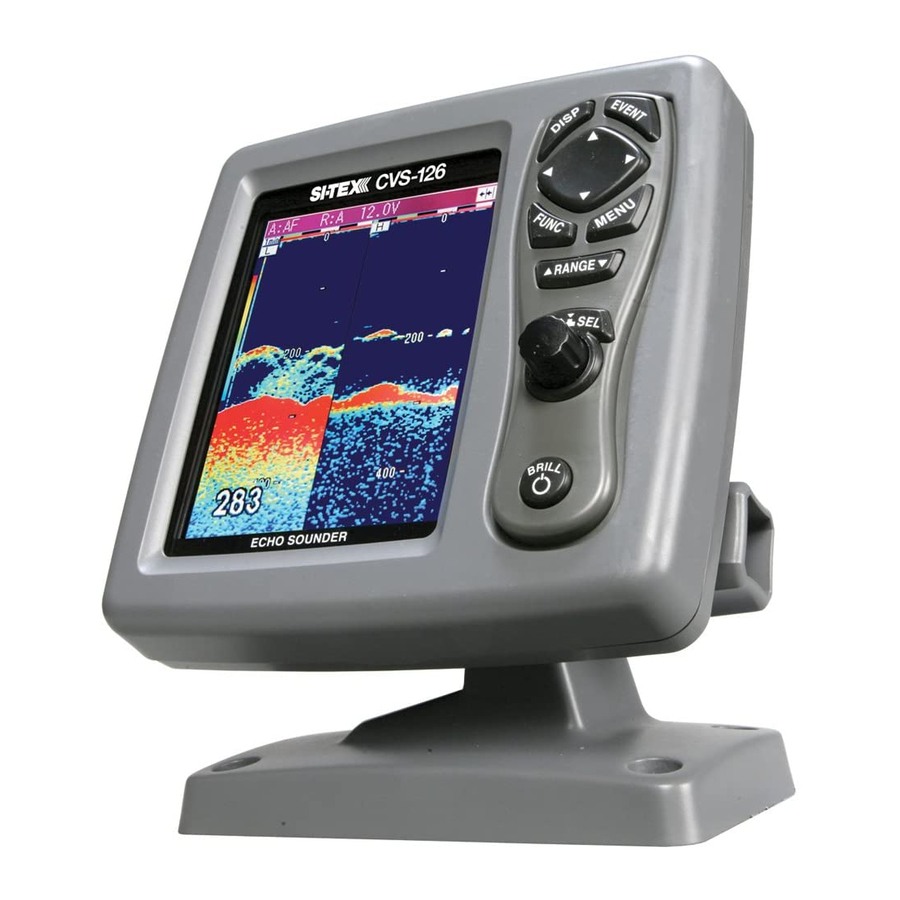
CVS-126 Introduction Introduction The CVS-126 is a Dual frequency (50kHz/200kHz) Color LCD display echo sounder. This unit equipped with digital process displays the circumstance in the water under all conditions, matching with the high luminance 5.7 inch LCD. The main features of this unit are as follows. -
Page 10: System Configuration
System Configuration CVS-126 System Configuration Connection Diagram CVS-126 Display unit GPS sensor GPS-20A External Navigation Equipment External water temperature meter External speaker (For speaker with amplifier) (Prepared by a user) TD: transducer * (Inner-hull, through-hull) * TD-500T-2B (Inner-hull) * TD-500T-3B (through-hull) - Page 11 CVS-126 System Configuration CVS-126 echo sounder unit With mounting bracket and hard cover Legend Standard configuration To Transducer Option connector To POWER connector CW264-2M External power output (For GPS etc) External speaker (For speaker with amplifier) (Prepared by a user)
-
Page 12: Configuration Of Equipment
Fuse F-7161-2A Normal fusion type for Cylinder (ø6.3x32) main power Trans Tapping Screw TPT5 x 20U For fixing CVS-126 Display unit LTWCAP-DABCFXC1 For transducer cable connector Instruction Manual CVS-126.OM.E English Quick Reference CVS-126.QR.E... - Page 13 CVS-126 Configuration of Equipment Essential Option Name of item Type Remark Weight/ Quantity Length Transducer Type of transducer transducer cable (with connector at one end) Type of transducer Specification Frequency Material Mounting method TD-500T-2B 50/200kHz Plastic Inner-hull (The inner-hull kit is needed.)
-
Page 14: Chapter 1 Basic Operation
CVS-126 Chapter 1 Basic Operation 1.1 How to use the key CVS-126 Display unit In addition, for your convenience when operating keys other than keys in the menu by the 【 MENU】 key, the menu displayed automatically closes. Key Name... -
Page 15: How To Remove The Hard Cover
Claw When removing CVS-126 Display unit: To prevent dust from entering, cap the connector at the rear of CVS-126 Display unit and the power cable with caps. Install the supplied cap to the transducer cable as shown in the figure and cap it. -
Page 16: Power On/Off
Chapter 1 Basic Operation CVS-126 Rainbow pattern 1.2 Power On/Off Time mark Range Function icon Gain Power on Press the 【BRILL 】 key to power on. The startup menu is displayed. When School of fish Oscillation line started up, the memories (ROM, RAM) are automatically checked. -
Page 17: Lcd Brilliance Adjustment
CVS-126 Chapter 1 Basic Operation Select the display you desire to display. 1.3 LCD Brilliance Disp Adjustment NAV1/ Normal (H) Normal (H) Adjustment of LCD Brilliance Zoom (H) Dual Freq The [Lcd brill] and [Panel brill] can be switched Zoom (L) every time when pressing the 【BRILL 】key. -
Page 18: Dual Frequency
Chapter 1 Basic Operation CVS-126 Dual frequency The High frequency image can be displayed in the right half side and the Low frequency image can be displayed in the left half side. Since the beam width differs depending on frequency, the school of fish and sea bottom look different. - Page 19 CVS-126 Chapter 1 Basic Operation The display width of zoom (1) Bottom is displayed in orange. Normal image Zoomed range 30.0 Zoom image (2) Bottom Discrimination The display width of zoom is displayed in orange. Normal image Zoomed range 30.0...
-
Page 20: Navigation Menu
Chapter 1 Basic Operation CVS-126 The display width of zoom is displayed in orange. (4) Bottom Zoom Normal image Zoomed range 30.0 Zoom image The image below the bottom is not zoomed. (5) Bottom Follow Zoom The display width of zoom is displayed in orange. -
Page 21: Switch-Over Of Range
CVS-126 Chapter 1 Basic Operation Range 1.5 Switch-over of Range 10.0 The range of measured depth displayed on the 50.0 display can be changed. 80.0 100.0 To meet your purpose, select the range of 150.0 measured depth. Set the range switching to auto range. -
Page 22: Fine-Adjusting The Auto Gain
Chapter 1 Basic Operation CVS-126 noise will appear on the entire Gain select image, resulting in an unclear Manual image. Adjust properly the gain so Cruising that the optimum image can be Fishing always displayed. Press the 【MENU】 key to close the menu. -
Page 23: Confirm The Gain State
CVS-126 Chapter 1 Basic Operation Confirm the gain state. When presetting the destination, switch [NAV] → [EVENT Key set] → [Store pos]. The present set value of frequency (High In the state that no other key is pressed, frequency or Low frequency) adjusted last is press the 【... -
Page 24: Store The Image
Chapter 1 Basic Operation CVS-126 Store the image. When you find the school of fish or tide, its location can be stored as a destination. (10 locations at maximum) When storing the image, switch [NAV] → [EVENT Key set] → {Store pos}. -
Page 25: Use Of 【Func】 Key
CVS-126 Chapter 1 Basic Operation 1.8 Use of 【FUNC】 key When factory-shipped, the [Image Speed] is assigned to the 【FUNC】 key. The function settable to the 【FUNC】 key can be selected among [Image Speed], [Interference Rejection], [Color Rejection], [Noise Rejection], [Range Mode], [Shift], [Zoom Range], [Zoom Start], [Background] and [White Line]. -
Page 26: Operation Of Vrm
Chapter 1 Basic Operation CVS-126 Press the 【MENU】 key to close the menu. The icons of functions preset are displayed at the upper right side on the menu. Image Speed Color Rejection Noise Rejection Range Mode Shift Zoom Range Zoom Start... -
Page 27: Chapter 2 How To Use The Menu
CVS-126 Chapter 2 How to use the Menu Chapter 2 How to use the Menu 2.1 How to operate the Adjust Range mode Manual D.range menu Shift Image Bottom Zoom select Alarm1 10.0m Zoom range Alarm2 Display the menu. / Stop the display... -
Page 28: Change Of Image Speed
Chapter 2 How to use the Menu CVS-126 the 【 】 key. having the same frequency and same firing The cursor returns to the menu column. times as those your boat has, the interference noise may be displayed. If you set the Press the 【MENU】... -
Page 29: Rejection Of Noise
CVS-126 Chapter 2 How to use the Menu Change the setting of [Color Rejection]. Setting of Fixed Shift Color Rejection The scope of range starting with the shift value is displayed. Press the 【MENU】 key to close the menu. 2.5 Rejection of Noise Noise Rejection Press the 【MENU】... -
Page 30: Setting Of Zoom Start
Chapter 2 How to use the Menu CVS-126 and [Bottom Follow Zoom] Zoom start The zoom range of each mode is identical. 0~800 Switch-over of Menu (See [1.4 Press the 【MENU】 to close the menu. (setting:except ft:2.5 ~ 200,ft:10.0 ~ 650) 2.9 Setting of Background... -
Page 31: Preset Of Range
CVS-126 Chapter 2 How to use the Menu Select [Disp] → [White Line]. [Bottom alarm] issues the alarm when the position recognized as the bottom is shallower Change the setting of [White Line]. than the upper limit or deeper than the lower “1”... -
Page 32: Setting The Alarm
Chapter 2 How to use the Menu CVS-126 The set state of [Water temp alarm], [Speed Setting the alarm alarm], [Arrival alarm] and [XTE alarm] can be confirmed by the icons at the upper side of Adjust Bottom alarm display. -
Page 33: Cancel The Nav
CVS-126 Chapter 2 How to use the Menu [WPT edit] list. Caution: The list No. selected is reversed in red. After selecting the number, press the 【 】 key or the 【Knob】. After selecting the number, press the 【 】... -
Page 34: Delete The Destination
Chapter 2 How to use the Menu CVS-126 Caution: If the 【 【 【 【 Knob】 】 】 】 is pressed at this pressed, the setting is cancelled and the menu returns to the moment, it is canceled. menu item. -
Page 35: Store/Recall/Deletion Of Image
CVS-126 Chapter 2 How to use the Menu When the echo sounder image to be stored appears, press the 【EVENT】 key. When the image store is fully filled, it shows that the [Store image] is fully filled. After deleting the unwanted image, try it again. -
Page 36: Add The Comment To The Stored Image
Chapter 2 How to use the Menu CVS-126 After selecting the number, press the 【 】 Image delete key or the 【Knob】. Comment Select the character with the 【 】 key or PIC00001 【 】 key.( character: A~Z,blank,0~ PIC00002 9,+,-./) -
Page 37: Selection Of Nav Display
CVS-126 Chapter 2 How to use the Menu Zoom select display1 BTM. B.D. display2 Water temp The time required Zoom B.Z. display3 B.F.Z. Course Wind dir. display4 Press the 【MENU】 key to close the Lat/Lon menu. For each zoom display, refer to [1.4 Switch-over Wind speed of display]. -
Page 38: Explanation Of Sonar
Chapter 2 How to use the Menu CVS-126 key. 2.18 Explanation of Menu 2.18 2.18 2.18 Caution: Every time when pressing the Item 【 【 【 【 】 】 】 】 key, the [Display] switches in the order of [NAV1] to [NAV4]. -
Page 39: Display The A Scope. / Stop The
CVS-126 Chapter 2 How to use the Menu Select the [Display] → [A scope]. Adjust Image speed D.range To display the A scope, select the [ON]. Strong Image To stop the display of A scope, select the Color Rejection Alarm1 [OFF]. -
Page 40: Image Swap
Chapter 2 How to use the Menu CVS-126 Adjust Disp width Center D.range Image swap Image NAV 1 Alarm1 NAV 2 Alarm2 Return Disp Sonar Next Select the [Disp] → [Disp. width]. Select the width of image. Image Swap The images of echo sounder at the right and left sides can be swapped. -
Page 41: Chapter 3 How To Use The System Menu
CVS-126 Chapter 3 How to use the system menu Chapter 3 How to use the system menu 3.1 Display of System Menu 3.2 Setting of External After powering on, besides the menu displayed In/Out first with the 【MENU】 key, the system menu, of which setting is not frequently changed, is provided. -
Page 42: Setting Of Correct Item
Chapter 3 How to use the system menu CVS-126 NMEA Monitor Draft Set The external input data can be displayed. The tolerance of depth can be corrected. To return to the original menu, press the Set the depth from the sea level to the set depth 【MENU】... -
Page 43: Setting Of System Item
CVS-126 Chapter 3 How to use the system menu 3.4 Setting of System Item Inner-hull The reduction in sensitivity due to signal attenuation in inner-hull use can be corrected. Prev (setting:0~10: through-hull: 0) Simple menu In out Operation Guide Select the [Correct]→[Inner-hull]. -
Page 44: Setting Of Basic Set Item
(setting:-11.0~14.0h)(UTC:0.0) (See [4.5 All WPTs deletes GPS select All WPT lists can be deleted. It selects whether the GPS sensor is the KODEN made one or not. All stored image deletes GPS initialize All stored image lists can be deleted. -
Page 45: Chapter 4 Maintenance And Inspection
To protect the LCD and enhance the visibility of display, the acrylic filter is installed to the surface of CVS-126 Display unit. If this part is dirty, an image becomes unclear. So, dip the soft cloth in the neutral or alcohol detergent and wipe the filter surface lightly with the cloth wrung lightly. -
Page 46: If You Suspect A Trouble
Chapter 4 Maintenance and Inspection CVS-126 4.4 If you suspect a trouble Symptom Trouble cause Countermeasure Even if the power is • Blown fuse. • Exchange a fuse.(See [4.3 Fuse powered on, nothing is • The power voltage is out of Replacement]) displayed. -
Page 47: Diagnostic Test
CVS-126 Chapter 4 Maintenance and Inspection 4.5 Diagnostic Test Perform the operation diagnosis. When checking the operation diagnosis of panel Return to the normal menu. key, the state of sensor inside and the version of Press the 【MENU】 key for more than 3 software, it is using. -
Page 48: Chapter 5 Installation
Chapter 5 Installation 5.1 Item of Caution on Installation To exercise fully the performance of echo sounder, the installation of CVS-126 must be performed by an engineer who is officially authorized by our company. The installation work includes the following content. -
Page 49: Installation Of Cvs-126 Display Unit
(1) Keep the transducer and power cable as far away from the cables of other electronic equipment as possible. (2) The cabinet of CVS-126 Display unit is securely grounded to the hull, using the ground terminal on the rear panel. - Page 50 (5) Connect the connectors for power and transducer to the unit respectively. (6) Install the CVS-126 Display unit in the installing location (square hole) and fix it with four tapping screws (4mm) (M4 or pan-head). (Prepare 4mm screws suitable for thickness of installing location.)
- Page 51 CVS-126 Chapter 5 Installation Threading hole Fixing screw 4mm 4 pieces Not supplied Front frame Figure 5.3 Flush-mount Installation Figure 5.4 Work of flush-mount installation hole 0093132702-02...
-
Page 52: Installation Of Transducer
Chapter 5 Installation CVS-126 5.3 Installation of Transducer The standard installation of this echo sounder is shown in figure 5.5. Figure 5.5 Installation of Transducer In case of Inner-Hull Using the optional inner-hull kit (MFB-04), install the transducer to the inner side of ship’s bottom. - Page 53 FRP or silicon glue. (Glue the wooden base likewise.) (7) Thread the rubber packing and fix it with the fixing nut firmly. (8) Connect the transducer cable to the connector of CVS-126 Display unit. Fixing nut Fixing nut...
-
Page 54: Wiring
Chapter 5 Installation CVS-126 5.4 Wiring Connection of Cable to CVS-126 Display unit Connect the power cable and transducer to the connectors of CVS-126 Display unit. Power input 10.8~31.2VDC NMEA data input output GPS, plotter etc Sonar tone output Line output for speaker with amplifier... - Page 55 Chapter 5 Installation Connection of Power Cable and Transducer Connect the power cable to the [POWER] connector and the transducer to the [TD] at the rear of CVS-126 Display unit connector. Connection of DC power cable (CW-264-2M) 3.5 stereo jack...
- Page 56 Chapter 5 Installation CVS-126 Connection with external equipment The DC power cable contains the connection cables for external equipment such as navigation equipment and KODEN GPS sensor. Color Remark Color Remark ③ ② Power input+ (with 2A fuse) White External speaker output (with ø3.5 stereo jack)
- Page 57 CVS-126 Chapter 5 Installation Connection with Speed Sensor or Water Temperature Sensor (Option) When installing the optional speed sensor or water temperature sensor, connect to the [TD] connector together with the transducer via the transducer cable (Type: CW-840-0.3M). For wiring, see the figure below.
-
Page 58: Serial Data
Chapter 5 Installation CVS-126 Connection of External Speaker (Prepared by a customer) The ø3.5 stereo jack is provided to the power cable. If you connect the speaker with the amplifier to the external, you can clearly hear the sonar sound. -
Page 59: Chapter 6 Table Attached
CVS-126 Chapter 6 Table Attached Chapter 6 Table Attached 6.1 Menu List The factory set value is shown by the bold and underline. 0093132702-02... - Page 60 Chapter 6 Table Attached CVS-126 ,Homing Inner-hull (-10~10:0) Other KODEN GPS All WPTs:DLT All IMG DT:DLT 0093132702-02...
-
Page 61: Specification
CVS-126 Chapter 6 Table Attached 6.2 Specification Item Content Model CVS-126 Transmission 50kHz/200kHz Frequency Transmission Single or alternate Method Transmission 600W Power Transmission 5000 times/minute at maximum Firing Times Transmission 50 s to 30ms Pulse Width Minimal 0dB V Reception Gain Display 5.7 inch color TFT LCD QVGA... -
Page 62: Appearance
Chapter 6 Table Attached CVS-126 6.3 Appearance 0093132702-02... - Page 63 CVS-126 Chapter 6 Table Attached 0093132702-02...
Need help?
Do you have a question about the CVS-126 and is the answer not in the manual?
Questions and answers
Hi, Cvs 126 , eco, do not open display power . What is the reason.?
@Nahid Every electric supply is ok
The Koden CVS-126 eco sounder display may not power on due to the following reasons:
1. Power Supply Issue – Check if the power voltage is within the required range. If the voltage is too low or too high, the unit may shut down.
2. Electric Current Capacity – Ensure the power supply provides sufficient current (Power consumption: 10W).
3. Wiring Problems – Verify if the power and transducer cables are connected correctly and not shorted.
4. Installation Issues – If the display unit is not properly installed or secured, it may not receive power.
5. Malfunction Detection – If the unit detects a voltage malfunction, it may blink an alarm and shut down automatically.
Checking these factors should help identify the cause of the issue.
This answer is automatically generated