
Related Manuals for Sym Track Runner 200


Summary of Contents for Sym Track Runner 200
- Page 1 FORWARD CONTENTS HOW TO USE THIS MANUAL SERIAL NUMBER Track Runner 200 SERVICE MANUAL...
-
Page 2: Track Runner
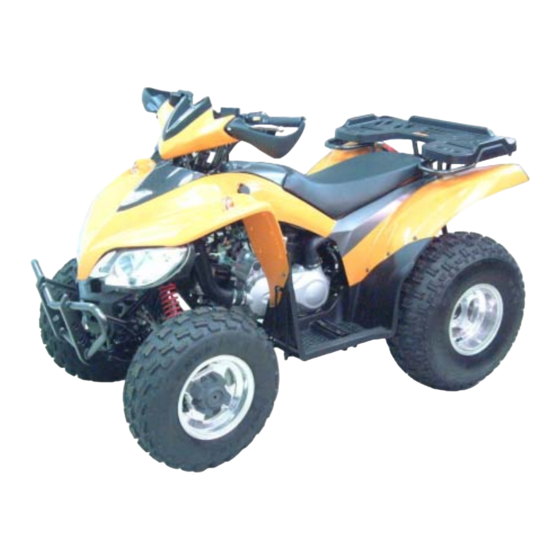
Homepage Contents FORWARD This service manual contains the technical data of each component inspection and repair for the SANYANG Track Runner 180 ATV. The manual is shown with illustrations and focused on “Service Procedures”, “Operation Key Points”, and “Inspection Adjustment” so that provides technician with service guidelines. If the style and construction of the ATV, Track Runner 180, are different from that of the photos, pictures shown in this manual, the actual vehicle shall prevail. -
Page 3: General Information
Homepage Contents HOW TO USE THIS MANUAL This service manual describes basic information of different system parts and system inspection & service for SANYANG Track Runner 180 ATV. In addition, please refer to the manual contents in detailed for the model you serviced in inspection and adjustment. -
Page 4: Table Of Contents
Homepage CONTENTS Page Content Index 1-1 ~ 1-20 GENERAL INFORMATION 2-1 ~ 2-14 SERVICE MAINTENANCE INFORMATION 3-1 ~ 3-8 LUBRICATION SYSTEM 4-1 ~ 4-12 FUEL SYSTEM 5-1 ~ 5-6 ENGINE REMOVAL 6-1 ~ 6-14 CYLINDER HEAD/VALVE 7-1 ~ 7-8 CYLINDER/PISTON 8-1 ~ 8-14 “V”... - Page 5 Home page Contents SERIAL NUMBER Frame number Engine number...
- Page 6 Homepage Contents 1. GENERAL INFORMATION Symbols and Marks......1-1 Specifications........1-11 General Safety ........1-2 Torque Values ........1-12 Service Precautions ......1-3 Troubles Diagnosis......1-14 Specifications ........1-9 Parts to Be Greased......1-19 Specifications ........1-10 Symbols and Marks Symbols and marks are used in this manual to indicate what and where the special service are needed, in case supplemental information is procedures needed for these symbols and marks, explanations will be added to the text instead of using the symbols or marks.
-
Page 7: General Safety
To this chapter contents 1. GENERAL INFORMATION General Safety Carbon monoxide Battery If you must run your engine, ensure the place is Caution well ventilated. Never run your engine in a closed area. Run your engine in an open area, if you •... -
Page 8: Service Precautions
To this chapter contents 1. GENERAL INFORMATION Service Precautions Always use with SANYANG genuine parts and Never bend or twist a control cable to prevent recommended oils. Using non-designed parts unsmooth control and premature worn out. for SANYANG ATV may damage the ATV. Rubber parts may become deteriorated when Special tools are designed for remove and old, and prone to be damaged by solvent and oil. - Page 9 To this chapter contents 1. GENERAL INFORMATION The length of bolts and screws for assemblies, Remove residues of the old gasket or sealant cover plates or boxes is different from one before reinstallation, grind with a grindstone if another, be sure they are correctly installed. In the contact surface has any damage.
- Page 10 To this chapter contents 1. GENERAL INFORMATION Lubricate the rotation face with specified After service completed, make sure all lubricant on the lubrication points before connection points is secured. assembling. Battery positive (+) cable should be connected firstly. And the two posts of battery have to be greased after connected the cables.
- Page 11 To this chapter contents 1. GENERAL INFORMATION When separating a connector, it locker has to Insert the terminal completely. be unlocked firstly. Then, conduct the service Check if the terminal is covered by the boot. operation. Do not let boot open facing up. Secure wires and wire harnesses to the frame Do not pull the wires as removing a connector with respective wire bands at the designated...
- Page 12 To this chapter contents 1. GENERAL INFORMATION Do not let the wire harness contact with rotating, Protect wires or wire harnesses with electrical moving or vibrating components as routing the tape or tube if they contact a sharp edge or harness.
- Page 13 To this chapter contents 1. GENERAL INFORMATION Do not let the wire harness been twisted as With sand paper to clean rust on connector installation. pins/terminals if found. And then conduct connection operation later. Clean rust Wire harnesses routed along the handlebar should not be pulled too tight or have excessive slack, be rubbed against or interfere with adjacent or surrounding parts in all steering...
-
Page 14: Specifications
To this chapter contents 1. GENERAL INFORMATION Specifications MAKER SANYANG MODEL UA18A-6 Overall Length 1765 mm Front Unit Swing Suspension System Overall Width 1040 mm Rear Unit Swing Overall Height 1135 mm Front AT21x7-10 (off road) Tire Specifications Wheel Base 1115 mm Rear AT22x10-10 (off road) - Page 15 To this chapter contents 1. GENERAL INFORMATION Specifications MAKER SANYANG MODEL UA18A1-6 Overall Length 1765 mm Front Unit Swing Suspension System Overall Width 1040 mm Rear Unit Swing Overall Height 1135 mm Front AT21x7-10 (on road) Tire Specifications Wheel Base 1115 mm Rear AT22x10-10 (on road)
-
Page 16: Specifications
To this chapter contents 1. GENERAL INFORMATION Specifications MAKER SANYANG MODEL UA18A2-6 Overall Length 1765 mm Front Unit Swing Suspension System Overall Width 1040 mm Rear Unit Swing Overall Height 1135 mm Front AT21x7-10 (off road) Tire Specifications Wheel Base 1115 mm Rear AT22x10-10 (off road) -
Page 17: Torque Values
To this chapter contents 1. GENERAL INFORMATION Torque Values The torque values listed in above table are for more important tighten torque values. Please see standard values for not listed in the table. Standard Torque Values for Reference Type Tighten Torque Type Tighten Torque 5 mm bolt、nut... - Page 18 To this chapter contents 1. GENERAL INFORMATION Frame Torque Values Item Q’ty Thread Dia. (mm) Torque Value(kgf-m) Remarks 2.40 Handlebar upper holder bolt 5.00 Steering shaft nut Steering tie-rod nut 5.00 5.00 Knuckle nut 3.40 Steering shaft holder bolt Tie rod lock nut 3.60 4.00 Handlebar under holder nut...
-
Page 19: Troubles Diagnosis
To this chapter contents 1. GENERAL INFORMATION Troubles Diagnosis A. Engine hard to start or can not be started Check and adjustment Fault condition Probable causes Loosen carburetor drain bolt to check if there is gasoline inside No fuel in fuel tank the carburetor Check if the pipes, fuel tank to carburetor and intake vacuum, are clogged. - Page 20 To this chapter contents 1. GENERAL INFORMATION B. Engine run sluggish (Speed does not pick up, lack of power) Check and adjustment Fault condition Probable causes Try gradual acceleration and check engine speed Air cleaner clogged Poor fuel supply Engine speed can be Engine speed can not be Lines in fuel tank evaporation system increased.
- Page 21 To this chapter contents 1. GENERAL INFORMATION C. Engine runs sluggish (especially in low speed and idling) Check and adjustment Fault condition Probable causes Check ignition timing (using ignition lamp) Normal Abnormal Incorrect ignition timing (malfunction of CDI or AC alternator) Adjust the air screw of carburetor Good...
- Page 22 To this chapter contents 1. GENERAL INFORMATION E. Clutch, driving and driving pulley PROBABLE CAUSES FAULT CONDITIONS Drive belt worn out or deformation Ramp plate of movable drive face damaged Engine can be started but Driving pulley spring broken motorcycle can not be moved. Clutch weights broken Drive slide-shaft gear groove broken Transmission gear damaged...
- Page 23 To this chapter contents 1. GENERAL INFORMATION G. Loss power Check and adjustment Fault condition Probable causes Raise wheels off ground and spin by hand Brake dragging Spin freely Abnormal Drive chain too tight Damaged wheel bearing Wheel bearing needs lubrication Check tire pressure Normal Abnormal...
-
Page 24: Parts To Be Greased
To this chapter contents 1. GENERAL INFORMATION Parts to Be Greased Rear swing arm Front suspension arm front side And steering shaft Front suspension arm rear side Right and left Knuckle 1-19... - Page 25 To this chapter contents 1. GENERAL INFORMATION Drive chain Acceleration cable/ Front & rear brake lever pivot Speedometer gear Wheel bearing 1-20...
-
Page 26: Maintenance Information
Home page Contents 2. MAINTENANCE INFORMATION Precautions in Operation ···················· 2-1 Drive Chain ··········································· 2-7 Periodical Maintenance Schedule ······ 2-2 Brake System (Disk Brake) ················· 2-8 Fuel Lines ············································· 2-3 Brake Light Switch/Starting Inhibitor Switch ··················································· 2-9 Acceleration Operation ······················· 2-3 Headlight Beam Distance ····················... -
Page 27: Periodical Maintenance Schedule
C ~ Cleaning (replaced if necessary) L ~ Lubrication Have your ATV checked, adjusted, and recorded maintenance data periodically by your SYM Authorized Dealer to maintain the ATV at the optimum condition The above maintenance schedule is established by taking the monthly 1000 kilometers as a reference which ever comes first. -
Page 28: Fuel Lines
To this chapter contents 2. MAINTENANCE INFORMATION Fuel Lines Fuel tank Remove the seat. Loosen 2 screws and 2 bolts Remove the tank cover Check all lines, and replace it when they are deterioration, damage or leaking Fuel hose Warning Gasoline is a low ignition material so any kind of fire is strictly prohibited as dealing it. -
Page 29: Valve Clearance
To this chapter contents 2. MAINTENANCE INFORMATION Valve Clearance Timing mark Caution Checks and adjustment must be performed when the engine temperature is below 35℃. Remove trunk. Remove central cover. Remove valve adjustment cap. Remove cylinder head side cover. Turn camshaft bolt in C.W. direction and let the “T” mark on the camshaft sprocket align with cylinder head mark so that piston is placed at TDC position in compression stroke. -
Page 30: Carburetor Idle Speed Adjustment
To this chapter contents 2. MAINTENANCE INFORMATION Carburetor Idle Speed Adjustment Ignition cable Caution Inspection & adjustment for idle speed have to be performed after all parts in engine that needed adjustment have been adjusted. Idle speed check and adjustment have to be done after engine is being warm up. -
Page 31: Ignition System
To this chapter contents 2. MAINTENANCE INFORMATION Ignition System Caution C.D.I ignition system is set by manufacturer so it can not be adjusted. Ignition timing check procedure is for checking whether CDI function is in normal or not. Connect tachometer and ignition light. Start engine. -
Page 32: Drive Belt
To this chapter contents 2. MAINTENANCE INFORMATION Drive Belt Loosen the 2 clamp strips of left crankcase cover, and then remove the left crankcase cover vapor hose. Remove 7 bolts of the engine left side cover and the cover. 7 bolts Check if the belt is crack or worn out. -
Page 33: Brake System (Disk Brake)
To this chapter contents 2. MAINTENANCE INFORMATION Brake System (Disk Brake) Brake System Hose Make sure the brake hoses for corrosion or leaking oil. Brake Fluid Check brake fluid level in the brake fluid reservoir. If the level is lower than the LOWER limit, add brake fluid to UPPER limit. -
Page 34: Brake Light Switch/Starting Inhibitor
To this chapter contents 2. MAINTENANCE INFORMATION Brake Lining Wear Front brake The indent mark on brake lining is the wear limitation. Replace the brake lining if the wear limit mark Lining closed to the edge of brake disc. Caution To check front brake lining must be remove Brake lining wear front wheel first. -
Page 35: Headlight Beam Distance
To this chapter contents 2. MAINTENANCE INFORMATION Headlight Beam Distance Turn on main switch Headlight beam adjustment. Turn the headlight adjustment screw to adjust headlight beam high. Caution To adjust the headlight beam follows related regulations. Improper headlight beam adjustment will make in coming driver dazzled or insufficient lighting. -
Page 36: Steering Handle
To this chapter contents 2. MAINTENANCE INFORMATION Steering Handle Caution Check all wires and cables if they are interfered with the rotation of steering handle bar. Lift the front wheel out of ground. Turn handle from right to left alternative and check if turning is smoothly. -
Page 37: Special Tools List
To this chapter contents 2. MAINTENANCE INFORMATION Special Tools List NAME NAME NAME R/L. CRANK DISASS. TOOL CRANK SHAFT PULLER L. CRANK SHAFT BRG. DRIVER SYM-1120000-H9A SYM-1130000-H9A SYM-9100200-H9A (ψ22mm) (ψ30mm) CRANK SHAFT BRG. FIXING NAME NAME NAME CRANK CASE BUSH PULLER... - Page 38 To this chapter contents 2. MAINTENANCE INFORMATION NAME Inner bearing puller NAME Outer bearing puller NAME AC.G. Flywheel puller SYM-6204002 SYM-6204001 SYM-3110A00 (12*20*5) (6901) Water pump mechanical NAME Water pump oil seal driver NAME Water pump bearing driver NAME seal driver...
- Page 39 To this chapter contents 2. MAINTENANCE INFORMATION NAME Drive shaft puller NAME Drive shaft install bush NAME Extension bush (long) SYM-1130000-L SYM-1130010 SYM-1130031 (55mm) NAME Extension bush (short) NAME Torque wrench NAME Rear axle nut torque wrench SYM-1130032 SYM-HT07004-RA1 SYM-4230200...
- Page 40 Home page Contents 3. LUBRICATION SYSTEM Mechanism Diagram ······························ 3-1 Engine Oil Strainer Clean ······················ 3-3 Precautions in Operation ······················ 3-2 Oil Pump ················································· 3-4 Troubleshooting ···································· 3-2 Gear Oil ··················································· 3-7 Engine Oil ··············································· 3-3 Mechanism Diagram Valve Rocker Arm Press-In Lubrication Cam Shaft Oil Route...
-
Page 41: Precautions In Operation
SAE 10W-30 (Recommended King serial oils) Gear oil Disassembly: 750c.c. Change: 650c.c. Gear oil viscosity SAE 140 (Recommended SYM Hypoid gear oils) 單位:mm Items Standard (mm) Limit (mm) Inner rotor clearance 0.15 0.20 Oil pump Clearance between outer rotor and body 0.15~0.20... -
Page 42: Engine Oil
To this chapter contents 3. LUBRICATION SYSTEM Engine Oil Turn off engine, and park the ATV in flat surface with main stand. Check oil level with oil dipstick So not screw the dipstick into engine as checking. If oil level is nearly low level, fill out recommended oil to upper level. -
Page 43: Oil Pump
To this chapter contents 3. LUBRICATION SYSTEM Oil Pump Oil Pump Removal Remove generator and starting gear. (Refer to chapter 10) 。 Remove snap ring and take out oil pump driving chain and sprocket. Clip Make sure that pump shaft can be rotated freely. Remove 2 screws on the oil pump, and then remove oil pump. - Page 44 To this chapter contents 3. LUBRICATION SYSTEM Check clearance between inner and outer rotors. Limit: 0.20 mm Check clearance between rotor side face and pump body Limit: 0.12 mm Oil Pump Re-assembly Install inner and outer rotors into the pump body Align the indent on driving shaft with that of inner rotor.
- Page 45 To this chapter contents 3. LUBRICATION SYSTEM Oil Pump Installation Install the oil pump, and then tighten bolts. Torque value:0.8~1.2kgf-m Make sure that oil pump shaft can be rotated freely. Install oil pump driving chain and sprocket, and then install snap ring onto oil pump shaft. Install starting gear and generator.
-
Page 46: Gear Oil
To this chapter contents 3. LUBRICATION SYSTEM Gear Oil Gear oil Inspection window Oil level inspection Park the ATV on flat surface. Check gear oil inspection window, gear oil level whether above scale division. Gear lubrication oil quantity has to be measured Gear oil Inspection window with measure device. - Page 47 To this chapter contents 3. LUBRICATION SYSTEM Notes:...
-
Page 48: Fuel System
Home page Contents 4. FUEL SYSTEM Mechanism Diagram ......4-1 Throttle Valve ........4-6 Precautions in Operation..... 4-2 Float Chamber........4-7 Trouble Diagnosis........ 4-3 Adjustment of Idle Speed....4-9 Carburetor Remove / Install ....4-4 Fuel Tank ..........4-10 Air Cut-Off Valve ........4-5 Air Cleaner..........4-11 Mechanism Diagram Fuel tank cap... -
Page 49: Precautions In Operation
To this chapter contents 4. FUEL SYSTEM Precautions in Operation General Information Warning Gasoline is a low ignition point and explosive materials, so always work in a well-ventilated place and strictly prohibit flame when working with gasoline. Cautions Do not bend off throttle cable. Damaged throttle cable will make unstable drive-ability. When disassembling fuel system parts, pay attention to O-ring position, replace with new one as re-assembly There is a drain screw in the float chamber for draining residual gasoline. -
Page 50: Trouble Diagnosis
To this chapter contents 4. FUEL SYSTEM Trouble Diagnosis Poor engine start Mixture too lean No fuel in fuel tank Clogged fuel injector Clogged fuel tube Vacuum piston stick and closed Too much fuel in cylinder Malfunction of float valve No spark from spark plug(malfunction of ignition Fuel level too low in float chamber system ) -
Page 51: Carburetor Remove / Install
To this chapter contents 4. FUEL SYSTEM Carburetor Remove / Install Screw Removal Drain out fuel in the float chamber. Loosen the choke cable fixed iron sheet screw from plate. Choke cable Remove the choke cable Choke cable Remove the carburetor top parts from the carburetor. -
Page 52: Air Cut-Off Valve
To this chapter contents 4. FUEL SYSTEM Air Cut-Off Valve 2 screws Disassembly Remove 2 screws. Remove air cut-off valve cover, spring and valve. O-ring Spring Air cut-off valve Cover Inspection Check the valve is in normal. If the valve is in normal, it will restrict air-flow. If air-flow is no restrict, replace carburetor assembly. -
Page 53: Throttle Valve
To this chapter contents 4. FUEL SYSTEM Throttle Valve Disassembly Remove carburetor upper parts, and then remove throttle valve and throttle cable. Throttle valve Disconnect the throttle cable from the throttle valve and remove the valve spring. Remove the fuel needle clamp and fuel needle. Spring Assembly Place the fuel needle onto the throttle valve and... -
Page 54: Float Chamber
To this chapter contents 4. FUEL SYSTEM Float Chamber Disassembly Remove 3 mounting screws and remove float chamber cover. 3 Screws Float Remove the fuel level plate, float pin, float and Float valve float valve. Fuel level plate Inspection Check float valve and valve seat for damage, blocking. - Page 55 To this chapter contents 4. FUEL SYSTEM Remove main jet, needle jet holder, needle jet, Needle jet holder slow jet and air adjustment screw. Main jet Caution Take care not to damage jets and adjust screw. Before removing adjustment screw, turn it all the way down and note the number of turns.
-
Page 56: Adjustment Of Idle Speed
To this chapter contents 4. FUEL SYSTEM Adjustment of Idle Speed Parking brake Caution Air screw was set at factory, so no adjustment is needed. Note the number of turns it takes to screw it all the way in for ease of installation. The parking brake must be used to stop the ATV to perform the adjustments. -
Page 57: Fuel Tank
To this chapter contents 4. FUEL SYSTEM Fuel Tank Fuel unit removal Open the seat. Remove the front cover (2 screws). Remove the front body cover (6 screws and 5 bolts). Remove the tank cover (2 bolts). Disconnect fuel unit coupler. Remove fuel unit (4 bolts). -
Page 58: Air Cleaner
To this chapter contents 4. FUEL SYSTEM Air Cleaner Clamp Removal Loosen the clamp strip of air cleaner and carburetor, and then remove the vapor hose. Remove the air cleaner (2 bolts). Installation Install the tank in the reverse order of removal. 2 bolts 3 screws Cleaning air cleaner element... - Page 59 To this chapter contents 4. FUEL SYSTEM Notes: 4-12...
-
Page 60: Engine Removal
Home page Contents 5. ENGINE REMOVAL Precautions in Operation ..... 5-1 Engine Installation ........ 5-5 Removal of Engine ....... 5-2 Removal of Engine Hanger Bush ..5-6 Precautions in Operation General Information The engine has to be supported with special service tools that can be lifted or adjustable. Engine shall be removal in the conditions of necessary repair or adjustment to the transmission system only. - Page 61 To this chapter contents 5. ENGINE REMOVAL Removal of Engine Negative Remove the seat. Remove battery negative post (-). Remove battery positive (+) post. Remove front fender, rear fender and the footrest (refer chapter 13). Negative Remove starter motor wire from start relay. Starter motor wire Remove the spark plug cap and remove ignition cable Spark plug cap...
- Page 62 To this chapter contents 5. ENGINE REMOVAL Remove the exhaust muffler (2 bolts, 2 nuts). 2 nuts 2 bolts Disconnect the choke cable. Disconnect the carburetor upper parts and cable. Remove fuel pipe and vacuum pipe Release the clamp strip of air cleaner duct. Clamp screws 2 nuts Release the 2 nuts of carburetor insulator, and...
- Page 63 To this chapter contents 5. ENGINE REMOVAL Remove gear change lever (1 bolt). 1 bolt Remove coolant drain bolt, and drain out coolant. Water hoses clamp Remove water hoses from water pump. Drain bolt Remove the thermo-sensor wire and coolant Thermo-sensor wire By-pass pipe by-pass pipe.
-
Page 64: Engine Installation
To this chapter contents 5. ENGINE REMOVAL Remove the drive chain retaining clip and master link, and then remove the drive chain. Clip Remove the rear side engine hanger mounting nuts and bolts. 2 nuts Remove the front side engine hanger mounting nut and bolt, then remove engine. - Page 65 To this chapter contents 5. ENGINE REMOVAL Removal of Engine Hanger Bush Bush Check if engine hanger bush for damage. Remove the engine hanger bush, must be disassemble crankcase and transmission cover first. Pressing out If engine hanger and the rear cushion rubber bush damaged.
-
Page 66: Cylinder Head/Valve
Home page Contents 6. CYLINDER HEAD/VALVE Mechanism Diagram ··························· 6-1 Valve Stem Replacement··················· 6-8 Precautions in Operation ··················· 6-2 Valve Seat Inspection and Service ··· 6-9 Troubleshooting·································· 6-3 Cylinder Head Reassembly ··············· 6-11 Cylinder Head Removal······················ 6-4 Cylinder Head Installation ················· 6-12 Cylinder Head Disassembly···············... -
Page 67: Precautions In Operation
To this chapter contents 6. CYLINDER HEAD/VALVE Precautions in Operation General Information This chapter is contained maintenance and service for cylinder head, valve, and camshaft as well as rocker arm. Cylinder head service can be carried out when engine is in frame. Specification Item Standard... -
Page 68: Troubleshooting
To this chapter contents 6. CYLINDER HEAD/VALVE Troubleshooting Engine performance will be affected by troubles on engine top parts. The trouble usually can be determined or by performing cylinder compression test and judging the abnormal noise generated. Low compression pressure 1. -
Page 69: Cylinder Head Removal
To this chapter contents 6. CYLINDER HEAD/VALVE Cylinder Head Removal Vacuum tube Clamp strip Remove seat, luggage box and body cover. Remove engine. (Refer to chapter 5) Remove the clamp strip bolt of carburetor, and disconnect vacuum tube from the carburetor insulator. - Page 70 To this chapter contents 6. CYLINDER HEAD/VALVE Remove the 2 cylinder head mounting bolts from 4 Nuts 2 Insulator bolts cylinder head right side, and then remove 4 nuts and washers from cylinder head upper side. Cylinder head mounting Remove the cylinder head. Remove 2 bolts of carburetor insulator and then take the insulator out.
-
Page 71: Cylinder Head Disassembly
Thus, press length is based on the valve cotter in which can be removed. Special Service Tool: Valve spring remover (SYM-1471110) Valve spring installer (SYM-1471120) Remove valve stem guide seal. Clean carbon deposits in combustion chamber. -
Page 72: Cylinder Head Inspection
To this chapter contents 6. CYLINDER HEAD/VALVE Cylinder Head Inspection Check if spark plug and valve holes are cracked. Measure cylinder head warp with a straightedge and thickness gauge. Service limit: 0.5 mm Valve spring free length Measure the free length of intake and exhaust valve springs. -
Page 73: Valve Stem Replacement
To this chapter contents 6. CYLINDER HEAD/VALVE Caution If clearance between valve stem and valve guide exceeded service limit, check whether the new clearance that only replaces new valve guide is within service limit or not. If so, replace valve guide. -
Page 74: Valve Seat Inspection And Service
To this chapter contents 6. CYLINDER HEAD/VALVE Valve Seat Inspection and Service Clean up all carbon deposits onto intake and exhaust valves. Apply with emery slightly onto valve contact face. Grind valve seat with a rubber hose or other manual grinding tool. Caution Do not let emery enter into between valve stem and valve guide. - Page 75 To this chapter contents 6. CYLINDER HEAD/VALVE Use 60° cutter to cut a quarter lower parts out. Remove the cutter and check new valve seat. Old valve seat width 60° Use 45° cutter to grind the valve seat to specified width.
-
Page 76: Cylinder Head Reassembly
Special Service Tool: Valve spring remover (SYM-1471110) Valve spring installer (SYM-1471120) Tap valve stem to make valve retainer and valve stem sealing properly. Caution Place and hold cylinder head on to working table so that can prevent from valve damaged. -
Page 77: Cylinder Head Installation
To this chapter contents 6. CYLINDER HEAD/VALVE Cylinder Head Installation Install a new O-ring into the indent of carburetor insulator, and then install the insulator onto cylinder head with 2 bolts. Carburetor insulator Install camshaft into cylinder head, and align rocker pin with rocker arm pin hole. - Page 78 To this chapter contents 6. CYLINDER HEAD/VALVE Tighten 4 nuts and washers on the cylinder head 4 Nuts 2 Insulator bolts upper side, and then tighten 2 cylinder head mounting bolts of cylinder head side cover. Torque value: 2.0~2.4kgf-m Install and tighten spark plug Torque value: 2.0~2.4kgf-m Caution This model is equipped with more precision...
-
Page 79: Valve Clearance Adjustment
To this chapter contents 6. CYLINDER HEAD/VALVE Valve Clearance Adjustment Loosen valve clearance adjustment nuts and bolts located on valve rocker arm. Measure and adjust valve clearance with feeler gauge. After valve clearance had been adjusted to standard value, hold adjustment bolt and then tighten the Adjustment nut. -
Page 80: Cylinder/Piston
Home page Contents 7. CYLINDER/PISTON Mechanism Diagram ······························ 7-1 Piston Removal ··································7-4 Precautions in Operation ······················ 7-2 Piston Ring Installation ·····················7-6 Trouble Diagnosis·································· 7-2 Piston Installation ······························7-7 Cylinder Removal··································· 7-3 Cylinder Installation ···························7-7 Mechanism Diagram... -
Page 81: Precautions In Operation
To this chapter contents 7. CYLINDER/PISTON Precautions in Operation General Information Both cylinder and piston service cannot be carried out when engine mounted on frame. UA18A Specification Unit:mm Item Standard Limit 60.995~61.015 61.016 Cylinder Bend 0.050 Top ring 0.015~0.050 0.090 Clearance between piston rings ring... -
Page 82: Cylinder Removal
To this chapter contents 7. CYLINDER/PISTON Cylinder Removal Remove cylinder head (refer to chapter 6). Remove coolant hose from cylinder. Remove cylinder. Coolant hose Remove cylinder gasket and dowel pin. Cover the holes of crankcase and cam chain with a piece of cloth. Clean up all residues or foreign materials from the two matching surfaces of cylinder and crankcase. -
Page 83: Piston Removal
To this chapter contents 7. CYLINDER/PISTON Piston Removal Plug crankcase opening with a cleaning cloth to prevent from piston pin snap ring or other foreign materials falling into crankcase when disassembling. Hold another snap ring with pliers. Push out the piston pin from the side that not removed the snap ring. - Page 84 To this chapter contents 7. CYLINDER/PISTON Measure the outer diameter of piston pin. Service Limit: 15.040 mm Measure the inner diameter of connecting rod small end. Service Limit: 15.06 mm Measure the inner diameter of piston pin hole. Service Limit: 15.04 mm Calculate clearance between piston pin and its hole.
-
Page 85: Piston Ring Installation
To this chapter contents 7. CYLINDER/PISTON Piston Ring Installation Clean up piston top, ring groove, and piston surface. Install the piston ring onto piston carefully. Place the openings of piston ring as diagram shown. Caution Do not damage piston and piston rings as installation. All marks on the piston rings must be forwarded to up side. -
Page 86: Piston Installation
To this chapter contents 7. CYLINDER/PISTON Piston Installation Install piston and piston pin, and place the IN marks on the piston top side forward to intake valve. Install new piston pin snap ring. Caution Do not let the opening of piston pin snap ring align with the opening piston ring. - Page 87 To this chapter contents 7. CYLINDER/PISTON Notes:...
- Page 88 Home page Contents 8. V-BELT DRIVING SYSTEM/KICK STARTER Mechanism Diagram ··························· 8-1 Kick Starter···········································8-4 Maintenance Description ···················· 8-2 Drive Belt ··············································8-5 Trouble Diagnosis ······························· 8-2 Drive Face·············································8-7 Left Crankcase Cover ························· 8-3 Clutch Outer/Driven Pulley··················8-10 Mechanism Diagram 5.0~6.0kgf-m 5.0~6.0kgf-m...
-
Page 89: Maintenance Description
33.940 ID of drive face 34.000~34.025 34.060 Torque value Special Service Tools Driven face nut: 5.0~6.0kgf-m Clutch spring compressor: SYM-2301000 Clutch outer nut: 5.0~6.0kgf-m Inner bearing puller: SYM-6204002 Clutch nut wrench 39 x 41 mm: SYM-9020200 Universal holder: SYM-2210100 Bearing driver:... -
Page 90: Left Crankcase Cover
To this chapter contents 8. V-BELT DRIVING SYSTEM/KICK STARTER Left Crankcase Cover Clamps Left crankcase cover removal Release the clamp strips of left crankcase cover ducts, and then remove the ducts. Remove left crankcase cover. (7 bolts) Remove 2 dowel pin and gasket. 7 bolts Left crankcase cover install Install left crankcase cover in the reverse... -
Page 91: Kick Starter
To this chapter contents 8. V-BELT DRIVING SYSTEM/KICK STARTER Kick Starter Removal Remove left crankcase cover. Disassembly of kick starter Remove 4 screws, and remove the kick starter plate. Remove snap clip and thrust washer from left crankcase cover. Install kick start arm, rotate the lever slightly, and then remove driven gear and washer. -
Page 92: Drive Belt
Drive Belt Removal Remove left crankcase cover Hold drive face with universal holder, and remove nut and drive face. Special Tool:universal holder Tools number:SYM-2210100 Universal holder Hold clutch outer with universal holder, and Drive belt remove nut and clutch outer. Caution Using special service tools for tightening or loosening the nut. - Page 93 To this chapter contents 8. V-BELT DRIVING SYSTEM/KICK STARTER Installation Caution Pull out driven face to avoid it closing. Cannot oppress friction plate comp in order Driven face to avoid creates the distortion or the damage. Install driving belt onto driven pulley. Install the driven pulley that has installed the belt Friction plate comp onto drive shaft.
-
Page 94: Drive Face
To this chapter contents 8. V-BELT DRIVING SYSTEM/KICK STARTER Drive Face Removal Remove left crankcase cover. Hold drive face with universal holder, and then remove drive face nut. Remove drive face. Universal holder Remove driving belt and movable drive face comp Movable drive face from crankshaft. - Page 95 To this chapter contents 8. V-BELT DRIVING SYSTEM/KICK STARTER Inspection Weight roller The weight rollers are to press movable drive face by means of centrifuge force. Thus, if weight rollers are worn out or damaged, the centrifuge force will be affected. Check if rollers are worn or damaged.
- Page 96 To this chapter contents 8. V-BELT DRIVING SYSTEM/KICK STARTER With 4~5g grease spreads wipes drives in the movable drive face axis hole. Install drive face boss. Caution The movable drive face surface has to be free of grease. Clean it with cleaning solvent. Drive face boss Install movable drive face comp.
-
Page 97: Clutch Outer/Driven Pulley
To this chapter contents 8. V-BELT DRIVING SYSTEM/KICK STARTER Clutch Outer/Driven Pulley Clutch nut wrench Disassembly Remove drive belt, clutch outer and driven pulley. Install clutch spring compressor onto the pulley assembly, and operate the compressor to let the wrench be installed more easily. Caution Do not press the compressor too much. - Page 98 To this chapter contents 8. V-BELT DRIVING SYSTEM/KICK STARTER Clutch lining Clutch lining Measure each clutch weight thickness. Replace it if exceeds service limit. Service limit: 2.0 mm Clutch weight Driven pulley spring Measure the length of driven pulley spring. Replace it if exceeds service limit.
- Page 99 To this chapter contents 8. V-BELT DRIVING SYSTEM/KICK STARTER Clutch weight Replacement Spring Driving plate Remove snap ring and washer, and then remove clutch weight and spring from driving plate. Caution Some of models are equipped with one mounting plate instead of 3 snap rings. Check if spring is damage or insufficient elasticity.
- Page 100 To this chapter contents 8. V-BELT DRIVING SYSTEM/KICK STARTER Install snap ring and mounting plate onto setting pin. Snap ring Replacement of Driven Pulley Bearing Outer bearing Remove inner bearing. Clipper Caution If the inner bearing equipped with oil seal on side in the driven pulley, then remove the oil seal firstly.
- Page 101 To this chapter contents 8. V-BELT DRIVING SYSTEM/KICK STARTER Installation of Clutch OUTER/Driven Pulley Oil seal Assembly Install new oil seal and O-ring onto movable driven face. Apply with specified grease to lubricate the inside of movable driven face. Specified grease O-ring Movable driven face Install the movable driven face onto driven face.
-
Page 102: Final Driving Mechanism
Home page Contents 9. FINAL DRIVING MECHANISM Mechanism Diagram - transmission cover Inspection of Mission Mechanism ···· 9-6 ······························································ 9-1 Bearing Replacement ························ 9-8 Mechanism Diagram - transmission ·· 9-2 Re-assembly of Final Driving Precautions in operation ···················· 9-3 Mechanism ········································· 9-10 Trouble Diagnosis ·······························... -
Page 103: Mechanism Diagram - Transmission
To this chapter contents 9. FINAL DRIVING MECHANISM Mechanism Diagram - transmission Shift spindle arm Shift spindle bracket Drive sprocket Bearing (6205LU) Shift fork shaft Shift spindle Bearing (6204) Oil seal (30x40x5) Gear shift drum Needle bearing (4905) Shift fork Final shaft Bearing (6302) Counter shaft... -
Page 104: Trouble Diagnosis
Oil seal (20*32*6) driver: SYM-9120200 Inner bearing puller: SYM-6204002 Drive shaft puller: SYM-1130000-L Drive shaft install bush: SYM-1130010 Extension bush (long): SYM-1130031 Extension bush (short): SYM-1130032 Trouble Diagnosis Engine can be started but motorcycle can not be moved. Damaged driving gear... - Page 105 To this chapter contents 9. FINAL DRIVING MECHANISM Disassembly of Final Driving Drive sprocket bolts Mechanism Remove engine. Remove driven pulley. Drain gear oil out from gear box. Remove drive sprocket. Gear oil drain bolt 10 bolts Remove shift spindle bracket. Remove gear box cover bolts (10 bolts) and then remove the cover and final shaft.
- Page 106 To this chapter contents 9. FINAL DRIVING MECHANISM Remove the drive shaft. In order to avoid damaging the crankcase, in the cover place a rag between the case and table. Check drive shaft and gear for wear or damage. Special tool: Shaft protector Bearing Oil seal...
-
Page 107: Inspection Of Mission Mechanism
To this chapter contents 9. FINAL DRIVING MECHANISM Inspection of Mission Mechanism Check if the shift spindle is wear or damage. Check if the shift drum is wear or damage. Check if the shift fork and shaft is wear or damage. Check if the gear shift shaft is wear or damage. - Page 108 To this chapter contents 9. FINAL DRIVING MECHANISM Check if the counter shaft is wear or damage. Check if the final shaft and gear are burn, wear or damage. Check bearings on gear box and gear box cover. Drive shaft bearing Gear box Rotate each bearing’s inner ring with fingers.
-
Page 109: Bearing Replacement
To this chapter contents 9. FINAL DRIVING MECHANISM Bearing Replacement Inner bearing puller Caution Never install used bearings. Once bearing removed, it has to be replaced with new one. Crankcase side Remove driving shaft bearing lock bolt, and then remove driving shaft bearing from left crankcase using following tools. - Page 110 To this chapter contents 9. FINAL DRIVING MECHANISM Gear box side Inner bearing puller Use inner bearing puller to remove the final shaft needle bearing, gear shift shaft bearing and counter shaft bearing from the cover inner side. Special tool: Inner bearing puller Remove cir clip of final shat out side bearing.
-
Page 111: Re-Assembly Of Final Driving
To this chapter contents 9. FINAL DRIVING MECHANISM Re-assembly of Final Driving Oil seal Mechanism Apply with grease onto the oil seal lip of final driving shaft. Final shaft Install final shaft, and then install the washer and cir clip. Final shaft washer Cir clip Counter shaft... - Page 112 To this chapter contents 9. FINAL DRIVING MECHANISM Align the position mark on the shift spindle Position mark sprocket with that of shift drum, and then install shift spindle. 10 bolts Install dowel pin and new gasket. Install gear box cover and bolts, and tighten. Torque value: 1.0~1.4kgf-m Apply with grease onto new oil seal lip, and then install the shift spindle oil seal.
- Page 113 To this chapter contents 9. FINAL DRIVING MECHANISM Notes: 9-12...
-
Page 114: Alternator
Home page Contents 10. ALTERNATOR/STARTING CLUTCH Mechanism Diagram ··························10-1 Starting Clutch ··································· 10-4 Precautions in Operation···················10-2 Flywheel Installation·························· 10-7 Right Crankcase Cover Removal ······10-3 A.C.G. Set Installation························ 10-7 A.C.G. Set Removal····························10-3 Right Crankcase Cover Installation·· 10-7 Flywheel Removal ······························10-3 Mechanism Diagram 1.0~1.4kgf-m 5.0~6.0kgf-m 0.8~1.2kgf-m... -
Page 115: Precautions In Operation
20.026~20.045 20.100 OD of starting clutch gear 42.175~42.200 42.100 Torque value Flywheel nut 5.0~6.0kgf-m Starting clutch hexagon bolt 1.0~1.4kgf-m with adhesive 8 mm bolts 0.8~1.2kgf-m 12 mm bolts 1.0~1.4kgf-m Tools Special tools A.C.G. flywheel puller: SYM-3110A00 Universal holder: SYM-2210100 10-2... -
Page 116: Right Crankcase Cover Removal
To this chapter contents 10. ALTERNATOR/STARTING CLUTCH Right Crankcase Cover Removal 9 bolts Remove left footrest and muffler. Drain out the engine oil and coolant, and then remove coolant hoses. Remove water pump cover (4 bolts). Remove 9 bolts from the right crankcase cover. Remove the right crankcase cover. -
Page 117: Starting Clutch
To this chapter contents 10. ALTERNATOR/STARTING CLUTCH Remove the oil through guide pin from crankshaft. Guide pin Pull out flywheel with A.C.G. flywheel puller. Special tool: A.C.G. Flywheel puller Flywheel puller Starting Clutch Starting driven gear Removal Remove starting driven gear. Remove the starter reduction gear, and the shaft. - Page 118 To this chapter contents 10. ALTERNATOR/STARTING CLUTCH Starting Clutch Inspection Check the starting clutch gear for wear or damage. Measure the ID and OD of the starting clutch gear. Service Limit: ID: 20.1 mm OD: 42.10 mm Check the starting reduction gear and shaft for wear or damage.
- Page 119 To this chapter contents 10. ALTERNATOR/STARTING CLUTCH Remove 3 hexagon bolts from starting one way clutch. Disassembly Install the components in the reverse procedures of removal. Caution Tape a tightening tape onto the thread of hexagon bolt. Torque value: 1.0~1.4kgf-m Installation Reduction gear Install reduction gear shaft and reduction gear.
-
Page 120: Flywheel Installation
To this chapter contents 10. ALTERNATOR/STARTING CLUTCH Flywheel Installation Guide pin Align the key on crankshaft with the flywheel groove, and then install the flywheel. Insert the oil through guide pin onto crankshaft. Make sure that there is no other material stock on it. - Page 121 To this chapter contents 10. ALTERNATOR/STARTING CLUTCH Install the water pump cover onto crankcase cover. Connect water hoses to the right crankcase cover and water pump cover. 10-8...
- Page 122 Home page Contents 11. CRANKCASE / CRANK Mechanism Diagram ··························11-1 Disassembly of crankcase ················ 11-3 General information ···························11-2 Crankshaft Inspection ······················· 11-5 Trouble diagnosis ······························11-2 Assembly of crankcase ····················· 11-6 Mechanism Diagram 0.8~1.2kgf-m 0.8~1.2kgf-m Eng. Oil drain bolt 1.1~1.5kgf-m Gear oil drain bolt 1.1~1.5kgf-m 11-1...
-
Page 123: General Information
R/L. crank disassemble/ install tool: SYM-1300001-H9A L. crank shaft bearing driver: SYM-9100200-H9A Crank shaft bearing fixing socket: SYM-9100210-H9A Crank shaft puller: SYM-1130000-H9A L. crank shaft oil seal driver (25*40*8): SYM-9121600 Outer bearing puller: SYM-6204010 Inner bearing puller: SYM-6204020 Clutch nut wrench: SYM-9020200... -
Page 124: Disassembly Of Crankcase
To this chapter contents 11. CRANKCASE / CRANK Disassembly of crankcase Tensioner Remove the cam chain setting plate, and then remove cam chain. Loosen the bolt and remove the tensioner. Cam chain setting plate 2 bolts Loosen 2 bolts on the right crankcase. 7 bolts Loosen 7 bolts on the left crankcase. - Page 125 11. CRANKCASE / CRANK Remove crank by left crank shaft. Refer to chapter 2: Special tools Special tool: R/L. crank case disassemble/install tool (SYM-1120000-H9A) Remove crankshaft from right crankcase. Remove gasket and dowel pins. Scrape gasket residues off the crankcase contact surface.
-
Page 126: Crankshaft Inspection
To this chapter contents 11. CRANKCASE / CRANK Crankshaft Inspection Use a thickness gauge to measure left and right clearance of connecting rod big end. Service limit: 0.6 mm Measure point for the crank big end of the connecting rod. Measure the clearance of the big end at the vertical directions. -
Page 127: Assembly Of Crankcase
To this chapter contents 11. CRANKCASE / CRANK Assembly of crankcase Special tool: R/L. crank case disassemble/install tool L. crank shaft bearing driver Crank shaft bearing fixing socket Crank shaft puller Clutch nut wrench The new bearing and bearing driver, puts on the left crank case. - Page 128 To this chapter contents 11. CRANKCASE / CRANK Install R/L. crank case disassemble/install tool on Crank shaft the left crank case. puller Again turns on crank shaft puller on the crankshaft spiral tooth. Caution Crank shaft puller lock into on as far as possible the crank spiral tooth, prevented pulls the bad crank spiral tooth.
- Page 129 To this chapter contents 11. CRANKCASE / CRANK Tighten 7 bolts on the crankcase. 7 bolts Torque value: 0.8~1.2kgf-m Clean the crankshaft. Apply a layer of grease on the lip of oil seal, Puts on the left crank shaft. Install the oil seal in the left crankcase with care not to damage the lip of the oil seal.
-
Page 130: Cooling System
Home page Contents 12. COOLING SYSTEM Mechanism Diagram ··························12-1 System Test········································ 12-5 General Information ···························12-2 Radiator ·············································· 12-6 Trouble Diagnosis ······························12-2 Water Pump ········································ 12-8 Trouble Diagnosis for Cooling System Thermostat ········································· 12-12 ·····························································12-3 Mechanism Diagram Cooling fan Thermo switch (fan) Radiator filler cap Reserve tank Radiator filler cap... -
Page 131: General Information
For water pump rotor 1.0~1.4kgf-m Tools Requirement Special tools Water pump bearing driver (6901): SYM-9100100 Water pump oil seal driver (Inner): SYM-9120500-H9A Water pump mechanical seal driver: SYM-1721700-H9A Inner bearing puller: SYM-6204020 Trouble Diagnosis The engine temperature is too high... - Page 132 To this chapter contents 12. COOLING SYSTEM Trouble Diagnosis for Cooling System The temperature indicated is too high A. Stop and waiting for the A1.Refill the radiator with engine is completely coolant then check for any cooled down, open cap to Water leaking problem leakage? check the capacity of...
- Page 133 To this chapter contents 12. COOLING SYSTEM Preceding page E. Keep eng. 3000~4000 rpm E-1. Measure thermal switch to and inspect cooling fan was confirm voltage be Replace thermal switch operating after the changed (12→0V)? temperature gauge over 3 checks? E-2.
-
Page 134: System Test
Stop the engine. Add coolant to proper level if necessary. Screw and tighten up the radiator filler cap. Caution In order to avoid the water tank rusting, please do not use the unclear trade mark refrigerant. Coolant recommended: SYM Bramax radiator agent. Concentration: 50% 12-5... -
Page 135: Radiator
To this chapter contents 12. COOLING SYSTEM Check reserve tank Remove the front cover, and then remove reserve tank filler cap. Check the liquid level in the front fender right side. Add coolant to proper level if too low. Reinstall the reserve tank filler cap. Upper Caution The reserve tank liquid level coca too is not high,... - Page 136 To this chapter contents 12. COOLING SYSTEM Disconnect the couplers for the thermo switch and Fan motor coupler Thermo switch coupler fan motor. Remove coolant upper side pipe. Loosen the radiator 1 bolts. 1 bolt Coolant pipe Remove coolant outlet pipe, and then remove radiator and cooling fan.
-
Page 137: Water Pump
To this chapter contents 12. COOLING SYSTEM Water Pump Check water pump seal / cooling system divulges inspection Disassembles the refrigerant drain bolt, overflows little buckles the N actually fluid, confirmed overflows the refrigerant whether has the greasy dirt. Turns on lathe the engine oil gauge rule, the inspection engine oil whether does have bleaches situation of the emulsified. - Page 138 To this chapter contents 12. COOLING SYSTEM Check any wear and damage of the mechanical Mechanical seal seal and inside seal. Caution The mechanical seal and inside seal must be replaced as a unit. Replacement of Mechanical Seal Water pump bearing Remove the inside bearing by inner bearing puller.
- Page 139 To this chapter contents 12. COOLING SYSTEM Install the new inner seal onto the right crankcase. Water pump oil seal Special tools: driver (inner) Water pump oil seal driver (inner) Install a new outside bearing to the right Water pump bearing crankcase cover.
- Page 140 To this chapter contents 12. COOLING SYSTEM Install the seal washer into the rotor. Caution Washer must be replaced together with the mechanical seal. Install the rotor onto the water pump shaft and Water pump rotor tighten. Torque Value: 1.0~1.4kgf-m Caution The rotor is left thread.
-
Page 141: Thermostat
To this chapter contents 12. COOLING SYSTEM Thermostat Temperature sensor Bolt Please refer to chapter 17 for inspection of temperature sensor. Removal Drain out the coolant. Disconnect the cable of temperature sensor. Disconnect the by-pass pipe. Remove the thermostat set. (1 bolt) By-pass pipe Disassembly Temperature sensor... - Page 142 To this chapter contents 12. COOLING SYSTEM Inspection Visually inspect thermostat for any damage. Place the thermostat into heated water to check its operation. Caution Whenever the thermostat and the thermometer are in contact to the wall of heated water container, the reading displayed is incorrect.
- Page 143 To this chapter contents 12. COOLING SYSTEM Notes: 12-14...
-
Page 144: Body Cover
Home page Contents 13. BODY COVER Mechanism Diagram ···························13-1 Rear center cover ······························ 13-4 Maintenance·········································13-2 Rear carrier········································· 13-4 Handle front cover·······························13-3 Rear fender········································· 13-5 Handle protect cover···························13-3 Front fender········································ 13-7 Front center cover·······························13-3 Footrest ·············································· 13-9 Mechanism Diagram Seat Handle cover Left handle protect cover Right handle protect cover Rear fender... -
Page 145: Maintenance
To this chapter contents 13. BODY COVER Maintenance Body covers disassemble sequence: Handle cover Rear carrier Handle protect cover Rear fender Front center cover Rear center cover Right footrest Front fender Be careful not to damage various covers in assembly or disassembly operation. Never injure hooks molded on the body covers. -
Page 146: Handle Front Cover
To this chapter contents 13. BODY COVER Handle front cover Disassembly Loosen 3 screws from handle cover rear side, and then remove handle cover. Installation Install in reverse order of removal procedures. 3 Screws Handle protect cover Loosen 2 screw from handle protect cover, and then remove handle protect cover. -
Page 147: Rear Center Cover
To this chapter contents 13. BODY COVER Rear center cover Fuel tank cap Remove Remove seat. Remove fuel tank cap. Remove 2 bolts, and then remove rear center cover. 2 bolts Installation Install in reverse order of removal procedures. Rear carrier Remove Loosen 4 bolts from the rear carrier. -
Page 148: Rear Fender
To this chapter contents 13. BODY COVER Rear fender Remove rear carrier. Pull the “Seat Release Bar” up in order to remove the seat. This seat release bar is under the rear side of the rear fender. Seat release bar Loosen the two bolts which connect the front fender and rear fender. - Page 149 To this chapter contents 13. BODY COVER Loosen the 2 bolts, which connect the rear tender and frame, these 2 bolts just below the rear fender. 2 bolts Remove taillight couplers, and then remove rear fender. Installation Install in reverse order of removal procedures. Taillight couplers 13-6...
-
Page 150: Front Fender
To this chapter contents 13. BODY COVER Front fender Fuel tank cap Remove Remove seat. Remove fuel tank cap. Remove 2 bolts, and then remove rear center cover. 2 bolts Loosen the two bolts which connect the front fender and rear fender. 2 bolts Remove 1 screw, and then remove fixed support catch. - Page 151 To this chapter contents 13. BODY COVER Remove front fender upper side 1 bolt. 1 bolt Loosen the front fender two side bolts. 2 bolts Loosen the 6 screws, which connect the front fender and footrest, these 6 screws just be twin the front fender two side.
-
Page 152: Footrest
To this chapter contents 13. BODY COVER Footrest Remove Loosen the 6 screws, which connect the front fender and footrest, these 6 screws just be twin the front fender two side. 6 screw Loosen the 6 screws, which connect the rear fender and footrest, these 6 screws just be twin the rear fender two side. - Page 153 To this chapter contents 13. BODY COVER Note: 13-10...
- Page 154 Home page Contents 14. FRONT BRAKE & FRONT WHEEL Mechanism Diagram···························14-1 Adding Brake Fluid ···························· 14-8 Maintenance Description ···················14-2 Brake fluid replacement / Air-bleed·· 14-9 Trouble Diagnosis ······························14-3 Front Brake Caliper···························· 14-10 Front Wheel·········································14-4 Brake Disk ·········································· 14-11 Front Wheel Hub·································14-4 Front Brake Master Cylinder ·············...
-
Page 155: Maintenance Description
To this chapter contents 14. FRONT BRAKE & FRONT WHEEL Maintenance Description Operational precautions Caution Inhaling asbestos may cause disorders of respiration system or cancer, therefore, never use air hose or dry brush to clean brake parts. Use vacuum cleaner or other authorized tool instead. The brake caliper can be removed without removing the hydraulic system. -
Page 156: Trouble Diagnosis
To this chapter contents 14. FRONT BRAKE & FRONT WHEEL Trouble Diagnosis Soft brake lever Hard steering 1. Air inside the hydraulic system 1. Faulty tire 2. Hydraulic system leaking 2. Insufficient tire pressure 3. Worn master piston 4. Worn brake pad 5. -
Page 157: Front Wheel
To this chapter contents 14. FRONT BRAKE & FRONT WHEEL Front Wheel Removal Raise the front wheels off the ground by placing a jack or other support under the frame. Remove the front wheel nuts, and then remove front wheels. Installation Install the front wheel and tighten the nuts. - Page 158 To this chapter contents 14. FRONT BRAKE & FRONT WHEEL Disassembly Inner bearing puller Caution Never install used bearings. Once bearing removed, it has to be replaced with new one. Remove out side bearing and seal from wheel hub using following tools. Special tool: Inner bearing puller Remove front wheel hub bearing inner spacer.
- Page 159 To this chapter contents 14. FRONT BRAKE & FRONT WHEEL Assembly Bearing driver Install brake disk. Install new inner side bearing and seal into front wheel hub. Install front wheel hub bearing inner spacer. Install new out side bearing and seal into front wheel hub.
-
Page 160: Disk Brake System Inspection
To this chapter contents 14. FRONT BRAKE & FRONT WHEEL Disk Brake System Inspection Inspection By visual examination whether divulges or the damage, with spanner inspection brake tube seam whether becomes less crowded, and the inspection handle bar turn right or turn left, or pressure the cushion, whether besides the pipeline protection department, whether there is interferes, contacts other parts of. -
Page 161: Adding Brake Fluid
To this chapter contents 14. FRONT BRAKE & FRONT WHEEL Adding Brake Fluid Master cylinder Before the brake fluid reservoir is removed, turn the handle so that the brake fluid reservoir becomes horizontal, and then remove the brake fluid reservoir. When maintenance brake system, will be supposed to paint the surface or the rubber parts catches up by the rags. -
Page 162: Brake Fluid Replacement / Air-Bleed
To this chapter contents 14. FRONT BRAKE & FRONT WHEEL Brake fluid replacement / Air-bleed Air-bleed valve Connect drain hose to air-bleed valve. Open the drain valve on the caliper and operate the brake lever until the old brake fluid is entirely drained out. -
Page 163: Front Brake Caliper
To this chapter contents 14. FRONT BRAKE & FRONT WHEEL Front Brake Caliper Brake hose bolt Removal Place a container under the brake caliper, and loosen the brake hose bolt and finally remove the brake hose. Caution Do not spill brake fluid on painted surfaces. 2 bolts Remove two caliper bolts and the caliper. -
Page 164: Brake Disk
To this chapter contents 14. FRONT BRAKE & FRONT WHEEL Brake Disk Brake disk Inspection Visually check the brake disk for wear or break. Measure the thickness of the disk at several places. Replace the disk if it has exceeded the service limit. - Page 165 To this chapter contents 14. FRONT BRAKE & FRONT WHEEL Remove the rubber boot. Remove the cir clip. Cir clip Remove the piston and the spring. Rubber boot Clean the master cylinder with recommended Piston brake fluid. Piston cup Spring Master cylinder Master Cylinder Inspection Check the master cylinder for damage or scratch.
- Page 166 To this chapter contents 14. FRONT BRAKE & FRONT WHEEL Master Cylinder Install Install the rubber pad into the groove correctly. Place the master cylinder onto handlebar, and install the bolts. 2 socket bolts Install the brake lever, and connect leads to brake Brake lever bolt Brake light switch light switch.
- Page 167 To this chapter contents 14. FRONT BRAKE & FRONT WHEEL Notes: 14-14...
- Page 168 Home page Contents 15. STEERING / SUSPENSION Mechanism Diagram ··························15-1 Steering Tie-Rod ································ 15-7 Operational Precautions ····················15-2 Knuckle ··············································· 15-8 Trouble Diagnosis ······························15-2 Front Cushion ···································· 15-9 Steering Handle ··································15-3 Suspension Arm ································ 15-10 Steering Shaft ·····································15-6 Toe-In ·················································· 15-11 Mechanism Diagram 2.4kgf-m 4.0kgf-m...
-
Page 169: Operational Precautions
To this chapter contents 15. STEERING / SUSPENSION Operational Precautions Torque Values 2.4kgf-m Handlebar upper holder bolt 4.0kgf-m Handlebar under holder nut 3.4kgf-m Steering shaft holder bolt 5.0kgf-m Steering shaft nut 5.0kgf-m Steering tie-rod nut 5.0kgf-m Knuckle nut 3.6kgf-m Tie rod lock nut 5.0kgf-m Suspension arm nut Front... -
Page 170: Steering Handle
To this chapter contents 15. STEERING / SUSPENSION Steering Handle Removal Remove the handle cover, handle protect cover and front fender. (Refer to chapter 13) 3 Screws Main switch coupler Remove meter set and main switch couplers. Meter set couplers Speedometer cable Remove speedometer cable. - Page 171 To this chapter contents 15. STEERING / SUSPENSION Loosen the socket bolts for the front brake master Handle protect cover cylinder, and remove front brake master cylinder. brocket bolts Caution Do not let foreign materials enter into the cylinder. Master cylinder bolts Remove 2 screws, and then remove throttle hosing holder and throttle hosing.
- Page 172 To this chapter contents 15. STEERING / SUSPENSION Remove switch wire band. 4 socket bolts Remove handle mounting bolt, and then remove the handle upper holder, handle. Remove 2 nuts to remove handle under holder. 2 Nuts Installation Install in reverse order of removal procedures. Torque value: 4.0kgf-m Handlebar under holder nut...
-
Page 173: Steering Shaft
To this chapter contents 15. STEERING / SUSPENSION Steering Shaft Remove Remove cotter pins, and loosen right and left steering tie-rod nuts. Cotter pin Remove tie-rod. Tie-rod nuts Steering shaft nut Cotter pin Remove the cotter pin steering shaft, and below remove steering shaft nut and washer. -
Page 174: Steering Tie-Rod
To this chapter contents 15. STEERING / SUSPENSION Steering Tie-Rod Remove Remove cotter pin and tie-rod nut from steering shaft side. Cotter pin Tie-rod nuts Tie-rod nuts Remove cotter pin and tie-rod nut from wheel side. Cotter pin Inspection Inspect the tie-rod for damage or bending. Inspect the ball joint rubbers for damage , wear or deterioration. -
Page 175: Knuckle
To this chapter contents 15. STEERING / SUSPENSION Knuckle Remove Remove front wheel, front wheel hub and front brake caliper mounting seat. Tie-rod Remove cotter pin and tie-rod nut, remove tie rod. Remove cotter pin and flange pin hole bolt nut, remove bolt, sleeve, seal cover and knuckle. -
Page 176: Front Cushion
To this chapter contents 15. STEERING / SUSPENSION Front Cushion Cotter pin Remove Remove front cushion under bolt cotter pin, and remove the bolt. Cotter pin Remove front cushion upper bolt cotter pin, and remove the bolt and cushion. Installation Install in reverse order of removal procedures. -
Page 177: Suspension Arm
To this chapter contents 15. STEERING / SUSPENSION Suspension Arm Remove Remove front wheel, wheel hub, and brake caliper, brake caliper mounting seat, tie-rod and front cushion. Suspension arm nuts Loosen arm front side nuts, remove suspension swing arm bolts. Suspension arm nuts Loosen s arm rear side nuts, remove... -
Page 178: Toe-In
To this chapter contents 15. STEERING / SUSPENSION Toe-In When repair or disassemble steering system parts, must to adjustment the toe-in. Keep the vehicle on level ground and the front wheels facing straight ahead. Mark the centers of the tires to indicate the axle center height. - Page 179 To this chapter contents 15. STEERING / SUSPENSION Note: 15-12...
- Page 180 Home page Contents 16. REAR BRAKE & REAR WHEEL & REAR CUSHION Mechanism Diagram···························16-1 Disk Brake System Inspection·········· 16-9 Maintenance Description ···················16-2 Adding Brake Fluid ···························· 16-10 Trouble Diagnosis ······························16-3 Brake fluid replacement / Air-bleed·· 16-11 Rear Wheel ··········································16-4 Rear Brake Caliper ····························· 16-12 Rear Wheel Shaft Connecter ·············16-4 Brake Disk ··········································...
-
Page 181: Maintenance Description
To this chapter contents 16. REAR BRAKE & REAR WHEEL & REAR CUSHION Maintenance Description Operational precautions Caution Inhaling asbestos may cause disorders of respiration system or cancer, therefore, never use air hose or dry brush to clean brake parts. Use vacuum cleaner or other authorized tool instead. The brake caliper can be removed without removing the hydraulic system. -
Page 182: Trouble Diagnosis
To this chapter contents 16. REAR BRAKE & REAR WHEEL & REAR CUSHION Trouble Diagnosis Soft brake lever Vibration or Wobble 1. Air inside the hydraulic system 1. Axle is not tightened well 2. Hydraulic system leaking 2. Bent rim 3. -
Page 183: Rear Wheel
To this chapter contents 16. REAR BRAKE & REAR WHEEL & REAR CUSHION Rear Wheel Removal Raise the rear wheels off the ground by placing a jack or other support under the frame. Remove rear axle cover (4 screws). 4 screws Remove the rear wheel nuts, and then remove rear wheels. -
Page 184: Rear Wheel Axle
To this chapter contents 16. REAR BRAKE & REAR WHEEL & REAR CUSHION Rear Wheel Axle Remove right and left rear wheel, wheel connecter. Remove 2 bolts, and then remove rear brake caliper. 2 bolts Remove 3 bolts, and remove drive chain cover. 3 bolts Remove drive chain lock clip, master link, and Master link... - Page 185 To this chapter contents 16. REAR BRAKE & REAR WHEEL & REAR CUSHION Bend out the rear axle nut fixed plate. Fixed plate Remove rear wheel axle nuts. Special tool: Rear axle nut wrench (55mm) Remove rear brake disk bracket and disk. Brake disk bracket Remove rear wheel axle and driven sprocket holder.
- Page 186 To this chapter contents 16. REAR BRAKE & REAR WHEEL & REAR CUSHION Inspection Check bearings on rear wheel axle bearing seat. Rotate each bearing’s inner ring with fingers. Check if bearings can be turned in smooth and silent, and also check if bearing outer ring is mounted on bearing seat.
- Page 187 To this chapter contents 16. REAR BRAKE & REAR WHEEL & REAR CUSHION Install rear brake disk bracket and disk. Brake disk bracket Install rear wheel axle nuts, rear axle nut fixed plate and tighten the nuts. Torque: 9.2kgf-m Special tool: Rear axle nut wrench (55mm) Rear axle nut torque wrench Torque wrench...
-
Page 188: Disk Brake System Inspection
To this chapter contents 16. REAR BRAKE & REAR WHEEL & REAR CUSHION Driven sprocket inspection Check the condition of the driven sprocket teeth. Replace the sprocket if it worn. Caution The drive chain, drive sprocket and driven sprocket must be also inspected for wear. Disk Brake System Inspection Inspection By visual examination whether divulges or the... -
Page 189: Adding Brake Fluid
To this chapter contents 16. REAR BRAKE & REAR WHEEL & REAR CUSHION Adding Brake Fluid Fluid cup Before the brake fluid reservoir is removed, turn the handle so that the brake fluid reservoir becomes horizontal, and then remove the brake fluid reservoir. -
Page 190: Brake Fluid Replacement / Air-Bleed
To this chapter contents 16. REAR BRAKE & REAR WHEEL & REAR CUSHION Brake fluid replacement / Air-bleed Air-bleed valve Connect drain hose to air-bleed valve. Open the drain valve on the caliper and operate the brake lever until the old brake fluid is entirely drained out. -
Page 191: Rear Brake Caliper
To this chapter contents 16. REAR BRAKE & REAR WHEEL & REAR CUSHION Rear Brake Caliper Brake hose bolt Removal Place a container under the brake caliper, and loosen the brake hose bolt and finally remove the brake hose. Caution Do not spill brake fluid on painted surfaces. -
Page 192: Brake Disk
To this chapter contents 16. REAR BRAKE & REAR WHEEL & REAR CUSHION Brake Disk Brake disk Inspection Visually check the brake disk for wear or break. Measure the thickness of the disk at several places. Replace the disk if it has exceeded the service limit. - Page 193 To this chapter contents 16. REAR BRAKE & REAR WHEEL & REAR CUSHION Right footrest side – rear brake master cylinder Hose clamp Place a container under the brake master cylinder, remove fluid hose clamp, and drain out the brake fluid.
- Page 194 To this chapter contents 16. REAR BRAKE & REAR WHEEL & REAR CUSHION Measure the outer diameter of the piston. Replace the piston if its measured value exceeds allowable limit. Allowable limit: 12.654 mm Master Cylinder Assembly Caution It is necessary to replace the whole set comprising piston, spring, piston cup, and cir clip.
- Page 195 To this chapter contents 16. REAR BRAKE & REAR WHEEL & REAR CUSHION Right footrest side – rear brake master cylinder Install the master cylinder socket bolts and the master cylinder. 2 socket bolts Install brake push rod to the brake pedal, and Lock nut Adjustment nut install pin and E type clip.
-
Page 196: Rear Cushion
To this chapter contents 16. REAR BRAKE & REAR WHEEL & REAR CUSHION Rear Cushion Cotter pin Removal Support the frame. Remove cotter pin, and remove rear cushion under bolt. Rear cushion under bolt Remove cotter pin, and remove rear cushion Cotter pin upper bolt. - Page 197 To this chapter contents 16. REAR BRAKE & REAR WHEEL & REAR CUSHION Note: 16-18...
-
Page 198: Electrical System
Home page Contents 17. ELECTRICAL SYSTEM Mechanism Diagram ··························17-1 Meters················································· 17-12 Maintenance Data·······························17-2 Light / Bulb········································· 17-13 Technical Specification······················17-2 Switch / Horn······································ 17-16 Trouble Diagnosis ······························17-3 Fuel Unit ············································· 17-19 Battery ·················································17-4 Cooling Fan Thermo Switch ············· 17-20 Charging System ································17-5 Thermo unit········································... -
Page 199: Maintenance Data
To this chapter contents 17. ELECTRICAL SYSTEM Maintenance Data Operational precaution When remove the battery, the disconnection sequence of cable terminals shall be strictly observed. (First disconnect the negative cable terminal, next, the positive cable terminal.) The model of the spark plug and the tightening torque. The ignition timing. - Page 200 To this chapter contents 17. ELECTRICAL SYSTEM Trouble Diagnosis No voltage Charging system does not operate Battery discharged properly The cable disconnected Burnt fuse The fuse is blown Poor contact, open or short circuit Improper operation of the main switch Poor regulator Poor ACG Low voltage...
- Page 201 To this chapter contents 17. ELECTRICAL SYSTEM Battery Removal Remove the seat, and then you can see the battery. Disconnect the negative cable terminal first, then the positive cable terminal. Remove the battery clamp, and then remove battery... Clamp Voltage Check Use the digital voltmeter to check the voltage of the battery.
-
Page 202: Charging System
To this chapter contents 17. ELECTRICAL SYSTEM Charging System Charging circuit Main switch Green Black Yellow Yellow Fuse 20A Yellow Battery Regulator rectifier AC. Generator Current Leakage Inspection Turn the main switch to OFF position, and remove the negative cable terminal (-) from the battery. Connect an ammeter between the negative cable terminal and the battery negative terminal. - Page 203 To this chapter contents 17. ELECTRICAL SYSTEM Connect a tachometer. Inspection on Charging Voltage Turn on the headlight to high beam and start the engine. Voltmeter Accelerate the engine to the specified revolution per minute and measure the charging voltage. Ammeter Specified Charging Current: 1.2 A / 6000 rpm...
- Page 204 To this chapter contents 17. ELECTRICAL SYSTEM Inspection on regulator rectifier Remove the seat, rear carrier and rear fender. Disconnect two 3 pin couplers of the regulator rectifier. Inspection the rectifier coupler to the wire harness passes the condition. Item Check Points Standard Value Main switch Battery voltage...
- Page 205 To this chapter contents 17. ELECTRICAL SYSTEM Ignition System Ignition circuit diagram Shift gear control unit CDI. Unit Black/White Green Green Green/White White/Black Black/Yellow Fuse 15A Ignition coil Black Blue/Yellow Main fuse Spark plug Battery Green Main switch Pulse generator C.D.I unit Disconnect connectors of the C.D.I unit.
- Page 206 To this chapter contents 17. ELECTRICAL SYSTEM Inspection on Ignition Coil Disengage the connector of the ignition coil and the spark plug cap. Measure the resistance between the terminals of the primary winding. Ω ± 10% Standard resistance: 0.17 Remove the cap from the spark plug and measure the resistance between the spark plug and the primary winding.
-
Page 207: Starting System
To this chapter contents 17. ELECTRICAL SYSTEM Starting System Starting circuit diagram Battery Main fuse 20A Main switch Black Fuse 15A White/Black Shift gear control unit Green/Red Neutral switch Starter relay Starter motor Green Yellow/Red Yellow/Black Brake Starter switch switch Green/Yellow Green Brake light... - Page 208 To this chapter contents 17. ELECTRICAL SYSTEM Removal of Starter motor Remove the seat. Disconnect the cable negative terminal (-), then the cable positive terminal (+). Negative Remove starter motor cable. Starter motor cable Loosen the lock bolts and remove the starter motor.
- Page 209 To this chapter contents 17. ELECTRICAL SYSTEM Meters Removal Remove handle cover. 3 Screws Main switch coupler Remove the front cover, and then remove meter coupler and main switch coupler. Meter set couplers Remove speedometer cable. Loosen 4 bolts of the meter stay, and then remove meter set and main switch.
-
Page 210: Light / Bulb
To this chapter contents 17. ELECTRICAL SYSTEM Light / Bulb Replacing bulb for headlight Remove 1 screw for the headlight cover, and remove the cover. Headlight cover screw Turn the headlight bulb connector by clockwise. Headlight bulb seat Take out the bulb connector and the bulb. Replace with new bulb if necessary. - Page 211 To this chapter contents 17. ELECTRICAL SYSTEM Replacing the Front winker light Bulb Remove front winker lens with “-” screw driver. Groove Replace with new front winker light bulb. Rear winker light Taillight Replacing Bulb of Taillight Remove rubber cap of the taillight connector. Remove the taillight connector and bulb.
- Page 212 To this chapter contents 17. ELECTRICAL SYSTEM Replace taillight bulb. Replacing the rear winker light Bulb Rear winker light Taillight Remove rubber cap of the rear winker light connector. Remove the rear winker light connector and bulb. Replace rear winker light bulb. 17-15...
-
Page 213: Switch / Horn
To this chapter contents 17. ELECTRICAL SYSTEM Switch / Horn Main Switch Inspection Remove the front center cover. Disconnect the main switch coupler. Check the continuity between two points as indicted below: BAT1 BAT2 Position Main switch coupler Wire Color Black Replacement of main switch Disconnect the coupler of the main switch. - Page 214 To this chapter contents 17. ELECTRICAL SYSTEM Headlight Switch Headlight switch BAT3 Position ● White Wire color White Blue Brown / Black Winker switch Position N PUSH OFF Brown / Wire color Pink Black Winker switch White Horn switch BAT3 Position FREE Wire Color...
- Page 215 To this chapter contents 17. ELECTRICAL SYSTEM Front Brake Switch Brake light switch While grasp the brake lever firmly, the terminals of brown/blue and green/yellow of the brake should have continuity. Replace the switch if damaged. Rear Brake Switch Brake light switch While grasp the brake lever firmly, the terminals of white/black and green/yellow of the brake should have continuity.
-
Page 216: Fuel Unit
To this chapter contents 17. ELECTRICAL SYSTEM Fuel Unit Fuel tank cap Remove the seat. Remove the fuel tank cap. Remove the rear center cover. 2 bolts Disconnect the coupler of the fuel unit. Remove the fuel unit (4 bolts). Fuel unit Caution Great care shall be taken not to damage or... -
Page 217: Cooling Fan Thermo Switch
To this chapter contents 17. ELECTRICAL SYSTEM Cooling Fan Thermo Switch The thermo switch mounted on the radiator controls the operation of the cooling fan motor. In case that the fan motor fails to work, disconnect the green and black/blue leads and connect jump wires to the terminals, then, turn on the main switch, the fan motor should operate. -
Page 218: Water Temperature Indicator Light
To this chapter contents 17. ELECTRICAL SYSTEM Thermo unit Thermo unit Remove the thermo unit. Hang the thermo unit in an oil heater, heat the oil and measure the resistance at each temperature. Temperature 50°C 80°C 100°C 120°C Standard (Ω) 134~149 47.5~57.0 26~29 14.8~17.2 Caution Wear gloves and goggles when performing this test. - Page 219 To this chapter contents 17. ELECTRICAL SYSTEM Notes: 17-22...
-
Page 220: Electrical Diagram
Home page Contents 18. ELECTRICAL DIAGRAM 18-1... - Page 221 Home page Contents 18. ELECTRICAL DIAGRAM Notes: 18-2...
Need help?
Do you have a question about the Track Runner 200 and is the answer not in the manual?
Questions and answers