Philips HP6578 Manual
Hide thumbs
Also See for HP6578:
- Manual (120 pages) ,
- User manual (15 pages) ,
- Quick start manual (53 pages)
Table of Contents
Advertisement
Quick Links
Advertisement
Table of Contents

Related Manuals for Philips HP6578


Summary of Contents for Philips HP6578
- Page 1 HP6578...
-
Page 5: Table Of Contents
EnglisH 6 Ελληνικα 18 EsPañol 32 italiano 44 Português 56 Português do Brasil 68 türkçE 80... -
Page 6: English
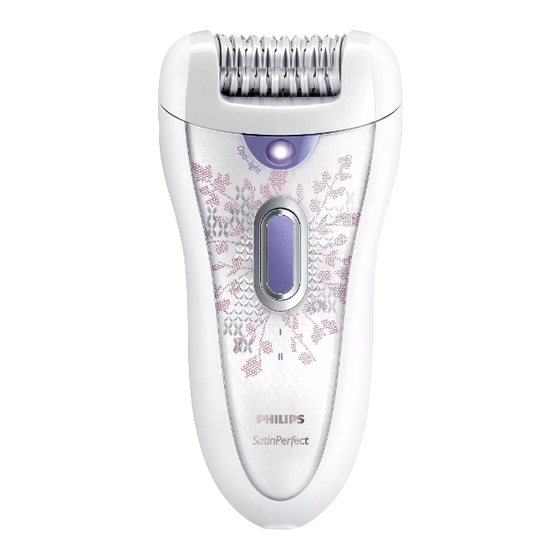
EnglisH introduction Congratulations on your purchase and welcome to Philips! To fully benefit from the support that Philips offers, register your product at www.philips.com/welcome. This Philips SatinPerfect epilator is produced in Europe according to the highest engineering standards and has been designed around the needs of today’s women. Worldwide many women are involved in our development and production processes. - Page 7 EnglisH s Smart Tweezers 1 Light of Smart Tweezers 2 On/off button for light 3 Battery and light compartment 4 Storage case of Smart Tweezers 5 Button batteries t Luxury pouch (not shown) important Read this user manual carefully before you use the appliances and save it for future reference. danger Keep the appliances and the adapter dry.
- Page 8 Only use the Smart Tweezers on alkaline button batteries type L763H or AG3 (dia. 7.8 x 3.4mm). Electromagnetic fields (EMF) These Philips appliances comply with all standards regarding electromagnetic fields (EMF). If handled properly and according to the instructions in this user manual, the appliances are safe to use based on scientific evidence available today.
- Page 9 EnglisH during epilation The epilator can be used cordlessly on rechargeable batteries, but it can also be used with the adapter on mains power. While epilating, stretch your skin with your free hand. This lifts up the hairs and helps to minimise the pulling sensation.
- Page 10 EnglisH When you press the on/off button a third time, the epilator switches off. Stretch the skin with your free hand to make the hairs stand upright. Place the epilating head at an angle of 90° onto the skin with the on/off button pointing in the direction in which you are going to move the appliance (Fig.
- Page 11 EnglisH Note: Make sure the surface of the trimming comb always stays fully in contact with the skin to ensure an even trimming result. When you have finished trimming, switch off the appliance and clean the sensitive area shaving head and the trimming comb (see chapter ‘Cleaning and maintenance’). Leave the trimming comb on the sensitive area shaving head when you store the appliance.
- Page 12 EnglisH Thoroughly clean the area to be epilated. Remove any residues of deodorant, makeup, cream etc. Then dab the skin dry. Switch on the appliance. Stretch the skin with your free hand. When epilating the underarms, raise your arm to stretch the skin.
-
Page 13: 3.4Mm
EnglisH Note: The Smart Tweezers work on three alkaline button batteries type L736H or AG3 (dia. 7.8 x 3.4mm). Screw the bottom back on the battery and light compartment by turning it clockwise with a coin (Fig. 25). Cleaning and maintenance Note: Make sure the appliances are switched off and unplugged before you start to clean them. - Page 14 All parts of the appliance can be replaced. If you need to replace one or more parts, go to your Philips dealer or an authorised Philips service centre. sensitive area shaving head If you use the sensitive area shaving head two or more times a week, we advise you to replace the shaving unit after one or two years or when it is damaged.
-
Page 15: Removing The Rechargeable Batteries
(Smart Tweezers). guarantee and service If you need service or information or if you have a problem, please visit the Philips website at www.philips.com or contact the Philips Consumer Care Centre in your country (you find its phone number in the worldwide guarantee leaflet). - Page 16 EnglisH Problem Cause Solution Poor epilating You move the epilator Move the appliance against the direction of hair results in the wrong direction. growth, with the on/off button pointing in the direction in which you move the epilator. You place the epilating Make sure that you place the epilating head on the head on the skin at skin at an angle of 90°...
- Page 17 EnglisH Problem Cause Solution The overload When the overload protection has been activated, protection is activated the speed setting indications flash red. Turn the because something tweezers with your thumb until you can easily got caught between remove the item that is blocking the rotating the rotating tweezers tweezers.
-
Page 18: Ελληνικα
Ελληνικα Εισαγωγή Συγχαρητήρια για την αγορά σας και καλώς ήρθατε στη Philips! Για να επωφεληθείτε πλήρως από την υποστήριξη που παρέχει η Philips, καταχωρήστε το προϊόν σας στην ιστοσελίδα www. philips.com/welcome. Αυτή η αποτριχωτική συσκευή SatinPerfect της Philips κατασκευάζεται στην Ευρώπη σύμφωνα... - Page 19 Ελληνικα P Βουρτσάκι καθαρισμού Q Μετασχηματιστής r Αποτριχωτική συσκευή ακριβείας 1 Διακόπτης on/off 2 Μη επαναφορτιζόμενες μπαταρίες 3 Καπάκι θήκης μπαταριών s Έξυπνο τσιμπιδάκι 1 Φως στο έξυπνο τσιμπιδάκι 2 Κουμπί on/off για φως 3 Θήκη μπαταρίας και φωτός 4 Θήκη αποθήκευσης για το έξυπνο τσιμπιδάκι 5 Μπαταρίες...
- Page 20 L763H ή AG3 (διαμ. 7,8 x 3,4 χιλ.). ηλεκτρομαγνητικά Πεδία (EMF) Οι συγκεκριμένες συσκευές της Philips συμμορφώνονται με όλα τα πρότυπα που αφορούν τα ηλεκτρομαγνητικά πεδία (EMF). Εάν γίνει σωστός χειρισμός και σύμφωνος με τις οδηγίες του παρόντος εγχειριδίου χρήσης, οι συσκευές είναι ασφαλείς στη χρήση βάσει των...
- Page 21 Ελληνικα Για να φορτίσετε την αποτριχωτική συσκευή, ακολουθήστε τα βήματα 1 και 2 στην παραπάνω ενότητα ‘Φόρτιση της αποτριχωτικής συσκευής’. Μπορείτε, επίσης, να λειτουργήσετε τη συσκευή με ρεύμα εισάγοντας το βύσμα της συσκευής στην υποδοχή της συσκευής και συνδέοντας το μετασχηματιστή σε μια πρίζα. Συμβουλές...
- Page 22 Ελληνικα Όταν χρησιμοποιείτε το ενεργό σύστημα ανόρθωσης τριχών με ενεργό μασάζ, βεβαιωθείτε ότι ο κύλινδρος ενεργού μασάζ και το ενεργό σύστημα ανόρθωσης τριχών παραμένουν πάντα σε επαφή με το δέρμα. Ο κύλινδρος μασάζ διεγείρει και χαλαρώνει το δέρμα για απαλότερη αποτρίχωση. Μετά...
- Page 23 Ελληνικα Τοποθετήστε την αποτριχωτική κεφαλή σε γωνία 90° επάνω στο δέρμα με το κουμπί on/off να είναι στραμμένο στην κατεύθυνση, προς την οποία επιθυμείτε να μετακινήσετε τη συσκευή (Εικ. 12). Μετακινήστε τη συσκευή αργά πάνω στο δέρμα, αντίθετα από τη φορά των τριχών. Όταν...
- Page 24 Ελληνικα Πιέστε το κουμπί απασφάλισης (1) και αφαιρέστε την αποτριχωτική κεφαλή από την αποτριχωτική συσκευή (2) (Εικ. 13). Τοποθετήστε την ξυριστική κεφαλή για την ευαίσθητη περιοχή στη συσκευή και πιέστε την μέχρι να εφαρμόσει σωστά (‘κλικ’) (Εικ. 14). Τοποθετήστε τον οδηγό κοπής στην ξυριστική κεφαλή για την ευαίσθητη περιοχή...
- Page 25 Ελληνικα Χρήση της αποτριχωτικής συσκευής ακριβείας Τοποθέτηση των μπαταριών Βγάλτε το καπάκι της θήκης μπαταριών, σύροντάς το προς τα κάτω μέχρι να βγει από τη συσκευή (Εικ. 18). Εισαγάγετε δύο αλκαλικές μπαταρίες AA 1,5 V στη θήκη μπαταριών (Εικ. 19). Σημείωση: Βεβαιωθείτε...
- Page 26 Ελληνικα Χρησιμοποιήστε μια ζεστή πετσέτα προσώπου για να μαλακώσετε το δέρμα πριν να βγάλετε τα φρύδια σας. Έτσι διευκολύνετε την αφαίρεση τριχών. Βουρτσίστε τα φρύδια σας προς την κατεύθυνση της φοράς των τριχών. Χρησιμοποιήστε ένα μολύβι ματιών για να σημειώσετε το επιθυμητό σχήμα των φρυδιών...
- Page 27 Ελληνικα καθαρισμός της αποτριχωτικής κεφαλής Πιέστε το διακόπτη απασφάλισης (1) και αφαιρέστε την αποτριχωτική κεφαλή από τη συσκευή (2) (Εικ. 13). Απομακρύνετε τις σκόρπιες τρίχες με το βουρτσάκι καθαρισμού (Εικ. 30). Ξεπλύνετε την αποτριχωτική κεφαλή με νερό βρύσης για 5-10 δευτερόλεπτα, ενώ γυρίζετε...
- Page 28 επίσημο σημείο συλλογής. Απορρίψτε τις μπαταρίες σε επίσημο σημείο συλλογής για μπαταρίες. Εάν αντιμετωπίσετε δυσκολίες στην αφαίρεση των μπαταριών, μπορείτε να απευθυνθείτε σε ένα εξουσιοδοτημένο κέντρο σέρβις της Philips, όπου θα αφαιρέσουν τις μπαταρίες και θα τις απορρίψουν με τρόπο ασφαλή για το περιβάλλον (Εικ. 44).
- Page 29 Εάν χρειάζεστε σέρβις ή πληροφορίες ή εάν αντιμετωπίζετε κάποιο πρόβλημα, παρακαλούμε επισκεφτείτε την ιστοσελίδα της Philips στη διεύθυνση www.philips.com ή επικοινωνήστε με το Κέντρο Εξυπηρέτησης Καταναλωτών της Philips στη χώρα σας (θα βρείτε το τηλέφωνο στο φυλλάδιο διεθνούς εγγύησης). Εάν δεν υπάρχει Κέντρο Εξυπηρέτησης Καταναλωτών στη χώρα...
- Page 30 Ελληνικα Πρόβλημα Αιτία Λύση Τοποθετήσατε την Βεβαιωθείτε ότι τοποθετείτε την αποτριχωτική κεφαλή πάνω στο αποτριχωτική συσκευή πάνω στο δέρμα με λανθασμένη γωνία. δέρμα σε γωνία 90° (βλ. ενότητα ‘Χρήση της αποτριχωτικής συσκευής’). Χρησιμοποιήσατε κρέμα ή Βεβαιωθείτε ότι το δέρμα σας είναι αποτριχωτική...
- Page 31 Ελληνικα Πρόβλημα Αιτία Λύση Οι Όταν η λυχνία φόρτισης ανάβει με επαναφορτιζόμενες μπαταρίες κόκκινο χρώμα συνεχώς, οι μπαταρίες είναι άδειες. είναι άδειες και πρέπει να φορτίσετε τη συσκευή (βλ. ενότητα ‘Φόρτιση’). Μπορείτε, επίσης, να λειτουργείτε τη συσκευή με ρεύμα όταν οι μπαταρίες είναι...
-
Page 32: Español
EsPañol introducción Enhorabuena por la compra de este producto y bienvenido a Philips. Para sacar el mayor partido de la asistencia que Philips le ofrece, registre su producto en www.philips.com/welcome. Esta depiladora SatinPerfect de Philips ha sido fabricada en Europa conforme los niveles de diseño más exigentes y pensando en las necesidades de la mujer de hoy. - Page 33 EsPañol 3 Tapa del compartimento de las pilas s Pinzas inteligentes 1 Luz de las pinzas inteligentes 2 Botón de encendido/apagado de la luz 3 Compartimento de las pilas y la luz 4 Estuche de las pinzas inteligentes 5 Pilas tipo botón t Funda de lujo (no se muestra) importante Antes de usar los aparatos, lea atentamente este manual del usuario y consérvelo por si necesitara...
- Page 34 3,4 mm). Campos electromagnéticos (CEM) Estos aparatos Philips cumplen todos los estándares sobre campos electromagnéticos (CEM). Si se utilizan correctamente y de acuerdo con las instrucciones de este manual, los aparatos se pueden usar de forma segura según los conocimientos científicos disponibles hoy en día.
- Page 35 EsPañol utilizar el cabezal de afeitado de zonas sensibles con el peine-guía para cortar previamente el vello y conseguir una longitud perfecta. Puesto que el vello crece en diferentes ciclos, al empezar a depilarse, es mejor hacerlo varios días seguidos para permanecer sin vello durante más tiempo, ya que el vello volverá a crecer de nuevo siguiendo el mismo ciclo y al mismo ritmo.
- Page 36 EsPañol Nota: Antes de conectar el adaptador de rendimiento óptimo o el sistema activo de levantamiento de vello con masaje, retire el adaptador de depilación básico. Agarre ambos lados del adaptador de depilación básico y sáquelo del aparato (fig. 8). Coloque el accesorio deseado en el cabezal depilador (fig.
- Page 37 EsPañol Cuando haya terminado el afeitado, apague el aparato y limpie el cabezal de afeitado de zonas sensibles (consulte el capítulo “Limpieza y mantenimiento”). Al guardar el aparato, coloque el peine-guía sobre el cabezal de afeitado de zonas sensibles. recorte con el peine-guía Utilice el cabezal de afeitado de zonas sensibles con el peine-guía conectado para recortar el vello de la línea del bikini a una longitud de 3 mm.
- Page 38 EsPañol uso de la depiladora de precisión inserción de las pilas Quite la tapa del compartimento de las pilas deslizándola hacia abajo hasta extraerla del aparato (fig. 18). Inserte dos pilas alcalinas AA de 1,5 voltios en el compartimento de las pilas (fig. 19). Nota: Asegúrese de que los polos + y - de las pilas apunten en la dirección indicada en el compartimento de las pilas.
- Page 39 EsPañol Utilice un lápiz de ojos para marcar la forma deseada de las cejas. Elimine todo el vello situado fuera de dicha marca. Encienda la luz pulsando una vez el botón de encendido/apagado. Elimine el vello siempre en la dirección de su crecimiento. Nota: Elimine el vello uno por uno.
- Page 40 EsPañol Seque bien el cabezal depilador con un paño. Nota: Asegúrese de que el cabezal depilador esté completamente seco antes de volver a colocarlo en el aparato. Para volver a colocar el cabezal depilador, póngalo en el aparato y presione hasta que encaje en su sitio (“clic”) (fig.
- Page 41 Deposite las pilas en un lugar de recogida oficial. Si no puede quitar las pilas, puede llevar el aparato a un servicio de asistencia técnica de Philips. El personal del servicio de asistencia técnica extraerá las pilas y se deshará de ellas de forma no perjudicial para el medio ambiente (fig.
- Page 42 Si necesita información o si tiene algún problema, visite la página Web de Philips en www.philips.com o póngase en contacto con el Servicio de Atención al Cliente de Philips en su país (hallará el número de teléfono en el folleto de la garantía mundial). Si no hay Servicio de Atención al Cliente de Philips en su país, diríjase a su distribuidor local Philips.
- Page 43 EsPañol Problema Causa Solución La protección contra Si la depiladora deja de funcionar y los indicadores el sobrecalentamiento de posición de velocidad y la luz de carga empiezan se ha activado. a parpadear en rojo, la protección contra el sobrecalentamiento se ha activado. Deje enfriar el aparato.
-
Page 44: Italiano
Congratulazioni per l’acquisto e benvenuti in Philips! Per trarre il massimo vantaggio dall’assistenza Philips, registrate il vostro prodotto su www.philips.com/welcome. Questo epilatore Philips SatinPerfect è prodotto in Europa rispettando i più alti standard di produzione ed è stato progettato per soddisfare le esigenze della donna di oggi. In tutto il mondo, infatti, molte donne sono impegnate nei nostri processi di sviluppo e produzione e ci forniscono utili informazioni sui nostri concetti e prodotti per fornirvi la migliore qualità... - Page 45 italiano 2 Batterie non ricaricabili 3 Coperchio del vano batterie s Pinzette “intelligenti” 1 Luce delle pinzette “intelligenti” 2 Pulsante on/off per la luce 3 Vano batterie e luce 4 Custodia pinzette “intelligenti” 5 Batterie a bottone t Elegante custodia (non illustrata) importante Prima di utilizzare l’apparecchio, leggete attentamente il presente manuale utente e conservatelo per eventuali riferimenti futuri.
- Page 46 (diam. 7,8 x 3,4 mm). Campi elettromagnetici (EMF) Questi apparecchi Philips sono conformi a tutti gli standard relativi ai campi elettromagnetici (EMF). Se utilizzati in modo appropriato seguendo le istruzioni contenute nel presente manuale utente, gli apparecchi consentono un utilizzo sicuro come confermato dai risultati scientifici attualmente disponibili.
- Page 47 italiano 2 settimane, oppure di utilizzare la testina di rasatura per le zone sensibili con il pettine regola altezza per tagliare prima i peli alla lunghezza ideale. Poiché i peli crescono con ciclicità diverse, è consigliabile effettuare l’epilazione per diversi giorni di seguito all’inizio del trattamento.
- Page 48 italiano Inserite l’accessorio desiderato sulla testina epilatoria (fig. 9). Nota La procedura di inserimento degli accessori sull’apparecchio è sempre la stessa. Premete il pulsante on/off per accendere l’epilatore. L’epilatore inizia a funzionare alla velocità II, ossia quella più efficace per l’epilazione. La spia inferiore dell’impostazione della velocità...
- Page 49 italiano rifinitura tramite il pettine regola altezza Utilizzate la testina di rasatura per le zone sensibili con il pettine regola altezza collegato per rifinire la zona bikini a una lunghezza di 3 mm. Potete utilizzare questo pettine per rifinire i peli lunghi (oltre i 10 mm) delle ascelle o della zona bikini in vista dell’epilazione tramite l’epilatore.
- Page 50 italiano utilizzo dell’epilatore di precisione inserimento delle batterie Rimuovete il coperchio del vano batterie facendolo scorrere verso il basso fino ad estrarlo (fig. 18). Inserite due batterie alcaline AA da 1,5 V all’interno dell’apposito vano (fig. 19). Nota Assicuratevi che i poli + e - delle batterie seguano quanto indicato nel vano batterie. Nota Le batterie nuove garantiscono un tempo di funzionamento massimo di 40 minuti.
- Page 51 italiano Accendete la luce premendo una volta il pulsante on/off. Togliete i peli tirandoli sempre verso la direzione di crescita. Nota Tirate i peli uno ad uno. Non utilizzate le pinzette “intelligenti” per rimuovere i peli dei nei. Non puntate la luce delle pinzette “intelligenti” direttamente sugli occhi. sostituzione delle batterie Aprite il vano batterie e luce ruotando il coperchio in senso antiorario con una moneta (fig.
- Page 52 italiano Nota Assicuratevi che la testina epilatoria sia completamente asciutta prima di riposizionarla sull’apparecchio. Per inserire nuovamente la testina epilatoria, posizionatela sull’apparecchio e premetela sull’apparecchio fino a che non scatta in posizione (fig. 33). Pulizia della testina di rasatura per le zone sensibili e del pettine regola altezza Rimuovete il pettine regola altezza, nel caso in cui quest’ultimo sia collegato, estraendolo dalla testina di rasatura per le zone sensibili (fig.
- Page 53 Tutti i componenti dell’apparecchio possono essere sostituiti. Se è necessario sostituire uno o più componenti, rivolgetevi al vostro rivenditore Philips o a un centro autorizzato Philips. testina per le zone sensibili Se utilizzate la testina di rasatura per le zone sensibili due o più volte la settimana, è consigliabile sostituire l’unità...
- Page 54 Per assistenza o informazioni e in caso di problemi, visitate il sito Web Philips all’indirizzo www.philips.com oppure contattate il Centro Assistenza Clienti Philips del vostro paese (per conoscere il numero di telefono consultate l’opuscolo della garanzia). Se nel vostro paese non esiste un Centro Assistenza Clienti, rivolgetevi al vostro rivenditore Philips.
- Page 55 italiano Problema Causa Soluzione Le batterie Quando la spia di ricarica si accende fissa in rosso le ricaricabili sono batterie sono scariche e l’apparecchio deve essere scariche. ricaricato (vedere il capitolo “Come ricaricare l’apparecchio”). Quando le batterie sono scariche l’apparecchio può essere utilizzato con la corrente di rete.
-
Page 56: Português
Português introdução Parabéns pela sua compra e bem-vindo à Philips! Para tirar todo o partido da assistência fornecida pela Philips, registe o seu produto em www.philips.com/welcome. Esta depiladora SatinPerfect da Philips é fabricada na Europa de acordo com os padrões mais elevados de engenharia e foi concebida tendo em conta as necessidades actuais da mulher. - Page 57 Português r Depiladora de precisão 1 Botão ligar/desligar 2 Pilhas não recarregáveis 3 Tampa do compartimento das pilhas s Pinça inteligente 1 Luz da pinça inteligente 2 Botão para ligar/desligar a luz 3 Compartimento das pilhas e da luz 4 Estojo de arrumação da pinça inteligente 5 Pilhas tipo botão t Bolsa luxuosa (não ilustrada) importante...
- Page 58 3,4 mm). Campos electromagnéticos (CEM) Estes aparelhos Philips estão conformes a todas as normas relacionadas com campos electromagnéticos (EMF). Se forem manuseados correctamente e de acordo com as instruções deste manual do utilizador, os aparelhos proporcionam uma utilização segura, como demonstrado pelas provas científicas actualmente disponíveis.
- Page 59 Português Certifique-se de que a sua pele está limpa, completamente seca e sem qualquer gordura. Não utilize cremes antes de começar a depilação. A depilação torna-se mais fácil e confortável quando o pêlo tem um comprimento ideal de 3 a 4 mm.
- Page 60 Português Se os pêlos estiverem encostados horizontalmente à pele, aconselhamos a utilização do sistema activo de levantamento do pêlo com massagem activa. Além de levantar o pêlo, o sistema activo de levantamento do pêlo com massagem activa também reduz a sensação de desconforto da depilação através do seu rolo de massagem activo.
- Page 61 Português Movimente o aparelho lentamente na direcção contrária ao crescimento do pêlo. Nota: Certifique-se de que a unidade de corte com o aparador integrado está sempre totalmente em contacto com a pele. Faça a depilação das virilhas tal como é indicado na figura (fig. 15). Corte os pêlos das axilas, tal como indicado na figura.
- Page 62 Português Protecção contra sobrecarga Se pressionar a cabeça de depilação com demasiada força sobre a sua pele ou se as pinças rotativas da cabeça de depilação ficarem bloqueadas (p. ex. por roupas, etc.), o aparelho pára e as indicações da regulação da velocidade ficam intermitentes a vermelho durante 5 segundos. Verifique se as pinças rotativas da cabeça de depilação estão bloqueadas rodando as pinças com o seu polegar até...
- Page 63 Português lhe permite uma utilização onde e quando quiser. As pinças inteligentes são fornecidas prontas a usar com 3 pilhas tipo botão no compartimento das pilhas. utilização da pinça Limpe as suas sobrancelhas com tónico para a pele ou álcool para evitar que os pêlos deslizem nas pontas da pinça.
- Page 64 Português Seque os acessórios antes de os utilizar ou guardar. limpeza da cabeça de depilação Prima o botão de libertação (1) e retire a cabeça de depilação do aparelho (2) (fig. 13). Retire os pêlos soltos com a escova incluída (fig. 30). Lave a cabeça de depilação em água corrente durante 5 a 10 segundos enquanto roda as pinças com o seu polegar (fig.
- Page 65 Elimine as baterias num ponto de recolha oficial para baterias. Se tiver problemas na remoção das baterias, também pode levar o aparelho a um centro de assistência Philips, onde as suas baterias serão retiradas e eliminadas de forma segura para o ambiente (fig. 44).
- Page 66 (depiladora de precisão) ou no lixo doméstico normal (pinça inteligente). garantia e assistência Se precisar de assistência ou informações, ou se tiver algum problema, visite o Web site da Philips em www.philips.pt ou contacte o Centro de Assistência ao Consumidor Philips no seu país (poderá...
- Page 67 Português Problema Causa Solução A depiladora não A tomada à qual o Certifique-se de que a ficha tem corrente. Se ligar funciona. aparelho está ligado não a depiladora a uma tomada no armário da funciona. casa-de-banho, poderá ter de acender a luz da casa de banho para se certificar que a tomada tem corrente.
-
Page 68: Português Do Brasil
Português do Brasil introdução Parabéns pela sua compra e bem-vindo à Philips! Para aproveitar ao máximo o suporte oferecido pela Philips, registre o produto em www.philips.com/welcome. Este depilador Philips SatinPerfect foi produzido na Europa, em conformidade com os mais altos padrões de engenharia e projetado em função das necessidades da mulher atual. - Page 69 Português do Brasil 2 Pilhas não recarregáveis 3 Tampa do compartimento de pilhas s Pinças inteligentes 1 Luz das pinças inteligentes 2 Botão liga/desliga da luz 3 Compartimento de bateria e luz 4 Estojo de armazenamento das pinças inteligentes 5 Baterias de botão t Nécessaire de luxo (não ilustrado) importante Leia este manual atentamente antes de usar o aparelho e guarde-o para consultas futuras.
- Page 70 Campos eletromagnéticos Este aparelho Philips atende a todos os padrões relacionados a campos eletromagnéticos. Se manuseado adequadamente e de acordo com as instruções deste manual do usuário, a utilização do aparelho é segura baseando-se em evidências científicas atualmente disponíveis.
- Page 71 Português do Brasil Como os ciclos de crescimento dos pêlos são diferentes, é melhor começar fazendo depilações durante alguns dias em seqüência. Isso ajudará a mantê-la depilada por mais tempo, pois seus pêlos começarão a crescer dentro dos mesmos ciclo e ritmo. O depilador vem com a capa de depilação básica encaixada.
- Page 72 Português do Brasil Nota: O procedimento de encaixe dos acessórios no aparelho é o mesmo para todos os acessórios. Pressione o botão liga/desliga para ligar o depilador. O depilador começa a funcionar na velocidade II, que é a mais eficiente para depilação. O indicador inferior de controle de velocidade II acenderá...
- Page 73 Português do Brasil Pressione o botão de liberação (1) e remova a cabeça depiladora do aparelho (2) (fig. 13). Coloque-a no aparelho e pressione-a até encaixar (você ouvirá um clique) (fig. 14). Coloque o pente para aparar na cabeça de corte para áreas sensíveis (fig. 17). Siga as etapas 3 a 6 da seção ‘Depilação de axilas e virilha’.
- Page 74 Português do Brasil Deslize a tampa do compartimento de pilhas de volta sobre o aparelho. Não deixe que objetos de metal tenham contato com os terminais das pilhas nem cause curto-circuito nas pilhas. depilação com o depilador de precisão Use o depilador de precisão para depilar axilas, virilha, buço, queixo e áreas de difícil acesso. Limpe totalmente a área que será...
- Page 75 Português do Brasil substituição das baterias Abra o compartimento de baterias e luz girando a parte inferior do aparelho no sentido anti-horário com uma moeda (fig. 23). Retire as baterias de botão antigas (fig. 24). Mantenha as baterias de botão fora do alcance de crianças e animais domésticos. Baterias de botão oferecem risco de choque.
- Page 76 A trava é desativada e você pode ligar novamente o depilador pressionando o botão liga/ desliga. substituição Todas as peças do aparelho podem ser substituídas. Se precisar substituir uma ou mais peças, dirija-se ao revendedor Philips ou a uma assistência técnica autorizada Philips.
- Page 77 (depilador de precisão) ou descarte-o com o lixo doméstico normal (Pinças inteligentes). garantia e assistência técnica Se precisar de serviços ou informações ou tiver algum problema, visite o site da Philips em www.philips.com ou entre em contato com o Centro de Atendimento ao Cliente Philips do seu país (o número de telefone encontra-se no folheto da garantia mundial).
- Page 78 Português do Brasil resolução de problemas Este capítulo resume os problemas mais comuns que você pode encontrar ao usar o aparelho. Se não conseguir resolver o problema com as informações abaixo, entre em contato com o Atendimento ao Cliente em seu país. Problema Causa Solução...
- Page 79 Português do Brasil Problema Causa Solução A trava está ativa. Pressione e mantenha pressionado o botão liga/ desliga por 3 segundos até que o indicador de controle de velocidade pisque 2 vezes na cor branca. A trava será desativada e você poderá pressionar o botão liga/desliga para ligar o aparelho.
-
Page 80: Türkçe
Ürünümüzü satın aldığınız için teşekkür ederiz; Philips’e hoş geldiniz! Philips’in sunduğu destekten faydalanabilmek için lütfen ürününüzü şu adresten kaydedin: www.philips.com/welcome. Bu Philips SatinPerfect epilatör, en yüksek mühendislik standartlarına uygun olarak Avrupa’da üretilmiş ve günümüz kadınlarının ihtiyaçları doğrultusunda tasarlanmıştır. Dünya çapında birçok kadın geliştirme ve üretim süreçlerimize katılmakta ve size mümkün olan en iyi kaliteyi sunabilmemiz için... - Page 81 türkçE 1 Akıllı Cımbızların ışığı 2 Işık açma/kapama düğmesi 3 Pil ve ışık bölmesi 4 Akıllı Cımbızların saklama çantası 5 Düğme piller t Şık saklama kılıfı (gösterilmemiştir) Önemli Cihazları kullanmadan önce bu kullanım kılavuzunu okuyun ve gelecekte de başvurmak üzere saklayın. tehlike Cihazları...
- Page 82 Elektromanyetik alanlar (EMF) Bu Philips cihazları, elektromanyetik alanlarla (EMF) ilgili tüm standartlara uygundur. Gereği gibi ve bu kılavuzdaki talimatlara uygun şekilde kullanıldıklarında, bugünün bilimsel verilerine göre bu cihazların kullanımı güvenlidir. Şarj etme Epilatörü şarj etme Epilatörün şarj edilmesi yaklaşık 1 saat sürer. Epilatör tam olarak şarj edildiğinde, 30 dakikaya kadar kordonsuz olarak kullanılabilir.
- Page 83 türkçE En iyi performans için, epilasyon başlığını cilt üzerine 90°’lik açıyla, açma/kapama düğmesi cihazın hareket ettirileceği yönü gösterecek şekilde yerleştirin. Cihazı, cilt üzerinde tüylerin uzama yönünün tersine, yavaş, sürekli hareketlerle ve herhangi bir baskı uygulamadan hareket ettirin. Bazı bölgelerde, tüyler farklı doğrultularda uzayabilir. Bu durumda, cihazı farklı yönlerde uygulamak en iyi sonuçların elde edilmesine yardımcı...
- Page 84 türkçE Optimum performans başlığını kullanırken optimum sonuçları elde etmek için, cilt germe aparatının her iki rulosunun cildinize her zaman temas ettiğinden emin olun. Aktif masajlı aktif tüy kaldırma sistemini kullanırken, aktif masaj rulosunun ve aktif tüy kaldırıcının cildinize her zaman temas ettiğinden emin olun. Masaj rulosu cildinizi daha nazik bir uygulama için yumuşatır.
- Page 85 türkçE aşırı ısınmaya karşı koruma Epilatörde, cihazın aşırı ısınmasını önleyen entegre bir aşırı ısınma koruması bulunmaktadır. Dikkat: Epilatörün aşırı ısınmasını önlemek için, cihazı cildinize çok fazla bastırmayın. Epilatörün en iyi sonuçları verebilmesi için, cihazı cildinizin üzerinde çok fazla baskı uygulamadan hareket ettirin. Aşırı...
- Page 86 türkçE Koltuk altınıza şekilde görüldüğü gibi epilasyon uygulayın. Tüm tüyleri yakalamak için cihazı farklı yönlerde hareket ettirin (Şek. 21). Dudağınızın üzerindeki bölgeyi şekilde gösterildiği gibi epilasyon yapın (Şek. 22). Bu cihazı, kaş ve kirpiklerinize epilasyon uygulamak için kullanmayın. Bu cihazı benlerden çıkan tüylere epilasyon uygulamak için kullanmayın. akıllı...
- Page 87 türkçE Cihazları ya da adaptörü kesinlikle musluk altında yıkamayın (Şek. 26). Cihazları ve adaptörü kuru olarak saklayın (Şek. 27). aparatların temizlenmesi Aparatı epilasyon başlığından çıkarın (Şek. 8). Temizlik fırçasıyla aparatlarda kalan tüyleri temizleyin (Şek. 28). Aparatları döndürerek, ılık suyla yıkayın (Şek. 29). Kullanmadan veya saklamadan önce aparatları...
- Page 88 önce mutlaka pilleri çıkarın. Pilleri, piller için resmi toplama noktasına teslim edin. Pilleri çıkarmakta güçlük çekiyorsanız, cihazı bir Philips servis merkezine de verebilirsiniz. Bu merkezin personeli pilleri sizin için çıkaracak ve atık işlemleri çevreye zarar vermeyecek şekilde gerçekleştirilecektir (Şek.
- Page 89 (Akıllı Cımbızlar). garanti ve servis Servise ya da daha fazla bilgiye ihtiyaç duyarsanız veya bir sorunla karşılaşırsanız, www.philips.com. tr adresindeki Philips Internet sitesini ziyaret edin veya ülkenizde bulunan Philips Müşteri Merkeziyle iletişim kurun (telefon numarasını dünya çapında geçerli garanti belgesinde bulabilirsiniz). Ülkenizde bir Müşteri Merkezi yoksa, yerel Philips bayisine başvurun.
- Page 90 türkçE Sorun Neden Çözüm Aşırı ısınma Epilatör durduğunda ve hız ayar göstergeleri ve şarj ışığı koruması etkin kırmızı renkte yanıp sönmeye başladığında, aşırı ısınma hale getirilmiştir. koruması devreye girmiştir. Cihazın soğumasını bekleyin. Işıkların yanıp sönmesi 30 saniye sonra durur. Cihaz soğuduğunda, epilatörü...
- Page 94 94 94 3 sec...
- Page 95 3 sec...
- Page 96 4203.000.4844.1...