Table of Contents
Advertisement
Advertisement
Table of Contents

Summary of Contents for Vision Research Phantom Miro M Series
- Page 1 P H A N T O M C A M E R A S M A N U A L...
- Page 2 PN: ZDOC-64084-MA-0003 Rev 1 Last Updated: Nov. 2012 Phantom Miro M & LC Series Camera Manual...
- Page 3 Phantom Miro M & LC Series M A N U A L 100 Dey Road, Wayne, New Jersey 07470 USA Phantom Miro M & LC Series Camera Manual...
- Page 4 W r i t t e n a n d p r o d u c e d b y t h e M a r k e t i n g D e p a r t m e n t a t V i s i o n R e s e a r c h .
-
Page 5: Table Of Contents
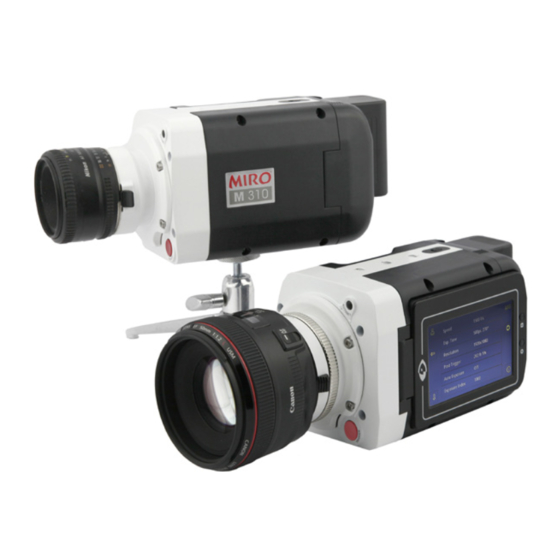
C o n t e n t s Introduction Quick Start Guides Miro LC Touchscreen Interface Phantom Software CineFlash & CineFlash Dock Phantom RCU Batteries & Battery Charger FAQ/Support Phantom Miro M & LC Series Camera Manual... - Page 6 Phantom Miro M310 (top) and Miro LC320S (bottom) • • 1 Megapixel and 2 Megapixel custom- Factory and user-definable ‘Presets’ designed CMOS sensors can be saved and retrieved • • Up to 3.2 Gigapixels/second throughput Extreme Dynamic Range • • Excellent light sensitivity Continuous Recording •...
-
Page 7: Introduction
1 µs or 2 µs for sharp, blur-free images using a global electronic shutter. Vision Research’s unique Extreme Dynamic Range (EDR) feature is standard on all models. With EDR enabled, each pixel in a frame will receive one of two exposure times –... - Page 8 The high-speed internal memory can be segmented into as many as 16 partitions for Cine storage. (A Cine is Vision Research’s raw image format that stores all image data in a compact file.) At the end of any shot, save your Cine to the removable Phantom CineFlash storage media at about 4GB/minute.
-
Page 9: Camera Control
Camera Control software (PCC), or using an adjustment ring on the lens mount. Remote control of focus and aperture is a huge benefit when cameras are remotely located and/or difficult to reach. Using Phantom Camera Control (PCC) software, Software Control you can configure, capture, view, edit, enhance and analyze Cine files. - Page 10 Battery Release Release Switch Sony BP-U30 or BP-U60 Battery Battery Compartment CineFlash Compartment 60GB, 120GB, or 240GB removable Flash drive F-Sync Switchable (In/Out) TTL Pulse (Falling Edge) HD-SDI (Miro 320S) / 4:2:2 HD-SDI (1080psf, 1080i, 720p) / Trigger (Switch closure or TTL Pulse) Trigger (Miro 120, 110, 310) Power Switch OFF/AUTO/ON Switch...
- Page 11 Autoset Tap to scroll through video tools functions: Zoom (1:1), Threshold and Live mode Long press (3 seconds) will perform an internal CSR (current session reference) Trigger Tap once to trigger the camera Long press (5 seconds) will delete the last RAM Cine file and re-arm the camera Chapter 1: Introduction...
- Page 12 Image shown is of the LCD screen flipped around and folded back into the side of the camera Menu Turns on/off ‘Menu’ icons. Exiting the menu is an electronic reset of the touchscreen. Reset takes about 5 seconds. Double-clicking the square button also resets the screen.
-
Page 13: Quick Start Guides
Quick Start Guides Prepare Camera Mount camera onto suitable support. Attach and adjust appropriate lens. Power Up Camera Insert battery or connect appropriate power supply (12-28VDC) to the DC Input connector, then set the power switch to the ‘ON’ position. Insert Phantom CineFlash Insert a Phantom CineFlash, if available. - Page 14 ‘Arm’ Camera Press the ‘Trigger’ button (front of camera) for 5 seconds to switch from ‘Pre-trigger’ or ‘Cine Stored’ to ‘Waiting for Trigger’ (recording) mode. Trigger Tap the ‘T’ (Trigger) icon (right-side) or Press the ‘Trigger’ button (front of camera). Edit Cine Tap the play icon in the ‘Cine Stored’...
- Page 15 ‘Re-Arm’ Camera From the LCD menu, tap on the File Management icon. The RAM Cine and status will be visible. Tap on the RAM Cine and then tap the X to delete. Tap the Record icon to start the camera in capture. If there is an asterisk* next to the RAM file that means it has not been saved to the CineFlash.
- Page 16 Prepare Your Computer Camera controlling computers: 1. Must have either the Microsoft Windows NT, Window XP Pro, VISTA Business Edition or Windows 7 operating system installed 2. Firewalls must be turned off (Contact your IT Group if necessary) 3. Using the ‘Windows Control Panel’ set the IP address of your computer’s network card to 100.100.100.1 with a 255.255.0.0 subnet mask.
- Page 17 Set Recording Parameters Click the ‘Live’ tab. Click ‘Cine Settings’ and define following parameters by either the selecting a value from the pull-down selection list, or type the required value into the respective data entry field: 1. Set ‘Resolution’ to the required width x height 2.
- Page 18 Edit Cine Click the ‘Play’ tab. Using the following ‘Video Control Buttons’ Rewind Fast Rewind Pause Rewind 1 Frame Play Advance 1 Frame Fast Forward Review Edited Cine Locate the first image of the Cine to be saved and click the ‘Mark-In button. Locate the last image of the Cine to be saved and click the ‘Mark-Out’...
- Page 19 Confirm Computer Save Click the ‘Open File’ button. (optional) In the ‘Open Cine’ window: 1. Navigate to the folder containing the saved Cine file. 2. Highlight the Cine file to be opened. 3. Click the Open button. Using the Video Control Buttons review the saved Cine file.
- Page 20 Connect Camera to Connect the the Remote cable between the RCU unit and the Miro-RCU Y-cable Remote Control Unit Connect the Miro-RCU Y-cable to the power connector on the camera. Connect the appropriate power supply to the Miro- RCU Y-cable. On the Miro M &...
- Page 21 Press the Return, , icon (upper-left) to return to the Setup Screen. Press the ‘Capture’ button. Perform CSR Tap the CSR, (Current Session Reference), button When prompted tap the Begin button. Tap the ‘White Balance’ button. Perform White Balance (Color Cameras Only) Place a white or neutral non-saturated object in front of the camera.
- Page 22 Camera State Resolution Cine # (for multi-Cine setups) Voltage / Battery Life Time Stamp Exposure Time Internal Memory Speed Number of Frames Available Serial Number / Name Record Time Cine Management Trigger Menu Menu Button CineFlash Status OSD Button IBAT Enabled Phantom Miro M &...
- Page 23 Miro LC Touchscreens Introduction The LCD Touchscreen can be used both as a viewfinder and for touch screen controls. The display will flip vertically when positioned upside down (such as mounted against the side of a camera, facing outward). Camera State The symbol and color will change based on the state of the camera.
- Page 24 Number of Frames Available Indicates the exact number of recordable frames available in the camera’s internal memory. Record Time Indicates the total length of recording time (in minutes and/or seconds). Trigger Triggers the camera. Trigger is also available from the red button on the front of the camera body, or via capture port.
- Page 25 Factory & User Settings Tap to display ‘Factory & User Settings’ menu used to load the factory settings, access 3 factory-saved presets, or store up to 6 of your own presets. Capture & Settings Scroll up and down for desired setting. Tap once to select parameter to change.
- Page 26 AWB (Automatic White Balance) automatically adjusts the camera’s white balance. Place a white or neutral object in the center square and tap once. White subject must not be fully saturated. Camera Info Camera Info displays model, serial #, memory size, firmware level, and current temperature readings.
- Page 27 Menu above is always available Expanded menu (above) is displayed when ‘Advanced Settings’ is set to ‘On’ Chapter 3: Miro LC Touchscreens...
- Page 28 Setting Access From the ‘Main’screen tap the ‘Menu’ icon as indicated to bring up the main ‘capture and setting control interface’. Scroll up and down for desired setting, then tap once to select parameter to change. Speed Defines the ‘Speed’ (Frame Rate / Sample Rate) that the camera will capture at.
- Page 29 Exposure Index EI (Exposure Index) is a reference value for the ISO level of the current shooting settings. A camera’s default EI value is measured at the default gamma of 2.222. Increasing the EI adds gain to the video image, the more gain that is added the more digital noise will be visible in the resulting Cine.
- Page 30 Master Gamma Gamma is the nonlinear relationship between signal level and brightness output of pixels, (a small signal level change at low voltage produces a larger variation in brightness than the same change in level at high voltage). A linear gamma would have the value of 1.0.
- Page 31 Shutter This activates shutter-off mode for PIV applications EDR (Extreme Dynamic Range™) sets a unique exposure time (defined in microseconds or a percentange of the defined ‘Exposure Time’) to pixels that may become saturated, (over exposed). This feature should not be enabled while performing a CSR, (Current Session Reference).
- Page 32 Trigger Polarity Defines whether the ‘Rising Edge’ (leading edge) or ‘Falling Edge” (trailing edge) of a TTL supplied input trigger signal is used to trigger the camera. Trigger Filter Specifies the length of time (defined in microseconds) the trigger signal state (high or low) must be held at to be a valid trigger signal.
- Page 33 Matrix Color Matrix is an advanced color matching tool, which previously was reserved for video engineers to match the HD-SDI output of cameras in a broadcast environment. In Phantom Miro M- and LC-series cameras a user ‘Matrix’ can be specified to fine tune the color of both the Cine image and HD-SDI output.
- Page 34 Menu Access Click the ‘Square’ button once to bring up touch screen menu. Tapping the center of the screen will also bring up ‘main menu’ icons. Select Setting Tap the menu icon to bring up the main ‘capture and setting’ control interface. Scroll up and down for desired setting, then tap once to select parameter to change.
- Page 35 Factory & User Settings Click the ‘Factory & User Settings’ icon. Load the factory settings, access 3 factory-saved presets, or store up to 6 of your own presets. When saving a user-setup, enter a name and tap the ‘return’ button to save it. Any of the 3 factory saved presets can be modified or overwritten.
- Page 36 Camera State OSD Button Time Stamp Play Cine Internal Memory Cine List Number of Frames Available CineFlash Mangement Record Time Erase Cine CineFlash Status Return Menu Button Phantom Miro M & LC Series Camera Manual...
- Page 37 See ‘Capture & Setting’ earlier in this chapter for descriptions. See ‘Main Menu’ earlier in this chapter for description. CineFlash Status Displays the status of the Phantom CineFlash, space used and the number of frames being saved. Play Cine Opens the ‘Play’ Cine screen. Used to select a Cine from the list to play or erase Cine List (asterisk indicates Cine had not yet been saved).
- Page 38 Camera State Menu Button Cine OSD Button Mark In Point Save to CineFlash Image Location Mark Out Time Stamp Forward Internal Memory Forward 1-Frame Mark Out Point Stop / Pause Number of Available Frames Reverse Record Time Mark In CineFlash Status Return Phantom Miro M &...
- Page 39 See ‘Capture & Setting’ earlier in this chapter for descriptions. See ‘Main Menu’ earlier in this chapter for description. Cine Indicates the internal memory (RAM) partition Cine being reviewed. Mark In Point Indicates the first image of the entire Cine to be saved.
- Page 40 The latest version of Phanom PCC software can be found and downloaded from the support section of the Vision Research website: www.visionresearch.com Phantom Miro M & LC Series Camera Manual...
-
Page 41: Phantom Software
Phantom Software Pre-Installation The Phantom cameras have a few requirements, which must be met before you can use it. 1. The Phantom Control Unit must have either the Microsoft Windows NT, Window XP Pro, VISTA Business Edition or Windows 7 operating system installed. - Page 42 Preview & Playback Panel ‘Preview’ panel displays exactly what the camera is imaging, while the ‘Playback’ panel displays recorded Cine files for review and/or editing. The type of panel displayed depends on the active control tab. Control Tabs When first started, the ‘Manager’ tab is selected. It is in this tab connected cameras are displayed, select for use, and renamed.
- Page 43 Camera Control via PCC PCC provides the ability to select various units for specific camera parameters by clicking the ‘Preference’ button at the bottom Manager tab. Units can be set to commonly used values (‘Presets’) or they can be customized using the pull-down selection lists.
- Page 44 The ‘Image Tools’ window is used to view a ‘Histogram’ and change settings that affect the computer display and the video output of the camera. Some of the variables include; brightness, gain, gamma, saturation, hue, white balance adjustments (Temp (K) and Tint), individual red, green and blue pedestal, gain and gamma values, tone control, and more.
- Page 45 Automatic White Balance Performing a White Balance should be the first step in color adjustment (color cameras only). Right mouse click on area that resemble white in the image in the ‘Preview’ or Playbak’ panel, then click on the ‘White Balance’ pop-up window. It is not necessary to fill the frame with white –...
- Page 46 Camera Settings Used to display, reset, or synchronize the time stamp clock, set the pixel bit depth, and/or partition (segment) the RAM of the camera. Click the ‘SetTime…’ button, then click ‘Update and Set’ in the ‘Set Camera Time’ window to synchronize the time stamps embedded in the recorded image data to the computer’s clock.
- Page 47 After pressing this button, the camera’s internal mechanical shutter will close, and a progress meter will be displayed (bottom of the image window). When completed the shutter re-opens, and the camera is ready for shooting. The first of these key features is the option to Key Advanced Settings enable the ‘Start/End of recording actions’...
- Page 48 Recording a Cine To begin recording to RAM click the red ‘Capture’ button. The red ‘Capture’ button changes to “Abort Recording” and the green “Trigger” button is enabled when the camera is recording The Abort Recording button instructs the camera to stop recording, leaving the camera’s RAM empty.
- Page 49 Use the ‘Video Control’ buttons to review the Cine. Rewind Pause Play Fast Rewind Rewind 1 Frame Advance 1 Frame Fast Forward To quickly search through Cine files to find the Performing a Quick Search points of interest: Through a Cine ‘Scroll’...
- Page 50 Editing a Cine Using the following ‘Video Control’ buttons locate the first image of the Cine to be saved and click the ‘Mark-In’ button. Locate the last image of the Cine to be saved and click the ‘Mark-Out’ button. Click ‘Play, Speed, & Options” and enable (check) ‘Limit to Range’.
- Page 51 To save a Cine clip in a ‘movie-like’ format simply select the desired format from the list, navigate to the destination folder, assign a file name and save. To convert a Cine clip into a sequence of frames you must add one of the following annotations to the end of the file name: ‘!n’...
- Page 52 If you are converting the Cine file into ‘movie-like’ formats leave the file name as ‘All selected file.’ The software automatically assigns the original file name to the converted file and appends the appropriate file extension. However, if you are converting the file into a sequence of images, you need to enter the annotation only detailed in the ‘Convert a Cine’...
- Page 53 The video format is set via the “Pvp Settings...” window. Video capture and playback are performed from the main ‘PVP’ window. The ‘Capture’ button places the camera into the recording mode writing frames into the camera’s RAM awaiting a trigger. Switch to the desired clip to view by selecting it in the ‘Cine:’...
- Page 54 Phantom Miro M & LC Series Camera Manual...
-
Page 55: Cineflash & Cineflash Dock
CineFlash & CineFlash Dock Introduction The Phantom CineFlash is a powerful component of the Phantom Miro M and LC product line, enabling Cine raw footage to be quickly transferred from the camera’s RAM to safe, non-volatile storage. These lightweight, solid-state storage devices are hot-swappable and designed to keep you shooting on the go. - Page 56 Phantom CineFlash Installation Open the Phantom CineFlash compartment door. Carefully align the insertion key guards, and slide the CineFlash into the camera until it is properly seated, then close the CineFlash compartment door. Phantom CineFlash Removal Re-open the CineFlash compartment door. Prior to removing the Phantom CineFlash verify that it safe to remove it by ensuring the ‘CineFlash Recording Indicator’...
- Page 57 The specific driver is available here: http://sourceforge.net/projects/fuse-ext2/ None of the above solutions are provided by Vision Research and we cannot guarantee they will work or continue to be supported. You can always access and manipulate Cine files stored on a CineFlash using the PCC application over the camera’s Ethernet port, and the above mentioned...
- Page 58 Install the EXT2 Driver Follow the installation instructions provided with the EXT2 driver. Connecting the CineFlash Dock Insert one end of the eSATA connector to the Phantom CineFlash Dock. to a Computer Insert the other end of the eSATA connector to the PC/MAC computer’s eSATA interface.
- Page 59 Reviewing a CineFlash Cine If the Phantom Cine Flash is in the docking station click the ‘Open File’ button in the PCC. Navigate to the folder the Cine file is saved in, highlight the file, and click the Open button. If the Phantom CineFlash is in the camera select the CineFlash Cine file to be reviewed from the: ‘Manager’...
- Page 60 Phantom Miro M & LC Series Camera Manual...
-
Page 61: Phantom Rcu
The Remote Control Unit Overview The Phantom Remote Control Unit (RCU) is an ideal companinon for the Phantom Miro M & LC- Series cameras. This small, lightweight, hand-held controller allows you to control most settings on your camera as well as view and save recorded Cines to a Phantom CineFlash drive. - Page 62 Sony BP-U60 Lithium-ion Rechargeable Battery Sony BP-U30 Lithium-ion Rechargeable Battery Phantom Miro M & LC Series Camera Manual...
-
Page 63: Batteries & Battery Charger
Batteries & Battery Charger Introduction The Sony BP-U30 and BP-U60 are a lithium-ion batteries designed for professional video shooting in both the field and the studio. These BP-U Series compact lithium-ion batteries boasts high power in a compact body. The batteries are equipped with the professional ‘INFO’... - Page 64 BP-U30 Lithium-ion Battery Dimensions (W x H x D): 1 11/16 x 3 1/4 x 2 3/4 in Specifications (41.5 x 82.5 x 69.7 mm) Mass: 8 oz (220 g) Maximum / nominal voltage: 16.4 VDC / 14.4 VDC Miro Run Time: 45 min Charging time (using the BC-U1): Approx.
- Page 65 BC-U1 Battery Charger Power requirements: 100 VAC to 240 VAC, 50/60 Hz Specification Power consumption: Operating temperature: +32 to +113 °F (0 to +45 °C) Demensions (W x H x D): 5 1/8 x 1 13/16 x 3 7/8 in (128 x 45 x 98 mm) Weight: 12 oz (330 g)
-
Page 66: Battery Installation
Battery Installation Vision Research recommends the following procedure for safe battery installation and removal. Only Sony BP-U30 and BP-U60 batteries are gaurenteed. Larger, heavier batteries should not be used. Failure to follow this procedure could result in physical damage to the camera, which must be repaired at a Vision Research service center. - Page 67 Battery should lower smoothly, then snap in place. Guides will ensure the battery lowers over the terminals perfiectly straight. Slide the battery lock, on the top of the camera, Battery Removal forward, and lift the battery up and back to remove. Chapter 7: Battery Installation...
- Page 68 Be sure to check www.visionresearch.com for additional troubleshooting info, support information, FAQs, software and firmware releases, and the Phantom Zone, an online community of Phantom users. Phantom Miro M & LC Series Camera Manual...
-
Page 69: Faq/Support
The reset will take 5-10 seconds before you can access the controls again. No, Vision Research has not identified a stylus to Can you use a stylus work with the Miro LC. The screen only responds to with the Miro LC screen? a human touch. - Page 70 What does the OFF / AUTO / ON In the On position, the camera will boot up with a battery connected and/or an external power supply switch do? connected to the camera’s DC input. When using a power supply, the battery acts as a battery backup. Note: the battery does not charge in the camera.
- Page 71 When I select a trigger point When selecting the trigger point using frames, you set the number of post-trigger frames. To be using a percentage number like consistent with this, when using percent, you set 20%, the trigger is set 20% from the percentage of frames you want to be post- the end of the available frames trigger, rather than pre-trigger.
- Page 72 Phantom Miro M & LC Series Camera Manual...
- Page 73 Phantom Miro M & LC Series Camera Manual...
- Page 74 Vision Research - Corporate Headquarters 100 Dey Road Wayne, New Jersey 07470 Ph: +1.973.696.4500 Toll Free: 800.737.6588 Fax: +1.973.696.0560 Vision Research - Florida Office 1002 Monterey Commons, Suite 200 Stuart, Florida 34997 Ph: +1.772.286.7000 Fax: +1.772.286.6206 Vision Research Ltd. - UK...
Need help?
Do you have a question about the Phantom Miro M Series and is the answer not in the manual?
Questions and answers