Advertisement
Welcome
Congratulations on your purchase of a Mountain Buggy.
We know how precious and inspiring a new little person can be in your
world. It's so important to be able to show your baby to the world and
just as important to show the world to your baby.
At Mountain Buggy you and your baby matter to us. That's why we
have spent years researching and developing a product that is safe,
comfortable and in tune with modern parents' needs. We want you to be
able to live your new family lifestyle with all the freedom and satisfaction
you have always experienced.
We also know that many parents use strollers incorrectly and as a result
may put their children at risk. Please take the time to read through this
manual carefully. Your Mountain Buggy will provide you with optimum
safety if you follow the instructions as detailed.
If you have any concerns, questions or comments about your Mountain
Buggy or how to use it, please do not hesitate to contact us. We'd love to
hear from you.
1
Advertisement
Table of Contents

Related Manuals for Mountain Buggy urban elite


Summary of Contents for Mountain Buggy urban elite
- Page 1 It’s so important to be able to show your baby to the world and just as important to show the world to your baby. At Mountain Buggy you and your baby matter to us. That’s why we have spent years researching and developing a product that is safe, comfortable and in tune with modern parents’...
- Page 2 Other newborn options include: 1. Mountain Buggy® Carrycot (available for all models except Swift) 2. Mountain Buggy® Carseat Adapter (available for all single models, except Swift). • Maximum seat loading for all model Single strollers is 35kg/77lb, and 25kg/55lb per seat on Double and Triple versions.
-
Page 3: Folding Your Stroller
Erecting and Folding the Stroller putting up your stroller When you first receive your stroller, remove it from the box, remove the black caps on the rear axles (not on Urban Single or Swift) and plastic outer wrapping. Dispose of plastic wrapping safely to avoid a child suffocating. -
Page 4: Wheel Assembly
Wheel Assembly Front Wheel Assembly Holding both knobs at the same time, unscrew and pull out the front axle. Insert the front wheel. Re-insert the axle and tighten both knobs by hand to secure wheel in place. axle On Terrain Double to remove remember to insert the spacer between... -
Page 5: Safety Harness
Safety Harness to fasten 1. Clip shoulder straps to waist strap buckles. 2. Push both waist buckle ends into crotch strap. to release the harness 1. Squeeze the tabs on either side of the main buckle with thumb and forefinger. to adjust width for a new born 1. -
Page 6: Seat Recline
Seat Recline The seat back can be reclined to any position between the upright and fully reclined positions. to recline Pull on the buckles to slide the straps through the buckles and recline the seat. buckles strap to raise Pull straps through the buckles to raise the seat angle. -
Page 7: Safety Wrist Strap
Brake It is important to put the brake on whenever you park the stroller. Ensure it is on when putting your child in or taking your child out of the stroller. to apply: push brake lever completely down. brake lever to release: lift brake lever completely up. -
Page 8: Seat Removal
Removing Seat and Sunhood seat removal Unfasten seat domes from frame along side tubes (4 domes each side). Unfasten straps underneath seat and those attached to frame (1 strap each side). Unfasten the domes For Terrain models which fasten the only, push seat sunhood and seat forward then slide... - Page 9 Buggy Care Regular maintenance is needed to keep the stroller working effectively and safely. Cleaning Fabric: The outdoor fabric should be cleaned regularly. Brush off any excessive dirt or sand and rinse with lukewarm water. Fabric can be removed and washed by hand using a mild natural soap solution in lukewarm water (no more than 38°C/100°F).
-
Page 10: Handlebar Grip
Buggy Care (continued) When the correct steering is achieved, turn the outside nut on the opposite side so it just touches the side of the tube. Tighten the inside nuts. tyres/tubes If a puncture occurs the inner tube can be repaired with a bicycle repair kit, or replaced. - Page 11 Top Tips transporting your stroller A special locking strap is located on the handlebar support bar. Wrap this strap around the axle and then clip fasteners together to secure stroller closed when folded. sunhood velcro The sunhood can be fastened back by applying the velcro on the sunhood window flap to the velcro on the inside edge of the sunhood.
-
Page 12: Key Benefits
For this reason, we offer a warranty programme that will give you total confidence in the quality of our products. A three year warranty is applied to the frame and fabric of all Mountain Buggy strollers. A one year warranty also applies on any authorized Mountain Buggy product accessories. - Page 13 To have a chat about any concerns related to any of our products or about the full terms of the Mountain Buggy World Warranty or if you would like to make a claim, please contact one of our Customer Care Centres in your area as outlined on the back page of this booklet.
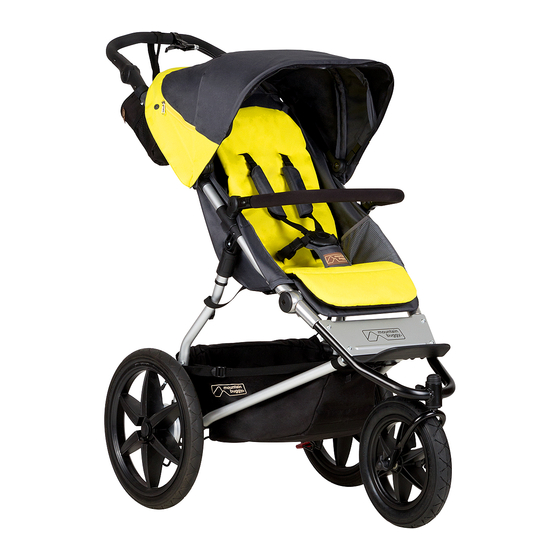
- Page 14 Parts of the Stroller Frame Handlebar Handle Adjuster Side Tube Sunhood Support Wire Sunhood Joint* Fastener Down Tube Brake Lever Brake Cog Heel Rest Brake Cam* Sliding Lock* Secondary Rear Axle Lock Foot Rear Wheel Plate Swivel Knob Sliding Lock* Accessory Lug Quick Release Clip Front Wheel Swivel*...
Need help?
Do you have a question about the urban elite and is the answer not in the manual?
Questions and answers