Table of Contents
Advertisement
Quick Links
Advertisement
Table of Contents

Related Manuals for Idis DR-6232P-S


Summary of Contents for Idis DR-6232P-S
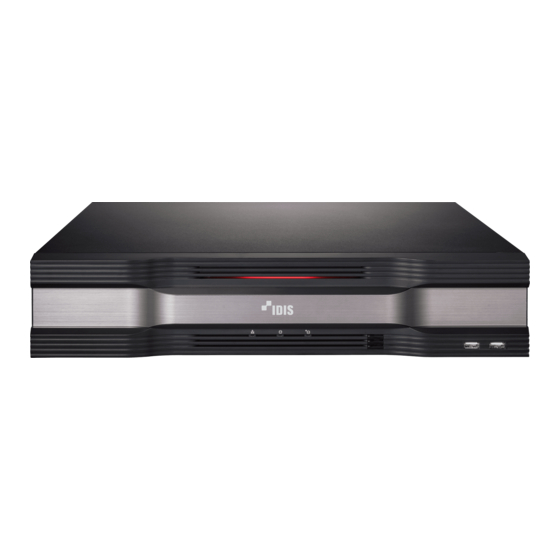
- Page 1 Network Video Recorder Operation Manual DR-6216P-S DR-6232P-S Powered by...
-
Page 2: Safety Precautions
Before reading this manual This operation manual contains basic instructions on installing and using DirectIP™ Network Video Recorder, an IDIS product. Users who are using this product for the first time, as well as users with experience using comparable products, must read this operation manual carefully before use and heed to the warnings and precautions contained herein while using the product. -
Page 3: Important Safeguards
Before reading this manual Important Safeguards 1. Read Instructions 14. Damage requiring Service All the safety and operating instructions should be read before the appliance Unplug this equipment from the wall outlet and refer servicing to qualified is operated. service personnel under the following conditions: 2. -
Page 4: Fcc Compliance Statement
Before reading this manual In-Text Symbol Type Description Caution Important information concerning a specific function. Note Useful information concerning a specific function. User’s Caution Statement Caution: Any changes or modifications to the equipment not expressly approved by the party responsible for compliance could void your authority to operate the equipment. - Page 5 © 2015 IDIS Co., Ltd. IDIS Co., Ltd. reserves all rights concerning this operation manual. Use or duplication of this operation manual in part or whole without the prior consent of IDIS Co., Ltd. is strictly prohibited. Contents of this operation manual are subject to change without prior notice.
-
Page 6: Table Of Contents
Table of Contents Part 1 - Getting Started ........9 Setup Wizard . - Page 7 General ................. . 29 Date/Time .
- Page 8 Part 4 - IDIS Web ........
-
Page 9: Part 1 - Getting Started
Part 1 - Getting Started Select the desired Setup Wizard option and click This document covers the 8-, 16-, and 32-channel Next. network video recorders. The NVRs are identical except for the number of cameras and alarms that can be connected and the number of cameras that can be displayed. - Page 10 Part 1 - Getting Started Choose the desired Recording Method and click Quick Wizard Next. Select Quick Wizard. Choose the desired Recording Quality and click Next. Specify the current date and time and then click Next. • Higher recording quality uses up more disk space.
- Page 11 Part 1 - Getting Started – Recording resolutions used under each recording method Network Wizard and record video quality setting are as follows: After exiting from Quick Wizard, you can click Go to High Video Quality Standard Longer Recording Priority Profile Recording Time Priority Network Setup and set up the network with Network...
- Page 12 NVR. Once registered, the name can be used to the next step. to access the NVR directly from clients such as the IDIS Center. Check the name's availability • If the NVR is on a network connected to a to complete the registration process. The Finish network that has a DHCP server, selecting Auto button will then become activated.You will...
-
Page 13: Camera Registration
Part 1 - Getting Started Camera Registration Click Finish to exit Network Wizard. Once Network Setup Wizard is complete, the system will automatically enter Camera Registration mode and scan for cameras connected to the NVR. Camera Scan Button Camera View Menus Camera List Area Video Display Area Apply/Cancel Buttons... -
Page 14: Camera Scan Button
Part 1 - Getting Started Camera Scan Button camera. The NVR scans for the camera matching the specified address. If you enter IP address’s range, the NVR scans for cameras falling under You can scan and search and register cameras that were the specified address’s range. - Page 15 Part 1 - Getting Started Select Search to commence scanning. Only cameras that are connected to the NVR via VIDEO IN ports can be scanned and registered. Select a camera from the scan list and then select Add Camera. The device login window will appear. Enter a User ID and a Password for the selected camera.
-
Page 16: Camera View Buttons
You can register on the NVR when the camera protocol is set to DirectIP. Select the protocol indicated IDIS and then set DirectIP. When you change the protocol, the camera reboots and then you can register the camera on the NVR. For more information on the settings, please refer to the network camera manual. -
Page 17: Camera List Area
Part 1 - Getting Started Camera List Area Video Display Area Left-click on the video display area to toggle between split screen and single screen modes. Drag the camera screens around to rearrange them. Camera Screen Registered Screen Initial registration display other NVRs (Registration X) -
Page 18: Apply/Cancel Buttons
Part 1 - Getting Started Apply/Cancel Buttons • Information is not indicated on the bottom of the screen for cameras already registered to the NVR, and the Screen Position/Registration Info icon is While in Camera Registration mode, select Apply to shown with a black background. -
Page 19: Camera Registration Mode
Part 1 - Getting Started Camera Registration Mode Login While in Live mode, right-click and select Camera Configuring the NVR’s settings and accessing its Registration. searching and other functions require an authorized user login. Bring up the Live menu and either press the SETUP button on the remote control or click on (Login) using the mouse. - Page 20 Part 1 - Getting Started Find Password If you do not know the password, select PW . You can set a new password. Enter a user, registered email and then select Get Verification Code. Enter Verification Code and select OK. •...
-
Page 21: Live Mode
Part 1 - Getting Started Live Mode Live Menu Press the Setup button while in Live mode to bring up the Live menu on the top of the screen. Press Setup once more to hide the menu. Use the Arrow buttons on the front panel of the NVR or the remote control to select the menu options. - Page 22 Part 1 - Getting Started 6 Alarm 9 Select Camera Pressing this button while the alarm has been Displays the selected camera in a single screen activated resets all NVR outputs, including the built- format. in buzzer. 0 Search Mode 7 Panic Recording ●...
-
Page 23: Zoom
Part 1 - Getting Started Zoom mouse. Also, it’s possible to use the mouse wheel to zoom in/ out. Press the ZOOM button on the remote control and • Logging in with an account that has PTZ Control select a channel you wish to zoom in on. A zoom frame Authority is necessary in order to control PTZ will appear on the selected channel. -
Page 24: Event Monitoring
Part 1 - Getting Started Advanced Settings • The exact PTZ protocol supported by the camera must be specified in order to use the NVR's PTZ In PTZ mode, selecting a camera and then clicking Menu controls. button loads the Advanced PTZ screen as shown below. •... -
Page 25: Edit Group
Part 1 - Getting Started then SETUP button on the front panel. Alternatively, Edit Group right-click on the mouse to access the Context menu. ● PTZ: Access PTZ controls. Edit Group lets you customize split screen pages in both ● Zoom: Zoom in. Live and Search modes. -
Page 26: Video Recording
Part 1 - Getting Started Video Recording Audio Recording If the Record Audio option under Record Setup > Video recording will only take place if all the connections General has been enabled the camera will record audio are made correctly as per information contained in Part 2 of this operation manual. -
Page 27: Remote Control Buttons During Playback
Part 1 - Getting Started Remote Control Buttons during Playback Camera Button: Displays the selected recording in full screen. Zoom Button: Allows you to zoom in on a specific area of the recording. Layout Button: Cycle through 1x1, 2x2, 1+5, 1+7, 3x3, 4x4, 5x5, and 6x6 modes. -
Page 28: Part 2 - Configuration
Part 2 - Configuration Menu Use Use the remote control’s arrow buttons to select an option and then press the remote control’s $ button or left-click on the option using the mouse. Information contained in this section (Menu Use) applies to all other instructions found throughout Part Change the setting and then select Apply or OK to 3 - Configuration. -
Page 29: Mouse
Part 2 - Configuration Mouse If an upgrade attempt fails, an upgrade failure message will be displayed. Refer to Error Code Types in the installation manual for more details. Using a mouse makes it easier to configure the settings. A mouse lets you make selections faster and use its wheel to scroll through long menus. -
Page 30: Date/Time
Part 2 - Configuration Date/Time In order to display the system_log.txt file, you must use the correct character encoding settings and use a fixed-width font. ● Date: Used to change the system’s date setting. ● Clear All Data: Erases all recording data. Selecting ●... -
Page 31: User
Part 2 - Configuration User • If you have configured the DNS Server setting under Network - IP Address, you can enter the time server's domain name instead of its IP address. Use this option to register users and assign permissions. •... - Page 32 Part 2 - Configuration Select OK. Configure Auto Login and Auto Logout settings. Select Apply or OK to exit. • Group names, user names, and passwords can be entered using the virtual keyboard. For more information on using the virtual keyboard, refer to the Text Input via Virtual Keyboard on page 28 •...
- Page 33 Part 2 - Configuration Group Permissions May change the System Time system's date and time Change settings. May shutdown the System Shutdown system from the May clear data stored Data Clear system menu. in the system. May upgrade the May configure PTZ PTZ Setup system from the settings.
- Page 34 Part 2 - Configuration Storage • Select Format to prepare the disk as a storage for data recording. • Disks formatted with Use As set to Not Using will Use this option to configure storage settings. not be used for data recording. •...
-
Page 35: Monitoring
Part 2 - Configuration – Stop: Once mirroring starts, you can stop it by Monitoring selecting Stop option and then designating disks to delete. Once mirroring is stopped, all existing Use this option to configure Monitoring settings. data on the disk will be erased. When mirroirng is stopped, the deleted disk will be set to NOT Used. - Page 36 Part 2 - Configuration Monitoring Options Specify the threshold temperature. Disk Once any disk reaches this threshold, Temperature the system will issue an alert. Define monitoring times. If self- diagnosis is not performed on a Monitors disks that support System Disk regular basis, the system will assume S.M.A.R.T.
-
Page 37: Self-Diagnosis
Part 2 - Configuration Self-Diagnosis – Run the failover: Click the Run the failover button when a fail is detected on the target device to resolve the problem. Use this option to configure self-diagnostic settings. Once Run the failover have made to the camera, the This feature is also supported when connected to the camera will reboot automatically. -
Page 38: Camera Setup
Part 2 - Configuration Camera Setup Device Scan Scan the device under Registration - Scan. Refer to the Menu Use on page 28 for basic information on using the Setup menus. Registration You can register cameras at remote locales. By selecting a number from the list, you can move the camera up or down the list using the mouse wheel to reorder its position. - Page 39 ● Address: Displays the scanned camera’s IP address. device. ● Model: Indicates the camera model. • For IDIS cameras, a user and password may not be required. ● Protocol: Indiscates the scanned camera’s protocol. ● Name: Displays the scanned camera’s IP name.
-
Page 40: General
Video In/PoE port display even when there are multiple camera or using a DirectIP™ PoE Switch (optional). Select connections. (Only for the DR-6232P-S model) Reset in the camera’s power settings to restart the camera. It is not supported by video encoders. - Page 41 Part 2 - Configuration 2 Scan Refer to the PTZ device manufacturer’s instructions Used to set up a profile for moving the camera between for the proper settings. two points. At least two presets must be available in order to use the scan feature. Types of configuration options shown vary depending on the PTZ functions supported by the camera.
- Page 42 Part 2 - Configuration pattern profile. You can record up to two minutes of Select Apply after setting up a preset, scan, movement. pattern, or tour profile to see images from the – Directional Buttons ( concerned camera on the left side of the screen. Used to tilt and pan the camera.
- Page 43 Part 2 - Configuration Privacy Masking Options Image Sensor Options Select Name to rename the privacy masking area. Select icon to delete the existing privacy masking area. Select Privacy Masking Setup to display additional privacy masking area options. You can drag on the area with the mouse to resize it or add up to 16 different ●...
- Page 44 Part 2 - Configuration ● Switching Level: Controls the changing time of Some camera models may not support the daytime / nighttime mode, depending on the Schedule function. Switching Level between 1 to 10. The higher the ● White LED Mode: Clicking on/off enables or disables value is, day / nighttime mode is changed under White LED lighting when motion is detected by the high-lighting conditions.
- Page 45 Part 2 - Configuration White Balance Options Exposure Options ● Preset: Use preconfigured white balance settings. ● AE Target Gain: Specify exposure compensation’s – Auto: Allow the system to adjust the white target gain. Exposure is compensated automatically balance automatically. The system will assess the based on the specified target gain.
- Page 46 Part 2 - Configuration ● Shutter Speed Control: Adjust Shutter Speed. This Miscellaneous option is available only when Anti-Flicker and Slow Shutter are both set to Off. – Auto: The system will assess the lighting conditions and adjust the shutter speed automatically. –...
-
Page 47: Stream
Part 2 - Configuration Stream Audio Configure audio recording settings for all cameras simultaneously. Configure the camera’s live and recording resolution, encode, picture quality, transfer speed, and ips speed settings. ● Camera Channels: It’s possible to configure a unique video profile for each camera. ●... -
Page 48: Upgrade
Part 2 - Configuration Record Setup Upgrade Refer to the Menu Use on page 28 for basic When using NetFS, select Firmware Upgrade. You can information on using the Setup menus. select or USB port or NetFS. If not, you can only select USB port. -
Page 49: Schedule
Part 2 - Configuration Schedule • If the recording stored on the disk is shorter than the duration specified under Limit Time-Lapse Recording, the older of Event Recording or Time Recording data is deleted first. • The system's recording time may change depending on recording quality, resolution, motion, and other configurations made by the user. - Page 50 Part 2 - Configuration Simple Mode Options Advanced Mode Options ● Mode: Select No Record, Time, Event, or Time & Select to configure event types and video profiles. Event. ● Type: Event-specific and time recording icons are as follows: Unless the Panic Record button is Time Lapse pressed, no recording will take place Audio Detection...
-
Page 51: Pre-Event
Part 2 - Configuration Event Setup Pre-Event Refer to the Menu Use on page 28 for basic When an event occurs, enabling this option includes information on using the Setup menus. the specified duration prior to the event in the event- triggered recording. - Page 52 Part 2 - Configuration ● Min. Blocks: Motion needs to be detected in more Use the remote control’s arrow buttons to move the block selection window up, down, left, and right. The than the specified number of blocks in order to selection window consists of 8 blocks per row.
- Page 53 Part 2 - Configuration Trip Zone – Select: Confirm the block selection in the selection window. – Clear: Clear the block selection in the selection ● No.: Select which cameras to apply Trip Zone to. window. ● Sensitivity: Set daytime and nighttime sensitivity –...
- Page 54 Part 2 - Configuration ● Actions: Specify which actions to take when Trip Zone Tampering is detected. – Record: Specify which cameras to begin linked recording on when an event occurs. If the schedule is set to Event or Time & Event mode, the selected cameras will begin linked recording when an event occurs.
-
Page 55: Alarm-In
Part 2 - Configuration Alarm-In Video Loss ● Actions: Specify which actions to take when a Video Loss event occurs. ● No.: Enable / disable alarm-ins. – Record: Specify which cameras to begin linked This option includes both local and network camera recording on when an event occurs. -
Page 56: Audio Detection
Part 2 - Configuration Audio Detection ● Use Ignoring Time: Select Time Setup to specify the audio detection ignore time. Audio detection will be disabled during the specified time frame. ● No.: Select which cameras to apply Audio Detection ● Sensitivity: Set to between 1 (Low) and 5 (High). ●... -
Page 57: Recording Fail
Part 2 - Configuration Recording Fail Text-In ● Actions: Specify which actions to take when a ● Setup: Configure text-in devices. Recording Fail event occurs. – Record: Specify which cameras to begin linked recording on when an event occurs. If the schedule is set to Event or Time &... -
Page 58: Camera System
Part 2 - Configuration ● Line Delimiter: Designate a string to mark the end of Camera System a line. You can enter control strings by selecting and then entering ^, followed by a letter. For example, The event occurs when the fan has stopped in the fan Carriage Return is ^M and Line Feed (new line) is ^J. -
Page 59: Face Detection
Part 2 - Configuration Face Detection ● Ignoring Interval: The system does not produce event log entries or issue remote notifications regarding face detected for the time specified When face detection event occurs in the selected after the initial motion was detected. Set the value camera, the area that the face is detected displays on between 1 sec and 5 secs or choose Never. -
Page 60: Ftp
Part 2 - Configuration • For the FTP notification to work properly, the related settings should be configured as follows: Network menu - NetFS tab - Use setting - Event menu - Actions - EventUpload setting • When you delete an FTP site from the NetFS setup screen in the Network menu, the FTP site in the FTP setup screen in the Notification menu will be deleted, too. -
Page 61: Device Setup
Part 2 - Configuration Device Setup Remote Control Refer to the Menu Use on page 28 for basic information on using the Setup menus. Alarm-Out ● Port: Select None, RS232 or RS485. Click the Setup button and then select the correct Baud Rate, Parity, Data Bits and Stop Bits for the device you are connecting to the NVR. -
Page 62: Network Setup
OpenSSL Project for use in Open SSL Toolkit (http:// www.openssl.org/). ● IDIS Web: If you wish to use IDIS Web, select IDIS Web - Use IDIS Web Service. Select IDIS Web - IDIS Web Port and choose a port number between 1024 and 65535. - Page 63 Part 2 - Configuration Function Press the ← or h key to move to the left in the menu. This is the same as ← or h pressing the Left arrow button on the front panel. Press the → or i key to move to the right in the menu.
- Page 64 Part 2 - Configuration ● Ping Test: Select to test the current WAN settings you made. Designate the IP address type as Manual or DHCP. Manual Enter the IP address of the NVR. Adjust the frequency of the ping test. Set Type to Manual.
-
Page 65: Fen
• If the device name contains the #, \, and/or % symbol, it might not be able to connect to the NVR from the IDIS Web program. ● Status: Used to check the status of the device being registered to the FEN server. -
Page 66: Netfs
Part 2 - Configuration NetFS ● Use: Select the usage for the NetFS feature. – N/A : Disables the NetFS feature. – ALL: Enables the NetFS feature. This allows you to register NetFS sites for the following – Upgrade: Allows you to use the upgrade file that functions: was uploaded to the NetFS site. -
Page 67: Notification Setup
Part 2 - Configuration Notification Setup Enter information about the NetFS site using the virtual keyboard and then click the test buton to test the current NetFS site. Schedule Select the + icon at the lower left corner of the screen to add a notification schedule. -
Page 68: Callback
Part 2 - Configuration Callback Select the icon to attach event recordings to outgoing mails. Select the icon to remove the account. Configure Callback settings. Select MP4 Clip to attach event recordings to outgoing mails. The event recordings generated by a camera can be attached only. -
Page 69: Sns
Part 2 - Configuration SMTP Setup Select SMTP Setup at the bottom right corner of the screen to configure an SMTP server. This option enables the NVR to send out SNS messages. Select the SMTP server Type. Enter the SMTP Server’s IP address or domain name and then configure the Port and Sender settings. -
Page 70: Push
Part 2 - Configuration Display Setup Push Refer to the Menu Use on page 28 for basic Configure Push settings. information on using the Setup menus. Show OSD (On Screen Display) information on the bottom of the screen. Select Push to use Push feature. The Push feature sends out event-related messages to mobile phone. -
Page 71: Main Monitor
Part 2 - Configuration Status Setup Main Monitor Refer to the Menu Use on page 28 for basic Configure monitor-related settings. information on using the Setup menus. Event This screen displays an overview of all events. When an event occurs, the corresponding channel flashes for 5 seconds. -
Page 72: Storage
Part 2 - Configuration ● Panic Record: Displays event status based on current Storage Panic Record status. ● Check Recording: Displays event status based on Indicates each disk's status. System Monitoring settings. For more information, refer to the Monitoring on page 35. ●... -
Page 73: Network
Part 2 - Configuration Network A disk that has never Formatted been used before. This page provides a complete overview of the network ● Disk performing status in real-time. normally. ● If the HDD is partially Good damaged, indicates the bad sector Disk Bad percentage. - Page 74 Part 2 - Configuration If receiving power from the NVR, indicates the camera is the actual amount of power connected. indicates consumed by each camera is Camera the camera is not connected. indicated under each camera icon. Connection Clicking the image displays Total power consumption is shown status information of the device at the top of the screen in the...
-
Page 75: Part 3 - Search
Part 3 - Search Time-Lapse Search While in Live mode, select the Search Mode icon and select Time-Laspe Search or Event Log Search or Sumnail Search. Select Setup while in Search mode to display a menu from which you can select Control Area. Press Setup once more to move the Control Area. - Page 76 Part 3 - Search The Control Area consists of Top, Center, Right, Bottom, and None. 1 Top: Activates top Search menu. Use the arrow buttons to select an option. 2 Center: Activates the middle screen section. Use the arrow buttons to select a camera. 3 Right: Activates the control buttons on the right.
-
Page 77: Search Menu
Part 3 - Search Search Menu CAM3 4 5 6 1 Layout Used to change the screen layout to single screen, , corridor format, 2x2,1+5, 1+7, 3x3 , 4x4, 5x5, or 6x6. In order to use the Corridor Format feature, Corridor Format (Display Setup - Main monitor - Use Corridor Format) must first be enabled. - Page 78 Part 3 - Search corresponding video recording. 1 Bookmark Select the icon to add a bookmark to the current playback position. Select a bookmark from the Bookmark setup window on the right side of the Time-Lapse Search mode screen to move to the registered playback position.
-
Page 79: Context Menu
Part 3 - Search Context Menu which is not shown can be checked in the minimum size of Time-Lapse search window. Select (zoom-in) to compose recording data Select the Menu button or right-click on the Camera in 1-minute segments and select (zoom-out) screen to access the context menu. -
Page 80: Text-In Search
Part 3 - Search Text-In Search Select Text-In Search from the Search menu to bring up the Text-In Search window. ● Select First under From and Last under To to search the recording from start to finish. Alternatively, you can uncheck the First and Last options and specify the search time frame manually. -
Page 81: Clip Copy
The maximum size limit for One-Touch Clip Copy files is 2GB. • Clip Copy files can be played back on Windows systems. For more information, refer to the IDIS ● Channels: Specify which channel to save the Center operation manual. -
Page 82: Print
Part 3 - Search Event Log Search Print Select Search Mode > Event Log Search to bring up Print the current image. the Event Log Search window. While in Search Mode, select Pause to pause playback. Select Print from the Search menu to open up the Print Setup window. -
Page 83: Sumnail Search
Part 3 - Search Sumnail Search ● Use event filters to include/exclude specific system events such as Panic Record, Check Recording, Check Alarm-In, Disk Almost Full, Disk Bad, Disk Select Search Mode > Sumnail Search to bring up the Temperature, Disk S.M.A.R.T., Fan Error, eSATA Sumnail Search window. -
Page 84: Overlapped Recording Search
Part 3 - Search Overlapped Recording Search If the system’s clock is changed to a point in the past, overlapping recordings may be produced. Overlapped recordings have to be searched in segments. For example, making a recording from 1 o’clock to 5 o’clock, changing the system’s clock at 5 o’clock to 3 o’clock, and then continuing to record until 6 o’clock produces two recordings that overlap between 3 o’clock... -
Page 85: Part 4 - Idis Web
Part 4 - IDIS Web IDIS Web is a program that allows you to view and search video from remote locations over the Internet and can be accessed on a regular web browser such as Internet Explorer. System requirements for running IDIS Web are as follows: ●... - Page 86 IDIS Web program. • If running IDIS Web, the bottom section of the screen may get cut off if the address bar or the status bar is shown. In this case, change Internet Options so that the address bar or the status bar is hidden. (Tools → Internet Options →...
-
Page 87: Web Live Mode
Press to terminate IDIS Web. Place the mouse pointer on the logo to check IDIS Web's version. Displays the current time. Select the desired mode. Changing the mode places the selected camera in the first cell of the layout that will be changed. - Page 88 Part 4 - IDIS Web Select the camera you wish to monitor. Use the arrow buttons to navigate to the previous/next camera group. Used to control a PTZ camera at a remote location. Used to adjust live video quality. Controls remote alarm out devices. Use the arrow buttons to navigate to the previous/next alarm group.
-
Page 89: Web Search Mode
& Press to terminate IDIS Web. Place the mouse pointer on the logo to check IDIS Web's version. Displays time information of the video recording from the remote NVR. Select the desired mode. Click to print the current video screen using a printer connected to the computer. - Page 90 Part 4 - IDIS Web Select the camera you wish to search. Use the arrow buttons to navigate to the previous/next camera group. Zoom in or out on the video. Adjust image brightness. Apply image filters (Sharpen, Blur, Equalizer, Interpolation, and Revert) to the images.
-
Page 91: Part 5 - Appendix
Panic Recording Pre-Event Print PTZ Control Alarm-In Alarm-Out Audio Recording Recording Record Setup Camera Registration Clip Copy Search Storage Stream Event Monitoring Text-In Text-In Search Timelapse Mode IDIS Web 85, 91 Upgrade Live Mode Login Video-Analytics Motion Search Wizard Mouse V3.0... - Page 92 IDIS Co., Ltd. For more information, please visit at www.idisglobal.com...