Table of Contents
Advertisement
1/3" CCD COLOR
OBSERVATION
CAMERA
INSTALLATION
INSTRUCTIONS
Ultrak Worldwide Support Center & Eastern Regional Office:
1301 Waters Ridge Drive Lewisville, TX 75057
(800) 796-2288 (972) 353-6400 FAX (972) 353-6670
Ultrak Western Regional Office:
6252 West 91st Avenue Westminster, CO 80030
(800) 846-8884 (303) 428-9480 FAX (303) 429-6609
KC-2A
Advertisement
Table of Contents

Related Manuals for Ultrak KC-2A


Summary of Contents for Ultrak KC-2A
- Page 1 1/3" CCD COLOR OBSERVATION CAMERA INSTALLATION INSTRUCTIONS Ultrak Worldwide Support Center & Eastern Regional Office: 1301 Waters Ridge Drive Lewisville, TX 75057 (800) 796-2288 (972) 353-6400 FAX (972) 353-6670 Ultrak Western Regional Office: 6252 West 91st Avenue Westminster, CO 80030...
- Page 2 (303) 428-9480 ALL RIGHTS RESERVED. NO PART OF THIS PUBLICATION MAY BE REPRODUCED BY ANY MEANS WITHOUT WRITTEN PERMISSION FROM ULTRAK. THE INFORMATION IN THIS PUBLICATION IS BELIEVED TO BE ACCURATE IN ALL RESPECTS. HOWEVER, ULTRAK CANNOT ASSUME RESPONSIBILITY FOR ANY CONSEQUENCES RESULTING FROM THE USE THEREOF.
- Page 3 AND COMPLYING WITH ALL FEDERAL, STATE, AND LOCAL LAWS AND STATUTES CONCERNING THE MONITORING AND RECORDING OF VIDEO AND AUDIO SIGNALS. ULTRAK SHALL NOT BE HELD RESPONSIBLE FOR THE USE OF THIS PRODUCT IN VIOLATION OF CURRENT LAWS AND STATUTES.
-
Page 4: Important Safeguards
IMPORTANT SAFEGUARDS 1. READ INSTRUCTIONS - Read all safety and operating instructions before operating this product. 2. RETAIN INSTRUCTIONS - Retain the safety and operating instructions for future reference. 3. CLEANING - Unplug all equipment before cleaning. Do not use liquid cleaners or aerosol cleaners. Use a damp cloth for cleaning. - Page 5 10. OVERLOADING - Do not overload wall outlets and extension cords as this can result in a risk of fire or electric shock. 11. FOREIGN OBJECTS - Never insert objects of any kind into this product through openings as they may touch dangerous voltage points or short-out parts that could result in a fire or electric shock.
- Page 6 TABLE OF CONTENTS...
- Page 7 PURPOSE ..................1 SYSTEM INSTALLATION ............1 WHITE BALANCE ADJUSTMENT..........3 MANUAL IRIS LENS ADJUSTMENT ...........4 VIDEO-TYPE AUTO IRIS LENS INSTALLATION AND ADJUSTMENT ................4 BACK FOCUS ADJUSTMENT .............5 ZOOM LENS BACK FOCUS ADJUSTMENT.......6 TROUBLESHOOTING ..............8 PREVENTIVE MAINTENANCE............8 SPECIFICATIONS............Back Cover...
-
Page 8: Section 1 Kc-2A Ccd Color Observation Camera
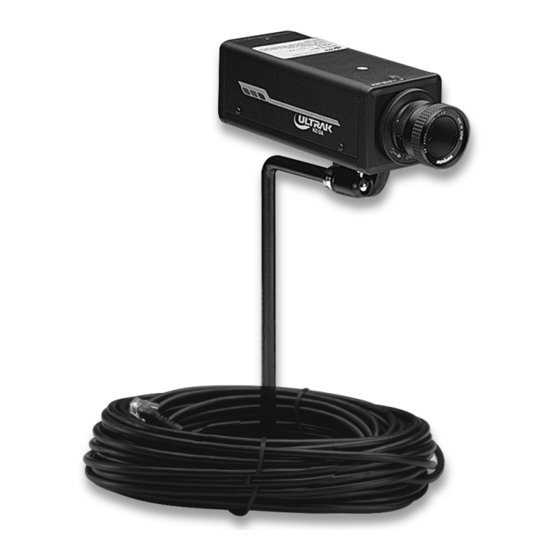
SECTION 1 KC-2A CCD COLOR OBSERVATION CAMERA PURPOSE The KC-2A CCD color observation camera provides a low cost solution to closed circuit television and security surveillance applications. The KC-2A camera features: • 1/3” interline transfer CCD image sensor • Supports standard CS- or C-mount lens •... - Page 9 FIGURE 1. KC-2A CAMERA...
-
Page 10: White Balance Adjustment
C. The KC-2A camera has a threaded mounting hole on the bottom and top of the camera housing to allow for bottom or top mounting. The ¼"-20 UNC threaded mounting hole attaches to the bolt on the camera stand or mounting bracket. -
Page 11: Manual Iris Lens Adjustment
VIDEO-TYPE AUTO IRIS LENS INSTALLATION AND ADJUSTMENT The KC-2A camera supports video-type auto iris lenses to adjust for changing light levels. Perform the following steps to install and adjust a Video-type auto iris lens. -
Page 12: Back Focus Adjustment
To slow the reaction of the lens to changing light, set the range to the AVG setting to average the video level from the camera. Use when there are bright spots in the picture such as lights or glare from the sun. To increase the speed of the lens reaction to the changing light, set the lens adjustment to PK so the lens will adjust to the brightest or peak object... -
Page 13: Zoom Lens Back Focus Adjustment
B. If a picture is visible, focus on the picture. If the picture is not visible, open the iris on the lens. Open the lens as wide as possible by adjusting the iris ring on the lens for the brightest picture or by placing the welder’s glass in front of the lens and forcing the lens to automatically open. - Page 14 Adjust the back focus ring for the clearest picture. J. Adjust the zoom on the lens back to the widest picture. K. Loosen the back focus screw. L. Readjust the back focus for the clearest picture. M. Tighten the back focus lock screw. N.
-
Page 15: Section 2 Troubleshooting And Maintenance
SECTION 2 TROUBLESHOOTING AND MAINTENANCE TROUBLESHOOTING If problems occur, verify the installation of the camera with the instructions in this manual and with other operating equipment. Isolate the problem to the specific piece of equipment in the system and refer to the equipment manual for further information. Problem Possible Solution No Video... -
Page 16: Specifications
SPECIFICATIONS Dimensions (WxHxD) 2.4 x 2.2 x 6.2 in (61 x 56 x 158 mm) Power supply 15V dc Power consumption 5.0W (5.5W max. with auto-iris) Image pickup element 1/3 inch CCD image area sensor (4.9mm H x 3.7mm V) Scanning system 2:1 interlace Scanning frequency...
Need help?
Do you have a question about the KC-2A and is the answer not in the manual?
Questions and answers