ARRI 435 Quick Manual
Hide thumbs
Also See for 435:
- Instruction manual (143 pages) ,
- Brochure & specs (32 pages) ,
- Quick manual (16 pages)
Table of Contents
Advertisement
435 Quick Guide
Customer Support/Safety Specifications ...........................2
Camera Left & Front........................................................3
Camera Right & Back .....................................................4
1. Quick Specs.................................................5
2. Status Indicators..........................................6
3. Loading the ARRIMAG 120 (400') ................7
4. Threading ...................................................9
5. Power On, Camera RUN, Inching...............11
6. Changing Fps ............................................12
7. Changing Shutter Angle.............................13
8. Timecode Sensitivity Table .........................15
9/97
Advertisement
Table of Contents

Related Manuals for ARRI 435


Summary of Contents for ARRI 435
-
Page 1: Table Of Contents
435 Quick Guide Customer Support/Safety Specifications ......2 Camera Left & Front............3 Camera Right & Back .............4 1. Quick Specs..........5 2. Status Indicators..........6 3. Loading the ARRIMAG 120 (400’) ....7 4. Threading ...........9 5. Power On, Camera RUN, Inching....11 6. Changing Fps ..........12 7. -
Page 2: Customer Support/Safety Specifications
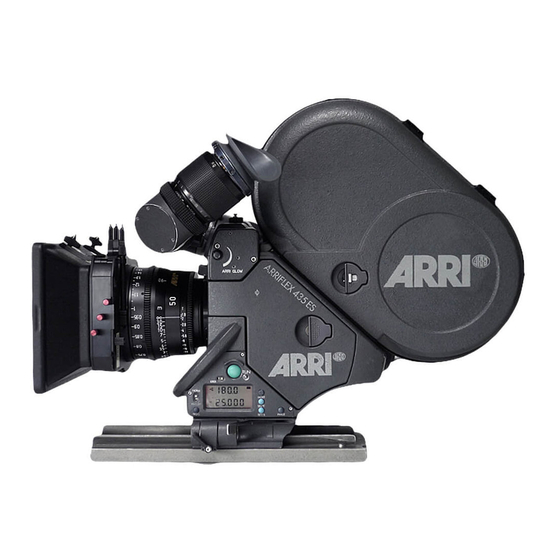
818-848-4028 435 and 435ES The ARRIFLEX 435 is available in two different models: the 435ES is equipped with an electronic shutter and a FEM (Functional Expansion Module). The standard 435 has a manually adjustable shutter and no FEM. Please note that the FEM is needed for the new 24 V accessories (including the CCU, RCU and ESU), for the LCC (Laptop Camera Controller) and for Timecode use. -
Page 3: Camera Left & Front
MODE button PROG button Electronic inching/PHASE button SEL button SET button LCD display Image rotation knob Image rotation release Sliding door securing field lens Viewfinder Viewfinder extension lock Ground glass PL mount Friction adjustment Arriflex 435 Quick Guide, 9/97, Page 3... -
Page 4: Camera Right & Back
Functional expansion Magazine release latch module (FEM) Bubble level ACC receptacle (accessories) Magazine opening cover CCU receptacle (camera control unit) Two 3/8-16 mounting holes underneath camera BAT receptacle (power input) Main power on/off switch Arriflex 435 Quick Guide, 9/97, Page 4... -
Page 5: Quick Specs
All 12 V dc outputs total: max. 3 amp continuous, 5 amp peak Fuses: All 435 fuses are self-resetting thermal fuses. If blown, the respective overload light will illuminate. To reset fuse, disconnect all accessories and wait for one minute. -
Page 6: Status Indicators
1000’ ARRIMAG No reverse operation with Secondary shutter/movement not ready 35-3/2C 1000’ magazine! monitor triggered or defective. 0 0 0 0 0 _ 0 0 0 0 Movement block not locked Arriflex 435 Quick Guide, 9/97, Page 6... -
Page 7: Loading The Arrimag 120 (400')
In addition to the new ARRIMAG magazines, all 35-3 and 35-2C magazines - with the exception of the shoulder magazines - can be used on the 435. The ARRIMAGs run up to 150 fps, the 35-3/2C magazines up to 130 fps. The ”fps” symbol will flash if a magazine is attached that cannot be used for the set fps rate or camera running direction. - Page 8 Film loop Plastic film core lock clockwise and flip it back into the recess. • Pull up on the magazine door to double check that it is properly locked. Drive gear Magazine throat Arriflex 435 Quick Guide, 9/97, Page 8...
-
Page 9: Threading
• Slide the film in between the movement and the film gate as far as it will go (see right graphic below). Upper loop area Movement Film gate Inching knob Movement in forward (closed) position Arriflex 435 Quick Guide, 9/97, Page 9... - Page 10 This allows you to check these values each time you reload! Note: The movement and the mirror shutter of the 435 are linked electronically, and will only move together when the camera is running or when it is inched with the PHASE button. When the camera is manually inched, the mirror shutter will not rotate.
-
Page 11: Power On, Camera Run, Inching
Turning Camera Power On The main power switch for the ARRIFLEX 435 is located on the back of the camera, underneath the magazine mounting port. When a battery is attached to the camera and the main power switch is turned on, you should see characters appear on the LCD display on the camera left side. -
Page 12: Changing Fps
Pay close attention! Current frame rate set at reverse Note: Camera direction will be set to reverse for the standard 150.00 fps. speeds (NORM) and for the programmable speeds (PS). Arriflex 435 Quick Guide, 9/97, Page 12... -
Page 13: Changing Shutter Angle
7. Changing Shutter Angle Checking the Mirror Shutter Angle (435 & 435ES) • Push the PHASE button for about 5 seconds while the camera is in standby. • The top line of the LCD display will show the open angle of the mirror shutter. - Page 14 • Press the SET button to confirm. • Set the desired shutter angle manually (see below). Manually Adjusting the Mirror Shutter Angle (435 & 435ES) Note: Before manually adjusting the shutter of the 435ES, make sure that the electronic adjustment is off.
-
Page 15: Timecode Sensitivity Table
Color Negative † 8571 Color Negative † 5287 Color Negative 5293 Color Negative † 5294 Color Negative † 5295 Color Negative † 5296 Color Negative 5297 Color Negative 5298 Color Negative 5620 Color Negative Arriflex 435 Quick Guide, 9/97, Page 15...
Need help?
Do you have a question about the 435 and is the answer not in the manual?
Questions and answers