Table of Contents
Advertisement
Available languages
Available languages
©2003 Sunbeam Products, Inc. All rights reserved.
MR. COFFEE
®
is a registered trademark of Sunbeam Products, Inc.
Distributed by Sunbeam Products, Inc., Boca Raton, Florida 33431.
Visit us at www.mrcoffee.com.
You will find exciting entertaining tips
and ideas including great recipes!
©2003 Sunbeam Products, Inc. Todos los derechos reservados.
MR. COFFEE
®
es una marca registrada de Sunbeam Products, Inc.
Distribuido por Sunbeam Products, Inc., Boca Raton, Florida 33431.
Visítenos a www.mrcoffee.com.
¡Ud. encontrará los consejos para entretener
y las ideas que incluyen recetas interesantes!
Printed in China / Empreso en China
User Manual
Manual de Usuario
P. N. 112087
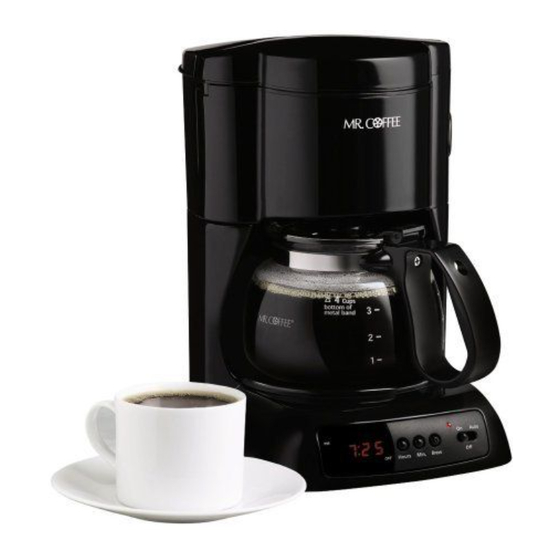
4-Cup Coffeemaker
Cafetera de 4 Tazas
NL Series / Serie de NL
Advertisement
Chapters
Table of Contents

Related Manuals for Mr. Coffee NL4


Summary of Contents for Mr. Coffee NL4
- Page 1 ©2003 Sunbeam Products, Inc. All rights reserved. MR. COFFEE ® is a registered trademark of Sunbeam Products, Inc. Distributed by Sunbeam Products, Inc., Boca Raton, Florida 33431. Visit us at www.mrcoffee.com. You will find exciting entertaining tips and ideas including great recipes! ©2003 Sunbeam Products, Inc.
-
Page 2: Important Safeguards
Return appliance to an authorized service facility for examination, repair or adjustment. 7. The use of accessory attachments not recommended by MR. COFFEE may cause injuries. 8. Do not use outdoors. -
Page 3: Table Of Contents
Setting Up Your Coffeemaker ........ -
Page 4: Setting Up Your Coffeemaker
Delay Brew: Would you like to wake up to a fresh pot of coffee? The timer allows you to preset when you would like the coffeemaker to brew your coffee automatically, up to 24 hours in advance. -
Page 5: Adjusting The Power Cord Length
Follow the cleaning instructions on Page 13 to clean the inside of your coffeemaker. Preparing Coffeemaker for Brewing 1. Open the swing-out brew basket. Insert a MR. COFFEE filter into the removable filter basket. 2. Add desired amount of coffee, referring to the Coffee Measurement Chart. -
Page 6: Brewing Coffee Now
Brewing Coffee Now For Models NL4 and NL5: Push the switch to ON. The ON/OFF switch will light, indicating that the coffeemaker is On and the brew cycle will begin. When the coffee stops flowing, the brew cycle is complete. -
Page 7: Cleaning The Coffeemaker Between Brew Cycles
Unplug the coffeemaker’s power cord when not in use. Maintaining Your Coffeemaker Maintaining your coffeemaker and its parts will help extend the life of the appliance. Cleaning the Coffeemaker Your coffeemaker must be cleaned when you notice any of the follow conditions: •... -
Page 8: Cleaning The Decanter
Make sure to accurately place the decanter on the warming plate to avoid the possibility of overflow. Start the brew cycle: For Models NL4 and NL5: Push the ON/OFF switch to ON to begin the brew cycle. For Models NLX4 and NLX5: Slide the switch to ON. -
Page 9: Troubleshooting
Center. If you live in the U.S. or Canada, please call us at the following toll-free telephone numbers to find the location of the nearest authorized service center: To assist us in serving you, please have the model number (NL4, NL5, NLX4 or NLX5) and date of purchase information when you call. -
Page 10: Precauciones Importantes
Retorne este artefacto a un centro de servicio autorizado para examinarlo, repararlo o ajustarlo. 7. El uso de accesorios no recomendados por MR. COFFEE lesiones. 8. No lo use al exterior. -
Page 11: Guarde Estas Instrucciones
DVERTENCIA PARA EVITAR DAÑAR EL DECANTADOR O SUFRIR HERIDAS CORPORALES, SIGA ESTAS PRECAUCIONES: • No coloque un decantador caliente sobre una superficie mojada o fría. • No coloque el decantador caliente sobre o cerca de papel, tela o cualquier otro material inflamable. •... -
Page 12: Introducción
Introducción ¡Felicitaciones! Usted es el propietario de una Cafetera MR. COFFEE de 4 tazas. Por favor lea cuidadosamente todas las instrucciones de este libro antes de comenzar a usar este aparato electrodoméstico. El cuidado y mantenimiento apropiados le garantizarán la larga vida de este artefacto electrodoméstico y su operación sin problemas. -
Page 13: Características De La Cafetera
Características de la Cafetera ODELOS 1. Interruptor de ON/OFF 3. Retire la Canasta de Preparación (Encendido/Apagado) (Sólo NL4 y NL5) 4. Depósito de Agua 2. Tablero de Control (Sólo NLX4 y NLX5) 5. Cable Eléctrico a. Botón de Horas 6. Filtros de Café Estilo Canasta b. -
Page 14: Operación Y Uso
Use más o menos café al gusto 2 cu. de sopa niveladas = 1 scoop nivelado de café Preparación Inmediata de Café Para los Modelos NL4 y NL5: Oprima el interruptor a la posición PRENDIDA. El interruptor de ON/OFF (Encendido/Apagado) se iluminará, indicando que la cafetera está... -
Page 15: Preparación De Café Más Tarde
Preparación de Café más Tarde Para los Modelos NLX4 y NLX5: Usted deberá ajusta la hora en que usted quiere que su cafetera comience a preparar su café. Mientras que el interruptor está en la posición OFF (Apagada), oprima y sostenga el botón de BREW (Preparación). -
Page 16: Mantenimiento De La Cafetera
Comience el ciclo de preparación: Para los Modelos NL4 y NL5: Oprima el interruptor de ON/OFF (Encendido/Apagado) para comenzar el ciclo de preparación. Para los Modelos NLX4 y NLX5: Deslice el interruptor a la posición ON... -
Page 17: Limpieza Del Decantador
7) Deseche el vinagre y el filtro de papel. 8) Llene el decantador con agua del acueducto y viértala en el depósito. 9) Coloque el decantador sobre el plato calefactor e inicie el ciclo de preparación. 10) Cuando el ciclo de preparación termine, deseche el agua del decantador y apague la cafetera. -
Page 18: Servicio Y Mantenimiento
Para ofrecerle un mejor servicio cuando llame, por favor tenga a la mano la información del número de modelo (NL4, NL5, NLX4 ó NLX5) y la fecha de compra. El número de modelo está estampado en la placa metálica debajo de la cafetera.
Need help?
Do you have a question about the NL4 and is the answer not in the manual?
Questions and answers