Advertisement
Table of Contents
- 1 Important Safety Instructions
- 2 Table of Contents
- 3 Introduction
- 4 About XTZ
- 5 Product Information
- 6 Installation
- 7 Calibration
- 8 Room Tuning & EQ Settings
- 9 Connections & Controls
- 10 Care of Your Speaker
- 11 Protection Circuitry
- 12 Troubleshooting and Service
- 13 Technical Specifications
- 14 Service & Support
- Download this manual
Advertisement
Table of Contents

Related Manuals for XTZ SUB 12.17


Summary of Contents for XTZ SUB 12.17
- Page 1 SUB12 Owners Manual...
-
Page 2: Important Safety Instructions
IMPORTANT SAFETY INSTRUCTIONS CAUTION! RISK OF ELECTRIC SHOCK DO NOT OPEN USE IN DRY LOCATIONS ONLY The lighting flash with arrowhead CAUTION: The exclamation point symbol, within TO PREVENT THE RISK OF ELECTRIC symbol, within an equilateral triangle, is an equilateral triangle, is intended SHOCK, DO NOT REMOVE COVER intended to alert the user to the presence to alert the user to the presence of... -
Page 3: Table Of Contents
CONTENTS Introduction................4 About XTZ................4 Product information..............5 Installation................6 Calibration................9 Room Tuning & EQ Settings..........11 Connections & controls............13 Care of your speaker............15 Protection circuitry..............15 Troubleshooting and service..........16 Technical specifications............17 Service & support..............18... -
Page 4: Introduction
Introduction Introduction Congratulations on your purchase of an XTZ subwoofer. This product represents the state of the art in subwoofer performance and will provide you with years of listening pleasure when properly setup and cared for. We strongly urge you to read this owner’s manual and follow the instructions provided to help you attain... -
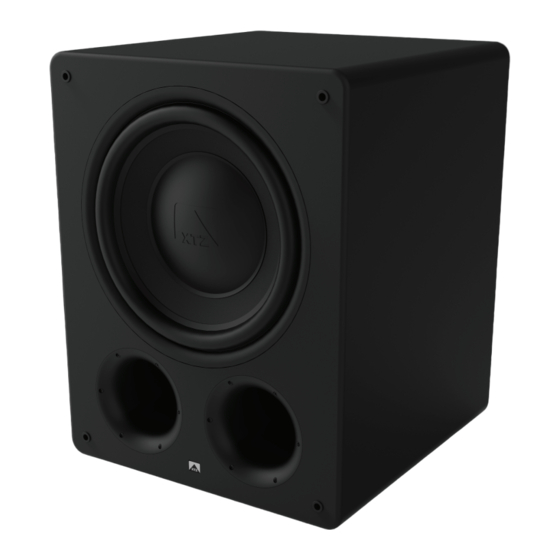
Page 5: Product Information
NOTE: Remember to make all equipment connections with system power disconnected to reduce the risk of personal shock or damage to equipment. Consult your dealer or info@xtz.se for optional accessories that may be required to properly complete your system installation. -
Page 6: Installation
Installation Cables - RCA When installing your new subwoofer using unbalanced RCA connections, you should use high quality shielded coaxial cables. Poor quality cables may pickup interference unbalanced and result in hum or noise. Keep the length of cable as short as possible and route all input signal cables away from power cables to reduce the potential of induced noise. - Page 7 Caution 1. This subwoofer has electronics built into the cabinet and must be properly ventilated. 2. Do not place the rear of cabinet against a wall, you must allow room for adequate ventilation of the amplifier (at least 2 inches). 3.
- Page 8 Multiple subwoofers When connecting multiple subwoofers, it is recommended to use the XLR pass through to the next subwoofer. The pass through is a signal split the XLR input. It is also possible to use the RCA signal connections,however you will need to use “Y”...
-
Page 9: Calibration
Calibration Introduction For optimal performance, you should calibrate your system to ensure proper level matching between all speakers and the proper setting of all controls (including crossover frequency, phase, and any channel delays your receiver/processor may offer). This procedure will vary depending on system configuration and the information below is provided as a basic guide to assist you. - Page 10 Do not hesitate to contact us at info@xtz.se for questions about settings. We are happy to assist you in optimizing your system!
-
Page 11: Room Tuning & Eq Settings
Room Tuning & EQ Settings Mechanical By using the supplied bass plugs in the bass reflex ports, you can alter the lower boundary frequency of subwoofer. This makes it possible to alter the sound adjustment of the characteristics of the subwoofer. The picture below shows four settings. boundary frequency One or two open reflex ports will increase the efficiency so that the subwoofer can handle higher sound pressure than with both ports closed. - Page 12 This control allows you to adjust characteristics of the subwoofer to match the room and speakers in your system. EQ “equalization” aims to get as even frequency response as possible in your sound system. SUB EQ The subwoofer has a switch marked with “EQ”, this allows you to choose between three different EQ “Characteristics”...
-
Page 13: Connections & Controls
Program Port This is a direct access to the programmable parts of the amplifier. Bare in mind this is not for consumers, the program port is meant to be used by XTZ employees only. CROSSOVER This control allows you to adjust the upper limit of the subwoofer’s frequency response from 40 to 160 Hz. - Page 14 Power Indicator Function LED Color GREEN The unit is turned on and working normal None LED first turns red then off after shutdown is complete STANDBY Waiting for signal to power on MUTE/PROTECT During turn on and turn off temporary mute Master Power The master power switch is located on the lower half of the unit.
-
Page 15: Care Of Your Speaker
Care of your speaker Your new subwoofer/-s does not require any regular maintenance or calibration. Normal dusting or cleaning of the surface for appearance purposes is all that is required. Cabinet and baffle Avoid using harsh detergents or chemicals when cleaning the cabinet. Abrasives, detergents, or cleaning solutions may damage the finish on the cabinet. -
Page 16: Troubleshooting And Service
Troubleshooting and service If you should experience a problem with the operation of your subwoofer, please check all of the following before seeking service. Following is a simple troubleshooting guide to assist you. 1. Verify unit is plugged in and that the power outlet used supplies the proper AC voltage &... -
Page 17: Technical Specifications
Technical specifications Driver size 12” High Speed Driver Anechoic REF 19 Hz - 160 Hz (Ported), 25 Hz - 160 Hz (Closed) Variable low pass 40 Hz - 160 Hz 24 dB/octave crossover Phase 0° - 180° Amp power 500W rms continuous power. (Class D) Inputs L &... -
Page 18: Service & Support
Service & support ”Do It Yourself” - We apply “do-it-yourself” service on all XTZ products. If you by yourself To aid service, XTZ products are constructed and produced us- are able to find out what part of the loudspeaker is defective, you are fully...
Need help?
Do you have a question about the SUB 12.17 and is the answer not in the manual?
Questions and answers