Table of Contents
Advertisement
Quick Links
Advertisement
Table of Contents

Summary of Contents for Digisol DG-HR3400
- Page 1 RANGER SERIES 300MBPS WIRELESS BROADBAND HOME ROUTER DG-HR3400 V1.0 2013-09-13...
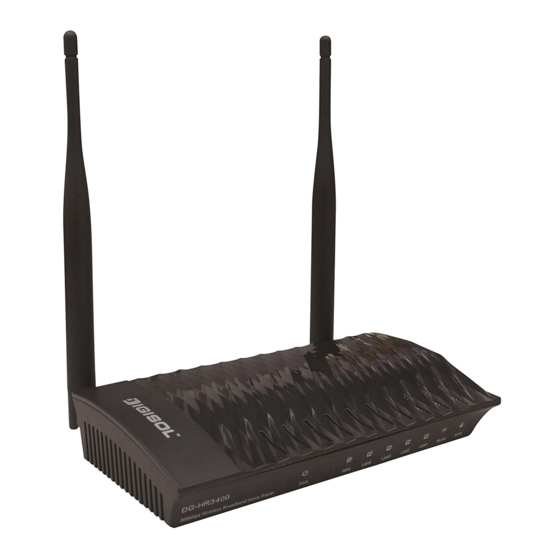
- Page 3 Thank you for purchasing DG-HR3400 300Mbps 802.11n Wireless Broadband Home Router! DG-HR3400 is the best choice for Small office / Home office users, all computers and network devices can share a single xDSL / cable modem internet connection at high speed.
- Page 4 High Internet Access throughput. Wireless speed up to 300Mbps. Allows multiple users to share a single Internet line. Shares a single Cable or xDSL internet connection. Access private LAN servers from the internet. Four wired LAN ports (10/100M) and one WAN port (10/100M). ...
-
Page 5: Front View
Front View Indication Name Status Power Router is switched on and correctly powered. (PWR) WAN port is connected. WAN port is not connected. Blinking WAN activity (transferring or receiving data). LAN port is connected. LAN(1-4) LAN port is not connected. Blinking LAN activity (transferring or receiving data). -
Page 6: Rear View
Rear View Interfaces Description These antennas are 5dBi dipole antennas. Antennas Power on/off Press this button to power on/off the router. button The Power socket is where you will connect the Power power adapter. Please use the power adapter provided with this Wireless Router. Local Area Network (LAN) ports 1 to 4. -
Page 7: Hardware Installation
Hardware Installation Please follow the below mentioned instructions to build the network connection between your new WIRELESS router and your computers, network devices: 1. Connect your xDSL / cable modem to the WAN port of the router by an Ethernet cable. Connect all your computers, network devices (switch / hub) to the LAN port of the router. - Page 8 3. Connect the power adapter (5V DC / 1A) to the wall socket, and then connect it to the ‘Power’ socket of the router. 4. Please check all LEDs on the front panel. Power LED ‘PWR’ should be steadily ON, WAN and LAN LEDs should be ON. Check if the computer/network device connected to the respective port of the router is powered ON and correctly connected.
-
Page 9: Software Installation
Software Installation Insert the Setup CD into your CD-ROM drive of notebook/desktop computer. Explore the CD and execute the “AutoRun.exe” file. Below given screen will appear. Click 'Start' to Continue. - Page 10 Connect one end of a network cable to the WAN port of the router and the other end to the DSL/Cable modem. Click ‘Next’ to continue. Connect one end of the provided network cable to one of the LAN ports (1~4) of the router and the other end to your computer.
- Page 11 Power on the Router. It will take approximately 30 seconds for the router to boot up completely. Click ‘Next’ to continue with the installation. Ensure the normal indication of all LED’s on the router. If not, try the above steps again else click ‘Next’...
- Page 12 Enter the Router’s password to log in to the Router. The default password is “1234”. It is recommended to change the router’s password to protect it from being accessed by other users. If you do not wish to change the current password, you can leave “New Password” and “Confirm New Password”...
- Page 13 PPPoE (DSL users) Choose PPPoE. (Point to Point Protocol over Ethernet) If your ISP uses a PPPoE connection you will be provided with a username and password. This option is typically used for DSL services. Once the user name and password is entered click on ‘Next’, the screen shown below will appear.
- Page 14 Enter the ‘SSID’ and click on ‘Next’. Configure the wireless security. Enter the security mode i.e. either ‘None’ or ‘WPA2 Mixed’ and click on ‘Next’.
- Page 15 The screen as shown below will appear. Click on ‘Finish’. Lastly, the router will reboot as shown below.
- Page 16 DHCP (Cable Modem users) Select DHCP Client to obtain IP Address information automatically from your ISP. Click on ‘Next’. The screen shown below will appear. Click on ‘Next’.
- Page 17 Below mentioned screen will appear. Click on ‘Next’. Enter the ‘SSID’ and click on ‘Next’.
- Page 18 Configure the wireless security. Enter the security mode i.e. either ‘None’ or ‘WPA2 Mixed’ and click on ‘Next’. Following screen will appear. Click on ‘Finish’.
- Page 19 Lastly, the router will reboot as shown below. Static IP (Cable Modem users) Select Static IP Address if all the Internet port’s IP information is provided to you by your ISP. You will need to enter in the IP address, subnet mask, gateway address and DNS address provided to you by your ISP.
- Page 20 The screen shown below will appear. Click on ‘Next’. Enter the ‘SSID’ and click on ‘Next’.
- Page 21 Configure the wireless security. Enter the security mode i.e. either ‘None’ or ‘WPA2 Mixed’ and click on ‘Next’. You can view the information about the wireless configuration in the next screen. Click ‘Finish’ to save your current settings and reboot the router.
-
Page 22: Web Management
Web Management Connecting the router’s management interface by web browser: After you assign an IP address to the computer, open the web browser, and type the IP address of the router in the address bar as ‘http://192.168.2.1’. The following message will be shown: Please input user name and password in the field respectively, default user name is ‘admin’, and default password is ‘1234’, then press ‘Login’... - Page 23 Following are the solutions to problems that may occur during the installation and operation of the Digisol DG-HR3400 Router. 1. Router cannot get connected to internet. Access the router’s web configuration and go to ‘status’->’Internet Connection’ menu and verify internet connection status.


Need help?
Do you have a question about the DG-HR3400 and is the answer not in the manual?
Questions and answers