Table of Contents
Advertisement
Quick Links
SERVICE MANUAL
original Version
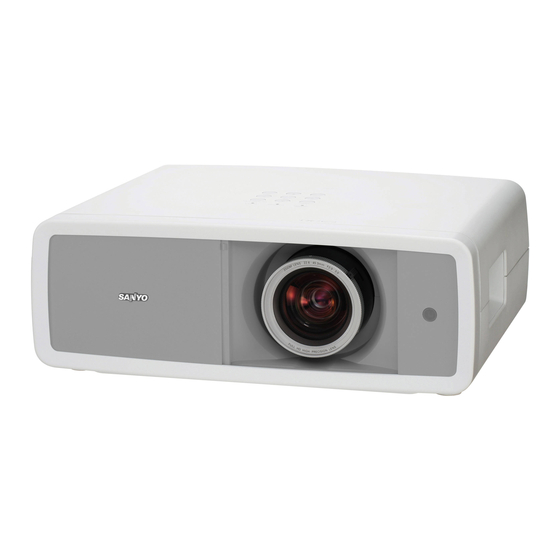
Multimedia Projector
PRodUCt CodE :
1 122 449 00
PLV-Z700
MF4A
1 122 450 00
PLV-Z700
PF4A
1 122 450 02
PLV-Z700
PF4C
U.S.A., Canada
Europe, Asia, Africa
U.K.
FILE NO.
PLV-Z700
ModEL No.
U.S.A., Canada, Europe,
Chassis No.
MF4-Z70000
NotE: Match the Chassis No. on the rating
sheet on the cabinet with the Chassis
No. in the Service Manual.
If the original Version Service
Manual Chassis No. does not
match the unites, additional Service
Literature is required. You must refer
to "Notices" to the Original Service
Manual prior to servicing the unit.
REFERENCE NO.
U.K. Asia, Africa
SM5110992-
00
Advertisement
Table of Contents

Related Manuals for Sanyo PLV-Z700


Summary of Contents for Sanyo PLV-Z700
-
Page 1: Service Manual
FILE NO. SERVICE MANUAL PLV-Z700 ModEL No. original Version U.S.A., Canada, Europe, U.K. Asia, Africa Multimedia Projector Chassis No. MF4-Z70000 NotE: Match the Chassis No. on the rating sheet on the cabinet with the Chassis No. in the Service Manual. -
Page 2: Table Of Contents
■ Contents SERVICE MANUAL ................. 1 Electrical Parts List ................90 Contents ....................2 Electrical Parts Location ...............91 Safety Instructions ................3 Electrical Parts List ................92 Safety Precautions ................3 Mechanical Parts List ..............106 Product Safety Notice ..............3 Cabinet Parts Location ............... Service Personnel Warning ............ -
Page 3: Safety Instructions
■ Safety Instructions SAFEtY PRECAUtIoNS WARNING: The chassis of this projector is isolated (COLD) from AC line by using the converter transformer. Primary side of the con- verter and lamp power supply unit circuit is connected to the AC line and it is hot, which hot circuit is identified with the line ( ) in the schematic diagram. -
Page 4: Specifications
■ Specifications technical Specifications Projector type Multimedia Projector dimensions 15.75” x 5.75” x 13.62” (400,0 mm x 146.0 mm x 346.0 mm) (not including raised portions) (W x H x d) Net Weight 16.5 lbs (7.5 kg ) LCd Panel System 0.74”... -
Page 5: Circuit Protections
■ Circuit Protections This projector provides the following circuit protections to operate in safety. If the abnormality occurs inside the projector, it will automatically turn off by operating one of the following protection circuits. ● Fuse A fuse(F601) is located inside of the projector. When the Fuse (F601) POWER indicator is not lightning, the fuse may be opened. -
Page 6: Lamp Cover Switch
Circuit Protection Lamp cover switch ● The lamp cover switch (SW8803) cuts off the drive signal to the lamp circuit when the lamp cover is removed or not closed completely. After opening the lamp cover for replacing the lamp unit, Lamp cover switch place the lamp cover correctly otherwise the projector can not turn on. -
Page 7: Maintenance And Cleaning
■ Maintenance and Cleaning After long periods of use, dust and other particles will accumulate on the LCD panel, prism, mirror, polarized glass, lens, etc., causing the picture to darken or color to blur. If this occurs, clean the inside of optical unit. Remove dust and other particles using air spray. -
Page 8: Cleaning The Rgb Panels
Maintenance and Cleaning Cleaning the RGB panels Blemishes such as dust and dirt on the internal optical components of the projector tend to degrade the brightness of the screen and are likely to appear as a shadow on the screen, which can lead to deterioration of image quality. This projector is equipped with the RGB panel cleaning holes on the bottom for cleaning of the internal parts (such as optical components) of the projector. -
Page 9: Bottom View
Maintenance and Cleaning Clean by using the Cleaning function in the Setting Menu Cleaning Turn the projector on and press the MENU button to display the On-Screen Menu. Select the Setting Menu with the Point buttons. Press the Point or OK buttons to access the submenu items. -
Page 10: Warning Indicator
Maintenance and Cleaning Warning Indicator The WARNING indicator shows the state of the function that protects the projector. Check the state of the WARNING indicator and the POWER indicator to take proper maintenance. the projector is shut down and the WARNING indicator is blinking red. When the temperature inside the projector reaches a certain level, the toP CoNtRoL projector is automatically shut down to protect its inside. -
Page 11: Cleaning The Air Filter
Maintenance and Cleaning Cleaning the Air Filters The air filters prevent dust from accumulating on the surface of the optical elements inside the projector. Should the air filters become clogged with dust particles, it will reduce cooling fans’ effectiveness and may result in a buildup of internal heat and adversely affect the life of the projector. -
Page 12: Resetting The Filter Counter
Maintenance and Cleaning Resetting the Filter Counter Be sure to reset the Filter counter after cleaning or replacing the air filter. Filter counter Turn the projector on and press the MENU button to display the On-Screen Menu. Select the Setting Menu with the Point buttons. -
Page 13: Lamp Replacement
Screws oRdER REPLACEMENt LAMP Replacement lamp can be ordered through your dealer. When ordering a projection lamp, give the following information to the dealer. Model No. of your projector: PLV-Z700 ● Replacement Lamp type No.: PoA-LMP114 ● (Service Parts No. 610 336 5404) -
Page 14: Lamp Replacement Counter
Lamp Replacement Lamp Replacement Counter Be sure to reset the lamp replacement counter after the lamp is replaced. When the lamp replacement counter is reset, the LAMP REPLACE indicator stops lighting. Lamp counter reset Turn the projector on and press the MENU button to display the On-Screen Menu. -
Page 15: How To Check Lamp Used Time
Lamp Replacement How to check lamp used time Lamp Counter display Projector used time The LAMP REPLACE indicator will light when the total Counter lamp used time reaches 3,000 hours. This is to indicate Projector 475H that lamp replacement is required. Lamp Normal 100H... -
Page 16: Service Port Notice
Service Port ■ Switch of standby mode Service port "Off" : Super standby mode Service port "On" : Normal standby mode The service port is factory default set "oFF". When the service port is used, the item of the service port of the setting menu is changed to "oN". (The service port cannot be used in the state of "oFF". -
Page 17: Mechanical Disassemblies
■ Mechanical disassemblies Disassemble should be made following procedures in numerical order. Screws Expression Following steps show the basic procedures, therefore unnecessary step may be (Type ) mm Diameter x Length ignored. T type M Type Caution: Tapping screw Machine screw The parts and screws should be placed exactly the same position as the original other- wise it may cause lose of performance and product safety. - Page 18 Mechanical disassemblies Lamp cover ass'y removal. 1. Loosen the screw-A and remove the Lamp cover ass'y. Lamp cover ass'y - 18 -...
- Page 19 Mechanical disassemblies Filter removal. 1. Remove the Filter cover and Filter. Filter Filter cover AV panel removal. 1. Remove the 2 screws-A(M3x8), remove the screw-B(T3x8) and remove the AV panel. AV panel - 19 -...
- Page 20 Mechanical disassemblies Main PWB shield plata(top) removal. 1. Remove the 9 screws-A(M3x6), remove the screw-B(M3x10) and remove the Shield plate (Main board-top) . Shield plate (Main board TOP) Main PWB removal. 1. Remove the 3 screws (M3x6), remove the Main board and remove the Shield plate (Main board-BTM). Heat sink sheet Caoution;...
- Page 21 Mechanical disassemblies Cover lens top removal. 1. Remove the 3 screws-A (T3x8), screw-B (M3x6) and remove the Bracket. 2. Remove the screw-C (T3x8) and remove the Cover lens top upward. 3. Remove the Spacer sheet assy and remove the Spacer sheet-A. Bracket Spacer sheet assy Cover lens top...
- Page 22 1 Cabinet front ass'y disassembly. 1. Remove the 3 screws-A(T3x10) and remove the Mounting front-a. 2. Remove the screw-B(T3x10) and remove the Mounting front-C. 3. Remove the screw-C(M3x6), remove the 2 screws-D(T3x10) and remove the Cover lens bottom assy. 4. Remove the 2 screws-E(T3x8) and remove the Cover lens bottom-a. Mounting front-A Cover lens bottom Cover lens bottom-A...
- Page 23 Mechanical disassemblies 3 Cabinet front ass'y disassembly. 1. Remove the 2 screws-A (T3x10) and remove Shutter rail top unit. 2. Remove the 2 screws-B (T3x10) and remove the Shutter motor. Shutter motor Shutter rail top unit 4 Cabinet front ass'y disassembly. 1.
- Page 24 Mechanical disassemblies 5 Cabinet front ass'y disassembly. 1. Remove the 3 screws-A (M2.6x4) and remove the Gear. 2. Remove the 2 screws-B (M2.6x4) and remove the Shutter panel. 3. Remove the 2 screws-C (M2.6x4) and remove the 2 spacers. Gear Spacer Shutter panel Spacer...
- Page 25 Mechanical disassemblies 1 Lamp unit removal. 1. Loosen the 2 screws-A and remove the Lamp unit. 2. Remove the screw-B (T3x8) and remove the Main board holder. Main board holder Lamp unit 2 Lamp connector removal. 1. Remove the 2 screws(T3X6) and remove the Lamp connector. Lamp connector Ballast Cable Caution:...
- Page 26 Mechanical disassemblies 3 Fan(FN902) removal. 1. Remove the 2 screws-A (T3x8) and remove the Fan unit. 2. Remove the 2screws-B (M3x8) and remove the Fan(FN902). Fan unit Fan(FN902) - 26 -...
- Page 27 Mechanical disassemblies 4 Lamp unit holder removal. 1. Remove the 2 screws-A (T3x8) and remove the Lamp unit holder. 2. Remove the screwB (T3x8) and remove the Lamp cover switch(SW8803) board. 3. Remove the 2screws-C (T3x8), remove the Spacer, remove the Cap and remove the Thermal switch(SW902). Lamp unit holder Lamp cover switch(SW8803) board Spacer...
- Page 28 Mechanical disassemblies Optical removal. 1. Remove the 4 screws (T3x10) and remove the Optical unit. Optical unit 1 Cover duct EXH removal. 1. Remove the 2 screws (T3x8) and remove the Cover duct EXH. Cover duct EXH - 28 -...
- Page 29 Mechanical disassemblies 2 Exhaust Fan (FN901, FN903) removal. 1. Remove the 3 screws-A (T3x8) and remove the Exhaust fan unit. 2. Remove the 8 screws-B (M3x28) and remove the Exhaust fan FN901, FN903. Exhaust fan unit FN901 FN903 - 29 -...
- Page 30 Mechanical disassemblies Power unit removal. 1. Remove the 6 screws-A (M3x6) and remove the Power & Ballast unit. 1. Remove the screw-B (M3x6) and remove the Power & Ballast unit. Power & Ballast unit Ballast unit Power unit - 30 -...
- Page 31 Mechanical disassemblies Filter board unit removal. 1. Remove the 2 screws (M3x6) and remove the Filter unit. Filter board unit Spacer Filter board - 31 -...
- Page 32 Mechanical disassemblies Duct unit removal. 1. Remove the 7 screws (T3x8) and remove the Duct panel top. 2. Remove the Spacer and remove the Themistor(TH902). 3. Remove the FN904 and FN905. 4. Remove the Duct panel bottom. Spacer Themistor(TH902) Duct panel top Duct panel bottom FN905 FN904...
- Page 33 Mechanical disassemblies Cabinet bottom unit desassemblies. 1. Remove the 6 screws-A (T3x8) and remove the Shield cabinet bottom. 2. Remove the 2 screws-B (T3x8) and remove the Adjustor. 3. Remove the 3 nuts. Shield cabinet bottom Adjustor Nuts Adjustor - 33 -...
-
Page 34: Optical Parts Disassembly
■ Optical disassemblies Optical unit Lens shift panel remonal. 1. Remove the screw-A (M3x6), remove the shield plate. 2. Remove the screw-B (M3x6), remove the Lens shift panel and remove the Slide cover. Shield plate Lens shift panel Slide cover - 34 -... - Page 35 Optical disassemblies LCD panel / prism ass'y removal. 1. Remove the Shield Light Plate upward. 2. Remove the 4 screws-A (M2.5x4) and remove the LCD panel / prism ass'y. Shield Light Plate LCD panel / prism ass'y Panel Type Check There are 2 types combination of the LCD Panel/Prism Ass'y and the optical unit, named Type-L and Type-R.Since both have no compatibility, each type should be combined with the same type, and the specificparts should be used.
- Page 36 Optical disassemblies LCD panel / prism ass'y disassemblies. 1. Remove the 3 screws (M2x2), remove the 3 Stoppers Optical filter and remove the Polarized glasses(R,G,B). (Push from bottom side.) stopper stopper stopper Polarized glass (OUT/G) Optical filter (B) Polarized glass (OUT/R) Polarized glass (OUT/B) Note;...
- Page 37 Optical disassemblies Polarized glasses removal. 1. Remove the 3 screws-A (M2.5x5) and remove the 3 Holders (R,G,B). 2. Remove the 3 screws-B (M2.5x6) and remove the 3 Stoppers (R,G,B). 3. Remove the 2 Optical filter ass'y and remove the 3 Polarized glass (IN) ass'y (R,G,B). Holder Stopper Optical filter (IN/R)
- Page 38 Lamp iris unit removal. 1. Remove the 3 screws-A (T3x10) and remove the lamp iris cover. 2. Remove the screw-B (T3x10) and remove the Lamp Iris unit. Lamp iris cover Lamp Iris unit - 38 -...
- Page 39 Lens shift unit removal. 1. Remove the 4 screws (M3x6) and remove the Lens shift unit. Lens shift unit Projection lens removal. 1. Remove the 4 screws (M2.6x6) and remove the Projection lens. Spacer Projection lens - 39 -...
-
Page 40: Optical Parts Location And Direction
● Optical parts location and direction L01R ASSY, LCD PNL/SM R-MF4A L01L ASSY, LCD PNL/SM L-MF4A LENS, PROJECTIO L03R/L03L COMPL, OPTICAL R/L-MF4A L03R-1R OPTICAL FILTER (WV-SPN)BL L03-5 L03-8 L03R-1G OPTICAL FILTER (WV-SPN)BR L03L-1R OPTICAL FILTER (WV-SPN)BR L03L-1G OPTICAL FILTER (WV-SPN)BL L03-7 L03-7 L03-2R... - Page 41 ASSY, LCD PNL / PSM L01R ASSY, LCD PNL/SM R-MF4A L01R-1R POLARIZED GLASS(OUT/R) L01R-1G POLARIZED GLASS(OUT/G) L01R-1B POLARIZED GLASS(OUT/B) L01R-2B OPTICAL FILTER (WV-QZ)BL L01L ASSY, LCD PNL/SM L-MF4A L01L-1R OPTICAL GLASS(OUT/R) L01L-1G OPTICAL GLASS(OUT/G) L01L-1B OPTICAL GLASS(OUT/B) L01L-2B OPTICAL FILTER (WV-QZ)BR L01R-1R,L01L-1R L01R, L01L L01R-1B,L01L-1B...
- Page 42 Chamfer corner comes this side. Chamfer corner comes this side up. Film attached side comes this side. DICHROIC MIRROR Flat surface side comes this side. Chamfer corner comes this side up. OPTICAL FILTER (R) CONDENSER LENS (G, B) The marker comes this The marker comes this up side.
- Page 43 The marker comes this Film side up side. The marker comes this Film side surface side. Film side Reflective surface Film side MIRROR LCD PNL/PRISM ASS'Y - 43 -...
-
Page 44: Adjustments
■ Adjustments Adjustments after Parts Replacement : Adjustment necessary : Check necessary ● ❍ Disassembly / Replaced Parts Optical Filter Polarized Glass COMPL, LCD/ Power Main OPTICAL Prism Ass’ Board Board UNIT Contrast Adjustment R-Contrast adjustment ❍ ❍ ● ● G-Contrast adjustment ❍... -
Page 45: Optical Adjustments
■ Optical Adjustment Before taking optical adjustments below, remove the Cabinet Top following to the "Mechanical Disassemblies". Adjustments require a 2.0mm hex wrench, Philips Screwdriver and a slot screwdriver. When you adjust Integrator lens or Relay lens adjustment, you need to disconnect some connectors and FPC cables of LCD panels on the main board. Note: Do not disconnect connectors on the main board, because the projector can not turn on or operate properly for adjustment. - Page 46 1. Contrast adjustment (Polarized glass and Optical filter) [ Before Adjustment ] - Input a 100% of black raster signal. 1. Loosen a screw on the optical base which you intend to adjust. 2. Adjust the slot to obtain the darkest brightness on the screen. (Polarized glass adjustment.) 3.
-
Page 47: Electrical Adjustments
. Remote Control MENU Normal Mode "S" mark display Service mode Service Mode INPUT DOWN POWER ON/STAND-BY Service Mode SANYO Input VIDEO Image Natural Group Data Ver. 1.00 MF4A - 47 -... -
Page 48: Circuit Adjustments
Electrical Adjustments ● Circuit Adjustment CAUTION: The each circuit has been made by the fine adjustment at factory. Do not attempt to adjust the following adjustments except requiring the readjustments in servicing otherwise it may cause loss of performance and product safety. - Page 49 Electrical Adjustments 1. Fan minimum voltage adjustment 3. Auto Calibration adjustment [PC] Equipment Digital voltmeter Input signal 16-step gray scale signal (XGA4) Input mode PC Analog 1. Enter the service mode. Input image Natural 2. Change data values of each test points to adjust the fan G-sync off minimum output voltage.
-
Page 50: Common Center Adjustment
Electrical Adjustments 6. Auto Calibration adjustment [Component] 480p 8. Auto Calibration adjustment [Component] 1080i Input signal 480p (Y, Cb, Cr) colour bar Input signal 1080i (Y, Cb, Cr) colour bar Input mode (Component1) Input mode (Component1) Input image Natural Input image Natural 1. - Page 51 12. Read/Write of LCD panel gamma data 10. Colour Correction when Main Board replacing Input signal Internal Signal Input mode (N/A) The gamma adjustment data of each LCD panel has been Input image (N/A) adjusted preciously to much each LCD panel characteristics at factory.
-
Page 52: Test Points And Locations
Electrical Adjustments Location of Test Points ● MAIN BOARD The test points are the solder points. There are no pins. FAN3 FAN2 FAN1 K78F IC4401 FAN4 IC1321 IC301 K35G IC1301 Shield Plate MAIN-top Test point ground --TE-MAIN - 52 -... -
Page 53: Service Adjustment Data Table
These initial values are the reference data written from the CPU ● Service Adjustment Data Table ROM to memory IC when replaced new memory IC. The adjustment items indicated with “✻” are required to readjust following to the “Electrical adjustments”. Other items should be used with the initial data value. - Page 54 Adjustment Item Initial Value Range Input source / Description Noise Pixel Range 0 - 2 <NSRANGEY> / <NSRANGEUV> Noise Region 0 0 - 1023 <NSREGIONY0> / <NSREGIONUV0> Noise Region 1 0 - 1023 <NSREGIONY1> / <NSREGIONUV1> Noise Region 2 0 - 1023 <NSREGIONY2>...
- Page 55 Adjustment Item Initial Value Range Input source / Description Group: 60 Sub Image Center Contrast 534/578/534/534/492/492 0 - 1023 Center Brightness 512/512/496/496/512/512 0 - 1023 Center Color 512/512/512/512/512/524 0 - 1023 Setting Value of Group Center Tint 90/90/90/90/90/90 0 - 180 Group 1 : Composite (Video), S-Video Center Sharpness 16/16/16/16/16/16...
- Page 56 Adjustment Item Initial Value Range Input source / Description UV Gain 1030 0 - 2047 UV Shift 6180 0 - 32767 WB Limit Out 0 - 255 WB Limit In 0 - 255 Group: 100 LCD Panel (EP7120) Factory Adjustment Value ColshdLebel_R 0 - 1023 4 Step : R_Min...
- Page 57 Adjustment Item Initial Value Range Input source / Description BasePos_G 0 - 15 BasePos_B 0 - 15 RGB_Adjust 0 - 7 RGB_AdjLv 0 - 4095 ColshdCtrl 0 - 511 ColshdCtrl_Ena 0 - 1 Color correction enable 1 : Enable 0 : Disable ColshdCtrl_PreEna 0 - 1 Pre-color correction enable...
- Page 58 Adjustment Item Initial Value Range Input source / Description DCOffset_R_05 0 - 2047 Normal 0 - 2047 R/L Reverse DCOffset_R_06 0 - 2047 Normal 0 - 2047 R/L Reverse DCOffset_R_07 0 - 2047 Normal 0 - 2047 R/L Reverse DCOffset_R_08 0 - 2047 Normal 0 - 2047...
- Page 59 Adjustment Item Initial Value Range Input source / Description 0 - 2047 Normal DCOffset_G_08 0 - 2047 R/L Reverse 0 - 2047 Normal DCOffset_G_09 0 - 2047 R/L Reverse 0 - 2047 Normal DCOffset_G_10 0 - 2047 R/L Reverse 0 - 2047 Normal DCOffset_G_11 0 - 2047...
- Page 60 Adjustment Item Initial Value Range Input source / Description DCOffset_B_10 0 - 2047 Normal 0 - 2047 R/L Reverse DCOffset_B_11 0 - 2047 Normal 0 - 2047 R/L Reverse DCOffset_B_12 0 - 2047 Normal 0 - 2047 R/L Reverse DCOffset_B_13 0 - 2047 Normal 0 - 2047...
- Page 61 Adjustment Item Initial Value Range Input source / Description F09_R 0 - 4095 F09_G 0 - 4095 SEL4 timing set F09_B 0 - 4095 F0A_R 0 - 4095 F0A_G 0 - 4095 SEL5 timing set F0A_B 0 - 4095 F0B_R 0 - 4095 F0B_G 0 - 4095...
- Page 62 Adjustment Item Initial Value Range Input source / Description Super Standby Mode 0 - 1 0: Normal Standby Mode, 1: Super Standby Mode No signal lamp mode 0 - 1 0: Disable 1: Enable Group:205 SPread Specturn Enabl 0 - 1 0: Diffusion OFF 1 : Diffusion ON Diffusion rate 0 - 300...
- Page 63 Adjustment Item Initial Value Range Input source / Description Costum Gamma -R step 4096 1 - 512 Costum Gamma -G step 0 1 - 512 Costum Gamma -G step 512 1 - 512 Costum Gamma -G step 1024 1 - 512 Costum Gamma -G step 1536 1 - 512 Costum Gamma -G step 2048...
- Page 64 Adjustment Item Initial Value Range Input source / Description Fan4 Min Limit 30 - 145 Fan5 Min Limit 1 - 510 Fan1 Max Limit 30 - 145 Fan2 Max Limit 30 - 145 Fan3 Max Limit 30 - 145 Fan4 Max Limit 30 - 145 Fan5 Max Limit 1 - 510...
- Page 65 Adjustment Item Initial Value Range Input source / Description Eco TempA Error 44/44/41/- -5 - 100 Eco_Temp. -sensor A_Shutdown-temp. Eco TempB Error 59/59/62/- -5 - 100 Eco_Temp. -sensor B_Shutdown-temp. Eco TempC Error 59/59/53/- -5 - 100 Eco_Temp. -sensor C_Shutdown-temp. Eco TempB-A Error 38/38/40/- 0 - 100 Eco_Temp.
- Page 66 Adjustment Item Initial Value Range Input source / Description Shutdown Time C 0 - 30 Shutdown Time B-A 0 - 30 Shutdown Time C-A 0 - 30 Control Curve Change Time 0 - 10 Lamp Monitor SW 0 - 1 0 : Off 1 : On Lamp Voltage...
- Page 67 Adjustment Item Initial Value Range Input source / Description CR - GAIN AREA V START 0 - 1000 Image AREA H WIDTH 0 - 4095 Image AREA V HIGHT 0 - 4095 Y - OFFSET TARGET 0 - 1023 CB OFFSET TARGET 0 - 1023 CR OFFSET TARGET 0 - 1023...
- Page 68 Adjustment Item Initial Value Range Input source / Description Group : 522 YCbCr (480P) Total Dots 0 - 4095 Disp Dots 0 - 4095 H Back Porch 0 - 4095 V Back Porch 0 - 4095 Disp Line 0 - 4095 Group : 523 YCbCr (575P) Total Dots 0 - 4095...
- Page 69 Adjustment Item Initial Value Range Input source / Description Group : 540 RGB Video (480i) Total Dots 0 - 4095 Disp Dots 0 - 4095 H Back Porch 0 - 4095 V Back Porch 0 - 4095 Disp Line 0 - 4095 Group : 541 RGB Video (575i) Total Dots 0 - 4095...
- Page 70 Adjustment Item Initial Value Range Input source / Description Group : 550 RGB Video (1080P - 50) Total Dots 2640 0 - 4095 Disp Dots 1920 0 - 4095 H Back Porch 0 - 4095 V Back Porch 0 - 4095 Disp Line 1080 0 - 4095...
- Page 71 Adjustment Item Initial Value Range Input source / Description Creative Cinema : VT_USED_B 0 - 100 x 0.01 Natural : LVL_USE 1 - 999 x 0.01 Natural : W_SXY_0 0 - 999 x 0.001 Natural : W_SXY_1 0 - 999 x 0.001 Natural : B_SXY_0...
-
Page 72: Chassis Block Diagram
■ Chassis Block Diagram ● Chassis Overview Z700 CHASSIS OVER VIEW DIGITAL DIGITAL ANALOG IC401 IC8001 DIGITAL HDMI GAMMA RECEIVER PC_H/V PC_RGB SCAN IC4401 CONVERTER COLOR PC_H/V MANAGER Y,Cb,Cr SCART_CV Y,Cb,Cr Y,Cb,Cr IC3401 Inoganic Hyblid LCD Panel SDRAM IC801 IC301 FLASH ROM IC1391 EEPROM... -
Page 73: Video Signal Processing Circuit
Chassis Block Diagrams ● Video signal processing circuit and LCD panel driving circuit MAIN BOARD TMDS IC8001 HDMI RECEIVER <SII9125> SIHS/SIVS TMDS ADHS SIOUTR,G,B ADVS IC801 FLASH ROM <S29GL064> PC_RGB PC_RGB/SCART IC301 IC1391 PC_HS SCAN EEPROM PC_VS CONVERTER, PC_H=SCART_CV SYSTEM CONTROL <PW392 >... -
Page 74: System Control
Chassis Block Diagrams ● System Controls MAIN BOARD IC8841 UNIT_POWER TEMP. SENSOR PC103 CN201 444,355 PHOTO S3.3VPW SCL0/SDA0 IC301 COUPLER POWER_ON_SW Always Available IC8001 PC101 HDMI PHOTO 154,41 CN101 RECEIVER SCL1/SDA1 COUPLER Always Available 153,258 IC1391 EEPROM SW902 THERMAL SW IC5731 IC5701 IRIS_ERR_OUT... - Page 75 Chassis Block Diagrams ● Description of System control circuit Remote control R/C signal is sent to pin 292 of IC301(Main CPU) and also sent to pin 20 of IC4801(Sub CPU). Thermal switch There is the thermal switch (SW902) above the lamp holder to prevent the internal abnormal temperature rising. If the internal temperature reaches near 100°C, the switch will be opened and the lamp operation will be stopped.
-
Page 76: Motor Driving Circuit
Chassis Block Diagrams ● Motor driving circuit DRV_CTRL1 IC5731 DRV_CTRL2 LAMP IRIS MOTOR MAIN BOARD IC5701 IRIS_SENS IRIS_ERR_OUT IRIS_PWR_ON IC301 FPGASCL IC4401 SCAN FPGASDA CONVERTER, 5VIRIS SYSTEM CONTROL <PW386> IC6551 MOTOR DRIVER <BA6287> OUT1 DRIVER DOOR_OPEN CONTROL LOGIC OUT2 DOOR_CLOSE DRIVER DOOR MOTOR... - Page 77 Chassis Block Diagrams ● Description of Motor driving circuit ● Lamp iris unit Lamp Iris Motor The lamp iris unit is located in the front of lamp. It is controlled by MOTOR the IRIS_PWR_ON signal, which is varied based upon the average luminance level of the input image signal, from pin 143 of IC301.
-
Page 78: Fan Control Circuit
Chassis Block Diagrams FN901 FN902 FN903 FN904 FN905 ● Fan control circuit MAIN BOARD FAN_MTR1-5 S16VF FAN1 Q7821 FAN_CTL0 TPFAN1 FAN2 Q7831 IC7801 FAN_CTL1 TPFAN2 FAN3 Q7841 FAN_SW FAN_CTL2 TPFAN3 FAN4 IC7802 Q7851 FAN_SW FAN_CTL3 TPFAN4 FAN5 IC7861 TPFAN5 Power-On : H FAN_SW FAN_CTL0 FAN_CTL1... - Page 79 Chassis Block Diagrams ● Description of Fan control circuit Fan control circuit The Fan drive power supplies "FAN1", "FAN2", "FAN3", "FAN4" and "FAN5" are generated from "S16VF". Each power supply drives fans as follow; FAN1 ..FN901 for power and ballast exhaust FAN2 ..FN902 for lamp cooling FAN3 ..FN903 for lamp exhaust FAN4 ..FN904 for intake and panel cooling...
-
Page 80: Power Supply & Protection Circuit
■ Power Supply Lines ● Power supply circuit and Protection circuit D5791 IC5781 IC5781 5VI-REF IRIS_PWR_ON IC7671 Q7672 -6VPNL -6V_SW D7631 IC7631 9VPNL IC7691 9V_SW 15V_SW D5771 IC5771 5VIRIS IRIS_PWR_ON FAN CONTROL D5686 IC5686 1.8V_SW IC7641 L7641 3.3VPNL D8082 IC8081 S3.3VSI ON_1.8V IC5621... - Page 81 Power Supply Lines ● Description of Power supply circuit When the projector is standby mode, IC301(Main CPU) is not working and IC4801(Sub CPU) is only working for saving ener- When the projector is connected to outlet with AC power cord and the Mains SW is switched to ON, SS3.3V line is supplied to to standby circuit, including IC4801.
-
Page 82: Troubleshooting
■ Troubleshooting ● Flow chart of projector condition (with AC power supply and Mains SW : ON) (90 sec.) AC OFF STAND-BY COOLING (Lamp : OFF) <RECOVER> (ON/STAND-BY KEY) (Slide Shutter error) <ACCIDENT> WARNING POWER ON (Slide Shutter error, Lamp error) (Lamp : ON) (20 sec.) <ACCIDENT>... -
Page 83: Indicators And Projector Condition
Troubleshooting Indicators and Projector Condition Check the indicators for projector condition. Indicators POWER LAMP Projector Condition WARNING red/green/ REPLACE orange yellow The Main On/Off switch is off or the AC power cord is unplugged. The projection lamp is being cooled down. The projector cannot be turned on until cooling is completed. -
Page 84: No Power
Troubleshooting ● No Power This projector provides a function which can be specified a defective area simply by indicating the LEDs on the control panel. Connect the AC cord and turn the projector on and then check the LED indication. Indicators Troubleshooting POWER... - Page 85 Troubleshooting Indicators Troubleshooting From previous page The symptom indicates that the projector detected an abnormal temperature risen inside the projector. Check the air filters and remove the object near the intake and WARNING (red) and exhaust fan openings, and wait until the POWER indica- POWER (red) indicators tor stops flashing, and then try to turn on the projector.
-
Page 86: No Picture
Troubleshooting ● No Picture Check following steps. Description of visual signal flow Sync: Description of sync signal flow Check signal processing stage and LCD driving stage; No p i c t u re w i t h a l l o f input sources Check power supply circuit 17.5V, -6VPNL, 9VPNL, 5VPNL, 3.3VPNL, 2.5VPNL and peripheral circuit. - Page 87 Troubleshooting From previous page Check Computer source input stage; No picture with Computer (RGB analog) input source Check IC301 and peripheral circuit. Check sync signals <PC_V> and <PC_H>. PC_RGB signals are sent to IC301. Sync: PC_HS/VS signals are sent to IC301. Check Computer source input stage;...
-
Page 88: Control Port Functions
■ Control Port Functions ● I/O Port Table of Main CPU (IC301, PW392) Pin No. Name Function Name Function S3.3V S3.3VPWA S3.3V S3.3VPW SIDEN SIEVNODD SICLK SIAHS SIHS SIVS DOOR SHUTTER_DEMO Door_Open/Close demo DOOR DOOR_OPEN_SENS Door open sensor DOOR DOOR_CLOSE SENS Door close sensor STANDBY_LED STANDBY LED Drive, On : H... - Page 89 ● I/O Port Table of Main CPU (IC301, PW392) _Continue Pin No. Name Function Name Function PW_SDATA_OUT PW_SCS PW_SCLK_OUT PW_PWM2 PW_PWM4 SDA0 IIC Bus Control data SCL0 IIC Bus Control Clock RXD1 Serial Control RXD TXD1 Serial Control TXD SDA1 IIC Bus Control data SCL1 IIC Bus Control data...
-
Page 90: Electrical Parts List
Electrical Parts List Product safety should be considered when a component replacement is made in any area of a projector. Components indicated by a mark in this parts list and the circuit diagram show components whose value have special significance to product safety. It is particularly recommended that only parts specified on the following parts list be used for components replacement pointed out by the mark. -
Page 91: Electrical Parts Location
MF4-Z70000 Electrical Parts Location ● Assembled Board A901 A8803 Ballast unit Lamp switch board A902 Power unit A100 Main board A8801 Door switch1 board A601 Filter board Front A8802 Door switch2 board A101 R/C board ● Out of Circuit Board Thermal Switch (SW902) Thermistor (TH901) FAN (FN903) -
Page 92: Electrical Parts List
MF4-Z70000 Electrical Parts List Key. No. Part No. Description Key. No. Part No. Description ASSEMBLED BOARD 610 340 7593 ASSY,PWB,MAIN.MF4A 610 335 4651 ASSY,PWB,DOOR SWITCH1 MD4A !A8801 TRANSISTOR Q1001 305 217 8614 TR RN1105 TE85L 610 335 4699 ASSY,PWB,DOOR SWITCH2 MD4A !A8802 Q1002 305 217 8614... - Page 93 MF4-Z70000 Electrical Parts List Key. No. Part No. Description Key. No. Part No. Description 305 015 8925 TR 2SC2812-L7-TB Q7692 305 191 5814 TR 3LN01C-TB-E 305 163 1615 TR 2SC2812N-L6-TB0 Q7801 305 217 5019 TR RN1117 TE85L 305 173 9816 TR 2SC3928A1R Q7802 305 217 7419...
- Page 94 MF4-Z70000 Electrical Parts List Key. No. Part No. Description Key. No. Part No. Description IC7802 309 531 6229 IC FA7701V-TE1 C2852 303 409 3426 CERAMIC 0.1U K IC7861 309 461 7822 IC PQ20WZ11 C2853 303 409 3426 CERAMIC 0.1U K IC8001 409 683 1817 IC SII9125CTU...
- Page 95 MF4-Z70000 Electrical Parts List Key. No. Part No. Description Key. No. Part No. Description C348 303 409 3426 CERAMIC 0.1U K C3806 303 372 7510 CERAMIC 2.2U K 6.3V C349 303 433 1112 CERAMIC 1U K C381 303 409 3426 CERAMIC 0.1U K C3502...
- Page 96 MF4-Z70000 Electrical Parts List Key. No. Part No. Description Key. No. Part No. Description C4439 303 409 3426 CERAMIC 0.1U K C473 303 369 0527 CERAMIC 0.01U K C444 303 369 0527 CERAMIC 0.01U K C474 303 369 0527 CERAMIC 0.01U K C4441 303 409 3426...
- Page 97 MF4-Z70000 Electrical Parts List Key. No. Part No. Description Key. No. Part No. Description 303 443 9214 CERAMIC 22U M 6.3V C7803 303 379 7315 CERAMIC 4700P K C5707 303 444 3310 CERAMIC 0.022U K C7804 303 409 3426 CERAMIC 0.1U K C5708 303 433 1112...
- Page 98 MF4-Z70000 Electrical Parts List Key. No. Part No. Description Key. No. Part No. Description C8035 303 276 1317 CERAMIC 1000P K C871 303 433 1112 CERAMIC 1U K C8036 303 276 1317 CERAMIC 1000P K C881 303 433 1112 CERAMIC 1U K C8037 303 358 3215...
- Page 99 MF4-Z70000 Electrical Parts List Key. No. Part No. Description Key. No. Part No. Description C9792 303 401 5715 CERAMIC 0.33U K R1431 301 226 1516 MT-GLAZE 0.000 ZA 1/16W C9793 303 401 5715 CERAMIC 0.33U K R1432 301 226 1516 MT-GLAZE 0.000 ZA 1/16W RESISTOR...
- Page 100 MF4-Z70000 Electrical Parts List Key. No. Part No. Description Key. No. Part No. Description R331 301 224 9019 MT-GLAZE 10K JA 1/16W R402 301 226 1516 MT-GLAZE 0.000 ZA 1/16W R332 301 263 7420 MT-GLAZE 75 JA 1/16W R4021 301 294 2712 MT-GLAZE 150 FA 1/16W R333...
- Page 101 MF4-Z70000 Electrical Parts List Key. No. Part No. Description Key. No. Part No. Description R4826 301 150 6014 MT-GLAZE 0.000 ZA 1/10W R6554 301 225 1210 MT-GLAZE 4.7K JA 1/16W R4833 301 224 9019 MT-GLAZE 10K JA 1/16W R6556 301 224 9316 MT-GLAZE 1K JA 1/16W R4834...
- Page 102 MF4-Z70000 Electrical Parts List Key. No. Part No. Description Key. No. Part No. Description R7804 401 344 1914 MT-GLAZE 10K DA 1/16W R8013 301 225 0312 MT-GLAZE 33 JA 1/16W R7806 301 224 8913 MT-GLAZE 100K JA 1/16W R8014 301 225 0312 MT-GLAZE 33 JA 1/16W R7807...
- Page 103 MF4-Z70000 Electrical Parts List Key. No. Part No. Description Key. No. Part No. Description R9727 301 304 3616 MT-GLAZE 1K DA 1/16W RB403 945 036 0986 R-NETWORK 47X4 1/32W R9728 301 304 3616 MT-GLAZE 1K DA 1/16W 945 037 0831 R-NETWORK 47X4 1/16W R9729 301 304 3616...
- Page 104 MF4-Z70000 Electrical Parts List Key. No. Part No. Description Key. No. Part No. Description 945 037 0831 R-NETWORK 47X4 1/16W L4021 945 086 7461 FILTER,EMI 100MHZ RB464 945 036 0986 R-NETWORK 47X4 1/32W L4041 945 086 7461 FILTER,EMI 100MHZ 945 037 0831 R-NETWORK 47X4 1/16W L4601 301 150 6014...
- Page 105 MF4-Z70000 Electrical Parts List Key. No. Part No. Description Key. No. Part No. Description D2868 407 264 6312 LED SMLE12Y8W T86 SC1058 945 076 3503 SURGE-ABSORBER D2869 407 264 6510 LED SMLE12V8W T86 SC1059 945 076 3503 SURGE-ABSORBER D2871 307 222 4810 LED SML-521MUW T86 SC2001 945 076 3503...
-
Page 106: Mechanical Parts List
Mechanical parts List MF4-Z70000 Cabinet Parts Location Optical Unit Cabinet Front ass'y - 106 - - 106 -... - Page 107 MF4-Z70000 Mechanical Parts List Cabinet Front ass'y - 107 - - 107 -...
-
Page 108: Optical Parts Location
MF4-Z70000 Mechanical Parts List Optical Parts Location Optical Unit - 108 - - 108 -... - Page 109 MF4-Z70000 Mechanical Parts List ASS'Y, LCD PNL/PRM S06 x 4 L01R, L01L L01R-1R,L01L-1R L01R-1G,L01L-1G L01R-1B,L01L-1B L01R-2B,L01L-2B L01R, L01L - 109 - - 109 -...
- Page 110 MF4-Z70000 Mechanical Parts List COMPL, OPTICAL UNIT (Inside) LENS- CONDENSER (OUT) and LENS-RELAY(OUT) are fixed with the adhesive on to the optical base bottom, so these parts are not the replaceable parts. Fixed (LENS,RELAY(OUT)) Not replaceable part. L03-8 L03-7 L03-7 L03R L03L L03-5...
- Page 111 MF4-Z70000 Mechanical Parts List COMPL, OPTICAL UNIT (Outside) L03-2R L03R-1R L03L-1R L03R-1G L03-2B L03L-1G L03-2G Thermistor Key No. M44 and Thermistor are not included in Key No. L03R/L - 111 - - 111 -...
-
Page 112: Mechanical Parts List
645 097 3758 POLARIZED GLASS(IN/R) 610 341 9275 SPACER SHEET LNS BTM-MF4A L03-2G 645 097 6254 POLARIZED GLASS(IN/G) 945 080 8792 BADGE,SANYO*26.2X5.7L26.0 L03-2B 645 097 6278 POLARIZED GLASS(IN/B) 610 341 9282 SPACER SHEET LNS TOP-MF4A L03-3 645 090 2109 LENS,CONDENSER(G) - Page 113 - 113 -...
- Page 114 SANYO Electric Co., Ltd. (MF4A) Oct. 2008 DC 300 Printed in Japan...
-
Page 115: Diagrams & Drawings
PLV-Z700 MF4_Z70000 These schematic diagrams and printed wiring board drawings are part of the service manual original for chassis No. MF4-Z70000 models PLV-Z700. File with the service manual No. SM5110992-00 Note: All the information of part numbers and values indicated on these diagrams are at the beginning of production. -
Page 116: Parts Description And Reading In Schematic Diagram
MF4-Z70000 Parts description and reading in schematic diagram 1. The parts specification of resistors, capacitors and coils Resistor Reading are expressed in designated code. Please check the parts Example 1/2 D J 10K B description by the following code table. 2. -
Page 117: Schematic Diagrams
Schematic Diagrams SS3.3V CAUTION K2801 A2801 J10EG045G U22B0730G C2802 C2803 R/C PREAmp. Fuse of the specified parts number must be used. L2801 10KK1MN 10EM1003T K8K_1 L3CU601PG POWER Unauthorized substitutions may resolt fire or accident. K8K_2 R2802 1/16GJ47A J10EG045G R2801 1/16GJ100A K8K_G AC CORD J10EG036G... - Page 118 IC8121 TC7WBD125AFK C8121 1 %%oOE1 16KK0.1MN R8121 S3.3VSI 1/16GJ4.7KA %%oOE2 5VSDA 5VSDA1 R8123 R1002 R8122 1/16GJ10KA R1001 5VSDA1 TO PC&HDMI EDID/DDC 1/16GJ4.7KA SDA1 1/16GJ1KA 1/16GJ10A HPD1 5VSCL 5VSCL1 5VSCL1 R8124 FROM IC301 B :2.2Kohm 1/16GJ10KA B-E:47Kohm SCL1 K10A Q1001 IC8111 R1HPDOUT R1DDCSDA J11B7450M...
- Page 119 IC1301 R1301 IC1321 1/16GD1.2KA S2.6VPW S2.6VPW S2.6VPW S1.3VREF R1302 EDD2516AETA-5B-E EDD2516AETA-5B-E 1/16GD1.2KA C1303 C1323 16KK0.1MN 16KK0.1MN MD[8] MD[7] MD[24] MD[23] S3.3VPW C1304 DQ15 C1324 DQ15 FPGA_FLASH 16KK0.1MN 16KK0.1MN S3.3VPW XC6202P502MP D5686 VDDQ VSSQ VDDQ VSSQ 1SS352G MD[9] MD[6] MD[25] MD[22] S3.3V IC5686 PFAIL_GROUP2...
- Page 120 IC4802 SS3.3V TC74LCX14FT J10EG045G C4803 L2831 R4811 16KK0.1MN R2831 R2832 1/16GJ100A 1/3GJ47 1/10GZ0C RC_VOUT 1/3GJ47 K8J_1 WIRELESS_REMOTE K8J_2 R/C RECEIVER R2833 IC4801 1/16GJ100A K8J_3 SS3.3V IC4804 PIC16LF819T-I TC7SH04FUP R4808 RA2/AN2/VREF- 1/16GZ0A RA1/AN1 SS3.3V RA3/AN3/VREF+ R4807 KEY_SW RA0/AN0 1/16GJ100A POWER_KEY_SW C4808 RA4/AN4/T0CKI PIC_READY_LED 16KK0.1MN...
- Page 121 9VPNL AD826ARZ-REEL R9767 1/16GJ5.1KA RLCCOM IC9751 R9758 C9761 C9768 16KK0.1MN 1/16GD1KA KK470MN C9759 C9754 5VCOM -6VCOM CJ33CGQ 16KK4.7BA R9768 -6VPNL 1/16GJ5.1KA UPC324GR-9LG R9752 GLCCOM 1/16GD1KA C3501 C3502 C9756 C9758 C9769 IC9701 CJ33CGQ 16KK2.21D C9751 16KK4.7BA KK470MN S3.3VFP C9701 R9751 R9762 9VPNL C9712 CJ33CGQ...
- Page 122 NO DATA SCH_MF4A...
-
Page 123: Printed Wiring Board Diagrams
Printed Wiring Board Diagrams ■ ! CAUTION This projector is isolated from AC line by using the internal converter transformer. Please pay attention to the following notes in servicing 1. D o not touch the part on hot side (primary circuit) or both parts on hot and cold sides (secondary circuit) at the same time. 2. Do not shorten the circuit between hot and cold sides. 3. T he grounding lead must be connected to the ground of the same circuit when measuring of voltages and waveforms. FILTER (SIDE : A) FILTER (SIDE : B) K601... - Page 124 MAIN (SIDE : A) POWER “CN201” R2851 SC2852 SC2853 C2852 R2852 L4602 Q2854 Q2853 L4601 Q6551 L7841 R2853 L7821 L7831 C2857 D7841 SC2854 R2862 L4851 R2863 C2851 C4851 L6551 R4601 R2861 Q2857 D6552 D7831 C7602 IC8851 C8856 R2831 R2832 R2864 D2853 D6551 C7603 D4606 R2866 D2854...
- Page 125 DOOR SW2 DOOR SW1 DOOR MAIN (SIDE : B) “K8811” “K8801” MOTOR LAMP BALLAST “K2801” “CN201” LAMP REPLACE BLUE D2871 D2868 D2869 R7839 R7821 C7833 Q7832 R7829 FAN1 FAN2 C7823 FAN3 WARNING TEMP TPLE_PWR READY R7849 Q7831 R4822 Q7821 TPLESTBY C7843 Q7841 L8852 TPLELAMP TPLEWARN SS3.3V Q7842 TE401 MENU...
- Page 126 LAMP BALLAST (SIDE : A) POWER (SIDE : A) LAMP BALLAST “CN101” FILTER “K6A” CN102 CN101 LAMP CN102 POWER “CN102” CN201 CN201 MAIN MAIN “K8P” “K8A” R/C (SIDE : A) R/C (SIDE : B) LAMP SWITCH (SIDE : A) LAMP SW ITCH (SIDE : B) MAIN "K8J" K8803 MAIN A30C5 1AA4B10C5980D “K8Q” R2801 C2801 SW8803 PARTS_SIDE C2802 A12 PCB_MF4A...
-
Page 127: Pin Description Of Diode, Transistor And Ic
MF4-Z70000 Pin description of diode, transistor and IC ● Diode ● Transistor/FET ● IC... -
Page 128: Note On Soldering
Note on Soldering Do not use solder containing lead. Solder This product has been manufactured using lead-free solder Use solder with the metal content and composition ratio in order to help preserve the environment. by weight given in the table below. Do not use solders Because of this, be sure to use lead-free solder when which do not meet these conditions.