Acer Iconia Tab 10 User Manual
Hide thumbs
Also See for Iconia Tab 10:
- User manual (57 pages) ,
- Product overview (11 pages) ,
- User manual (17 pages)
Table of Contents
Advertisement
Advertisement
Table of Contents

Related Manuals for Acer Iconia Tab 10


Summary of Contents for Acer Iconia Tab 10
- Page 1 User’s Manual...
- Page 2 This revision: April 2015 Sign up for an Acer ID and enjoy great benefits Open the Acer Portal app from the Start screen to sign up for an Acer ID or sign in if you already have an Acer ID.
-
Page 3: Table Of Contents
Table of contents - 3 A B L E O F C O N T E N T S Getting started with your tablet Playing music Features and functions ......4 Multimedia playback ......31 Unpacking your tablet......4 Managing people and contacts Getting to know your tablet .... -
Page 4: Getting Started With Your Tablet
Your new tablet comes packed in a protective box. Carefully unpack the box and remove the contents. If any of the following items are missing or damaged, contact your dealer immediately: • Acer Iconia tablet • Product setup and safety information • USB cable •... -
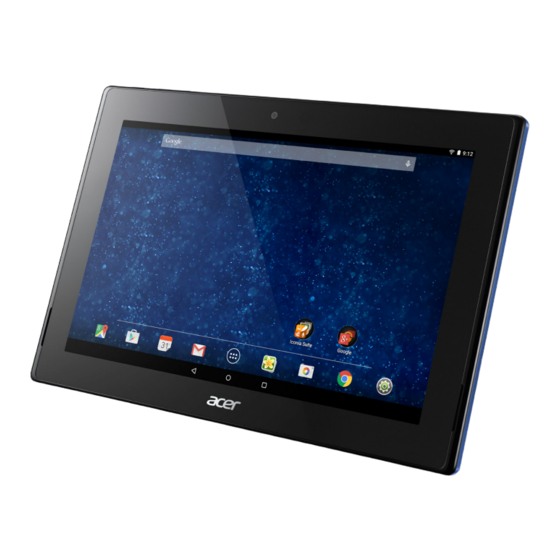
Page 5: Getting To Know Your Tablet
Getting started with your tablet - 5 Getting to know your tablet No. Item Description Long press to turn the tablet on, press briefly to turn the screen on/off or enter Power button sleep mode; press and hold to turn the tablet off. -
Page 6: Turning On For The First Time
Turning on for the first time To turn on your tablet, press and hold the power button until you see the Acer logo. Wait a moment for your tablet to boot up. You will then be asked some questions before you can use your tablet. - Page 7 Getting started with your tablet - 7 and other information. If you do not yet have Internet access, or do not want to use this feature, then tap Skip. Important You must sign in to a Google Account to use Gmail, Hangouts, Google Calendar, and other Google Apps;...
-
Page 8: Charging Your Tablet
8 - Charging your tablet H A R G I N G Y O U R T A B L E T Assembling the power adapter Your tablet is bundled with one of two types of USB power adapters: a fixed-prong type or a removable-prong type. -
Page 9: Connecting Power
Connect the power connector to your tablet and plug the AC adapter into any AC outlet. Warning Only use an Acer-approved adapter to charge your device. Note It is normal for the tablet surface to become warm during charging or long... -
Page 10: Using Your Tablet
10 - Using your tablet S IN G Y O U R T A B L E T Using the touchscreen Your tablet uses a touchscreen for selecting items and entering information. Use your finger to tap the screen. Tap: Touch the screen once to open items and select options. Drag: Hold your finger on the screen and drag across the screen to select text and images. - Page 11 Using your tablet - 11 The Home screen already features some useful controls and information. Status and Widget notification area Search Application Application "APPs" menu Application dock Navigation Search Note In order to search or browse the internet, you must be connected to a See Going online on page 24 wireless network.
- Page 12 12 - Using your tablet (you may need to minimize the keyboard). You can also choose what Tablet searches for. After entering search words and tapping , tap the Menu icon on the left side of the search box. Then tap Settings >...
- Page 13 Using your tablet - 13 The extended Home screen The Home screen extends to either side of the initial Home screen, giving you more room to add widgets or organize shortcuts. To view the extended Home screen, swipe your finger to the left or right. A total of five pages are available, two to the left and two to the right.
-
Page 14: Status And Notification Area
14 - Using your tablet Status and notification area Status and notification icons are shown at the top of the screen. The top-right area displays a variety of information, such as time, battery status, and connectivity. The top-left area displays event icons, such as a new message. - Page 15 Using your tablet - 15 settings by opening the Application menu and tapping Settings > Sound & notification > Interruptions. Quick Settings icons Icon Name Description Tap to toggle Airplane mode on and off. When on, Airplane mode all wireless connectivity is disconnected. Tap to toggle automatic screen rotation on and Auto rotate off.
-
Page 16: Personalizing The Home Screen
16 - Using your tablet Personalizing the Home screen Note If your device’s battery is getting too hot, you will be notified and advised to turn off the device. If you fail to turn it off, it will shut down automatically. You may personalize your Home screen by adding or removing application shortcuts or widgets, and by changing the wallpaper. -
Page 17: Changing The Home Screen Wallpaper
Using your tablet - 17 Changing the Home screen wallpaper Tap and hold any open space on the Home screen. Here you can choose from a variety of options to set as the background to your device. The onscreen keyboard When you tap a text box to enter text, an onscreen keyboard will appear. -
Page 18: Editing Text
18 - Using your tablet Tap the ?123 button to see numbers and special characters, and then tap the ~ [ < key to see more options. Tap and hold a key to select alternative characters (if available for that key), such as letters with accents or related symbols. - Page 19 Using your tablet - 19 Selecting text To select text that you want to cut, copy, delete or replace: 1. Tap the text you want to select. If you can select this text, a cursor is inserted below the text. 2.
-
Page 20: Shutting Down Your Tablet
20 - Using your tablet Security Options For additional security, you may set a code or number that must be entered to access the tablet, such as an unlock pattern (a set of dots that must be tapped in the correct order). Open the Application menu and tap Settings >... -
Page 21: Connecting Devices To Your Tablet
Connecting devices to your tablet - 21 O N N E C T I N G D E V I C E S T O Y O U R T A B L E T Connecting to AC power See Charging your tablet on page 8 Inserting a microSD card You may install a microSD card to expand your device's storage space. -
Page 22: Connecting A Bluetooth Device
22 - Connecting devices to your tablet internal memory), you can connect your device to a PC using the supplied USB cable. 1. Plug the USB sync cable into the micro USB connector on your device. 2. Plug the USB client connector into an available USB port on your computer. -
Page 23: Accessories
Please check for updates to the tablet's software which may add support for additional Bluetooth devices (open the Application menu and tap Settings > About tablet > System updates > CHECK NOW. Accessories For a complete list of accessories, visit store.acer.com. -
Page 24: Going Online
24 - Going online O I N G O N L I N E Managing Wi-Fi connections If you did not connect to a Wi-Fi network when you first started your tablet, or want to connect to a new network, open the Application menu and tap Settings >... -
Page 25: Setting Up The Email Application
Going online - 25 To navigate forward and backward in your browser’s history, tap the arrow icons. To adjust browswer settings and perform other tasks, tap the Menu icon. Chrome enables you to open multiple tabs. When a page is open, tap the small New tab button. -
Page 26: Google Services
26 - Going online Google services Note APPs may not be available in all countries and regions. You must activate a Google account before using Google services. The first time you access Google services, you must read and accept the Terms of Service. -
Page 27: Voice Search
Going online - 27 4. Enter the recipient's email address, the subject and message. 5. When you are finished composing your message, tap Voice Search Note Voice Search is available only in selected regions. With voice actions, you can send emails, find directions to locations, search the internet and even send a note to yourself using your own voice. - Page 28 28 - Going online Once you have selected an application, tap the Install button to download and install the application. You will be told which services (contact information, wireless access, GPS, etc.) the application requires access to in order to function correctly. If none of these services seem unusual, tap ACCEPT to proceed with the installation.
- Page 29 Going online - 29 You may keep track of the download progress from both the APP’s page and your device’s notification area. Important Some APPs may require payment before you can download them. You will need to have a Google Wallet account in order to pay for these APPs.
- Page 30 30 - Going online Using downloaded APPs Once you’ve downloaded and installed an application, you may find it in the APPs sections of the Application menu. Certain APPs provide both an APP and widget, or only provide a widget (with no application icon). See Personalizing the Home screen on page Uninstalling downloaded APPs...
-
Page 31: Playing Music
Playing music - 31 L A Y I N G M U S I C Multimedia playback Your tablet comes supplied with a variety of programs that you can use to enjoy multimedia content. Note The available option of Google Play Music varies by region. For example, in some regions, Google Play Music can serve as cloud storage for your personal music collection and make it available on all your devices. - Page 32 32 - Playing music Tap the Menu icon or swipe in from the left side to display a list of views, such as Listen Now, My Library, and Playlists as well as Settings, Help, and Send feedback. Albums and invidividual tracks have their own playback options. You can access these by tapping the Menu icon .
-
Page 33: Managing People And Contacts
Managing people and contacts - 33 A N A G I N G P E O P L E A N D C O N T A C T S Your tablet features an address book that allows you to save contacts to the internal memory or your Google account. -
Page 34: Adding A New Contact
34 - Managing people and contacts Adding a new contact to add a new contact. If you have multiple accounts, you will be asked which account you want to use to store the contact. The contact will be synchonized with that account. You may now edit the new contact entry. - Page 35 Managing people and contacts - 35 Editing a contact on your computer If you have synchronized your Google account and contacts, you can use your computer to access and edit your contact list. Open the internet browser on your computer and go to contacts.google.com. Sign in to your account then select and edit contacts from the list;...
-
Page 36: Using The Camera And Camcorder
36 - Using the camera and camcorder S I N G T H E C A M E R A A N D C A M C O R D E R Your tablet features a front- and rear-facing camera. This section will take you through all the steps in taking photos and videos with your tablet. -
Page 37: Mode
Using the camera and camcorder - 37 icon changes to a Quick settings icon when the left-hand buttons are not visible. Tap the Quick settings icon to rapidly change a few simple settings. To zoom in, reverse pinch the screen. To zoom out, pinch the screen. When Video mode is selected, tap the Shutter button to begin recording. -
Page 38: Quick Settings
38 - Using the camera and camcorder Setting Description Tap to toggle the save location quick settings button on or off. Save Note: Ensure Location services are also turned on along location with this button (see Location on page 15). For more information on location services, see Location services on page... -
Page 39: Shooting A Video
Using the camera and camcorder - 39 3. Zoom in or out as needed. Note When zooming, the image on the screen does not represent the quality of the final image. 4. Tap to take the photo. Shooting a video 1. -
Page 40: 40 - Advanced Settings
40 - Advanced settings D V A N C E D S E T T I N G S To access Settings, open the Application menu and tap Settings. Wireless & Networks Activating or deactivating Wi-Fi connections Tap Wi-Fi to display all available wireless networks. Turn the Wi-Fi function on or off. -
Page 41: Data Usage
Advanced settings - 41 To connect to a device, tap the device in the list of available devices. You may be asked to enter a PIN on both devices to establish the connection. Note Only A2DP stereo headsets (playback only, no microphone) are supported. Please check for updates to the tablet's software which may add support for additional Bluetooth devices. -
Page 42: Device
42 - Advanced settings You need to set a lock screen PIN or password before you can use credential storage. Device Sound & notification Adjust the volume of your tablet using the volume buttons on the side of the tablet. Display You can adjust your tablet screen settings by tapping APPs >... -
Page 43: Personal
Advanced settings - 43 Apps Closing an application To close an active application, go to Settings > Apps. Swipe over to the RUNNING tab, then tap the program you wish to close. Select Stop to close the program. Uninstalling an application You can remove programs installed on your tablet to free up extra storage memory. -
Page 44: Changing Language And Text Options
44 - Advanced settings only. Each mode uses different sources (or combination of sources) to estimate your device’s location. Note The "Device only" option uses Global Positioning System (GPS) technology; as such, to operate effectively, it usually requires a clear view of the sky and may take some time before it establishes location information. -
Page 45: System
Advanced settings - 45 System Setting the date and time To set the date and time, tap APPs > Settings > Date & time. Note If you travel frequently or live in an area that uses daylight saving time, and have mobile network access, activate Automatic time zone from this menu. -
Page 46: Updating Your Tablet's Operating System
46 - Advanced settings You can delete an alarm by tapping . This action can be undone by tapping UNDO. Updating your tablet’s operating system Your tablet can download and install system updates, adding support for new devices or expanding software options. To check for updates, tap APPs >... -
Page 47: Faq And Troubleshooting
FAQ and troubleshooting - 47 F A Q A N D T R O U B L E S H O O T I N G This section lists frequently asked questions that may arise during the use of your tablet, and gives easy answers and solutions to these questions. - Page 48 Google account username and password. I forgot my unlock You must have an active Google Unlock pattern pattern. account on the tablet and an Internet connection. If this option is not available, please contact your local Acer service center.
-
Page 49: Other Sources Of Help
All Acer tablets are factory-tested before release. Other sources of help For information on: Refer to: Up-to-date information www.acer.com... -
Page 50: 50 - Specifications
50 - Specifications P E C I F I C A T I O N S Performance ® ™ • Intel Atom processor 1.33 GHz processor • System memory: • 2 GB of RAM • 16, 32, 64 GB of flash memory ™... - Page 51 Specifications - 51 Power • DC power-in (5.35 V, 2 A) Connectivity • 802.11ac/a/b/g/n wireless LAN • Bluetooth 4.0 • aGPS Camera • Front camera • 2-megapixel • 720p HD audio/video recording • Rear camera • 5-megapixel • 1080p Full HD audio/video recording Expansion •...
- Page 52 52 - Specifications Dimensions Height 176 mm Width 260 mm Thickness 9.7 mm Weight 540 g Environment Temperature ° ° Operating: 0 C to 35 ° ° Non-operating: -20 C to 60 Humidity (non-condensing) Operating: 20% to 80% Non-operating: 20% to 80%...
-
Page 53: End User License Agreement
1. Use or copy the Software except as that you may, after prior written notification provided in this Agreement; to Acer, transfer the Software as a whole to 2. Rent or lease the Software to any third a third party so long as you do not retain party;... - Page 54 TRADEMARKS This Agreement does not grant to you any rights in connection with any trademarks or service marks of Acer or of Acer's licensors or suppliers. DISCLAIMER OF WARRANTIES TO THE MAXIMUM EXTENT PERMITTED BY...
- Page 55 WITHOUT TERMINATION Without prejudice to any other rights, Acer may 2. Destroy or return to Acer the original and immediately terminate this Agreement without all copies of the Software; and notice if you fail to comply with any terms and 3.
- Page 56 56 - End user license agreement products of Acer's licensors' or suppliers' third subject to additional terms and conditions and party licensors. Your use of the Third Party policies which can be accessed through our Software and Third Party Services is also global website.
Need help?
Do you have a question about the Iconia Tab 10 and is the answer not in the manual?
Questions and answers