Table of Contents
Advertisement
Samsung Electronics (UK) Ltd, Euro QA Lab.
Blackbushe Business Park
Saxony Way, Yateley, Hampshire
GU46 6GG United Kingdom
The purpose of Safety Concerns is to ensure users' safety and to prevent property losses.
Please read this document carefully for proper use.
Part No: GL68-00686A(Ed.01)
USER MANUAL
GX-SM650SJ
Advertisement
Table of Contents

Related Manuals for Samsung GX-SM650SJ


Summary of Contents for Samsung GX-SM650SJ
- Page 1 USER MANUAL GX-SM650SJ Samsung Electronics (UK) Ltd, Euro QA Lab. Blackbushe Business Park The purpose of Safety Concerns is to ensure users’ safety and to prevent property losses. Saxony Way, Yateley, Hampshire Please read this document carefully for proper use.
- Page 2 To protect natural resources and to promote material reuse, please separate batteries from other types of waste and recycle them through your local, free battery return system. Information in this document is proprietary to SAMSUNG ELECTRONICS Co., Ltd. This guide may be changed for product improvement, standardization or other technical reasons without prior No information contained here may be copied, translated, transcribed or notice.
-
Page 3: Important Note
afety Information The purpose of the Safety Concerns section is to ensure the safety of users and prevent property damage. Please read this document carefully for proper use. WarNiNG TO REDUCE THE RISK OF ELECTRIC SHOCK, DO NOT REMOVE THE COVER (OR BACK). NO USER-SERVICEABLE PARTS ARE INSIDE. - Page 4 Adapter to malfunction. See the illustration below. CopyrigHt © 2015 SAMSUNG ELECTRONICS Co., Ltd. All rights reserved. No part of this user’s manual may be reproduced or copied without the prior written permission of SAMSUNG ELECTRONICS Co., Ltd.
-
Page 5: Table Of Contents
ontents about the product ---------------------------------------------------- Key Feature ............Media file format compatibility . - Page 6 Contents Picture ............. . Screen resolution ....................
- Page 7 Contents using the Basic Functions --------------------------------------------- Watching TV Channels ..........Using the remote control buttons ................
- Page 8 Contents Using the DLNA ............appendix -------------------------------------------------------------- Troubleshooting .
-
Page 9: About The Product
bout the product KEy FEaturE Image Display of HD Grade Supports high-resolution video output of up to 1080p, enabling you to enjoy clear and sharp video. Electronic Program Guide (EPG) Function Using the EPG Channel Guide, you can check the program information and broadcasting schedule of a desired channel, and schedule the programs to watch. -
Page 10: Media File Format Compatibility
About the product Media file format compatibility PVR (Personal Video Recorder) Allows recording chosen TV/Radio programs and watch them later. This feature will help you to avoid missing favorite shows and movies while you are not available. Dual Recording Thanks to double tuner configuration, a simultaneous PVR recording from two separate sources are possible at the same time. -
Page 11: Supported Formats
• The STB does not support PTP protocol (Picture Transfer Protocol). • Do not remove USB storage device while in use (recording, formatting, etc.). • SAMSUNG is not responsible for any loss of data on USB storage device. • USB HDD for PVR should be connected to rear USB port. -
Page 12: Accessories
(AAA Size) SCART Gender Cable HD+ Supplement User Manual Smart Card \ You can purchase the cable accessories (not supplied with the product) from a local Samsung dealer. Not supplied cable: - HDMI cable - Coaxial cable - LAN cable... -
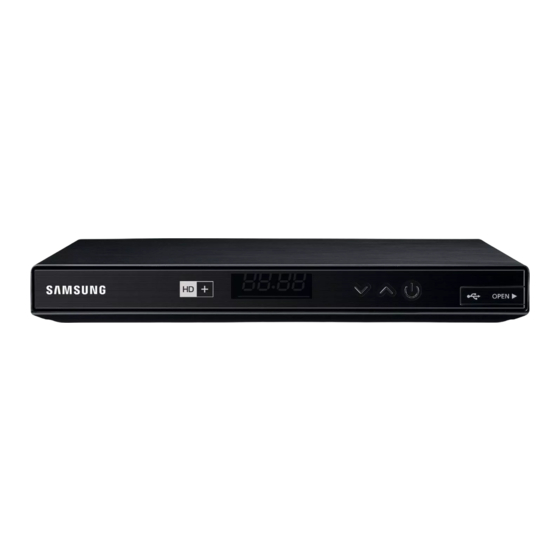
Page 13: Front Panel
About the product Front Panel FroNt paNEl This section describes the button and LEDs at the front panel. Smart Card Slot Channel button REMOTE CONTROL SENSOR USB port (0.5A) CLOCK OR CHANNEL DISPLAY POWER button 7 Segment 7-segment display presents simple information about current status of the device. When the device is in standby mode, the current time value is presented with blinking colon every second. -
Page 14: Rear Panel
About the product Rear Panel rEar paNEl This section describes the names and functions of the ports on the rear panel. 4 USB 2 ANT IN 5 HDMI OUT 8 DC POWER 1 Common Interface Slot 6 LAN 3 OPTICAL OUT 7 EXT (TV) Slot to insert Conditional Access Module. -
Page 15: Remote Control
About the product Remote Control rEMotE CoNtrol This section describes the function of each button on a remote control. Put the STB in stand-by mode (no TV power on/off. signal to TV). Press number buttons to enter numeric value or to access channels directly. - Page 16 About the product Remote Control Installing batteries \ If the remote does not operate properly: - Check the polarity +/– of the batteries. - Check if the batteries are drained. - Check if the remote sensor is blocked by obstacles. - Check if there is any fluorescent lighting nearby.
- Page 17 About the product Remote Control TV Control Codes Brand Code Brand Code NOKIA TV+74 SAMSUNG TV+01, +02, +03, +04, +05, +06, +07, +08, +09 NORDMENDE TV+72, +73, +75 AIWA TV+82 PANASONIC TV+53, +54, +74, +75 ANAM TV+10, +11, +12, +13, +14, +15, +16, +17, +18...
-
Page 18: Connections
onnections This section describes the connection to peripherals. Connect the peripherals (TV, DVD, etc.) referring to the descriptions in the following page. CoNNECtiNG to a tV You can connect your product to your TV using one of the methods illustrated on page 16 or 17. Method 1) Connection to a TV with the EXT(TV) Port - Scart Connection This section describes how to connect to a TV with Scart cable. - Page 19 Connections Connecting to a TV Method 2) Connection to a TV with the HDMI Port This section describes how to connect to a TV with an HDMI cable. Audio Video Connect the product to your TV using an HDMI cable. Turn on the product and TV.
- Page 20 Anynet+ is a convenient function that offers linked operations with other Samsung products that have the Anynet+ feature. To operate this function, connect this product to an Anynet+ Samsung TV using an HDMI cable. The STB supports HDMI Anynet+ functionality (extensions of the HDMI CEC standard). This makes it possible to control the STB using a TV remote control (or to control the TV using the STB remote control in the case of the automatic power on function).
-
Page 21: Connecting To An Antenna
Connections Connecting to an antenna CoNNECtiNG to aN aNtENNa You can connect your double tuner STB to an antenna in two supported configurations. Double tuner configuration In this configuration, both tuners have to be connected to antenna signal independently by two separate coaxial cables. -
Page 22: Connecting To An Audio System
Connections Connecting to an Audio System CoNNECtiNG to aN audio systEM HIMI OUT HIMI IN Audio HIMI IN Method 1 Method 2 Audio / Video Connect the product to an audio system using one of the two methods illustrated above. Turn on the product, audio system, and TV. -
Page 23: Connecting To A Network Router
ISP’s policy. For more information, contact your ISP (Internet Service Provider). \ DSL users, please use a router to make a network connection. \ To use the Samsung Link function with your PC, you must connect your PC to your network. -
Page 24: Connecting The Power
Connections Connecting the Power CoNNECtiNG tHE poWEr After connecting your STB to your TV, connect the included power adaptor to the STB, and then plug the power adaptor with power cord into a wall socket. When you plug in the power adapter for the first time, the STB will turn on automatically and display the first installation screen. -
Page 25: Settings
• The OSD (On Screen Display) of this product may change after you upgrade the software version. \ You can download the latest user manual on www.samsung.de • The access steps may differ depending on the menu you selected. - Page 26 Settings The Setup Procedure Use the ▲▼ buttons to choose a TV aspect ratio, and then press the v button. Select [Next], and then press the v button on the remote control. Use the ▲▼ buttons to choose a resolution, and then press the v button.
-
Page 27: Scanning
Settings The Setup Procedure Scanning There are three different scanning options. Quick Scanning This is the recommended scanning type; it is the simplest and the fastest. It downloads the complete channel list from a dedicated Astra transponder: 12.60375 Horizontal 22000 DVB-S KS/s... - Page 28 Settings The Setup Procedure Auto Scanning Auto scanning performs channel search on all predefined transponders of the selected satellite. After successful scanning, a result screen appears with showing the numbers of the TV and radio channels found. Select [Save] and press the v button to confirm. \ Auto scanning can take several minutes depending on the satellite selected.
-
Page 29: Software Upgrade
Settings The Setup Procedure Software Upgrade You have to upgrade your STB with the latest software to use all the functionalities. - The detail upgrade way is described in [Settings] > [System] > [Software upgrade]. SatCR environment users have to do the [USB Update] way for the first time. - Refer to page 50 to do the software upgrade by the [USB Update] way. -
Page 30: Main Menu
Settings Main Menu MaiN MENu Guide : View the program schedule, select programs to watch, and view information about future programs. (See page 57.) Channel : Displays the list of channels memorized. (See page 62.) Library : Provides access to and allows management of the list of recorded material. (See page 67.) Media : Plays videos, photos or music content from an external USB storage device. -
Page 31: Accessing The Settings Screen
Settings Accessing the Settings Screen aCCEssiNG tHE sEttiNGs sCrEEN Press the MENU button on the remote control. The Main menu appears. Select [Settings], and then press the v button. To access the Settings menus, sub-menus, and options, please refer to the remote control illustration and the Settings Control Button table in the below. -
Page 32: Channel
Settings Channel CHaNNEl You can configure various channel options. ASTRA channel list update Astra channel list update is the simplest and fastest way of scanning services. This option allows you to Change or Update the channel list available for the ASTRA satellite network. If channel list has not been chosen previously, please select Change option and press the v button. -
Page 33: Manual Tune
Settings Channel Manual tune To scan the channel list of a satellite manually, follow these steps. Select the [Channel] option using the ▲/▼ button, and then press the ▶ button. Select the [Manual tune] option using the ▲/▼ button, and then press the ▶ button. Select an option you want using the ▲/▼... - Page 34 Settings Channel Tuner Settings ◈ Loop configuration In this configuration, antenna signal is passed by only one coaxial cable and the connection between tuners is created internally. And satellite signal has to be connected to the first tuner (ANT 1 IN) (near PCMCIA slot). This configuration introduces minor limitations when both tuners are used at the same time.
- Page 35 Settings Channel ◈ Double tuner configuration In this configuration, both tuners have to be connected to antenna signal independently by two separate coaxial cables. This configuration allows both tuners tuning to two satellite transponders at the same time. With double tuner configuration, the user can take advantage of PIP or Double-REC with no restrictions. Please refer to the following table for the detail functionalities.
- Page 36 Settings Channel Installation Expected Tuner settings Availalble/Restricted Services Type Result - 2 REC in same TS - 2 REC among different TS 2.1 Disabled status [Tuner1 (ANT 1 IN)] - PIP 2.SatCR - Zapping among different TS with 1 REC Not Supported (No AV) 2.2 Disabled status : It will be mentioned in 1st install help description and User manual...
- Page 37 Settings Channel ◈ User settings Accordingly which antenna motor type has been selected, its configuration can be done in user settings window. DiSEqC Motor settings In this window, you are able to: - < West : Drive West - East > : Drive East - Assign Sat.
- Page 38 Settings Channel ◈ Installer settings These settings should be done while mounting the antenna with a motor and shouldn’t be changed during normal use. It is to set limits on the positioner motor if the satellite dish can’t move over whole driver angle (~180 degrees).
-
Page 39: Guide Timeline
Settings Channel Guide timeline This menu specifies the standard for setting the time interval for the display of the program list on a channel guide screen. The longer the interval the more programs can be checked on a single screen. HbbTV You can launch a Hybrid Broadcast Broadband TV interactive service while watching a TV program. -
Page 40: Sound
Settings Sound souNd You can configure various audio options such as the [Prefered audio type], [Digital volume control], etc. Preferred audio type This allows selection of which audio type (Stereo or Multichannel) should be used when both are available on the service selected. Digital volume control This menu allows turning on/off volume control for HDMI and SPDIF digital outputs. -
Page 41: Picture
Settings Picture piCturE You can configure various display options such as the [Screen resolution], [HDMI aspect ratio], etc. Screen resolution This allows you to set the output resolution of the video signal. The number indicates the number of lines of video per frame. The i and p indicate interlaced and progressive scan, respectively. The more lines, the higher quality. -
Page 42: Hdmi Video Conversion
Settings Picture HDMI video conversion This allows you to change the screen output type when you connect them using an HDMI cable. HDMI aspect ratio HDMI video conversion [Auto], [Letter box], [Centre cut out], Setting for how standard programs [Stretch], [None] display on a widescreen TV 16:9 [Auto], [Pillar box], [Centre cut out],... -
Page 43: Tv Scart Aspect Ratio
Settings Picture TV Scart aspect ratio This lets you adjust the output of the STB to the screen size of your TV when you connect them by usng a TV Scart cable. TV Scart video conversion This allows you to change the screen output type when you connect the TV and STB by using a Scart cable. Screen output types are the same as the HDMI video conversion. -
Page 44: Language
Settings Language laNGuaGE You can configure on-screen message language as well as subtitle languges. The selected language will only appear if it is supported. Language On Screen Display (OSD) is used to change the language of the menu screen. Automatic subtitles This allows you to enable/disable subtitles, or change to Hearing Impaired. -
Page 45: Library / Media
Settings Library / Media liBrary / MEdia You can configure various options related to recording and USB storage setting. Media auto open Allows you to automatically open the library/media when a USB memory stick is inserted. Instant recording This allows you to choose the automatic recording of the program currently being watched. A temporary recording starts when you change from the channel you are watching to another one and stops when you change channels again. -
Page 46: Media Renderer
Settings Library / Media Media renderer DLNA Media Renderer is one DLNA functionality that enables you to remotely control viewing of content on device. Instead of browsing DMS (Digital Media Server) directly on STB, you can browse DMS (Digital Media Server) on tab or phone and also control from the playback of content on STB. -
Page 47: Smart Card Information
This option allows downloading additional list of services shared by the CI module provider. \ GX-SM650SJ is a CI+ certified product from Digital TV Labs. So you can use any CI+ certified CAM(Conditional Access Module). But some interoperability issues may happen even though the... -
Page 48: System
Settings System systEM You can check product information or reset the STB to default settings. Product information This menu displays the product information: [Brand ID], [Product ID], [Firmware version], [Software version], [Micom version], [Serial number] and [Last software update]. Auto Turn off This lets you set the STB go into the standby mode automatically from live mode if your STB is not being used for the set up time. -
Page 49: Network Settings
Settings System Network settings Before you begin, contact your ISP (Internet Service Provider) to find out if your IP address is static. If it is dynamic and you have a wired network, we recommend using the Automatic configuration procedures described below. -
Page 50: Reset To Default Settings
Settings System Reset to default settings Resets all settings to their default settings. The default PIN is 0000. To Reset to the default, follow these steps: Press the MENU button. Select [Settings] > [System], and then press the ▶ button. -
Page 51: Software Upgrade
\ Never turn the STB off during the update process. \ When the update is completed, the STB turns off and then turns on again by itself. \ SAMSUNG ELECTRONICS takes no legal responsibility for STB malfunction caused by consumer negligence during a software Update. - Page 52 USB Update You can update the software by using a USB flash drive. Visit www.samsung.de Enter the product's model name into the search field. As you enter the model name, a drop down will display products that match the model name.
-
Page 53: Change Stb Pin-Code
Settings System Change STB PIN-Code This function works in conjunction with the Parental Rating function which requires you to enter a PIN before it allows access. You can change the 4-digit PIN used to access the Parental Rating function. To change the PIN, follow these steps: Press the MENU button on the remote control. -
Page 54: Using The Basic Functions
sing the Basic Functions WatCHiNG tV CHaNNEls After Auto scanning is completed, you can watch your TV channels. Using the remote control buttons To use these buttons, see the table on the right. NUMBER buttons : To move to a TV channel directly, press the number buttons that correspond to the desired TV channel. -
Page 55: Switching Channel
Using the Basic Functions Watching TV Channels Switching channel You can switch the current channel by pressing the CH button or entering the channel number directly using the NUMERIC(0-9) buttons. • Press the TV/RADIO button to switch between TV channels and radio channels. -
Page 56: Viewing The Service Information
Using the Basic Functions Viewing the service Information ViEWiNG tHE sErViCE iNForMatioN Pressing the INFO button displays a channel information. Pressing the INFO button on the remote control displays information about the channel being watched. Pressing the INFO banner twice makes more detailed information appear. Pressing it three times produces a display of current tuner information, including data on signal strength and quality. - Page 57 Using the Basic Functions Viewing the service Information Display icons Icon Definition Icon Definition Favourite channel Dolby Digital Sound Lock channel Dolby Digital Plus Sound HD channel Audio description SD channel DVB Subtitle Parental Lock Digital text Watch timer New recording Record Timer Video aspect ratio...
-
Page 58: Program Information
Using the Basic Functions Viewing the service Information Program Information You can see the synopsis of current watching program by pressing the INFO button twice. • Press the EXIT button to close the banner. Signal Information You can see the signal information by pressing the INFO button three times. • Press the INFO button again or EXIT button to close the banner. -
Page 59: Viewing The Epg Information
Using the Basic Functions Viewing the EPG information ViEWiNG tHE EpG iNForMatioN EPG (Electronic Program Guide) provides users with television, radio, and other media applications with continuously updated menus that display broadcast programming and scheduling information for current and upcoming programs. -
Page 60: Viewing Program Information
Using the Basic Functions Viewing the EPG information Viewing Program information Select a channel in the EPG screen, and then press the INFO button on the remote control. The program's detail information will appear in the banner on the screen. Searching programs You can search programs by selecting the appropriate search options(Day/Time/Genre/Category/Search text). -
Page 61: Pausing And Rewinding Live Tv
• Press the REC button to store recorded program in the [Library]. Watching the stored recording from the [Library] will not stop this recording. The model GX-SM650SJ allows using time shifting mode in two scenarios. First, by using the internal memory only and second with the external USB storage device. -
Page 62: Recording Programs
Using the Basic Functions Recording programs rECordiNG proGraMs You can record a program not only whilst watching the desired program, but also after selecting the desired program from the information banner, the TV guide or the Search menu. To record TV channels or Radio programs, press the REC button on the remote control. - Page 63 Using the Basic Functions Recording programs Double tuner architecture allows Dual-REC functionality. After connecting both tuners to the antenna, it is possible to watch and record or time-shift other channels while previously started recording in the background. Available scenarios are: Service on tuner 1 Service on tuner 2 (ANT 1 IN)
-
Page 64: Channel List
Using the Basic Functions Channel list CHaNNEl list The Channel list displays the list of channels memorized and indexed during the Scanning process. On the Channel list screen, you can select and change channels, lock and unlock channels, view indexed channels by sort order (name, number), and access and edit Favourites. - Page 65 Using the Basic Functions Channel list Create new favourite channel list Add a channel to new favourite channel list. In the Channel list, press the Yellow button. Select the [Create new favourites list], and then press the v button. The virtual keyboard appears. Input the favourite list name using the pop-up keyboard.
-
Page 66: Sorting Channel List
Using the Basic Functions Channel list Sorting channel list To sort the channels in the Channel list. You can order the list by name or number. In the Channel list, press the TOOLS button on the remote control. Select the sort option you want, and then press the v button. -
Page 67: Using The Hbbtv
Using the Basic Functions Using the HbbTV usiNG tHE HBBtV HbbTV(Hybrid Broadcast Broadband TV) is a major new pan-European initiative aimed at harmonizing the broadcast and broadband delivery of entertainment to end consumers through connected TVs and set-top boxes. If the satellite TV service provider which you are subscribed to offers the interactive service, you can launch it at any time by pressing the RED button on the remote control while watching a TV program. -
Page 68: Watching Picture-In-Picture
Using the Basic Functions Watching Picture-In-Picture WatCHiNG piCturE-iN-piCturE Picture-In-Picture (PIP) functionality allows you watching services simultaneously from both tuners. After enabling this feature in menu settings you can activate it by pressing [PIP] button on the remote control. PIP shows up as a resizable popup window in the left corner of the display. -
Page 69: Using The Library
sing the Library This function launches the PVR contents list by using the [Library / Media] menu. Cyclic recordings can be browsed within their own folders. You may play a selected recording and browse through it using Rewind, Forward, Pause and Play. You can also delete selected recordings. -
Page 70: To Delete The Timer
Using the Library Contents & Timer list To delete the timer Select a timer by pressing the Yellow button on the remote control. Press the TOOLS button on the remote control. Select [Delete] on the pop-up window and press the v button on the remote control. To sort timers Press the TOOLS button on the remote control. -
Page 71: Media Play
edia Play Your STB can play the contents located on the USB devices. It is also possible to navigate through menus, selecting items, viewing information about items, browsing and playing/viewing an item. You can delete, copy, move, sort, select and deselect all items on the storage medium by pressing the TOOLS button and choosing an option from the list. -
Page 72: Controlling Playback
Media Play Controlling Playback CoNtrolliNG playBaCK You can control the playback of media file located on an external USB storage device. Depending on the contents, some of the functions described in this manual may not be available. • Press the p button on the remote control to pause or resume playback. • Press the @ button on the remote control to stop playback. -
Page 73: To Create A New Folder
Media Play Controlling Playback To create a new folder Press the TOOLS button on the remote control. Select [New Folder] on the pop-up window, and then press the v button on the remote control. Input the name of the new folder by using the ▲/▼/◀/▶ and v buttons on the remote control. Confirm with the [Save] button on the pop-up window. -
Page 74: Using The Dlna
Media Play Using the DLNA usiNG tHE dlNa DLNA functionality gives you to share digital contents between STB and other multimedia devices, control the contents remotely and render the contents by using external device e.g. phone. The STB supports DLNA Media Player and DLNA Media Renderer device profiles. -
Page 75: Network Configuration
Media Play Using the DLNA • Play files similarly to playback from USB or HDD. For more information about playback from USB or HDD, see 'Playing Files on a USB Device' on page 69. In the DLNA, Trick modes are not supported, audio jumps are limited to 15 second steps and files are not cached. -
Page 76: Appendix
Press the MENU button and then select [Settings] > [System] > [Reset to default settings] in another TV which supports 1080p. When the factory default settings are restored, all stored user data is deleted. Forgot password y Call the service center of Samsung Germany. - Samsung Germany Call center: 01806 7267864... - Page 77 Go to the table of contents and find the section of the user manual that contains the explanations regarding the current problem, and follow the procedure once again. y If the problem still cannot be solved, please contact your nearest Samsung authorized service center. - Samsung Germany Call center: 01806 7267864 Abnormal HDMI output screen.
-
Page 78: Specifications
Appendix Specifications spECiFiCatioNs Model Name USB port ▪ GX-SM650SJ ▪ USB 2.0 (1 rear panel, 1A / 1 front panel, 0.5A) Power General ▪ Power Consumption ▪ Net Weight: 0.6 Kg Power On: Max. 35 W ▪ Dimensions: 240 (W) x 30 (H) x 174 (D) mm Power Off: 0.5 W... -
Page 79: Licence
With a Sky CI Plus-Module and a CI+ capable Samsung STB you can receive Sky. The Sky CI Plus-Module is easy: just plug it together with your Sky Smartcard in the CI+ slot of your Samsung STB, GX-SM650SJ. No need for any... -
Page 80: Network Service Disclaimer
Samsung is neither responsible nor liable for customer service related to the content and services. Any question or request for service relating to the content or services should be made directly to the respective content and... -
Page 81: Allgemeine Geschäftsbedingungen Hd
Appendix Allgemeine Geschäftsbedingungen HD+ allGEMEiNE GEsCHäFtsBEdiNGuNGEN Hd+ Geltungsbereich, Vertragsgegenstand und HD+ Karte Diese allgemeinen Geschäftsbedingungen der HD PLUS GmbH mit Sitz in der Betastraße 1-10, 85774 Unterföhring („HDP“) gelten ausschließlich für den HD+ Service. HDP überlässt dem Nutzer nach Maßgabe dieser allgemeinen Geschäftsbedingungen den Besitz an einem Datenträger („HD+ Karte“). - Page 82 Appendix Allgemeine Geschäftsbedingungen HD+ Eine uneingeschränkte, vollumfängliche Nutzung des HD+ Services ist nur bei der Verwendung von HD+ zertifizierten Digitalempfängern möglich. Bei der Verwendung von Digitalempfängern ohne HD+ Zertifizierung kann es zu technischen Nutzungseinschränkungen des HD+ Services kommen, auch wenn HD+ zertifizierte Common-Interface-+ Empfangsmodule verwendet werden.
- Page 83 Appendix Allgemeine Geschäftsbedingungen HD+ Freistellung Der Nutzer haftet gegenüber HDP für die Einhaltung der in den Ziffern 4 und 5 aufgeführten Pflichten. Er stellt HDP von sämtlichen Ansprüchen Dritter frei, die infolge einer schuldhaften Verletzung dieser Pflichten und/oder schädigender Handlungen des Nutzers gegen HDP geltend gemacht werden und leistet Ersatz für darüber hinausgehende Schäden einschließlich der Kosten für eine eventuell erforderliche Rechtsverfolgung und -verteidigung.
- Page 84 Appendix Allgemeine Geschäftsbedingungen HD+ Haftung HDP haftet nur, soweit HDP, ihren Erfüllungsgehilfen und/oder gesetzlichen Vertretern ein vorsätzliches oder grob fahrlässiges Verhalten zur Last fällt. Bei leicht fahrlässig verursachten Schäden haftet HDP nur, wenn eine wesentliche Vertragspflicht verletzt wurde oder ein Fall des Verzugs oder der Unmöglichkeit vorliegt. In diesen Fällen ist die Haftung auf den typischen vorhersehbaren Schaden begrenzt.
-
Page 85: Limited Warranty To Original Purchaser
Antenna or Signal related external problems, such as broadcasting signal not available due to low signal power (not a problem of the Samsung box) and noise added signal from exterior. -
Page 86: Open Source License Notice
Appendix Open Source License Notice opEN sourCE liCENsE NotiCE Open Source used in this product can be found on the following webpage. (http://opensource.samsung.com) Open Source License Notice is written only English.