Table of Contents
Advertisement
Advertisement
Table of Contents

Related Manuals for NextBase 402g


Summary of Contents for NextBase 402g
- Page 1 Instruction Manual inc. Driving Recorder Player Software Installation Guide...
-
Page 3: Table Of Contents
TABLE OF CONTENTS PRECAUTIONS ........................... CAUTIONS ON USING THIS PRODUCT .................... PRODUCT SPECIFICATION ....................... PACKAGE CONTENTS ........................PRODUCT FEATURES ........................PARTS & CONTROLS ............................IN VEHICLE INSTALLATION ....................... VIDEO MODE ............................PHOTO MODE ............................ PLAYBACK MODE VIDEO PLAYBACK .......................... PHOTO PLAYBACK ........................ -
Page 4: Precautions
PRECAUTIONS Please read this manual carefully before operation and keep it for future reference. It will be helpful should you encounter any operational problem. WARNING: Do not expose this product to rain, moisture or water under any circumstances, doing so may result in the risk of electric shock of fire. -
Page 5: Product Specification
PRODUCT SPECIFICATION Model Number / Name NBDVR402G / NEXTBASE iN-CAR CAM 402G PROFESSIONAL Power Requirements 5V / 600mA Power Supply 12-24Vdc Car Power Cable (supplied) Fuse Type: 20mm Glass Fast Blow 2A Output: 5Vdc Sensor Resolution 3M Pixel (3,000,000 Pixel) Lens Type / Angle / Aperture 6G / 140°... -
Page 6: Package Contents
NBDVR402-Q-F-A0 Product appearance may differ slightly to that shown above. PRODUCT FEATURES Thank you for purchasing this NEXTBASE iN-CAR CAM product, in this section we will outline some of the features available with this device. 2.7" 16:9 LCD Colour Screen Large screen for ease of use and viewing the playback of recorded videos and photos. -
Page 7: Parts & Controls
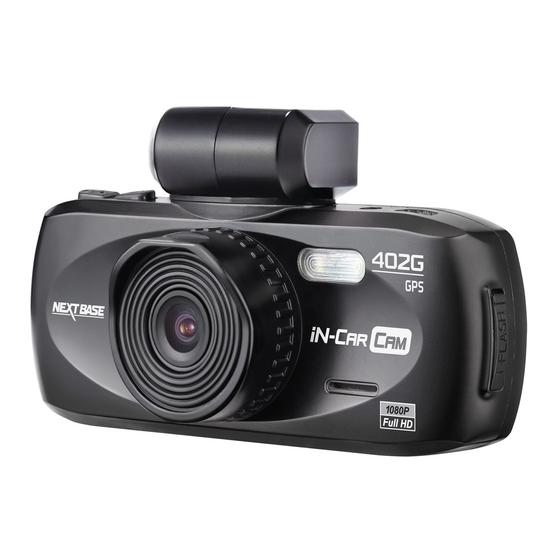
PARTS & CONTROLS 16 17 19 20 1. MEMORY CARD SLOT (under dust cover) 7. LED INDICATOR Insert MicroSD memory card here. Car adaptor connected and iN-CAR CAM switched on: 2. LENS PURPLE = Battery charging RED = Battery charged 3. - Page 8 PARTS & CONTROLS (CONTD.) 16 17 19 20 9. SOS FILE PROTECTION 15. MODE ‘One touch button’ to protect current recording Press to select: Video / Photo / Playback in the event of an emergency situation. modes. 10. MICROPHONE 16. MINI USB 2.0 SOCKET Connect car power cable / USB cable here.
-
Page 9: In Vehicle Installation
IN VEHICLE INSTALLATION 12-24V DC The above diagram is for illustration purposes only. 1. Open dust cover and insert a suitable memory card in to the iN-CAR CAM, taking care to follow correct orientation markings (gold contacts facing the back of the device). Push the memory card until it clicks into place and close dust cover. - Page 10 IN VEHICLE INSTALLATION (CONTD.) Please read and follow the notes below for the safe operation of your iN-CAR CAM within your vehicle. As per the installation instructions, it is advised to install the iN-CAR CAM so it does NOT obstruct the drivers view of the road, preferably on the passenger side of the vehicle and behind the rear view mirror.
-
Page 11: Video Mode
VIDEO MODE The key below explains the various information displayed on the screen when your iN-CAR CAM is in Video mode, some icons will only be displayed once the relevant function has been selected within the Video menu, as described further down this page. 1080P 00:00:00 1. -
Page 12: Photo Mode
PHOTO MODE The key below explains the various information displayed on the screen when your iN-CAR CAM is in Photo mode, some icons will only be displayed once the relevant function has been selected within the Photo menu, as described further down this page. AUTO 1. -
Page 13: Playback Mode
PLAYBACK MODE The iN-CAR CAM can display Videos and Photos stored upon the SD card when in Playback Mode. The displays for video and photo playback differ slightly, please refer to the relevant section. VIDEO PLAYBACK When a video is detected upon the SD Card, the screen below is shown. The key below explains the various information displayed on the screen, during video playback and how to use the control buttons. -
Page 14: Photo Playback
PLAYBACK MODE (CONTD.) PHOTO PLAYBACK When a photo is detected upon the SD Card, then the screen below is shown. The key below explains the various information displayed on the screen, during photo playback. 100-0001 2592x1944 01/01/13 12:34 1. Photo Playback Icon: Indicates the iN-CAR CAM is displaying a photo in the Playback mode. 2. -
Page 15: Menus And Settings
MENUS AND SETTINGS Each mode (Video, Photo and Playback) has a menu used to access the various options and settings, press the MENU button on the rear of the device to access the menu, specific to the current mode selected. Note: Menus are not accessible whilst the iN-CAR CAM is recording, stop recording prior to pressing the ‘MENU’... - Page 16 MENUS AND SETTINGS (CONTD.) 1.12 Compass When turned on, the screen will display current speed and a compass after the selected period of time, press any button to return to normal viewing, this function is only available when a GPS connection is present.
-
Page 17: Photo Mode
MENUS AND SETTINGS (CONTD.) 2. PHOTO MODE 2.1 Image Size Select image size, this will increase or decrease the size of the recorded image Default Setting: 5M 2.2 Colour Adjust the colour effect of the recorded image. Default Setting: Normal 2.3 Anti-Shaking Turn On / Off the anti-shaking feature, may help reduce image being blurred. -
Page 18: Setup Menu
MENUS AND SETTINGS (CONTD.) 4. SETUP MENU There is also a Setup menu for the general settings, press the MENU button twice on the rear of the device to access the menu. The options and settings available are described below. 4.1 Format Format the inserted memory card, this will delete all content. -
Page 19: Pc Connection
PC CONNECTION Connecting the iN-CAR CAM to a Windows based PC using the supplied USB Cable will automatically trigger the iN-CAR CAM to display the two options of: · · Mass Storage PC Camera Use the UP and DOWN buttons to select preferred option and OK to confirm. Mass Storage If Mass Storage is selected, the iN-CAR CAM screen will show the words ‘Mass Storage’... -
Page 20: Video & Audio Output
· The controls upon the iN-CAR CAM operate normally. Please contact your local NEXTBASE dealer for accessory purchases. Note: - An external power supply may be required when viewing recordings via the AV or HD output of the iN-CAR CAM, e.g. -
Page 21: Driving Recorder Player For Windows
Note: The instruction manual, installation guide and installation files are all available for download from the Nextbase website: www.nextbase.co.uk, if required. Should you experience any difficulties during installation please do not hesitate to call our English speaking technical support team on +44 (0)2920 866429,... -
Page 22: Installation
DRIVING RECORDER PLAYER FOR WINDOWS (CONTD.) INSTALLATION: Open the ‘NBDVR402G Driving Recorder Player for Windows' folder and then open the folder with required version based upon your preferred speed units (MPH or KMH). Run the ‘setup.exe’, for some operating systems a security warning may appear, click ‘RUN’ to proceed. To install this application software you need to have 'Microsoft.NET Framework 4.0 Client' installed upon your PC. - Page 23 DRIVING RECORDER PLAYER FOR WINDOWS (CONTD.) If your PC already had 'Microsoft.NET Framework 4.0 Client' installed then the 'Welcome to the InstallShield ….' window will open, as shown below. Press 'Next' to continue, the 'License Agreement' window will open, as shown below. Check the 'Accept' button and press 'Next' to proceed.
- Page 24 DRIVING RECORDER PLAYER FOR WINDOWS (CONTD.) The 'Destination Folder window will open, ’ as shown below. Choose a destination folder should you not want files saved to the default folder within the Program Files directory. Press 'Next' to proceed, the 'Ready to Install the Program' window will open, as shown below. Click ‘Install’...
- Page 25 DRIVING RECORDER PLAYER FOR WINDOWS (CONTD.) The 'Installing Driving Recorder Player' window will open. During installation the status window will be on screen, as shown below. Once installation is complete the 'InstallShield Wizard Completed' window will open, as shown below. Installation now is complete, press 'Finish' to close the InstallShield Wizard window.
-
Page 26: Using The Driving Recorder Player
CAM to your PC and use these for playback. - Early Windows operating systems may require installation of video codec software to enable video playback. Please visit http://www.nextbase.co.uk to download the 'PC Codec Pack (PC version)', installation instructions are also available within the downloaded file. -
Page 27: Features & Controls
DRIVING RECORDER PLAYER FOR WINDOWS (CONTD.) FEATURES & CONTROLS The key below explains the various information displayed within the Driving Recorder Player when using a Windows platform. 13/08/2013 14:08:44 NBDVR402G AB12 3456 29MPH N 51 35 32.72 W 3 58 16.93 X: -0.03 Y: -1.06 Z: 0.16... - Page 28 DRIVING RECORDER PLAYER FOR WINDOWS (CONTD.) 10. Driving Recorder Player controls Screen Capture, this will create a still image for each frame of the image seen within the playback window. Open screen capture folder. Browse for files stored on your computer. Open settings window, adjust language and unit of speed.
-
Page 29: Driving Recorder Player For Mac
- NBDVR402G Driving Recorder Player for Windows - NBDVR402G Driving Recorder Player for Mac Note: The instruction manual and installation files are all available for download from the Nextbase website: www.nextbase.co.uk, if required. Should you experience any difficulties during installation please do not hesitate to call our English speaking technical support team on +44 (0)2920 866429, lines are open during normal business operating hours: 09:00-17:30hrs. -
Page 30: Installation
Alternatively, once the required Driving Recorder Player software has been downloaded from the Nextbase website open the 'Downloads' folder on your Mac. The software is saved in a compressed (.zip) folder, free de- compression applications are readily available, for example 'The Unarchiver' available from the Mac Appstore. - Page 31 DRIVING RECORDER PLAYER FOR MAC (CONTD.) The Driving Recorder Player 'volume' can now be ejected, right-click, select Eject 'Driving Recorder Player” and right-click once more, see image below. The 'Driving Recorder Player' can also be found within the Applications List, see below. At this point may also want to drag a copy onto your desktop, this can then be used as a desktop shortcut or placed on your Dock.
-
Page 32: Using The Driving Recorder Player
DRIVING RECORDER PLAYER FOR MAC (CONTD.) USING THE DRIVING RECORDER PLAYER: Connect the iN-CAR CAM to your Mac using the supplied USB cable and select Mass Storage by pressing ‘OK’ on your iN-CAR CAM. Alternatively remove the MicroSD Card from your iN-CAR CAM and using a suitable MicroSD adaptor insert it directly to the card reader on your mac. -
Page 33: Features & Controls
FILE INFO Locked: Date: 2013-08-06 17:18:14 Location: /Users/David/Desktop/402G - videos/17150019.MOV REMOVE 1. Playback window of selected video file View current video. 2. Date / Time / Model / Vehicle Registration / Speed / GPS Co-ordinates Stamp Data saved to the recorded file, this content will vary depending iN-CAR CAM settings and GPS signal. - Page 34 13/08/2013 14:08:44 NBDVR402G AB12 3456 29MPH N 51 35 32.72 W 3 58 16.93 FILE INFO Locked: Date: 2013-08-06 17:18:14 Location: /Users/David/Desktop/402G - videos/17150019.MOV REMOVE 10. Screen Capture Screen Capture, this will create a still image for each frame of image within the playback window. Open screen capture folder to view images.
-
Page 35: Troubling Shooting
PC, as this may be required for the necessary driver to be loaded correctly. Disconnect and reconnect the In-CAR CAM. Contact NEXTBASE for the required driver. The sucker will not stay in Ensure that the protective cover (plastic film) has been removed place upon my windscreen. - Page 36 TROUBLE SHOOTING (CONTD.) PROBLEM SOLUTION My iN-CAR CAM shuts down Either the battery has gone flat, or there is no power to the by itself after a while. iN-CAR CAM and the AutoPower Off period (which is in the SETUP menu) has been triggered. No power to my iN-CAR CAM, The cigarette power cable is not working.
- Page 37 Correct. Adjust the time manually within the SETUP menu. iN-CAR CAM do not adjust for Daylight Savings time. Unresolved issues. Reset the iN-CAR CAM to the default settings within the Setup Menu and try again. Should the problem persist call the helpline (02920) 866429 or email: support@nextbase.co.uk...
- Page 38 NOTES...
- Page 40 NBDVR402G-IM-ENG-R06...
Need help?
Do you have a question about the 402g and is the answer not in the manual?
Questions and answers