3D Systems CubePro User Manual
Prosumer 3d printer
Hide thumbs
Also See for CubePro:
- User manual (89 pages) ,
- Replacement manual (52 pages) ,
- Repair manual (40 pages)
Table of Contents
Advertisement
Quick Links
Advertisement
Table of Contents

Related Manuals for 3D Systems CubePro


Summary of Contents for 3D Systems CubePro
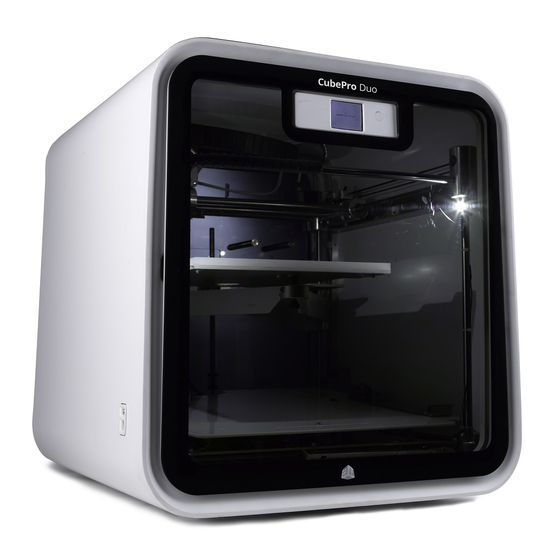
- Page 1 CubePro ™ Prosumer 3D Printer User Guide Original Instructions...
-
Page 2: Table Of Contents
Home Tab . . . . . . . . . . . . . . . . . . . . . . . . . . . . . . . . . . . . . . . . . . . . . . . . . . . . . . . . . . . . . . . . . . . . . . . . . . . . . . . . . . . . . . . . . 35 3D Systems, Inc. - Page 3 Contacting Support . . . . . . . . . . . . . . . . . . . . . . . . . . . . . . . . . . . . . . . . . . . . . . . . . . . . . . . . . . . . . . . . . . . . . . . . . . . . . . . . . 80 3D Systems, Inc.
- Page 4 CUBIFY SUSTAINABILITY PROGRAM . . . . . . . . . . . . . . . . . . . . . . . . . . . . . . . . . . . . . . . . . . . . . . . . . . . . . . . . . . . . . . . . . . . . . 81 3D Systems, Inc.
-
Page 5: Introduction
3D Systems, Inc . Cubify, and the 3D Systems logo are registered trademarks of 3D Systems, Inc . CubePro is a trademark of 3D Systems, Inc . Use of the Cubify .com website constitutes acceptance of its Terms of Service and Privacy Policy . -
Page 6: Warranty
CubePro 3D Printer . The warranty period for the CubePro 3D printer is the shorter of (i) 90 days from the date your CubePro 3D printer is activated or (ii) 24 months after the CubePro 3D Printer is shipped from 3D Systems to the end customer or intermediary . -
Page 7: Important Safety Information
To ensure safety, please exercise caution when operating your CubePro . Read and follow all safety precautions as outlined in this user guide . Be careful when operating your CubePro to ensure proper printing and be mindful of and avoid hot surfaces . -
Page 8: Cubepro 3D Printer Features And Benefits
CUBEPRO 3D PRINTER FEATURES AND BENEFITS The CubePro 3D printer prints the model by pulling material from the cartridge through the print jets via the delivery tubes . The material is then jetted through the print jet in a thin string of molten material . The print jet movement is coordinated by the print plate, which lowers incrementally after each layer is deposited so a new layer can be drawn on top of the last, building the part up . -
Page 9: At A Glance
Get acquainted with your CubePro 3D printer before you begin printing. This section identifies the important areas that will be discussed throughout this guide . CubePro Trio is depicted for illustration purposes only . Locations of important areas are the same for the CubePro and CubePro Duo . Removable Top Cover... - Page 10 NOTE: The following image illustrates the second and third cartridge bays of a CubePro Trio . View From Top Material Tube Clamp Rollers Cartridge Recognition Connections Material Cartridge Bay 2 Hinge Material Cartridge Mount Rings Material Cartridge Bay 2 Material Cartridge Bay 3...
-
Page 11: Specifications And Requirements
System RAM - 2GB • Screen resolution - 1024 x 768 dpi SOFTWARE • CubePro Client Software - Available at www .cubify .com . ELECTRICAL REQUIREMENTS • 100-240V AC 50-60 Hz auto switching, 6A MATERIAL STORAGE Although all polymers degrade with time, the following conditions help ensure the quality of the material: •... -
Page 12: Unpacking And Setting Up Your Cubepro
UNPACKING AND SETTING UP YOUR CUBEPRO CONTENTS CubePro printer Material cartridge* Cube® Glue (x2) Print pad Jet Wiper Power cord Cubify Invent License Toolkit USB Stick Code Wire Cutters Needle Nose Wrench Print Pad Cleaner Hex Drivers T-Handle Sandpaper Pliers... -
Page 13: Unpacking And Setting Up Your Cubepro
NOTE: Ensure that you save all foam and packing material for the future repacking of your CubePro . Transporting the printer without original packing materials may damage the printer . - Page 14 Pull the protective bag down around the printer and remove the printer assembly from the lower foam support . Position the printer where it will be used . NOTE: Ensure the printer is placed in a location where its size and weight will be properly supported . 3D Systems, Inc.
- Page 15 . Do not attempt to remove the door from the printer . 11 . Loosen and remove the four (4) 4mm screws securing the Z-Axis guard and remove the guard . Save the guard and screws for future repacking . 3D Systems, Inc.
- Page 16 16 . Remove the print pad from the box and place it onto the print platform with the round magnet on the bottom of the pad inserted into the triangular opening on the platform . Ensure the print pad is securely seated on the print plate . 3D Systems, Inc.
- Page 17 . Press the power on/off switch (A) to power on the CubePro . 18 . Press the on/off button (A) beside the LED screen to power on the CubePro touchscreen display .
-
Page 18: Setup And Activate Your Cubepro
. Press the letters to select them . Select the checkmark to continue . If you do not wish to name your CubePro, press SKIP to move to the next screen and continue with step 4 . - Page 19 . If you have not activated an account, select SIGN UP enter the appropriate information . Navigate to www .cubify .com/en/CubePro/Activate . NOTE: The serial number of your printer will appear on the printer’s touchscreen display . Take note of the serial number . You will need it to activate your printer .
- Page 20 NOTE: If the wrong activation code was entered, select RETRY enter the activation code again . 10 . Select the checkmark to complete the activation process . Your printer is now ready to print a creation . 3D Systems, Inc.
- Page 21 . 15 . Insert the print material under the cartridge clamp roller of cartridge bay 1 and into the material tube . Select the checkmark to continue . 3D Systems, Inc.
- Page 22 18 . To continue with the test print, select PRINT . NOTE: If the test print file uses a color that is not installed in the printer, select the checkmark to enable the printer to change the color of the print to a color currently installed . 3D Systems, Inc.
- Page 23 NOTE: Print jet 1 will begin to heat . NOTE: The printer will begin printing the welcome message test print . 20 . Select the checkmark to continue to go to the main menu . NOTE: Please wait while the print jet cools . 3D Systems, Inc.
-
Page 24: Touchscreen Display
PRINT allows the user to print a creation stored either on a USB mass storage device or from the CubePro software . You can invent your own creation by using Cubify Invent software available at www .cubify .com . SETUP allows the user to configure the printer, connect to a wireless or ad hoc network, install cartridges, or view the printer status . - Page 25 . LIGHT allows the user to turn on or off the print jet LEDs . The other interior LEDs are managed by the firmware when the CubePro is powered on. Advanced Selecting the...
-
Page 26: Installing A Material Cartridge
SETUP menu . Select the cartridge to be installed . NOTE: The print jet will begin to heat . Open the packaging and remove the thumbscrew from the new cartridge . Select the checkmark to continue . 3D Systems, Inc. - Page 27 Gently push the print material into the print jet until print material extrudes into checkmark the jet wiper . Select the to continue . NOTE: When the material reaches far enough into the print jet area, a motor will assist with feeding the material into the print jet . 3D Systems, Inc.
- Page 28 . NOTE: The print pad must be calibrated before printing your first creation . For more information, refer to the following section titled Calibrate Print Pad . 3D Systems, Inc.
-
Page 29: Printing Your Creation
There are many 3D creations available at www .cubify .com . In addition, you can create your own with the included Cubify Invent software. For more information about converting a .stl file into a .cubepro file which the printer can use, refer to the section titled CubePro Software . - Page 30 . You can also change the cartridge by selecting BACK and following the CHANGE CARTRIDGE instructions . To change the cartridge, refer to the section titled Replacing A Material Cartridge . 3D Systems, Inc.
- Page 31 CAUTION: Do not touch the print jets until they have cooled to room temperature . NOTE: The blue bar at the top is a progress indicator . Select PAUSE to temporarily stop printing . Select CANCEL if you wish to cancel the print job . 3D Systems, Inc.
- Page 32 CAUTION: Do not touch the print jets until they have cooled to room temperature . Refer to the section Finishing Your Creation for information about removing your creation from the print pad and the procedure for cleaning the creation and the print pad . 3D Systems, Inc.
-
Page 33: Finishing Your Creation
Removing Rafts A raft is the flat support structure that is attached to the base of your creation if you enabled that option when building the .cubepro file. Though it is recommended that printing be done without a raft, some larger, more complicated parts may require one . -
Page 34: Removing Supports - Optional Ultrasonic Support Removal Tank
After the model has been thoroughly washed, the PLA support material should easily crumble away . NOTE: A blunt knife can be used to scrape the support away from the model. Additional rinsing may help flush remaining support material fragments from the model . 3D Systems, Inc. -
Page 35: Caustic Soda Method
. 11 . Empty the caustic solution from the Ultrasonic Support Removal Tank . NOTE: It is safe to pour it in the sink as caustic soda can be used as a drain cleaner . 3D Systems, Inc. - Page 36 . 16 . Once the ultrasonic process has completed the second time, use plastic tongs to remove the model from the ultrasonic tank . 17 . Rinse it under cold water for 1 to 2 minutes . 3D Systems, Inc.
-
Page 37: Cubepro Software
CUBEPRO SOFTWARE CubePro software is an easy-to-use tool that simplifies the printing process. The software is available by logging in to your www .cubify . account . Downloads are available for Windows and Mac operating systems . INSTALLING WINDOWS SOFTWARE Go to www .cubify .com... -
Page 38: Installing Mac Software
. Navigate to www .cubify .com/en/CubePro/Activate . Select DOWNLOAD SOFTWARE and then select Mac . Select the Downloads icon on the Dock and select the CubePro .dmg file. Drag the CubePro file into the Applications folder. 3D Systems, Inc. -
Page 39: Cubepro Software Overview
Before the printer can print a file, the software must slice it into layers during the build process. This process converts a .stl file to a .cubepro file which is the file type the printer can print. Once a .cubepro file has been generated, this print file can no longer be edited although the original .stl file can be used again to create another .cubepro file. -
Page 40: Cad File Functions
Enter the scale percentage Field the Z axis by the specified value. Scale the 3D model to the Undo the applied rotation and Revert - to mm millimeter value entered in the revert to the original position . field. 3D Systems, Inc. -
Page 41: Color, Build, Print File And Help
Contains Zoom, View and Print side of the model View Tab Path tools Select the button to view the right Right View Fit the model to the center of the side of the model Fit to Window window . 3D Systems, Inc. -
Page 42: Print Paths
Printer Set the printer type, number of Firmware Update the printer firmware. Configuration print jets and printer materials Update Printer Setup a wireless connection with Connection the printer 3D Systems, Inc. -
Page 43: Printer Configuration
Select the type and color of Set the number of print jets in your Print Jets Material material installed in cartridge bay 2 printer Print Jet 3 Select the type and color of Material material installed in cartridge bay 3 3D Systems, Inc. -
Page 44: Build Settings
Adjustments to print pattern fill and Advanced Resolution part the creation shell The strength of the inner structure Print Strength Help Opens the help menu of a creation The design of the inner structure of Print Pattern a creation 3D Systems, Inc. -
Page 45: Descriptions
Best for parts that will be stressed Print Pattern Lines • Fastest print fill pattern • Minimal cross bracing Diamonds • Strong print pattern with 2-direction cross bracing Honeycomb • Strong print pattern with 3-direction cross bracing 3D Systems, Inc. - Page 46 Options as well as enabling or disabling Support Borders or Draw Fine Features . Print Pattern Fill Fill Spacing is the amount of space between interior supports . Lower values increase the interior strength of the creation . 3D Systems, Inc.
- Page 47 Support borders (A) reinforce supports (B) for overhanging parts and should not be used for holes and cavities (C) . Draw Fine Features Select enable for small parts with fine features. For larger parts needing more accuracy, this feature should not be enabled. 3D Systems, Inc.
- Page 48 Set the number of layers that will be printed . Sidewalk Offset Set the distance between the part and the sidewalk . Enabling this option will create a perforated intersecting line at the border of the part for easier Sidewalk Perforation removal . 3D Systems, Inc.
-
Page 49: Firmware Update
Firmware Update How to Update Firmware Instructions for updating firmware in your CubePro Download Firmware Download firmware to a mass storage device Printer Connection Printer Select Select the printer connection Discover Find an applicable printer on the network Add a printer using the printer’s IP address... -
Page 50: Preparing And Printing A Creation
CAUTION: Do not change the material cartridge color or material type during printing . Doing so may damage the printer . The CubePro software client includes useful tools to place a creation in the optimum position for printing . The model can be moved or rotated using the mouse . - Page 51 View Tab for more information . 10 . Browse to the location where the file will be saved and enter a file name. Select CubePro Build Files as Save As Type . Select Save . 3D Systems, Inc.
- Page 52 NOTE: The build file may take a few minutes to create. During this time, the file is being converted from a .stl file to a .cubepro file. NOTE: Once the build is complete, the estimated print time will appear . Select to close the window .
-
Page 53: Operation Procedures
Apply a thin layer of glue to the print pad: Layer 2 Apply a second thin layer of glue to the print pad in the opposite direction: NOTE: For best results, allow the glue to dry before printing . 3D Systems, Inc. -
Page 54: Replacing A Material Cartridge
REPLACING A MATERIAL CARTRIDGE The CubePro can utilize up to three installed cartridges depending on your printer model . The creation you wish to print may require a different color or material, or there may not be enough material left in the cartridge to complete your next print . Refer to the following steps to replace material cartridges . - Page 55 CAUTION: Do not attempt to push the excess material back into the cartridge . Doing so will cause the cartridge to bind making it unusable . Remove the thumbscrew securing the material to the new material cartridge . checkmark Select the to continue . 3D Systems, Inc.
- Page 56 11 . Gently push the material into the print jet until molten plastic extrudes into the jet checkmark wiper . Select the to continue . NOTE: When the material reaches far enough into the print jet area, a feed motor will assist with feeding the material into the print jet . 3D Systems, Inc.
- Page 57 . CAUTION: If replacing the third cartridge, be sure to rotate the second bay cartridge to its vertical position before selecting the checkmark . 3D Systems, Inc.
-
Page 58: Setting Up An Ad Hoc Network
Using either the left or right the navigation arrows, navigate to the Network screen . Select WIFI . ADHOC Select from the Select WIFI Connection Type screen . Select the ON/OFF bar to turn on the ad hoc network connection . 3D Systems, Inc. - Page 59 10 . Select Set up a new connection or network . 11 . Select Set up a wireless ad hoc (computer-to-computer) network . 12 . Select Next . 13 . Follow the steps in the wizard . 3D Systems, Inc.
-
Page 60: Cubepro Maintenance
Printer Setup Remove the waste material from the jet wiper and then reinstall it in the CubePro . Refer to the section titled more information about installing the jet wiper . Recycling information can be found in the section titled Cubify Sustainability Program . -
Page 61: General Cleaning
Waste material from the printing process can accumulate inside the printer . Using a slightly damp, lint-free cloth, wipe the interior of the CubePro including the print plate, the print pad, cartridge bays and anywhere else you might find pieces of plastic waste material. - Page 62 If the wiper tip is too low, remove the jet wiper assembly and turn the adjustment thumbscrew (A) counter-clockwise . Reinstall the jet wiper and return to step 5 . Once satisfied with the adjustment, you may connect your printer to utility power and power on the printer . 3D Systems, Inc.
-
Page 63: Calibrating The Print Pad
. NOTE: If the paper can not be inserted between the print jets and the print pad, turn the adjustment knob clockwise (from the bottom) until there is a slight resistance on the paper . 3D Systems, Inc. - Page 64 NOTE: If the paper can not be inserted between the print jets and the print pad, turn the adjustment knob clockwise (from the bottom) until there is a slight resistance on the paper . 11 . Once completed, select the checkmark to exit the utility . 3D Systems, Inc.
-
Page 65: Calibrating The Z-Gap And Print Pad Level
Z-Gap - The Z-Gap is the distance between the print pad and the print jet nozzles . Print Pad Level - The Print Pad Level is a measurement to determine if the print pad is level with the print jet nozzles . 3D Systems, Inc. -
Page 66: Printing The Level Gap Calibration File
Printing the Level Gap Calibration File NOTE: Ensure the print pad is completely clean from glue and printed parts before beginning this procedure . Navigate to http://cubify .com/en/CubePro/Activate . Select CALIBRATION FILES and extract them to your computer’s hard drive . -
Page 67: Adjustment Knob Measurement
Acceptable Print Pattern The Print Pad Level calibration file should print with no gap between the Print Pad Level calibration lines and the baselines . The illustration indicates No Gap an acceptable print pattern from a profile view. 3D Systems, Inc. -
Page 68: Reading The Z-Gap Calibration Print
NOTE: The Closed Z-Gap (A) and the Open Z-Gap (B) are two different measurements but should be read together . Correct Closed Z-Gap Referring to the illustration, the Closed Z-Gap bars (B) should touch the baseline (A) . 3D Systems, Inc. - Page 69 If they touch on the second print, adjust all three (3) print pad adjustment knobs clockwise (right) 1-step and reprint the file. Continue this procedure until there is a gap . 3D Systems, Inc.
-
Page 70: Calibrating The Offset Jets
Calibration files can be downloaded from http://cubify .com/en/CubePro/Activate. These files are printed like any other .cubepro file. There are four files available. The files are specific for the model printer (CubePro Duo or CubePro Trio) and for the material type (ABS or PLA) currently installed in the printer . -
Page 71: Reading The Offset Jets Scale
(left) direction. Compare the lines of print jet 1 and 3 to the left of the center arrows and find the printed lines that are properly aligned, In this illustration, the lines at -0 .3 are aligned . This means that the offset must be corrected by decreasing the offset by .3 mm . 3D Systems, Inc. -
Page 72: Offset Jets Calibration Procedure
Navigate to the file location and copy the appropriate Nozzle Offset Calibration file to your USB mass storage device. NOTE: The Nozzle Offset Calibration files are specific for the model printer (CubePro Duo or CubePro Trio) and for the material type (ABS or PLA) currently installed in the printer . - Page 73 Insert the mass storage device into the CubePro USB inlet port and select PRINT . Navigate to the calibration file and select PRINT . NOTE: The filename may differ from the illustration. NOTE: The printer may require you to install additional cartridges or replace a cartridge .
- Page 74 12 . Once finished adjusting the settings, select the checkmark to continue. 13 . Remove the original calibration print from the print pad . Reprint the calibration file and verify that the arrows align properly on the X-axis and Y-axis. 3D Systems, Inc.
-
Page 75: Calibrating The Wipe Function
JETS function from the Print Jet Calibration menu is a utility that enables you to test the print jet heating elements and the extruder operation . Print Jet Calibration CONTROL JETS . Navigate to the screen and select 3D Systems, Inc. - Page 76 0 .0°C . You can now select the next print jet and follow this procedure if necessary . NOTE: Pressing the values twice for target temperature and speed should change the values to 0 .0 . For further troubleshooting, contact Cubify Support at cubifysupport@cubify .com . 3D Systems, Inc.
-
Page 77: Moving The Print Jets
. NOTE: The Z: up arrow raises the print pad and the Z: down arrow lowers the print pad . checkmark Move the print jets or print pad in the desired direction and select the when finished. 3D Systems, Inc. -
Page 78: Updating The Cubepro Firmware
UPDATING THE CUBEPRO FIRMWARE The CubePro firmware can either be updated via wireless connection or by using a USB mass storage device. When using a USB mass storage device to update the firmware, log into your www.cubify.com account and download the latest firmware to your device. -
Page 79: Updating Firmware Using Wi-Fi
Press and release the touchscreen display ON/OFF button and the display will restart . Updating Firmware Using WI-FI To update the firmware using the wireless utility, the printer must be connected to a wireless network. Select SETUP . 3D Systems, Inc. - Page 80 NOTE: If the printer can not connect to the server, select RETRY connect to the server . Select CANCEL if you do not want to update the firmware. NOTE: The printer will check for a firmware update. 3D Systems, Inc.
- Page 81 NOTE: This process could take a few minutes . WARNING: DO NOT POWER OFF OR DISCONNECT THE PRINTER FROM UTILITY POWER DURING THE UPDATE PROCESS . ON/OFF button Press and release the touchscreen display and the display will restart . 3D Systems, Inc.
-
Page 82: Replacing Fuses
Remove the fuse cartridge from the power inlet housing . Remove the defective fuses and install new ones . Caution: Ensure the replacement fuses are rated correctly . NOTE: Fuse: 5x20mm T10A L 250V . Insert the fuse cartridge into the power inlet housing . 3D Systems, Inc. -
Page 83: Lubricating The Bearing Rods
NOTE: Ensure each bearing rod has been fully treated with a thin layer of bearing rod grease . Manually move the print jet carriage (A) front-to-back and left- to-right . NOTE: The print jet carriage should glide smoothly . Front 3D Systems, Inc. -
Page 84: Error Codes
The rate of temperature increase is below the expected rate of change Set point deviation • The temperature is different from the target temperature For more information, contact Cubify Support . CONTACTING SUPPORT Cubify Support is available at cubifysupport@cubify .com . 3D Systems, Inc. - Page 85 CubePro 3D printers use eco-friendly plastics that can be recycled, re-purposed or composted responsibly . 3D Systems invites all CubePro and Cubify consumers to partner in creating a cleaner world, one printed part at a time, by participating in the Cubify Sustainability Program .
- Page 86 3D Systems, Inc . 333 Three D Systems Circle | Rock Hill, SC | 29730 www .3dsystems .com ©2015 3D Systems, Inc . All rights reserved . PN: 403163-00-EN Rev . D...
Need help?
Do you have a question about the CubePro and is the answer not in the manual?
Questions and answers