
Related Manuals for The Singing Machine iSM1060BT


Summary of Contents for The Singing Machine iSM1060BT
- Page 1 INSTRUCTION MANUAL www.singingmachine.com The Singing Machine® is a registered trademark of The Singing Machine Co., Inc.
- Page 2 Warnings WARNING: TO PREVENT FIRE OR SHOCK HAZARD, DO NOT EXPOSE CAUTION THIS UNIT TO RAIN OR MOISTURE. RISK OF ELECTRIC SHOCK FCC WARNING: This equipment may generate or use radio frequency DO NOT OPEN energy. Changes or modifications to this equipment may cause harmful interference unless the modifications are expressly approved in the CAUTION: TO REDUCE THE RISK OF ELECTRIC SHOCK, DO NOT instruction manual.
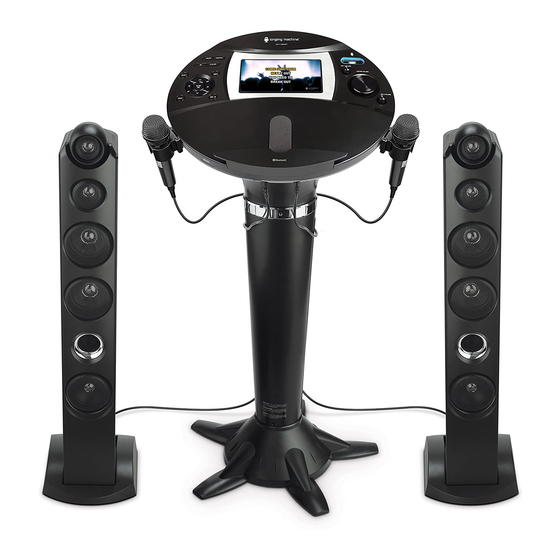
- Page 3 Included Please make sure the following items are included. iSM1060BT Base Wired Microphone x 2 Tower Speaker x 2 Pedestal Detachable Mic Holder x 2 Singing Machine Flash Drive Foot Screw x 10 Foot x 5 Speaker Stand Screw x 4...
- Page 4 Installation Turn the stand upside down and insert the feet as shown. Insert and tighten the two black foot screws as illustrated for all for all 4 feet. Repeat this step for the remaining four feet. Insert the pedestal into the stand u and then gently rotate clockwise v until tight, making sure the screw hole in the Pedestal aligns with the screw...
- Page 5 Installation Install the power cord clips into areas u and v and secure them using the two black clamp screws. Then align the power cord securely under the clamps. Insert the base into the pedestal u and then gently rotate clockwise v until the screw hole on the base aligns with the screw hole on the pedestal.
- Page 6 Installation Place the tower speaker on to the speaker stand aligning the screw holes on both the speaker and stand, then insert and tighten the black screws through the bottom of the base. — 5 —...
- Page 7 Location of Controls (Top/Front) 1. TFT LCD Color Screen 14. RECORD Button 2. FUNCTION Button 15. MIC 1 Holder 3. BLUETOOTH Pairing Button 16. SD Card Slot (for Record only) 4. ON/OFF Button 17. MIC 1 Jack 5. VOCAL Button 18.
- Page 8 Location of Controls (Rear) 1. Right Tower Speaker Jack 4. HDMI Jack 2. Left Tower Speaker Jack 5. LINE IN Jack 3. AC Power Cord Location of Controls (Playback Display) Song Total Time Song Title Song Current Elapsed Time Playlist Lead Vocal Status Playback Status Record...
- Page 9 Connecting the Tower Speakers To protect the speakers, make sure the iSM1060BT is off and the MASTER VOLUME and the MIC 1 and 2 VOLUME controls are set to minimum. Connect the Right and Left Tower Speakers to the jacks on back of the unit as illustrated.
- Page 10 Connection Connecting the Unit to a TV The video and lyrics will be displayed on the built-in screen. You may also want to connect a TV to display a larger image and additional sound; follow the steps below: Rear of External TV HDMI Jack (Out) Plug the HDMI cable (not Rear of External TV...
- Page 11 Drive which is used for storing Karaoke songs as well as recordings from this unit. There are two songs included on the Singing Machine USB Flash Drive but you can access the Karaoke Store for many more songs. Just follow the Welcome...
- Page 12 The Karaoke Store application can be installed on Microsoft Windows computers running Vista, Windows 7 and Windows 8 or higher. The Karaoke Store application requires connection to the Internet (a high-speed connection is recommended). Insert the Singing Machine USB Flash Drive into a powered USB slot on your computer.
- Page 13 The Karaoke Store application can be installed on Apple Macintosh computers running OS X 10.8 and higher. The Karaoke Store application requires connection to the Internet (a high- speed connection is recommended). Insert the Singing Machine USB Flash Drive into a powered USB slot on your computer.
- Page 14 USB plug. Insert it into the USB slot on the unit so it faces towards the back of the unit. Note: The Singing Machine flash drive has an 8GB capacity (the actual capacity may vary slightly). The USB mode will be selected by default;...
- Page 15 Operation Playing Songs from the USB (Continued) Use the Navigation 5 up and down buttons to navigate through the list of songs in which you have previously downloaded into your USB. Press the ENTER button to start the playback. The HD karaoke video will play on the screen.
- Page 16 Operation Playing Songs from the USB (Continued) LEAD VOCAL: To sing with the lead singer on the recording press the VOCAL button; “ ” will appear at the top right of the monitor). To listen to music only, press the VOCAL button again; “...
- Page 17 Operation Playing Songs from the USB (Continued) RECORDING YOUR SINGING: To record your singing as well as the music, press the RECORD button; recording will begin and the record icon at the top right corner of the monitor which will display red. When done recording, press the RECORD button again;...
- Page 18 Operation Playing Songs from the USB (Continued) SEARCHING BY GENRE, ARTIST or TITLE: To filter by Genre, Artist or Title, select the Genre, Artist, or Title using the Navigation left and right buttons, then press the ENTER button. The alphabet will appear at he bottom of the screen;...
- Page 19 Operation Playing Songs from the USB (Continued) USING THE PLAYLIST: To play your previously created playlist, select Playlist using the Navigation right and left buttons, then press the ENTER button; the row under Playlist will be highlighted. Select the desired selection using the Navigation ...
- Page 20 Operation Playing Songs from the USB (Continued) CREATING FAVORITES: To create a favorite playlist, select a song using the Navigation 5 up and down buttons then scroll to the Favorite column using the Navigation right or left button. Press the ENTER button to confirm the operation;...
- Page 21 Operation Using a Bluetooth Device Connect the unit as described previously. Press the ON/OFF button u to turn the unit on; the ON/OFF indicator will light blue. Press the Navigation right or left button to select the Bluetooth mode. Press the ENTER button;...
- Page 22 Operation Using a Bluetooth Device (Continued) You can control your Bluetooth device to start the music playback OR press the ENTER button to start playback. Press the ENTER button during playback to pause the song. Adjust the volume to a comfortable level using the MASTER VOLUME control on this unit as well as the Volume on your Bluetooth device.
- Page 23 Operation Using a Bluetooth Device (Continued) RECORD YOUR VOCAL PERFORMANCE: To record your singing as well as the music, press the RECORD button. Recording will begin and the record icon at the bottom right of the monitor will blink red and blue.
- Page 24 Operation Playing Songs from the Recorded Files Connect the unit as described previously. Press the ON/OFF button u to turn the unit on; the ON/OFF indicator v will light blue. Press the Navigation right or left button to select the Recordings mode and press the ENTER button to continue.
- Page 25 Operation Playing Songs from the Recorded Files (Continued) Connect the microphone(s) as shown on page 8. Slide the Mic’s Power switch to the ON position Adjust the MIC VOLUME 1 or 2 control as desired. Increasing this will increase the volume of the respective microphone.
- Page 26 Operation Using the LINE IN Jack Connect the unit as described previously. Press the ON/OFF button u to turn the unit on; the ON/OFF indicator will light blue. Connect the external unit to the LINE IN Jack on the rear of this unit. Connecting an external unit will allow the audio and video to be played through your Singing Machine.
- Page 27 Operation Using the LINE IN Jack (Continued) Adjust the MIC VOLUME 1 or 2 control as desired. Increasing this control will increase the volume of the respective microphone. Press ECHO +/- buttons to add an echo effect to your voice. The higher the number, the more echo effect.
-
Page 28: Troubleshooting Guide
Troubleshooting Guide Should this unit exhibit a problem, check the following before seeking service: No Power • Power is not on; press the ON/OFF button to turn power on. • Make sure unit is connected to AC power. No Sound – General •... -
Page 29: Specifications
2. Download the latest software (e.g xxxxxx.img) from www.singingmachine.com/ softwareupdates and save it into this folder. 3. Plug the Singing Machine USB Flash Drive into the USB jack on the unit and turn the unit on. 4. The unit will update automatically. - Page 30 Visit Our Website: www.singingmachine.com Visitez notre site Internet au: www.singingmachine.com The Singing Machine Company, Inc. 4060 E Jurupa Street, Unit B Ontario, CA 91761-1413 USA PRINTED IN CHINA IMPRIMÉ EN CHINE 1060BT-1508-ENG01 — 29 —...
Need help?
Do you have a question about the iSM1060BT and is the answer not in the manual?
Questions and answers