
Related Manuals for Toro LC168F


Summary of Contents for Toro LC168F
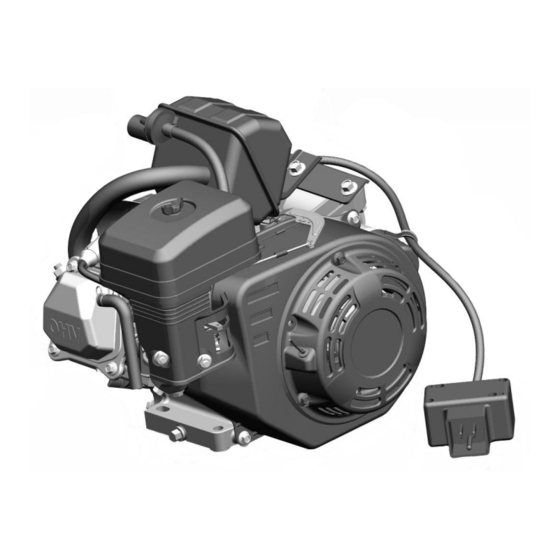
- Page 1 RESIDENTIAL PRODUCTS SINGLE STAGE SNOW ENGINE SERVICE MANUAL LC168F / LC168FD (163cc)
-
Page 2: About This Manual
An electronic version of this service manual is available on the Toro Dealer Portal. We are hopeful that you will find this manual a valuable addition to your service shop. If you have any questions or comments regarding this... - Page 3 Chapter 1 – General Service Information Chapter 2 - Engine Service / Maintenance Chapter 3 - Engine Disassembly and Service Chapter 4 - Electrical...
- Page 4 NOTES:...
-
Page 5: Table Of Contents
Chapter 1 – General Service Information Safety Service Rules Engine Model / Serial Number Location Engine Fastener Torque Specification General Specifications Engine Specifications Troubleshooting... -
Page 6: Safety
This manual is intended as a service and repair manual only. The safety instructions provided herein are for troubleshooting, service, and repair of the Toro engine. The Toro operator’s manual contains safety information and operating tips for safe operating practices. -
Page 7: Service Rules
Service Rules 1. Only use genuine Toro parts and lubrication products. 2. Always install new gaskets, O-rings and seals when assembling engine. 3. Always torque fasteners to specification and in sequence. 4. Always lubricate friction components with clean engine oil or engine assembly lube when assembling engine. -
Page 8: Engine Fastener Torque Specification
Engine Fastener Torque Specifications Torque Item Specification Oil Drain Plug 17 ft-lbs (23 Nm) Connecting Rod Bolts 8.5 ft-lbs (12 Nm) Crankcase & Cover Bolts 17.5 ft-lbs (24 Nm) Valve Lash Lock Nut 11 ft-lbs (15 Nm) Rocker Arm Studs 22 ft-lbs (30 Nm) Spark Plug 22 ft-lbs (30 Nm) -
Page 9: General Specifications
General Specifications MODEL LC168F-1 (Recoil Start) LC168FD-1 (Electric Start) Engine Type OHV Single Cylinder, Four Stroke, Forced Air Cooling Displacement (cc) Bore x Stroke (mm) 68 x 45 Compression Ratio 8.5:1 Engine Operating RPM 3550 - 3850 RPM Oil Capacity 20 oz. -
Page 10: Troubleshooting
Troubleshooting Hard Starting / Poor Running - Incorrect Fuel (Level, Age, Octane, Ethanol Content) - Fuel System Contamination and / or debris in Carburetor - Incorrect Oil Level - Spark Plug (Incorrect Gap, Fouled, Loose or Faulty) - Air Intake System Leaks - Ignition Coil to Flywheel Gap Incorrect - Weak / No Spark - Choke / Linkage... - Page 11 Chapter 2 - Engine Service / Maintenance Engine Oil Change Procedure Spark Plug Service Valve Clearance Inspection and Adjustment Engine Governor – Zero Point Setting Engine RPM Adjustment Fuel Filter Replacement...
-
Page 12: Engine Oil Change Procedure
Engine Oil Change Procedure 1. Run engine to warm engine oil. 2. Remove the ignition key. NOTE: Ensure fuel system contains no fuel to prevent leakage when engine is tipped. 3. Position oil drain pan under oil drain plug. 4. Remove the oil fill / check cap. 5. -
Page 13: Spark Plug Service
Spark Plug Service NOTE: Spark plugs of the wrong size or incorrect heat range can cause severe engine damage. NOTE: The shrouding, discharge chute and handle may need to be removed to access the spark plug. High Voltage Ignition Systems can be Dangerous - Use Caution when Servicing Ignition Systems 1. -
Page 14: Valve Clearance Inspection And Adjustment
Valve Clearance Inspection and Adjustment NOTE: Valve clearance inspection and adjustment must be done with the engine cold 1. Rotate engine to TDC (top-dead-center) of the compression stroke. 2. Remove the valve cover. Be sure both valves are completely closed and the decompression arm is not holding the valve open. -
Page 15: Engine Governor - Zero Point Setting
Engine Governor – Zero Point Setting 1. Loosen but do not remove the governor pinch bolt nut (A). 2. Move the governor arm (B) towards the carburetor to fully open the throttle valve. Firmly hold the governor arm in this position. 3. -
Page 16: Fuel Filter Replacement
Fuel Filter and Hose Replacement - Fuel is Extremely Flammable - Use Extreme Caution When Servicing Fuel System 1. Drain the fuel tank into an approved container. NOTE: Ensure fuel system contains no fuel to prevent leakage when the fuel filter is replaced. 2. - Page 17 Chapter 3 - Engine Disassembly and Service Engine Service – Upper End 14-23 Muffler / Heat Shield Exploded View Heater Box Exploded View Carburetor Mounting Carburetor Exploded View Recoil Asm. Exploded View Starter / Flywheel / Coil Exploded View Cylinder Head Exploded View and Service Information Cylinder Head / Valves Exploded View and Service Information Cylinder Head Specifications Valve Seat Reconditioning...
-
Page 18: Engine Service - Upper End
Engine Service – Upper End Muffler / Heat Shield Exploded View Muffler / Exhaust Pipe 22 ft-lbs (30Nm) 7 ft-lbs (10Nm) Gasket Muffler Mount Bracket... -
Page 19: Heater Box Exploded View
Heater Box Exploded View Wing Nut Cover Spacer and Washer Base Heater Box 7 ft-lbs (10Nm) Gasket Note Orientation for Assembly... -
Page 20: Carburetor Mounting
Carburetor Mounting Cylinder Head Gasket Primer Hose Spacer Gasket Fuel Hose Note Orientation for Assembly 7 ft-lbs (10Nm) -
Page 21: Carburetor Exploded View
Carburetor Exploded View O-ring Throttle Shaft Stop Screw Choke Lever Choke Plate Nozzle Main Jet Needle and Asm. Gasket Float Float Bowl Exchange Gasket Drain Screw 7 ft-lbs (10 Nm) -
Page 22: Recoil Asm. Exploded View
Recoil Asm. Exploded View Shroud and Recoil Asm. 7 ft-lbs (10 Nm) Set Screw Spring Clip Spring Recoil Housing Guide Ratchet Wheel... -
Page 23: Starter / Flywheel / Coil Exploded View
Starter / Flywheel / Coil Exploded View Blower Shroud Starter Asm. Electric Start (Optional) Blower Shroud Recoil Start 7 ft-lbs (10 Nm) Flywheel Ignition Coil Asm. Side Plate 7 ft-lbs (10 Nm) Flywheel Nut 62.5 ft-lbs (85 Nm) Image for Reference Only Starter Removal 1. -
Page 24: Cylinder Head Exploded View And Service Information
Cylinder Head Exploded View and Service Information Cylinder Head Bolt Torque Sequence: 1. Initially Torque the (4) Cylinder Head Bolts in a Crisscross Pattern to 10 ft-lbs (14 Nm). 2. Evenly Torque the (4) Cylinder Head Bolts in a Crisscross Pattern to 25 ft-lbs (34 Nm). Spark Plug Cylinder Head Bolts 25 ft-lbs (34 Nm) -
Page 25: Cylinder Head / Valves Exploded View And Service Information
Cylinder Head / Valves Exploded View and Service Information Exhaust Valve Valve Spring Retainer Rotator Intake Valve Rocker Push Rod Pivot Stud Valve Lash Lock Nut 22 ft-lbs (30 Nm) 11 ft-lbs (15 Nm) NOTE: The only internal parts available for this engine are gaskets and seals. -
Page 26: Cylinder Head Specifications
Valve Seat Width Inspection Remove carbon deposits from the combustion chamber. Inspect the valve seats for pitting or other damage. Standard Service limit 0.03149” (0.8mm) 0.07874” (2.0mm) Cylinder Head Warp Inspection - Remove carbon deposits from the combustion chamber. STRAIGHT EDGE - Clean off any gasket material from the cylinder head surface. -
Page 27: Valve Seat Reconditioning
Valve Seat Reconditioning 1. Thoroughly clean the combustion chamber and valve seats to remove carbon deposits. 2. Apply a light coat of Prussian Blue or erasable felt-tipped marker ink to the valve faces. 3. Properly install valves, springs and keepers. Manually open the valves, then and snap them closed against their seats several times. -
Page 28: Engine Service - Lower End
Engine Service – Lower End Crankcase Exploded View and Service Information 17.5 ft-lbs (24 Nm) Seal Bearing Gasket Crankshaft Governor Bearing Governor Crankcase Cover Shaft Camshaft 8.5 ft-lbs (12 Nm) Piston Asm. Seal Triangular Mark to Face Down NOTE: The only internal parts available for this engine are gaskets and seals. -
Page 29: Governor Exploded View
Governor Exploded View Clip Weight Slider Governor Gear Washer Washer Governor Shaft Clip Shaft NOTE: The only internal parts available for this engine are gaskets and seals. -
Page 30: Piston / Connecting Rod Exploded View And Information
Piston / Connecting Rod Exploded View and Service Information Second Ring / Gap Piston Rotation Arrow Install Piston Ring Markings “UP” Oil Rings Top Ring / Gap Stagger Scraper Rings 8.5 ft-lbs 150°~ 210° from the Oil Ring (12 Nm) Connecting Rod Piston Pin Piston Pin Clip... -
Page 31: Valve Timing
Valve Timing Crankshaft Timing Marks Camshaft... - Page 32 NOTES:...
- Page 33 Chapter 4 – Electrical System Information Ignition Coil Gap Adjustment Ignition Coil Resistance Inspection Spark Testing...
- Page 34 Ignition Coil Gap Adjustment High Voltage Ignition Systems can be Dangerous - Use Caution when Servicing Ignition Systems Install the ignition coil and lightly tighten the ignition coil mounting bolts. Rotate engine so ignition coil is aligned with the magnet portion of the flywheel. Insert the feeler gauge between the flywheel and coil.
- Page 35 Ignition Coil Resistance Inspection Primary Coil Place Ohm meter leads between the harness connection lead and the exposed metal coil leg. 1.0-1.6 Ω A - Primary Coil Resistance Secondary Coil Place Ohm meter leads between exposed metal coil leg and the spark plug terminal connection. 15.5 KΩ...
- Page 36 RESIDENTIAL PRODUCTS Form Number: 492-9230...