Zte MF190 User Manual
Hsupa modem
Hide thumbs
Also See for MF190:
- Quick start manual ,
- Quick user manual (21 pages) ,
- Quick manual (9 pages)
Table of Contents
Advertisement
Advertisement
Table of Contents

Related Manuals for Zte MF190


Summary of Contents for Zte MF190
- Page 1 Invitel Manager User Manual...
- Page 2 ZTE Corporation. NOTE: The manual is published by ZTE Corporation. We reserve the right to make modifications on print errors or update specifications without prior notice. Edition 1st edition, March 2011...
-
Page 3: Table Of Contents
Content 1. Installation of the ZTE MF190 HSPA modem ............6 2. Introduction of the modem ................... 8 Introduction ......................8 Warning and notice ....................8 Modem ........................8 In aircraft ........................9 Applicability scope ....................9 System requirements ....................9 Functions ......................... - Page 4 7. Connection settings .................... 16 Creating a new Configuration ................16 Editing a Configuration ................... 16 Deleting a Configuration ..................17 Setting a Configuration as Default ................. 17 8. Data Record ......................18 Viewing the Data Record ..................18 Resetting the Data Record ..................18 9.
- Page 5 PIN Operations ......................25 Enabling/Disabling the PIN Verification .............. 25 Modifying the PIN Code ..................25 Entering the PIN Code ..................26 Unlocking the PIN ....................26 Auto Start of Invitel Net’n’Go Manager ..............26 Auto Connect to the Internet: ..................26 Saving User Data ......................
-
Page 6: Installation Of The Zte Mf190 Hspa Modem
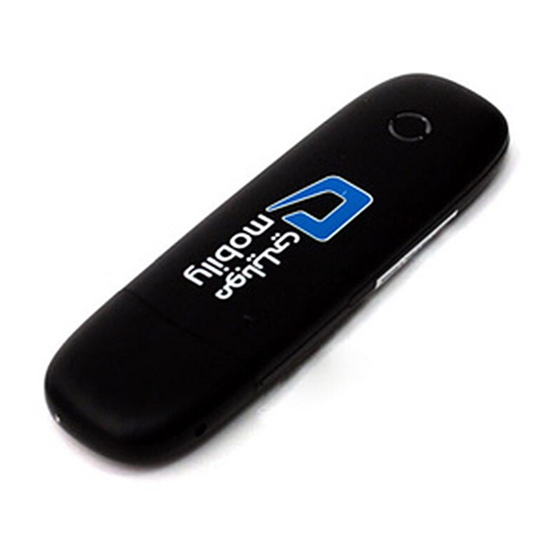
Installation of the ZTE MF190 HSUPA modem Connect to the Internet in four easy steps Put finger on the bottom finger grip, and then lift the front cover of the modem to release and remove. Do not open the front cover rudely so as avoid the damage of the front cover. - Page 7 Plug the modem into a free USB slot of your laptop or PC. Software installation starts automatically.
-
Page 8: Introduction Of The Modem
The ZTE MF190 HSPA modem is a type of multi-mode 3G modem, suitable for HSPA/ WCDMA/ EDGE/ GPRS/ GSM networks. It adopts a USB interface which provides an easy interface to laptop and desktop PC. -
Page 9: In Aircraft
Applicability scope The ZTE MF190 modem supports the present mainstream types of laptops and desktop PCs, such as HP, IBM, Toshiba, Lenovo, Dell, Asus, etc. as well as all Apple Computers running on Mac OS X 10.4 or later. -
Page 10: Using The Invitel Net'n'go Manager With Windows
• NOTE: If you have problems with installation after following the instructions above, please contact the shop or ZTE. After the installation, a “Invitel Net’n’Go Manager” program group will be created in the start- menu, including “Invitel Net’n’Go Manager” and “Uninstall”... -
Page 11: Uninstalling The Software
Uninstalling the software Close the application program before the software uninstalls. • Click the “Start > Programs > Invitel Net’n’Go Manager > "Uninstall" shortcut on the laptop or desktop PC and follow the system prompts to complete the uninstall of the application software. -
Page 12: Functions & Operation
Functions & Operation Description of the Invitel Net’n’Go Manager GUI Interface introduction Shortcut icons The following table lists the shortcut icons provided by the Invitel Net’n’Go Manager. Icon Description Display the Connect interface. Connect to the Internet/ Disconnection. Shows information about the current an past connections. - Page 13 Shows the records of software usage. About: View the information about the application software and modem hardware versions. Help: Enter the MF190 HSPA modem software help. Language: Choose the language of the GUI Exit: Close the software and stop the modem from working. Using the...
-
Page 14: Internet Services
Internet Services Connecting the Internet After setting the network and connection profiles, you can access the network through the Invitel Net&Go Manager. To access the Internet, do as follows: Click Click the “Connect” button. The system will search for available networks automatically. -
Page 15: Network Settings
Network settings You can set the network settings with Invitel Net’n’Go Manager. Selecting a Network Type You can select different network types to search and access the network. NOTE: Contact your network service provider for the network type and frequency band. Choose Settings >... -
Page 16: Connection Settings
Connection settings To ensure that the modem can connect to the Internet properly, you should configure the connection information first. To display the Connection interface do as follows: Click In the navigation tree, click Connection. NOTE: For details about setting the profile, contact your service provider. Creating a new Configuration Click Add to set the a new Configuration name, access number, user name,... -
Page 17: Deleting A Configuration
Deleting a Configuration Select a configuration in the Configuration name list. Click Delete and the Prompt dialog box is displayed. Click OK to delete the setting; or click Cancel to cancel the deletion. Setting a Configuration as Default Select the configuration to be set as default in the Configuration name list. -
Page 18: Data Record
Data Record You can view related information for your internet operation, such as transfer information, and data record. The transfer information includes transfer time, transfer rate, data stream and statistics information. The data record includes start time, end time, duration, upload and download. -
Page 19: Sms-Services
SMS-services You can send and receive SMS via the Invitel Net’n’Go Manager application if your network provider supports that kind of services. Creating and Sending SMS With Invitel Net’n’Go Manager installed on your PC, you can send text messages to mobile phones or other terminal devices that support the SMS function. -
Page 20: Reading Sms
Reading SMS When receiving a new SMS, the system will pop-up a dialog box in the taskbar. • You can then click “OK” to enter the SMS interface. NOTE: You can press and hold Shift or Ctrl, and click the selected messages; •... -
Page 21: Draftbox, Important, Deleted And Report
Click to display the SMS interface. Choose Local > Sentbox or SIM > Sentbox to display the Sentbox interface.. NOTE: For further details, refer to „Inbox”. Draftbox, Important, Deleted and Report Draftbox stores the drafts of messages. • Important stores your important messages. •... -
Page 22: Setting The Sms Center Number And Sms Validity Period
The audio file supports MP3, WAV, WMA and MIDI format. If you select “Mute”, you cannot hear any corresponding alert. & NOTE: The SMS alert tone can be a *.wav or *.mid file. Click Apply to save settings. Setting the SMS Center Number and SMS Validity Period To set the SMS Center (SMSC) number and SMS Validity Period, do as follows: Click In the navigation tree click... -
Page 23: Phonebook
Phonebook Net’n’Go Manager. You can manage contacts in the phonebook conveniently by the Invitel Phonebook Management To enter the local phonebook, do as follows: Click to display the Phonebook interface. Click PC/SIM in the navigation tree. Creating a new Contact &... - Page 24 • View: View the detailed information of the selected contact. Delete: Delete the selected contact(s). • Move: Move the selected contactto a different location (to computer or to SIM card). • • Edit : Change the information of the selected contact.
-
Page 25: Settings And Information Query
Settings and Information Query Change the Language The Invitel Net’n’Go Manager provides several interface languages for you. Click on the drop-down button on the main interface or right click on the tray icon and select Language option. Choos the language. PIN Operations If a SIM card is used in your terminal, the Personal Identity Number (PIN) code protects your card from unauthorized use. -
Page 26: Entering The Pin Code
Entering the PIN Code When the PIN verification is enabled, you need to enter the correct PIN code to use the network-related functions. After the Invitel Net’n’Go Manager is launched, the Enter PIN dialog box is prompted. Enter the correct PIN code. Click OK to complete the verification. -
Page 27: Viewing Diagnostics Information
Viewing Diagnostics Information Click on the drop-down button on the main interface or right click on the tray icon and choose Diagnostics to view information of the hardware, Terminal Management and Network settings, such as APN(s), PS network attachment, PS network registration, CS network registration, signal strength, network selection mode, network name, PIN code status, phone number(s), card serial number, application port, firmware, hardware version, card name, serial number, IMEI number. -
Page 28: Update Now
Update now If you click the “Update Now” button, the system will automatically search for new version information. If an update is found, the system will popup the new version description. Click “Next” button to continue. Click “Update” button to update the software. While the system shows the installation progress, please wait until the software update is completed. -
Page 29: Faq And Answers
FAQ and Answers When you encounter one of the following problems while using the MF190 HSPA modem, please refer to the following answers to solve it. If the problems still exist, please contact your supplier. Problem Description Possible Causes Problem Solving... - Page 30 Problem Description Possible Causes Problem Solving When the device is being 1. The installation programs of 1. Run the installation program installed, the computer cannot the MODEM device have not first then connect the device. find it. been installed properly. Now install the drivers as normal in Windows.
- Page 31 Problem Description Possible Causes Problem Solving 1. After connection, you are 1. Check that the APN in the Connected to the internet, but unable to open web pages. confi guration fi les is correct. it cannot open any website page. 2.
-
Page 32: Acronyms And Abbreviations
Acronyms and Abbreviations The Third Generation Access Point Name Domain Name Server GPRS General Packet Radio Service Global System for Mobile communications Personal Identification Number PIN Unblocking Key Subscriber Identity Module WINS Windows Internet Name Service...
Need help?
Do you have a question about the MF190 and is the answer not in the manual?
Questions and answers