Table of Contents
Advertisement
This User's Guide has been written assuming that the user is familiar with terms used for basic Windows operation such as "folder", "file", or
"window". It also assumes that the user is able to perform basic mouse operation and understands how to use help in Windows or its installed
applications to resolve problems.
In this user's manual, unless separately specified, "Windows 7" refers to genuine Windows
System configuration and software installation should be conducted by a user who has administrator privileges. If a [User Account Control]
screen comes up, please be sure to confirm the contents before continuing.
The information contained within this manual applies to the following models:
• VX Model: VC25M/X-D, VG25M/X-D
• VB Model: VC17H/BB-D, VG17H/BB-D
1
Checking Included Accessories .............................................2
2
Connecting Included Accessories . .........................................2
3
Windows Setup . .....................................................................4
4
Knowing the Parts . .................................................................6
5
Keyboard . ...............................................................................9
6
The NX Pad ...........................................................................9
7
LAN Function ....................................................................... 10
Note: The illustrations, screenshots, icons, and on-screen text shown in this document may differ from the ones you actually encounter.
User's Guide
VX Model
VB Model
®
7 Professional 32 bit with Service Pack 1 installed.
8
Wireless LAN Function......................................................... 12
9
Memory . ............................................................................... 14
10
System Configuration . .......................................................... 14
11
Applications ......................................................................... 16
12
Recovery . .............................................................................21
13
Appendix . .............................................................................23
Advertisement
Table of Contents

Related Manuals for NEC VersaPro VX


Summary of Contents for NEC VersaPro VX
-
Page 1: Table Of Contents
User's Guide VX Model VB Model This User's Guide has been written assuming that the user is familiar with terms used for basic Windows operation such as "folder", "file", or "window". It also assumes that the user is able to perform basic mouse operation and understands how to use help in Windows or its installed applications to resolve problems. -
Page 2: Checking Included Accessories
安全使用说明 Connecting power sources Instructions For Safe Use 1. Install the battery pack. NEC软件的使用条件 【即EULA】 (对顾客的特别提示) Please install the battery pack according to the following illustration. (请务必先仔细阅读如下内容后, 决定是否打开本个人电脑的包装) VX Model Terms and Conditions for using software (For Customer) - Page 3 2. Connect the AC adapter. B attery pack removal VX Model • After purchase, be sure to fully charge the battery before use. • Do not remove the AC adapter before Windows setup has completed. Battery eject lock Insert the AC adapter into the power input jack ( Connect the power cord to the AC adapter. Battery unlock Insert the other end of the power cord into a wall outlet. When the AC adapter is connected, the battery will start to recharge and the battery recharge indicator ( ) will turn orange.
-
Page 4: Windows Setup
Windows Setup If two-byte characters, environment-dependent characters, or certain symbols are used for any part of the user name or computer name, Windows setup may not be completed, or some applications may not run correctly. When you first power up your new computer, it is necessary to perform Therefore, it is important that the user name and computer name only includes Windows setup. single-byte alphanumeric characters and does not contain any symbols or spaces. The length is also limited to 20 characters. Never turn off the power during Windows setup. Turning off the power switch or Turning on the power pulling out the power cord in the middle of this process may lead to damage. If there is some sort of problem or you accidentally press the power switch, Open the computer lid. please see "If you encounter problems during setup" on p.5. Important points during setup Please securely support the keyboard side when opening and closing the LCD O Always follow the procedure written in the manual. display. In order to prevent excess force from being directly applied to the LCD Setup may not be able to be successfully completed if you omit any steps, screen, please handle the screen around the border area. - Page 5 After checking the contents, check [I accept the license terms] and Press the <F10> key. click [Next] to continue. The setup confirmation screen should come up. Select [Yes] and then press <Enter>. The BIOS setup utility should now be finished and Windows will automatically restart. If you do not accept the license terms, setup cannot continue.
-
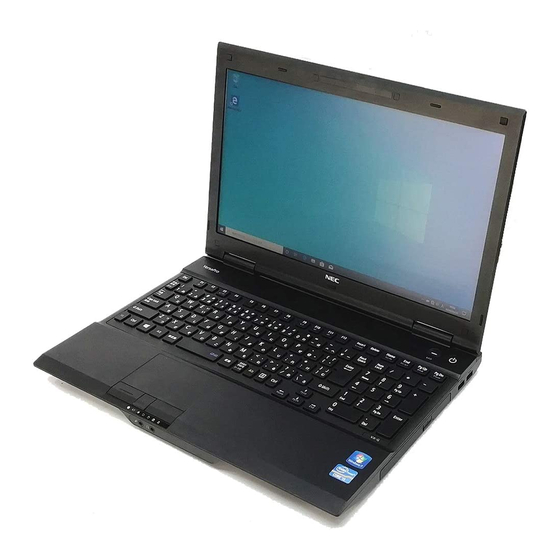
Page 6: Knowing The Parts
Click [Next]. Knowing the Parts Enter the desired volume size into the [Simple volume size in MB:] box and click [Next]. Confirm that [Assign the following drive letter:] is selected and click [Next]. Names and descriptions of your computer's major components Confirm that [Format this volume with the following settings:] is ‹... -
Page 7: Keyboard 9
‹ The‹bottom. ‹ Number Name Explanation VX Model VB Model (15) DC power input ( ) Used to connect to the supplied AC adapter. (22) (16) Memory slot This slot is used when installing an expanded (18) (22) (22) RAM board. (22) (17) Battery eject This locks the battery pack in place to prevent it lock from falling out. It must be unlocked in order to remove the battery. (18) Battery unlock This is used when you want to remove the (18) (19) battery pack. Please use it after releasing the (16) (16) battery eject lock. (19) (17) (17) (19) Battery pack This rechargeable battery is used when there ‹... - Page 8 ‹ Num Lock indicator LED Status LEDs LED state Computer State ‹ Power LED On (Green) <Num Lock> is on (Part of the keyboard can be used LED state Computer State as a numeric keypad) White Computer power on <Num Lock> is off (VX model) Blue Flashing Sleep...
-
Page 9: Keyboard
Keyboard The NX Pad This section covers the NX pad usage and extended feature settings, as well Using the keys as the driver update process. Names and roles of the main components Hotkeys (Using the function keys) VX Model VB Model By pressing the function key <Fn> in combination with another key, you can easily change common computer settings. -
Page 10: Lan Function
‹ Using the touchpad to zoom in and out. LAN Function Click on the window that you would like to zoom in or out and run your finger along the far left edge of the touchpad. This should allow you to zoom in and out. - Page 11 PC which allows you to do the following. • Operating system installation • BIOS flashing (Rewriting the BIOS ROM) • BIOS configuration changes To enable network booting, when your computer starts up, press <F12> several times as soon as the NEC logo appears.
-
Page 12: Wireless Lan Function
Click [Connect] after confirming that the [Connect automatically] Wireless LAN Function checkbox is selected. If a window comes up asking for a security key, enter the security key of the network you are connecting to and click [OK] to continue. Configuration is now complete. - Page 13 Installing PROSet/Wireless Uninstalling PROSet/Wireless By using PROSet/Wireless with your computer's wireless LAN, it is possible PROSet/Wireless can be uninstalled with the following steps. to use authentication functions (LEAP, etc.) that do not have native Windows Close any other open applications. support.
-
Page 14: Memory
Windows menu after Windows has loaded, or turn the power off after selecting When inserting memory, this part opens left and right, [Save Changes and Power Off] from the [Exit] menu when you wish to save the to secure the memory return to the original position. new settings. Confirm that both sides lock and that the memory is firmly seated in the connector. Entering the BIOS setup utility Turn your computer on and press <F2> several times as soon as the Notch NEC logo appears. The BIOS setup utility will then be displayed. If you have trouble entering the BIOS setup utility, please try to vary the timing when pressing the <F2> key. Protrusion... - Page 15 Turn your computer on and press <Ctrl> + <P> as soon as [Press <F9> Returns all BIOS setup utility setting values to their factory default settings. <CTRL-P> to enter Intel(R) ME Setup] is displayed after the NEC logo. <F10> Saves any changes and restarts the computer.
-
Page 16: Applications
Restoring default factory setting values Applications Please follow these steps to restore your ME BIOS Extension to the default factory settings. Battery Tool Be sure not to turn your computer off while following these steps. By using the Battery tool, you can automatically perform battery refresh, performance diagnostics and battery refresh diagnostics. Enter the BIOS setup utility. - Page 17 [Next]. • DoD-introduced mode (3 time erasure + Verify) Deletes data from the hard disk in a method compliant to the U.S. Department If the [Battery tool Files in Use] screen is displayed, click [NEC Battery Refresh Utility-Scheduler (Process Id: XXXX)], and then click of Defense Standard.
- Page 18 When [Data on the hard disk will be erased. Are you sure?] is displayed, select [Yes] and then press <Enter>. • The icons in the table are the factory settings. The displayed icon will change Select the hard disk for data deletion and click [Next]. according to the mode selected. • When the Windows logon screen is displayed, pressing the ECO button or the Select the deletion method that the data should be deleted and click specified keyboard shortcut will not switch the mode.
- Page 19 ‹ Keyboard Shortcut Settings DVD/CD Power Switch (VB model) Setting a keyboard shortcut used to switch modes, separate from the ECO From the icons in the notification area of the Task Bar, the power for the built-in button, can be easily done. optical drive can be switched ON or OFF.
- Page 20 HDD Anti-Shock Tool (VB model) Install Using the HDD anti-shock tool will reduce the risk of damage to the hard disk Start Windows. by returning the head of the hard disk to a safe position when the detection Insert the Application Disc into the optical drive. sensor detects acceleration or vibrations from the computer falling, or other similar movement.
-
Page 21: Recovery
Recovery One of the [advanced recovery method] under the [Recovery] in the [Control Panel], [Reinstall Windows] can not be used. Recovery‹Basics Connect‹the‹adapter Here we will explain the basics before recovery. Please read this before Recovery cannot be performed via battery power. Be sure to connect the AC performing recovery. adapter. Turn‹OFF‹the‹wireless‹LAN‹function Required‹Materials Confirm that the wireless LAN function is OFF. If the wireless LAN function is When recovering from a DVD, the following materials are required. Prepare all ON, turn it OFF before recovery. of the materials before starting the process. Disconnect‹peripheral‹devices • Application Disc • Recovery Disc Disconnect peripheral devices to return to the state at time of purchase (excluding the optical drive used for recovery). Backup‹Data‹from‹the‹Hard‹Disk Before recovery, if there is data that you would like to maintain, make a backup of the data and then perform recovery. If the computer's LAN cable is connected, disconnect it before recovery. Do‹not‹interrupt‹recovery For multi-user computers, each user should logon and make personal backups. Do not interrupt the recovery process once it has started. If you interrupt, the recovery may not be performed correctly, so you have to start over from the beginning. Maintain‹System‹Settings When‹recovery‹cannot‹be‹performed When the recovery has completed, all BIOS Setup Utility settings, network settings, etc. return to the factory settings. If you would like to use the same If "The computer can not be restored". is displayed, it is possible that the model settings after recovery, maintain the current settings by writing down the information is not written correctly. Please contact our repair facilities. information, etc. Do‹not‹leave‹the‹computer‹alone‹during‹recovery Do not leave the computer unattended until the recovery has completed Returning‹the‹BIOS‹Utility‹Settings‹to‹the‹Original‹Values including passing all the screens which require your key operations, and power... - Page 22 Turn ON the power of the computer. Next, continue to "Resetting to Initial Setup". When the NEC logo screen is displayed, repeatedly press <F11> until the NEC logo screen disappears and "Windows is loading files..." is Do again the settings which you did after your purchase displayed.
-
Page 23: Appendix
Comments Appendix * 2 : Supports Hyper-Threading technology. * 6 : Protrusions such as rubber feet are excluded. * 8 : D oes not include a PC card slot. The VB model does not come equipped with and SD memory Specifications card or DVD Super Multi drives. * 1 4 : Equipped with an enhanced version of Intel SpeedStep ® Technology. * 2 0 : Depending on the user environment and load the CPU operating speed may vary. VX‹Model * 2 8 : T he maximum RAM is 8 GB. However, the 32 bit version of the OS cannot utilize the entire capacity. Even with 4 GB or more of RAM, the usable capacity is approx. 3 GB. Furthermore, Model name VC25M/X-D VG25M/X-D depending on the configuration the usable RAM volume may vary. * 4 9 : Shows the normal capacity (actual battery pack capacity). Intel ®... - Page 24 Precautions (1) Unauthorized copying of all or part of the contents of this manual is prohibited. (2) The contents of this manual may change without notice. (3) The contents of this manual have been created with full efforts, if there are any errors, queries, or omissions please contact the vendor or our 121 Contact Center. Manuals with missing pages or with pages out-of-order will be replaced. (4) We shall bear no liability for claims of damages or lost profits resulting from using the product, regardless of the terms outlined in article (3). (5) This product is not intended for use with medical equipment, nuclear facilities and/or equipment, aerospace equipment, transportation facilities and/or equipment, etc. or with life monitoring facilities and/or equipment, or for any other use that requires high reliability in built-in or control facilities and/or equipment. In the event that the product is used for the above facilities and/or equipment or in control systems, etc. where personal injury and/or property damage is caused, NEC assumes no responsibility. (6) The OS, product DVDs and internal DVD-ROM, CD-ROM, and hard disk drive are for the use with this product only. (7) Distribution and copying all or part of the software without permission of the copyright owner is copyright infringement. (8) The content in this manual was created at the time of product creation. Contact information such as: Customer Support, address, telephone numbers, and homepage content may change. Please be advised. Microsoft, Windows, and Internet Explorer are either registered trademarks or trademarks of Microsoft Corporation in the United States and/or other countries. The official name of Windows is Microsoft Windows Operating System. Intel, Intel SpeedStep, and Intel Core are either registered trademarks or trademarks of Intel Corporation or its affiliated companies in the U.S. and/or other countries. HDMI, High-Definition Multimedia Interface are either registered trademarks or trademarks of HDMI Licensing LLC. All other company names and brand names used on this manual are trademarks or registered trademarks of their respective holders. User's‹Guide VX Model VB Model First edition December 2011 ©NEC Personal Computers, Ltd. 2011 Reproduction without the expressed consent of NEC Personal Computers, Ltd. 2011 is prohibited. 853-810602-418-A Printed in China * 8 1 0 6 0 2 4 1 8 A *...