Advertisement
NOTE:
Please read all instructions
carefully before using this
product
Table of Contents
Safety Notice
Hardware Pack
Assembly Instruction
Parts List
Operation Tips
Warranty
Ordering Parts
Model
TT-320
Retain This
Manual for
Reference
130225
OWNER'S
MANUAL
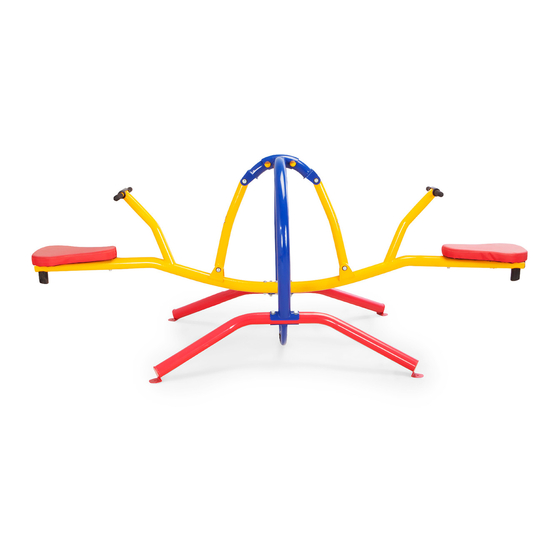
Gym Dandy
TEETER TOTTER
TT-320
IMPEX
2801 S. Towne, Pomona, CA 91766
Tel: (800) 999-8899 Fax: (626) 961-9966
www.impex-fitness.com
info@impex-fitness.com
®
INC.
®
Advertisement
Table of Contents

Summary of Contents for Gym Dandy TEETER TOTTER TT-320
- Page 1 NOTE: ® Please read all instructions Gym Dandy carefully before using this product TEETER TOTTER Table of Contents TT-320 Safety Notice Hardware Pack Assembly Instruction Parts List Operation Tips Warranty Ordering Parts Model TT-320 Retain This Manual for Reference 130225 ®...
-
Page 2: Table Of Contents
Specification for Home Playground Equipment. BEFORE YOU BEGIN ® Thank you for selecting the Gym Dandy Teeter Totter TT-320 by IMPEX FITNESS PRODUCTS. For your safety and benefit, read this manual carefully before using the machine. As a manufacturer, we are committed to provide you complete customer satisfaction. -
Page 3: Warning Label Placement
WARNING LABEL PLACEMENT The Warning Label shown here has been placed on the Base Stabilizer. If the label is missing or illegible, please call customer service at 1-800-999-8899 for replacement. Apply the label in location shown. -
Page 4: Important Safety Notice
IMPORTANT SAFETY NOTICE This play ground equipment is built for optimum safety. However, certain precautions apply whenever you operate a piece of play ground equipment. Be sure to read the entire manual before you assemble or operate your equipment. In particular, note the following safety precautions to reduce the likelihood of serious or fatal injury. - Page 5 CONSUMER INFORMATION FOR PLAYGROUND SURFACING MATERIALS Do not install home playground equipment over concrete, asphalt, or any other hard surface. A fall onto a hard surface can result in serious injury to the equipment user. Grass and dirt are not considered protective surfacing because wear and environmental factors can reduce their shock absorbing effectiveness.
-
Page 6: Hardware Pack
HARDWARE PACK... -
Page 7: Assembly Instruction
ASSEMBLY INSTRUCTION Tools Required Assembling the Machine: Two #6 Allen Wrenches and one Adjustable Wrench. NOTE: It is strongly recommended two or more people assembling this machine to avoid possible injury. Caution: Children must NOT use the equipment until it’s properly installed. STEP 1 (See Diagram 1) A.) Place the two Base Stabilizers (#2) on a flat surface. - Page 8 STEP 2 (See Diagram 2) A.) Attach the Pivot on a Swing Arm (#6) to the open bracket on the Swing Base (#7). Align the holes and insert an Axle (#12) through the holes. Secure each end of the Axle with one Bushing (#13), Ø...
- Page 9 Step 3 (See Diagram 3) A.) Connect the Left Seat Support (#5) and the Right Seat Support (#4). Secure them together with two M10 x 2 ¾” Allen Bolts (#21), four Ø ¾” Bent Washers (#26), and two M10 Aircraft Nuts (#28). DIAGRAM 3...
- Page 10 Step 4 (See Diagram 4) A.) Note: Help of another person is strongly recommended for this step. B.) Attach the two open brackets on the Right and Left Seat Supports (#4 & #5) to the pivot on the two Swing Arms (#6). C.) Insert an Axle (#12) through the holes.
- Page 11 STEP 5 (See Diagram 5) A.) Place a Seat Pad (#8) onto the Left Seat Support (#5),Secure the front hole on the Left Seat Support with one M10 x 3 3/8” Allen Bolt (#20), Ø ¾” Lock Washer (#29), and Ø ¾” Bent Washer (#26).
-
Page 13: Parts List
Parts list KEY NO. DESCRIPTION Q’ty Main Frame Base Stabilizer Cross Brace Right Seat Support Left Seat Support Swing Arm Swing Base Seat Pad Handlebar Handle Cover Handlebar Grip Axle Bushing Rubber Bumper Seat Support End Cap Manual Ball Bearing L-shaped Lock Pin Cable Strap M10 x 3 3/8”... -
Page 14: Care And Maintenance, Operation Tips
Care and Maintenance 1. At beginning of each play season A.) Lubricate all metallic moving parts. B.) Check metal pats for rust. If found, sand and repaint using a non-lead based paint meeting the requirements of 16 CFR 1303. C.) Rake and check depth of loose fill protective surfacing materials to prevent compaction and to maintain appropriate depth. -
Page 15: Limited Warranty
® IMPEX INC. LIMITED WARRANTY ® IMPEX INC. ("IMPEX ") warrants this product to be free from defects in workmanship and material, under normal use and service conditions, for a period of 2 YEARS from the date of purchase. This warranty extends only to the original purchaser.
Need help?
Do you have a question about the TEETER TOTTER TT-320 and is the answer not in the manual?
Questions and answers
Can you order replacement all nuts, bolts, washers, lock washers and bushings in one package for the model TT- 320 teeter tauter? And at what cost?