Table of Contents
Advertisement
Advertisement
Table of Contents

Related Manuals for Spytec G1W-H


Summary of Contents for Spytec G1W-H
- Page 1 G1W-H Dash Camera User Manual Spy Tec www.spytecinc.com...
-
Page 2: Table Of Contents
GETTING STARTED Components Features Powering Up the Device MicroSD Memory Card for Data Storage Attaching the Device to Tilting Suction Mount Menu Options Accessing Menu Items Video Menu Resolution Loop Recording Wide Dynamic Range (WDR) Exposure Motion Detection Record Audio G-Sensor Date Stamp Video Settings Menu... -
Page 3: Getting Started
GETTING STARTED Components • Camera with rechargeable battery • USB cable • Car charging unit • Suction holder • User Manual Features • 1080P HD Video & Audio Recording • Up to 64 GB microSD • Novatek NT96650 & Aptina AR0330 •... -
Page 4: Powering Up The Device
Powering Up the Device Plug the USB cable into the dash cam device via the small USB port and attach the cord to the external power supply via the larger USB port (computer or adapter) or use the car charger. You may allow the device to charge until fully charged and begin programming when finished –or–... -
Page 5: Microsd Memory Card For Data Storage
Micro SD Memory Card for Data Storage On the right-facing side of the G1W-H device, you will see a slot for the Micro SD card (not included). Place the microSD memory card (up to 64GB), text facing upwards, into the slot and push in until it clicks into place. To remove or replace the microSD memory card, simply push in until it clicks in/out of place. -
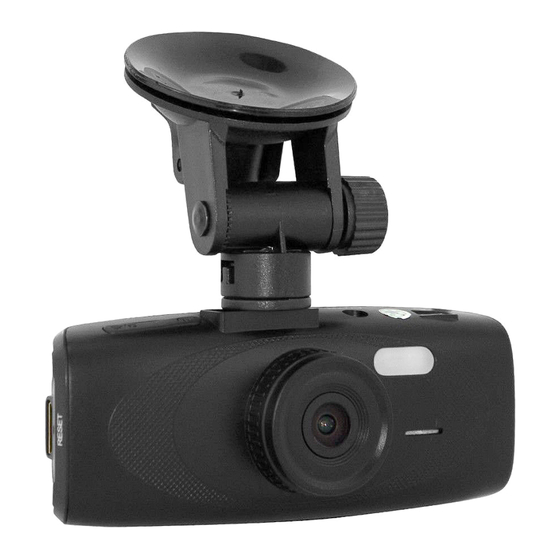
Page 6: Attaching The Device To Tilting Suction Mount
Now you may remove the clear film on the suction and attach to the glass surface. To remove the suction mount, pull the tag on the right-facing side of the suction and gently pull off the glass surface to detach. G1W-H with mount Spy Tec Spy Tec www.spytecinc.com... -
Page 7: Menu Options
Menu Options Press the Menu button on the right side of the screen to access the Video menu and press the Menu button again to access the Settings menu. Use the Up and Down arrow buttons to the left of the screen for navigation of menu selections. -
Page 8: Video Menu
Video Menu To access the Video menus, if the device powers on and is not automatically in Video mode, press the Mode button to the right of the screen until you are in Video mode (shows a film strip icon to the top left of the screen) and then the Menu button. -
Page 9: Record Audio
Record Audio There are settings to enable or disable audio recording available from the menu by selecting the Record Audio option and navigating using the Up and Down buttons to choose either On or Off. In Off mode, only video is recorded and in On mode, both audio and video are recorded. -
Page 10: Language
Language Select the Language icon from the menu to choose English, French, Spanish, Portuguese, German, Italian, Simplified Chinese, Traditional Chinese, Russian, or Japanese and pressing the Capture button to save settings. TV Mode Use the AV Out port to connect an HDMI cable to the camera for viewing images on a television monitor. -
Page 11: Still Capture Menu
Still Capture Menu To access the Still Capture menus, press the Mode button to the right of the screen until you are in Camera mode (shows a camera icon to the top left of the screen) and then the Menu button on top of the camera and press the Menu button twice for Setup. -
Page 12: White Balance
White Balance There are settings to enhance white balance available from the menu by selecting the White Balance option and navigating using the Up and Down buttons to choose either Auto, Daylight, Cloudy, Tungsten or Flourescent. In Auto mode, settings will adjust themselves to changes in lighting. -
Page 13: Still Capture Settings Menu
Video Recording When the G1W-H is powered on, it automatically goes to the Video screen. To start recording, press the Capture button. To end recording, press the Capture button again. To have automatic recording take place upon powering the device, adjust settings as explained in the previous section (Video Settings, 11). - Page 14 Press the Menu button to either Delete or Protect the files. Protecting the files allows the current image to be set as Locked or Unlocked. By choosing the Lock All or Unlock All option, the entirety of microSD files will be selected. When files are locked, a key icon will appear at the top center of the screen disabling any changes to the file.
-
Page 15: Specifications
Specifications Sensor 3M CMOS Sensor Solution Novatek 96650 Lens fixed focus lens Zoom 4 x digital zoom LCD Display 2.7 inch 16:9 TFT LCD Lens Angle 120 degree ultra wide angle lens Night Video Enhanced led lights Video Output AV (SVBS): composite TV signal output NTSC/PAL High definition TV terminal interface: HDMI output Picture JPG file format Maximum output pixel: 5.0 Mega Pixels... -
Page 16: Precautions
Any previously stored data will be lost after reformatting the card. • The security and integrity of the internal files on the G1W-H are not covered under warranty. • Do not adjust settings or placement while driving. -
Page 17: Frequently Asked Questions (Faqs)
Frequently Asked Questions (FAQs) How do I unfreeze the device? Press the Menu button. Wait a few seconds to see if the device unfreezes. Try this again. If the Menu button does not return to the menu, so that you may resume activity, turn the power to Off...
Need help?
Do you have a question about the G1W-H and is the answer not in the manual?
Questions and answers