Table of Contents
Advertisement
Advertisement
Table of Contents

Related Manuals for Gtech eBike City

Summary of Contents for Gtech eBike City
- Page 1 City OPERATING MANUAL...
- Page 2 A damaged or entangled when mounting it on a bicycle carrier. charger cord increases the risk of fire and • We DO NOT recommend that you use a bicycle electric shock. trailer with your Gtech eBike.
-
Page 3: Battery Safety
• Do not abuse the charger cord. Never carry the Brake Safety: charger by the cord. • Regularly check your brakes for signs of wear • Do not pull the cord to disconnect from a and tear. Any worn parts must be repaired or socket;... - Page 4 Thank you for choosing a Gtech eBike “I started Gtech to create sensible, easy to use products, which do a great job. Your opinion is important to us. Please take the time to write a review of the eBike by emailing us at support@gtech.co.uk.
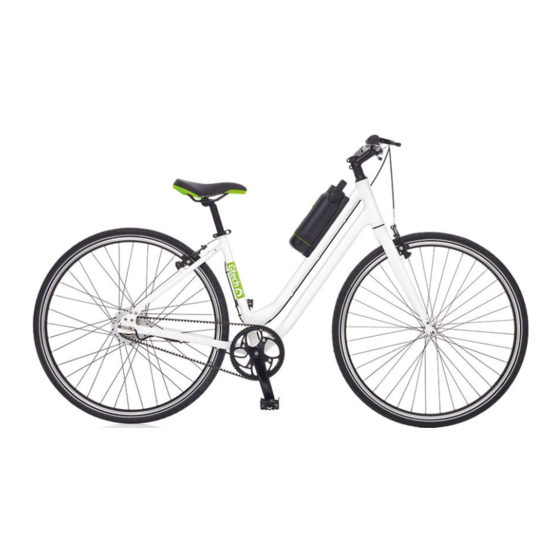
- Page 5 What’s in the box Your eBike comes fully assembled. All you need to do is set the handlebars in the correct position. Charger Power Cable Battery lock keys Your eBike is like a normal bicycle, but with electric pedal assistance. This means that you can pedal it like a normal bike, or the bike can assist your pedalling.
-
Page 6: Table Of Contents
Setting the handlebars ..............7 Setting the saddle height ..............8 Adjusting the saddle height ............. 9 Adjusting the saddle angle and travel ..........10 Storing the Gtech tool ..............11 Removing the battery ..............12 Attaching the battery ..............13 Operation Charging the battery .............. -
Page 7: Setting The Handlebars
Removing the battery ..............12 Attaching the battery ..............13 Setting the handlebars You will need to use your Gtech tool for the following instructions. The Gtech tool is located under the battery, in the centre of the battery cradle. See page 11... -
Page 8: Setting The Saddle Height
Preparation Setting the saddle height Sit on the bike saddle. Try to reach the pedal with your heel when it is in the bottom position. Your knee should be more or less fully straight. Place the balls of your feet on the centre of the If you need to adjust the saddle height pedal. -
Page 9: Adjusting The Saddle Height
Preparation Adjusting the saddle height Pull back the quick-release lever. Adjust the saddle to the correct height for you, making sure that the minimum mark is not above the seat tube. See page 8 for advice about finding the correct saddle height. Close the quick-release by firmly pushing on the Check that the saddle cannot move once the quick-release lever, so that it lies flat against... -
Page 10: Adjusting The Saddle Angle And Travel
Preparation Adjusting the saddle travel Now that the saddle is loose you can move it 1. The screw for adjusting the saddle is located horizontally forwards or backwards to improve beneath the saddle. your reach to the handlebars. 2. Whilst looking up at the base of the saddle, turn the screw anti-clockwise to loosen it. -
Page 11: Storing The Gtech Tool
Preparation Storing the Gtech tool Store the Gtech tool in the centre of the battery Line up the notches in the Gtech tool with the cradle. tabs on the battery cradle. Push the tool down firmly into place. The tool should sit in its holder in the battery cradle so that the top of the tool sticks outwards, away from the battery cradle and frame. -
Page 12: Removing The Battery
Preparation Removing the battery If you have locked your battery in place, you must unlock it before trying to remove it from the battery cradle: To unlock the battery, first remove the rubber Insert the battery key into the lock and turn lock cover. -
Page 13: Attaching The Battery
Preparation Attaching the battery Sit the battery in the base of the battery cradle, Push the battery firmly down towards the frame. located on the down tube. Make sure that the It will click when it is in place. green power button is facing outwards, away from the down tube. -
Page 14: Operation
Operation Operation Charging the battery ..............15 Turning on your eBike ..............16 Brake controls ................18 Ready for your first journey? Before you go out adventuring check that the following steps have been completed in accordance with the instructions in the assembly section. We want to ensure you get the most out of your new eBike and by following the list below you will be ready to get out there with confidence. -
Page 15: Charging The Battery
Operation Charging battery When the lights rapidly cycle red, recharge 1. You can charge the battery while it is still the battery. attached to your eBike. 2. Plug the charger into the wall, then remove the rubber charging point cover and connect the charger to the battery. -
Page 16: Turning On Your Ebike
Operation Turning your eBike on Your battery has two power settings – High Power & Low Power. Press the green power button on your battery. The LEDs show how much charge is in the bat- tery. Your battery will remember the power mode it was last in. - Page 17 Operation You can still check how much charge is left in To turn the battery off, press and the hold the your battery when it is not attached to the bike. green power button for two seconds. Briefly press the green power button to display the level of charge.
-
Page 18: Brake Controls
Operation Brake Controls The left brake lever activates The right brake lever activates your rear brakes. your front brakes. Always use both brakes together. Emergency braking When emergency braking, your weight will shift forwards, reducing the load on your rear wheel. This can cause your rear wheel to slip, which is dangerous, especially when riding downhill. -
Page 19: Maintenance
Maintenance Maintenance Inflating the tyres ................20 Removing the front wheel ............. 22 Removing the rear wheel .............. 23 Replacing the inner tube ............... 26 Replacing the drive belt ..............29 Attaching the rear wheel ............... 32 Assembling the brakes ..............36 Adjusting the brakes .............. -
Page 20: Inflating The Tyres
Inflating the tyres Before starting to inflate your tyres, check that the pump is in the correct mode for your tyre valve. For the Gtech eBike, it will need to be in Schrader mode. Remove the valve cap. Briefly press down on the valve to make sure the valve doesn’t stick and to remove any loose dirt. - Page 21 – printed on the sidewall of the tyre. Remove pump nozzle from the valve stem. Replace the dust cap. The correct pressure for the tyres on the Gtech eBike is: min 50psi, max 75psi. Do not over or under inflate the tyres.
-
Page 22: Removing The Front Wheel
Maintenance Removing the front wheel Detach your brakes, which are located at the Place the frame upside down on a flat surface, top of the front forks, from the front wheel rim resting on the saddle and the handlebars. by closing the brake arms using your thumb and You may need to put something down on the index finger and lifting out the brake cable. -
Page 23: Removing The Rear Wheel
Maintenance Removing the rear wheel Detach your brakes, which are located at the top Adjust the saddle so that it is at its lowest of the rear forks, from the wheel rim by closing position. Turn the bike upside down and place the brake arms using your thumb and index on a soft surface. - Page 24 Maintenance Locate both of the belt tension adjusters at the Loosen the bolts on either side of the wheel by rear forks and, using the tool provided, turn them placing the tool through them and turning anti-clockwise to loosen. Make sure you hold anti-clockwise.
- Page 25 Maintenance Take the drive belt off the rear wheel sprocket and The drive belt needs to stay resting in this move around the rear forks, away from the frame. position. Slide the wheel backwards off the frame to remove.
-
Page 26: Replacing The Inner Tube
You will need a 700C x 35/43c inner tube. You will also find it easier if you have a tyre lever handy. These can be ordered at www.gtech.co.uk or can be purchased from good bike shops. If changing the tyre at the same time, you will need a 700 x 35c tyre. - Page 27 Maintenance Run the tyre lever all the way around the tyre. 1. Push the inner tube valve in, towards the tyre. 2. Remove the inner tube from between the outer tyre and rim. To replace... Check the inside of the outer tyre for sharp objects Partially inflate the inner tube.
- Page 28 Refit the wheel onto the bike (see page 32). tyre. The correct pressure for the tyres on the Gtech eBike is: min 50psi, max 75psi. Do not over or under inflate the tyres.
-
Page 29: Replacing The Drive Belt
Maintenance Replacing drive belt: In the unlikely event of the belt becoming damaged and in need of replacement: Make sure you read the safety instructions for the drive belt under Important Safeguards (see pages 2-3) before you start to replace the drive belt. Remove the rear wheel (see page 23). - Page 30 Maintenance Take the belt off the pedal sprocket. Feed the belt through the gap towards you to remove the belt. Feed the new belt through the gap in the 1. Rest the drive belt over the pedal sprocket dropout. next to the frame. 2.
- Page 31 Maintenance Replace the rear wheel (see page 32). Place the dropout plate back onto the bike and align with the holes. Insert all four nuts and tighten them securely.
-
Page 32: Attaching The Rear Wheel
Maintenance Attaching the rear wheel Place the frame upside down on a flat surface, resting on the saddle and the handlebars. You may need to put something down on the surface to stop your bike frame from getting scratched. Make sure that the belt tension adjuster bolts are Slot the rear sprocket, cable end first, into the horizontal and facing the rear of the bike. - Page 33 Maintenance Slide rear wheel backwards, making sure that the Rotate the pedals slowly and line up the belt stays on the sprockets. This creates the initial teeth to feed the slackened drive belt onto the tension on the belt. pedal sprocket. Keep the rear wheel in this position and tighten To align the rear wheel with the frame, tighten the the belt tension adjuster screw that is on the...
- Page 34 Maintenance Carefully turn your eBike upright (the rear wheel Push down on the belt directly above the tension will not be fully secure) and locate the tension marker with your index finger. Make sure that marker on the frame of your eBike. there is 1cm of movement when you push on the belt.
- Page 35 Maintenance 1. Reconnect the hub connector cable by lining Turn the eBike the correct way up and reconnect up the arrows and pushing together. the battery. You will need to reattach and adjust 2. Tighten the cable guide to hold the hub your brakes (see page 36).
-
Page 36: Assembling The Brakes
Maintenance Brakes These instructions apply to both your front and rear brakes. You should adjust your brakes regularly, as well as after any maintenance that involves removing and re-attaching your brakes. Assembling the brakes Locate the rear brake arms and brake cable at Pull the brake cable across and hook the thinner the top of the forks. -
Page 37: Adjusting The Brakes
Maintenance Adjusting the brakes You should not be able to pull the brake levers all the way back to the handlebar grip. If this occurs, you will need to adjust the brake lever reach. Locate the reach adjuster ring where the brake Unscrew the reach adjuster bolt by a few turns. -
Page 38: Adjusting Brake Travel
Maintenance Adjusting brake travel Your brake pads should hit the wheel rim at the same time, if this doesn’t happen then you will need to adjust them. Make sure that there isn’t an excess of brake Locate the brake spring adjuster screws at the cable between the brake arms. -
Page 39: Adjusting The Brake Cable
Maintenance Adjusting the brake cable Minor adjustments can be made at the brake levers, but you may need to tighten at the cable as the brakes wear down. The brakes should be adjusted so that, when the brake arms are pulled to the halfway travel position, the whole of the brake pads’... -
Page 40: Aligning The Brake Pads
Maintenance Aligning the brake pads The brake pads on your bike should be accurately aligned against the wheel rim. Close the brake arms using your thumb and Loosen the brake pad fixing screws. index finger and lift out the brake cable. Straighten the brake pad and make sure that it is Hold the brake pad in the correct position against at the right height, so that the whole of its surface... - Page 41 Maintenance Close the brake arms using your thumb and index finger and then put the brake cable back in place.
-
Page 42: Replacing The Brake Pads
Maintenance Replacing the brake pads You can judge the wear of your brake pads by the appearance of the grooves. If the pads are worn down to the bottom of the grooves, you will need to replace them immediately with a new set of linear pull brake pads. - Page 43 Maintenance Hold the brake pad so that its whole surface Close the brake arms using your thumb and rests against the wheel rim and re-tighten index finger and put the brake cable the screws. back in place. It is essential to adjust the brakes after replacing the pads. See pages 37 & 39.
-
Page 44: Technical Specification
Technical Specification eBike parts Saddle Seat Post Saddle Quick-release Rear Brakes Seat Stay Dropout Plate Rear Dropout Motor Rear Sprocket Drive Belt Pedal Sprocket Crank Pedal... - Page 45 Technical Specification Battery Handlebar Stem Handlebars Head Tube Front Brakes Front Forks Front Dropout Battery Cradle...
-
Page 46: Tightening Torques
Technical Specification eBike model EB02 1016A0010 Battery model 36V 5.6Ah Li-Ion Battery 3 hours Charging period 42V DC 2.0A Battery charger output Weight 16kg Frame 17” Aluminium 36V 250W Rear Hub Motor 30 miles Range Modes High Power Low Power Drive Train Gates Carbon Drive Brakes... -
Page 47: Warranty
Warranty – Terms and Conditions Your 2-year warranty will be automatically registered for you. If your Gtech eBike has a fault, don’t worry, we’re here to help. Go to www.gtech.co.uk or call 01905 345 891 for assistance. WHAT ISN’T COVERED... - Page 48 Grey Technology Limited Cupola Court, Spetchley, Worcestershire WR5 1RL email: support@gtech.co.uk telephone: 01905 345891 www.gtech.co.uk CPN282...
Need help?
Do you have a question about the eBike City and is the answer not in the manual?
Questions and answers