Canon CR-180 Instructions Manual
Check reader
Hide thumbs
Also See for CR-180:
- Brochure & specs (16 pages) ,
- Brochure & specs (16 pages) ,
- Cleaning and maintenance (4 pages)

Related Manuals for Canon CR-180


Summary of Contents for Canon CR-180
- Page 1 CANON CHECK READER INSTRUCTIONS Please read this manual before operating this unit. After you finish reading this manual, store it in a safe place for future reference.
-
Page 2: Trademarks And Registered Trademarks
The contents of this manual are subject to change without notice. e Every effort has been made to ensure the accuracy of information presented in this manual. However, Canon Electronics Inc. and the subsidiaries on the back cover assume no responsibility for any errors or their consequences. - Page 3 COMMUNICATIONS BETWEEN YOU AND CANON RELATING TO THE SUBJECT MATTER HEREOF. NO AMENDMENT TO THIS AGREEMENT SHALL BE EFFECTIVE UNLESS SIGNED BY A DULY AUTHORIZED REPRESENTATIVE OF CANON. Should you have any questions concerning this Agreement, or if you desire to contact Canon for any reason, please write to Canon's local affiliate.
-
Page 5: Introduction
INTRODUCTION Thank you for purchasing the Canon Check Reader CR-180. Please read this manual thoroughly before operating the machine in order to familiarize yourself with its capabilities, and to make the most of its many functions. After reading this manual, store it in a safe place for future reference. -
Page 6: Table Of Contents
Power Supply ....................8 Carrying ...................... 8 Chapter 1 Introduction to the CR-180 1.1 Features of the CR-180..............10 1.2 Packaging: What Is in the Box? ............12 1.3 Part Names ..................13 N Front View ..................... 13 N Rear View ....................14 N Connectors .................... - Page 7 Chapter 3 Software 3.1 About the Software ................. 28 3.2 Installing the Software ..............29 Installing the Scanning Utility ..............29 Installing the ISIS/TWAIN Driver ............... 30 3.3 How to Use the Software..............32 Starting and Closing the Scanning Utility ..........32 N Starting the Scanning Utility ..............
- Page 8 Specifications ...................67 Scanner Specifications ................67 Exterior Dimensions .................. 68 Index ......................69...
-
Page 9: Safety Precautions
Safety Precautions Daily Maintenance When you are working around the scanner, follow these precautions to avoid fire and electrical shock. I Never install and operate the scanner near flammable substances, such as alcohol, paint thinner, benzene, or any other type of volatile solution. WARNING I Never damage or modify the power cord, and never place heavy objects on the power cord. - Page 10 I To avoid damage to the scanner, never place the scanner on an unstable or vibrating surface. The scanner may tip or fall over, causing injury. CAUTION I To avoid overheating and causing a fire, never block the air vents on the back of the scanner.
-
Page 11: Installation Location
Installation Location More than 3.9 (100 mm) " More than " (150 mm) More than 25.6 (650 mm) " For operation, maintenance and ventilation, make sure that there is enough space around the scanner, as shown in the illustration above. Avoid placing the scanner in the following places. -
Page 12: Power Supply
• Keep the area around the power outlet free of obstacles. Carrying When you move the CR-180, hold it firmly with both hands and carry it carefully. The scanner weighs approximately 13.9 lb (6.3 kg). When moving the scanner, be sure to turn OFF the power and remove any cables. If... -
Page 13: Chapter 1 Introduction To The Cr
1.1 Features of the CR-180 ......10 1.2 Packaging: What Is in the Box? ..12 1.3 Part Names ..........13 Front View ..........13 Rear View .......... -
Page 14: Chapter 1 Introduction To The Cr-180
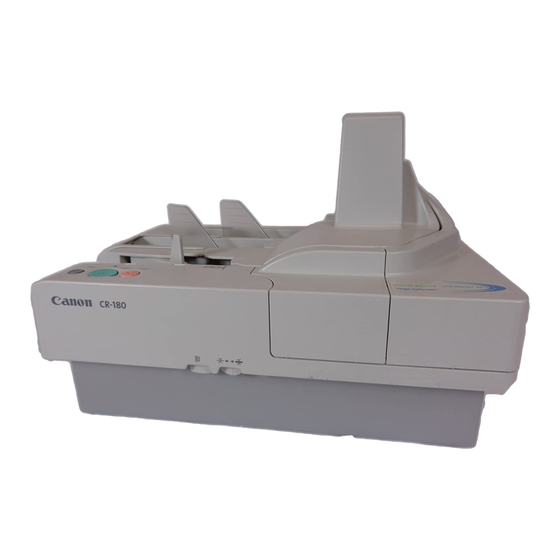
Introduction to the CR-180 Features of the CR-180 The Canon Check Reader CR-180 is a scanner with magnetic heads that can read checks and other documents that are printed with MICR (Magnetic Ink Character Recognition) compatible fonts and is capable of OCR (Optical Character Recognition). - Page 15 1.1 Features of the CR-180 G Automatic separator mechanism Scanned documents are automatically ejected to one of two pockets based on separation conditions. G Double feed detection The scanner detects double fed documents. G Drop out color This function enables drop out scanning of a specific color in the document.
-
Page 16: Packaging: What Is In The Box
Introduction to the CR-180 Packaging: What Is in the Box? Make sure that you have everything. Check every item you have removed from the box. If any items are missing, contact your local authorized Canon dealer. Document Feed Guide CR-180 Jogger Support... -
Page 17: Part Names
1.3 Part Names Part Names This section describes the names and functions of each part. Before you connect the CR-180, take a few minutes to familiarize yourself with the main parts and their functions. N Front View Jogger Support Top Cover... -
Page 18: N Rear View
Chapter 1 Introduction to the CR-180 N Rear View Power Cord Connector Connect the power cord provided with the scanner to this connector. Connectors Air Vent To avoid overheating and causing a fire, never block the air vents on the back of the scanner. - Page 19 Chapter 2 Preparation Before Use This chapter describes how to prepare the scanner to scan documents. 2.1 Checking Your Operating Environment ........16 2.2 Connecting the Scanner to a Computer ..........17 SCSI Connections ........17 USB Connections ........19 Connecting the Power Cord ....20 2.3 Turning ON and OFF the Power..
-
Page 20: Chapter 2 Preparation Before Use
Chapter 2 Preparation Before Use Checking Your Operating Environment Your computer system must meet the following conditions to use the CR-180. G IBM PC/AT or compatible machines that meet the following specifications: • Intel Celeron 733 MHz or faster • 256 MB main memory or more (recommended) •... -
Page 21: Connecting The Scanner To A Computer
2.2 Connecting the Scanner to a Computer Connecting the Scanner to a Computer There are two ways to connect the scanner to your computer; SCSI or USB. Use the method that is compatible with your computer system. I Do not turn OFF the scanner or remove any interface cables when an application is running. -
Page 22: N Connecting The Scsi Cable
SCSI device at the end of the daisy chain. Also, turn all terminator SCSI devices that are connected on the daisy chain between the computer and CR-180 to OFF. CR-180... -
Page 23: Usb Connections
G USB interface card Use an extended USB interface card that is compatible with a Hi-Speed USB 2.0 connection, and has been operationally tested by Canon. N USB 2.0 Interface Cards Be sure to use one of the recommended USB 2.0 interface cards when connecting the scanner with a USB interface cable. -
Page 24: N Connecting The Usb Interface Cable
Chapter 2 Preparation Before Use N Connecting the USB Interface Cable Do not connect both a SCSI cable and USB interface cable at the same time. CAUTION USB Connector SCSI Connector (cannot be connected at the same time) Connecting the Power Cord Connect the power cord. -
Page 25: Turning On And Off The Power
Important If the scanner does not work, or the LED continues to flash, there is a problem with the scanner. Turn OFF the power, and contact your local retailer or a Canon service department. If you hear strange sounds, detect smoke or abnormal heat, sense a vibration, or... -
Page 26: Recognizing The Scanner
Chapter 2 Preparation Before Use Recognizing the Scanner If you are using Windows 95/98/Me or Windows 2000/XP, the first time that you turn ON your computer after connecting the scanner, Windows Plug and Play automatically displays a screen prompting you to install the scanner driver. Follow the instructions on the screen to proceed with the installation. - Page 27 Although a message appears indicating that the driver “has not passed Windows logo testing”, simply continue the installation. 5. Click [Finish] on the “Completing the Found New Hardware Wizard” screen. G The CR-180 will be registered as “CANON CR-180 SCSI” or “CANON CR-180 USB” in the Imaging Device directory. Note G The displayed device name of the CR-180 differs depending on the connection, via SCSI or USB.
-
Page 28: Turning Off The Power
Chapter 2 Preparation Before Use Turning OFF the Power Turn OFF your computer. To turn OFF the scanner, press the power switch. Turn OFF the power to the computer if you are using a SCSI cable to connect the scanner. Important I Wait at least 10 seconds before turning the scanner back ON. -
Page 29: Preparing The Ink Cartridge
2.4 Preparing the Ink Cartridge Preparing the Ink Cartridge This section describes how to prepare the ink cartridge so that you can use the imprinter to print text on scanned documents. About the Ink Cartridge The ink cartridge is not included with the scanner. Purchase an ink cartridge separately, as shown below. - Page 30 Chapter 2 Preparation Before Use Squeeze the print position adjustment lever and lift up to adjust the print position. G Adjust the position of the text so that it aligns with the adjustment line on the print position adjustment lever. Note G The value of the adjustment line indicates the distance from the bottom edge of the document to the center of the text.
- Page 31 Chapter 3 Software This chapter describes how to install and use the scanning software, Scanning Utility, and ISIS/TWAIN driver. 3.1 About the Software ......28 3.2 Installing the Software .......29 Installing the Scanning Utility ....29 Installing the ISIS/TWAIN Driver ..... 30 3.3 How to Use the Software ....32 Starting and Closing the Scanning Utility ............
-
Page 32: Chapter 3 Software
Be sure to open and read the Readme.txt file on the setup disc before installing the software. G Scanning Utility for the CR-180 This utility software is a dedicated software application for the CR-180. A dedicated scanner driver is installed after you install the utility software. G ISIS/TWAIN driver... -
Page 33: Installing The Software
3.2 Installing the Software Installing the Software This section describes how to install the Scanning Utility and ISIS/TWAIN driver so that you can use the scanner. Installing the Scanning Utility Follow the instructions below to install the Scanning Utility and the dedicated driver. -
Page 34: Installing The Isis/Twain Driver
Chapter 3 Software Enter “D:\SU180\setup.exe” in the [Open] fields, and then click [OK]. Installation starts. Follow the instructions on the screen to complete the installation. Installing the ISIS/TWAIN Driver Connect the scanner to your computer. G If another ISIS compatible driver is already installed on the computer, be sure to make a backup of the following file. - Page 35 3.2 Installing the Software Click [Start], and then select [Run]. The screen the appears depends on which Windows operating system you are using. Enter “D:\Driver\setup.exe” in the [Open] field, and then click [OK]. Installation starts. Follow the instructions on the screen to complete the installation.
-
Page 36: How To Use The Software
N Starting the Scanning Utility Click [Start], point to [Programs], then click [Scanning Utility for CR-180]. Click [All Programs], then [Scanning Utility for CR-180] if your Operating System is Windows XP. Start the Scanning Utility. The basic operation of the Scanning Utility is noted in the Scanning Utility help file. -
Page 37: N Closing The Scanning Utility
How to Use the ISIS/TWAIN Driver The explanation on how to use the ISIS/TWAIN driver is in the ISIS/TWAIN driver help file. To view the help file, click [Start] point to [Programs], click [Canon Document Scanner], and then click [Canon CR-180 Help]. -
Page 38: Uninstalling The Software
Chapter 3 Software Uninstalling the Software This section describes how to uninstall the Scanning Utility and ISIS/TWAIN driver. G Be sure to log on as the Administrator if your system is Windows NT 4.0 Workstation, Windows 2000 Professional, or Windows XP. Important G The dialog boxes and button names in Windows XP are different from the ones used in this manual. - Page 39 3.4 Uninstalling the Software Select the software that you want to remove from the list in the dialog box, and then click [Add/Remove]. G If you uninstall the “Scanning Utility for CR-180” you also need to uninstall the “Canon Driver for CR-180.” Important G If you uninstall the ISIS/TWAIN driver, select the “Canon CR-180 ISIS/TWAIN Driver.”...
- Page 41 Chapter 4 Document Feeding and Scanning This chapter describes precautions regarding documents that can be handled on this scanner and scanning operations. 4.1 Documents ..........38 Types of Documents ........ 38 Placing Documents ........39 4.2 Document Feeding and Scanning ..41 Scan Procedure ........
-
Page 42: Chapter 4 Document Feeding And Scanning
This section describes the types of documents that can be used and how to place them. Treat the documents carefully. The paper edges may cut your fingers. CAUTION Types of Documents The CR-180 can feed a wide variety of Length document sizes. The ranges of width and length for a document are: Hight : 2.4"... -
Page 43: Placing Documents
4.1 Documents G Note that mixing documents of different thickness and size may cause a malfunction during feeding. Note G Curled, wrinkled, or folded documents may cause an error. If this happens, straighten out the curls, or reduce the number of documents loaded. G Documents containing text or pictures within 0.2"... - Page 44 Chapter 4 Document Feeding and Scanning G If you place long documents, move the stopper to the edge of the document in the document tray. Otherwise, this may cause a paper eject error. Stopper...
-
Page 45: Document Feeding And Scanning
4.2 Document Feeding and Scanning Document Feeding and Scanning This section describes how to load and scan documents. I Avoid wearing loose fitting clothing, dangling jewelry, long ties, or long hair that could become entangled with moving parts, especially the rollers that feed paper through CAUTION the scanner. - Page 46 Chapter 4 Document Feeding and Scanning If the documents are not aligned, press [Jog]. The jogger mechanism can be used to align documents. Start Stop If you press [Jog] when a batch of documents of various sizes are loaded, the alignment will be incomplete, and the documents will not be scanned in the order Important loaded.
-
Page 47: Manual Feeding (Bypass Mode)
4.2 Document Feeding and Scanning Scanning starts. If the documents are large, the documents may fall over while they are being fed. If this happens, attach the document feed guide to prevent the documents from falling Note over. Document Feed Guide If “Sort Method”... - Page 49 Chapter 5 Troubleshooting This chapter describes the problems that might occur in the CR-180, and how to remedy them. 5.1 When the Scanner Is Not Recognized .........46 SCSI Connections ........46 USB Connections ........47 5.2 Clearing Paper Jams ......48 5.3 Feeding Trouble .........
-
Page 50: Chapter 5 Troubleshooting
Chapter 5 Troubleshooting When the Scanner Is Not Recognized The following causes and remedies describe why your computer may not recognize the scanner. SCSI Connections Cause The scanner is not connected correctly. Remedy Connect the SCSI cable to the scanner correctly. (See “SCSI Connections,”... -
Page 51: Usb Connections
Remedy Cancel the SCSI device terminator that is connected between the CR-180 and the computer. The CR-180 must be at the end of the daisy chain, and all other SCSI devices in between the computer and CR-180 must their terminators OFF. -
Page 52: Clearing Paper Jams
Chapter 5 Troubleshooting Clearing Paper Jams If paper has jammed, open the maintenance cover and remove the jammed paper. I Be careful when you clear a paper jam. You may be injured unexpectedly. For example, the paper edges may cut your fingers, or the document may be damaged. I Remove all jammed sheets of paper. - Page 53 5.2 Clearing Paper Jams Close the maintenance cover in the order shown in the diagram below. Carefully replace the top cover.
-
Page 54: Feeding Trouble
Clean the rollers if they are dirty. (See “Cleaning the Scanning Glass and Rollers,” on p.55.) Worn rollers must be replaced. Contact your dealer or Canon service representative. • The separation roller gap is too wide. Adjust the separation roller gap. - Page 55 Cause and Remedy Ink is clogged in the ink jet nozzle. Clean the ink jet nozzle. Cleaning the ink jet nozzle is recommended before using the CR-180. (See “Cleaning the Ink Heads and Ink Absorber,” on p.60.) Condition Documents get dirty when using the imprinter.
-
Page 56: When The Scanned Image Is Not Normal
If this happens, the interface card is not compatible. Use the recommended interface card. If the above remedies do not rectify the problem, contact your dealer or a Canon service representative. -
Page 57: Chapter 6 Maintenance
Chapter 6 Maintenance This chapter describes how to clean and maintain the scanner. 6.1 Daily Cleaning ........54 Cleaning the Main Unit ......54 Cleaning the Scanning Glass and Rollers ............55 Cleaning the Magnetic Heads ....58 Cleaning the Ink Heads and Ink Absorber .......... -
Page 58: Daily Cleaning
Chapter 6 Maintenance Daily Cleaning To ensure high-quality image scanning, regularly clean your CR-180 as described below. I Before you clean the scanner, turn OFF the scanner and computer, and disconnect the power cord from the power outlet. Otherwise, it may cause an electrical shock. -
Page 59: Cleaning The Scanning Glass And Rollers
6.1 Daily Cleaning Cleaning the Scanning Glass and Rollers If stripes appear on scanned images or if dirt appears on scanned documents, clean the scanning glass or rollers. Clean the scanning glass and rollers regularly. Remove the top cover. Press the open button, and pull the maintenance cover open to the right and left. - Page 60 Chapter 6 Maintenance Spin the rollers while wiping them clean with a firmly wrung cloth dampened with water or a mild detergent. There are 13 roller positions, as shown in the diagram below. Scanning Unit G Use cotton swabs to clean the rollers in locations that are too narrow for your fingers.
- Page 61 If paper jams and double feeds (two papers being fed at the same time) still occur after cleaning the rollers, the rollers may be worn. The rollers need to be changed. Important Contact your local dealer or a Canon service representative.
-
Page 62: Cleaning The Magnetic Heads
Chapter 6 Maintenance Cleaning the Magnetic Heads If the magnetic heads are dirty, then MICR characters cannot be scanned correctly. Periodically, clean the magnetic heads with a commercially available audio head cleaner. Press the open button, and pull the maintenance cover open to the right and left. - Page 63 6.1 Daily Cleaning Close the maintenance covers in the order shown in the diagram below.
-
Page 64: Cleaning The Ink Heads And Ink Absorber
Chapter 6 Maintenance Cleaning the Ink Heads and Ink Absorber Ink that collects around the ink jet nozzle may stain your documents or cause the text to appears as scratched. Clean the area around the ink heads and the ink absorber periodically. - Page 65 6.1 Daily Cleaning Clean the ink heads and absorber with a firmly wrung cloth dampened with water or a mild detergent, then dry them with a clean, dry cloth. Ink Absorber Ink Cartridge Remove the ink cartridge. For more information, see “Replacing the Ink Cartridge,” on p.63. Use a cotton swab to remove the ink from around the ink jet nozzle.
- Page 66 Chapter 6 Maintenance Close the maintenance covers in the order shown in the diagram below. Carefully replace the top cover. If the top cover is not firmly in place, the ink cartridge is not installed properly. Check the ink cartridge. Note...
-
Page 67: Maintenance
6.2 Maintenance Maintenance Make the following adjustments to maintain scanning quality. Replacing the Ink Cartridge The ink cartridge needs to be replaced if the printed text becomes scratchy or faint even if you have cleaned the ink jet nozzle. Replace the ink cartridge according to the following procedure below. - Page 68 Chapter 6 Maintenance Squeeze the print position adjustment lever, and lift up the cartridge. Bend the lock lever to the left, lever and remove the ink cartridge. Lock Lever Bend the lock lever down, and insert the new ink cartridge. Reposition the lock lever, and make sure that the ink cartridge is securely in place.
- Page 69 6.2 Maintenance Squeeze the print position adjustment lever, and lower the ink cartridge into place. Close the maintenance covers in the order shown in the diagram below. Carefully replace the top cover. If the top cover is not firmly in place, the ink cartridge is not installed properly. Check the ink cartridge.
-
Page 70: Adjusting The Separation Roller Gap
Chapter 6 Maintenance Adjusting the Separation Roller Gap If documents do not feed correctly, the separation roller may not be adjusted correctly. Adjust the separation roller gap according to the following procedure. Place two sheets of paper in the document tray, and hold the Stop button down for 10 seconds. -
Page 71: Specifications
Specifications Scanner Specifications Type Desktop sheet feed Document size Hight: 2.4" to 4.6" (60 to 118 mm) Length: 4.7" to 9.1" (120 to 230 mm) Thickness: 0.003" to 0.008" (0.08 to 0.20 mm) Weight: 16 to 32 lb bond (60 to 120 g/m Document feeding Automatic / Not separate Scanning method... -
Page 72: Exterior Dimensions
Specifications Exterior Dimensions Units: inches (units in parenthesis are millimeters) 18.8" (477 mm) (with the eject stopper open) 15.7" (398.7 mm) 15.7" (399 mm) -
Page 73: Index
Recognizing the scanner ....22 Exterior dimensions ......68 Rollers ..........55 - F - - S - Features of CR-180 ......10 Scanner unit ......13, 56 Feeding trouble ....... 50 Scanning glass ........ 56 Flapper ..........43 Scanning Utility ......28, 32 SCSI connections ..... - Page 74 Index Separation roller gap adjustment dial ..........13, 66 Setup disc ........12 Shutter..........66 Software .......... 28 - Uninstall ........34 - Install .......... 29 - How to use the software ..... 32 Specifications - Specifications for the scanner ..67 - T - Top cover ........
- Page 76 CANON ELECTRONICS INC. 1248, SHIMOKAGEMORI, CHICHIBU-SHI, SAITAMA 369-1892, JAPAN CANON U.S.A. INC. ONE CANON PLAZA, LAKE SUCCESS, N.Y.11042, U.S.A. CANON CANADA INC. 6390 DIXIE ROAD, MISSISSAUGA, ONTARIO L5T 1P7, CANADA CANON EUROPA N.V. BOVENKERKERWEG 59-61, P.O.BOX 2262, 1180 EG AMSTELVEEN, THE NETHERLANDS CANON LATIN AMERICA, INC.