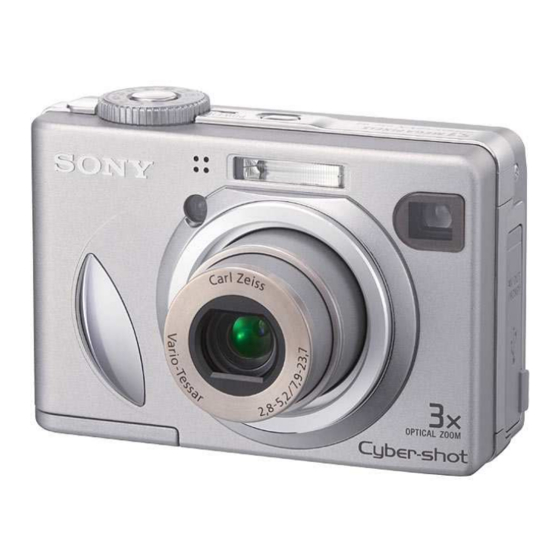
Sony Cyber-shot DSC-W5 How To Use Manual
Hide thumbs
Also See for Cyber-shot DSC-W5:
- User's manual / troubleshooting (141 pages) ,
- Service manual (51 pages) ,
- Specifications (2 pages)
Advertisement
Advertisement
Table of Contents

Related Manuals for Sony Cyber-shot DSC-W5


Summary of Contents for Sony Cyber-shot DSC-W5
- Page 1 Using the Sony Cyber-shot DSC-W5...
-
Page 2: The Basics
How to use this camera • This is a quick use handout • I highly recommend looking at the manual to see all of the features that this camera has! • I also recommend reviewing the “Read This First” booklet (blue booklet) for a quick overview of the basics This is your navigation area - it... - Page 3 Batteries • This camera uses 2 AA batteries. • It is best to recharge batteries when they are completely used up • It comes with 2 rechargeable – Recharging before the using up batteries and a battery charger. the existing charge can shorten •...
-
Page 4: Lcd Display
• You can use the LCD LCD display display or the viewfinder when taking pictures • Turning off the LCD will help conserve battery power □ • Pressing the | button on the camera will take you thru 4 views –... -
Page 5: Picture Quality
Picture Quality • 5 settings for picture quality – 5.1 MP for best quality when printing 8x10 – 3.2 MP – 3 MP – 1 MP – good quality for 4 x 6 prints – VGA – best for email, web pages and getting the most images on the memory stick... -
Page 6: Storage Medium
Storage Medium • This camera has 32MB of internal memory, but… • Use the 64MB Memory Stick (to store images). The lower the MP setting, the more pictures you can get on the stick. • At Fine setting (which gives you better print/shoot quality) on a 32MB stick. - Page 7 Remove/insert memory stick • The slot for the memory stick is located in the compartment on the bottom where the batteries are located • Lexar memory sticks have a “lock” slide on the opposite side – If Locked(you will see red) you cannot take/delete pictures •...
- Page 8 Insert/remove stick This is not a view of the W5 but the cover opens the same. The cover is located on the bottom of the W5.
-
Page 9: Changing Image Size
Changing image size • To change the 5M, 3.2M, 3M, 1M and VGA settings • Turn the dial to the picture of the camera and turn on power • Press the button on the back that has a small grid/trash can... - Page 10 Changing image size...
- Page 11 Flash • 3 settings – Forced Flash • Flash used regardless of light – Slow synchro (lightning bolt with SL) • Flash used and shutter speed is slower under dark conditions – No flash • Just press the button to move thru the choices...
-
Page 12: Taking Pictures
Taking pictures • The dial can be on any setting (except Set Up and movie) to take a picture. – Pressing the shutter button half way will focus your image – Press all the way to “shoot” your picture • Quickly review your last shot while taking pictures –... -
Page 13: Viewing Images On Camera
Viewing images on camera (this is different than reviewing the last picture taken while “shooting” • Turn the dial to • Use the to scroll thru the images Back Forward... -
Page 14: Viewing Images On Your Computer
Viewing images on your computer • You can use the Card Reader to view/print pictures saved on your memory stick... - Page 15 Viewing with the card reader • Just insert the memory stick into the card reader in the front slot Insert the memory stick with label side up (contact side down) Label side Contact side...
- Page 16 Insert card reader in USB port • Insert the reader with the memory stick into the USB port – Found at the front of your computer on most newer models • Your computer will automatically “see” and “find” this new hardware –...
- Page 17 Viewing images on your computer • After the card reader • Double click DCIM (with the memory stick) • Double click 101MSDSF has been connected to • Your pictures will now be your computer available • Double click on My •...
-
Page 18: Printing Images
Printing Images • You can always print an image by inserting it into a blank Word document and resizing to desired size • See “Inserting into projects” slide for instructions... - Page 19 Printing images using Windows XP • Windows XP offers a picture printing feature that allows you to choose 8x10, 4x6, 5x7, etc choices • Follow the instructions for viewing images using the card reader • While viewing your images, click on a picture •...
- Page 20 Inserting into projects • Inserting a picture is the • Double click on DCIM same process as • Double click on inserting a picture from a 101MSDCF floppy. • Click on the image to be • There are just a couple of inserted more clicks involved •...
-
Page 21: Deleting Pictures
Deleting pictures • You can delete pictures while the memory stick is still in the camera • Or you can delete using the card reader... - Page 22 Preparing to delete images using card reader and computer • After the card reader (with the • Deleting…. memory stick) has been – Delete entire folder connected to your computer • Click on folder named 101MSDSF • Double click on My Computer •...
- Page 23 Delete pictures directly on camera • You can quickly delete the last picture taken while in “shoot” mode • Or you can delete while in Viewing mode...
- Page 24 Delete in “shoot” mode • While “reviewing” the last picture taken, you can delete this image • Click on the “back” button to see the last picture taken...
- Page 25 • If you want to delete the image you are viewing – click the “trash can” button – This is the same button you use to change the megapixel setting...
- Page 26 • This will give you the Delete/Exit button • Use the Up button to select Delete – The active choice will be yellow • Push the middle button to delete Actual view may differ slightly on the DSC-W5 model...
- Page 27 Delete in “View” mode • Turn your dial to View • You will see the Back/Next at the bottom Actual view may differ slightly on the DSC-W5 model...
- Page 28 • Use the left/right arrow keys to move thru your pictures • When you find one you want to delete, touch the “trash can” button...
- Page 29 • This will give you the Delete/Exit button • Use the Up button to select Delete – The active choice will be yellow • Push the middle button to delete Actual view may differ slightly on the DSC-W5 model...
- Page 30 Saving images to your H • You can also save a copy of your images to your H folder (or hard drive, jump drive, etc) • Just use Windows Explorer – Select the image(s) to copy – Click Copy selected Items link found on the LH side of window –...
Need help?
Do you have a question about the Cyber-shot DSC-W5 and is the answer not in the manual?
Questions and answers