Table of Contents
Advertisement
Quick Links
In the interests of user-safety (Required by safety regulations in some countries) the set should be restored
to its original condition and only parts identical to those specified should be used.
• SPECIFICATIONS .............................................. 2
• IMPORTANT SERVICE SAFETY NOTES ......... 3
• NOTE TO SERVICE PERSONNEL ................... 4
• OPERATION MANUAL ...................................... 8
• REMOVING OF MAJOR PARTS ..................... 14
• RESETTING THE TOTAL LAMP TIMER ......... 19
• THE OPTICAL UNIT OUTLINE ....................... 20
FOCUS ADJUSTMENT .................................. 21
• ELECTRICAL ADJUSTMENT .......................... 27
• ADJUSTING THE PC INTERFACE ................. 34
• TROUBLE SHOOTING TABLE ........................ 35
• CHASSIS LAYOUT .......................................... 50
SHARP CORPORATION
SERVICE MANUAL
LCD PROJECTOR
XG-P10XU
MODEL
CONTENTS
Page
• BLOCK DIAGRAM ........................................... 52
• OVERALL WIRING DIAGRAM ........................ 54
• WAVEFORMS .................................................. 57
• SCHEMATIC DIAGRAM .................................. 58
Ë ELECTRICAL PARTS ................................ 118
Ë CABINET AND MECHANICAL PARTS .... 144
Ë ACCESSORIES PARTS ........................... 148
Ë PACKING PARTS ..................................... 148
• PACKING OF THE SET ................................. 149
This document has been published to be used for
after sales service only.
The contents are subject to change without notice.
1
XG-P10XU
S70D6XG-P10XU
Page
Advertisement
Table of Contents

Related Manuals for Sharp XG-P10XU


Summary of Contents for Sharp XG-P10XU
-
Page 1: Table Of Contents
XG-P10XU SERVICE MANUAL S70D6XG-P10XU LCD PROJECTOR XG-P10XU MODEL In the interests of user-safety (Required by safety regulations in some countries) the set should be restored to its original condition and only parts identical to those specified should be used. CONTENTS... -
Page 2: Specifications
(6 ⁄ ", 15 cm), Remote mouse receiver, Extra air filter, Lens cap (attached), CD- ROM, LCD projector operation manual, LCD projector quick reference, Sharp Advanced Presentation Software operation manual Replacement parts Standard lens unit (CLNS-0169CE02), Lamp unit (Lamp/cage module) (BQC-XGP10XU/1),... -
Page 3: Important Service Safety Notes
XG-P10XU IMPORTANT SERVICE SAFETY NOTES Ë Service work should be performed only by qualified service technicians who are thoroughly familiar with all safety checks and servicing guidelines as follows: » Use an AC voltmeter with sensitivity of 5000 ohm per WARNING volt., or higher, sensitivity to measure the AC voltage... -
Page 4: Note To Service Personnel
XG-P10XU NOTE TO SERVICE NOTE POUR LE PERSONNEL PERSONNEL D’ENTRETIEN 1 2 3 4 5 6 7 8 9 0 1 2 3 4 5 6 7 8 9 0 1 2 3 4 5 6 7 8 9 0 1 2 1 2 3 4 5 6 7 8 9 0 1 2 3 4 5... -
Page 5: Lamp Replacement
éviter une exposition des yeux et la peau (Fig. 1). Note: Please obtain a lens cap before servicing a Remarque: Priére de se procurer un capuchon model XG-P10XU that is received without d'optique acant d'entretien un modéle one. XG-P10XU qui est livré sans. -
Page 6: Cautions Concerning The Laser Pointer
XG-P10XU Cautions Concerning the Laser Pointer "COMPLIES WITH 21 CFR SUBCHAPTER J" SHARP ELECTRONICS CORPORATION SHARP PLAZA, MAHWAH, NEW JERSEY 07430 TEL : 1-800-BE-SHARP U.S.A. ONLY LASER RADIATION- DO NOT STARE INTO BEAM REMOTE CONTROL MODEL NO. : RRMCG1518CESA WAVE LENGTH : 650nm DC3V(1.5VX2PCS.) - Page 7 XG-P10XU WARNING: High brightness light source, do not stare into the beam of light, or view directly. Be especially careful that children do not stare directly in to the beam of light. WARNING: TO REDUCE THE RISK OF FIRE OR ELECTRIC SHOCK, DO NOT EXPOSE THIS UNIT TO MOISTURE OR WET LOCATIONS.
-
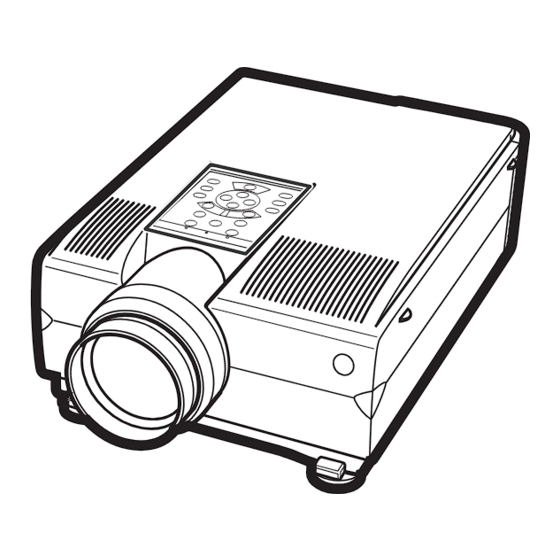
Page 8: Location Of Controls
XG-P10XU Location of Controls Projector LAMP REPLACEMENT MUTE button indicator TEMPERATURE WARNING POWER indicator indicator VOLUME buttons ( + − / ) POWER buttons (ON/OFF) LENS button MENU button INPUT button AUTO SYNC button FREEZE button RESIZE button ENLARGE button... -
Page 9: Operating The Wireless Mouse Remote Control
XG-P10XU Operating the Wireless Mouse Remote Control Remote Control Front View Top View Remote control MUTE button signal transmitter Laser VOLUME buttons POWER buttons pointer − / ) (ON/OFF) window LENS/BLACK LASER POINTER/ SCREEN button MENU button Rear View MOUSE/... - Page 10 XG-P10XU...
-
Page 11: Operation Manual
XG-P10XU Use as a Wireless Mouse Be sure the supplied remote mouse receiver is connected to your computer. Slide the MOUSE/ADJUSTMENT switch to MOUSE. MOUSE ADJ. Effective buttons in MOUSE mode LASER BLACK SCREEN POINTER LEFT-CLICK MOUSE RIGHT-CLICK • The wireless mouse may not operate correctly if your computer serial port is not correctly set up. Refer to the computer’s operation manual for details of setting up/installing the mouse driver. - Page 12 XG-P10XU Connection Pin Assignments...
- Page 13 XG-P10XU Dimensions...
-
Page 14: Removing Of Major Parts
XG-P10XU REMOVING OF MAJOR PARTS 1. Removing the Intake cover, lamp unit and lens cover. 1-1. Detach the Intake cover. 1-2. Remove the four lock screws off the inner filter frame. Detach the frame. 1-3. Remove the lock screw off the lamp cover. Slide and detach the lamp cover. -
Page 15: Removing The Top Cabinet
XG-P10XU 3. Removing the top cabinet. 3-1. Remove the four lock screws off the top cabinet. 3-2. Unhook the top cabinet by pressing the center of both sides of the bottom cabinet as well as the hook on the front (all marked with `). Slowly lift the back of the cabinet and disconnect the operation key unit connector (KY) and the speaker connector (SP). -
Page 16: Removing The Pwb Units
XG-P10XU 4. Removing the PWB units 4-1. Remove the five lock screws off the PC I/F unit. Lift and detach the unit off the output unit. 4-2. Disconnect the connectors from the output unit. 4-3. Remove the four lock screws off the output units. Remove also the lock screw off the ground fixture and detach the ground fixture. - Page 17 XG-P10XU 5. Removing the optical mechanism unit 5-1. Remove the two lock screws off the lamp socket holder. Detach the holder. 5-2. Disconnect the ground wire from the power unit. 5-3. Disconnect the connector(BA) from AC power switch and connector (PF) from the ballust unit.
- Page 18 XG-P10XU 6. Removing the ballast / filter / sound-out unit assembly. 6-1. Disconnect the ground wire from the inlet unit. 6-2. Remove the two lock screws off the ballast/filter/sound-out unit assembly. Detach the assembly. 7. Removing the power unit 7-1. Remove the three lock screws off the power PWB. Detach the power unit.
-
Page 19: Resetting The Total Lamp Timer
· Clogged air filter. · Clean the filter. · Cooling fan breakdown. · Take the projector to your nearest Au- · Internal circuit failure. thorized Sharp Industrial LCD Products Dealer or Service Center for repair. LAMP REPLACE- The lamp does · Burnt-out lamp. -
Page 20: The Optical Unit Outline
XG-P10XU THE OPTICAL UNIT OUTLINE Layout of the optical system Note: Layout for positioning the optical system. Projection Lens 1/2λ plate Sapphire glass Polarizing plate 1/2λ plate + polarizing plate Incident polarizing plate B Incident polarizing plate R Dichroic coating... -
Page 21: Convergence And Focus Adjustment
XG-P10XU CONVERGENCE AND FOCUS ADJUSTMENT » Start the convergence and focus adjustments with the top cabinet and the LCD cover removed but the power on. Use the remote control to adjust the image. Take the follow- ing procedures. 1. Focusing the projection lens (A) Replacing all the 3 LCD panels 1. - Page 22 XG-P10XU Notes : 1 The eccentric cam is used for convergence adjustment. This means that the cam’s turning and the linear movement are not always uniform. 2 This model is not equipped with the LCD image adjustment mechanism. This is because the dichroic prism is used for image formation.
- Page 23 XG-P10XU Convergence and Focus Adjustments at a Glance Adjustment directions Adjustment Direction Definition Direction of LCD panel X direction LCD right and left Convergence Y direction LCD top and bottom θZ direction Rotation around Z axis LCD turning axis Z direction LCD optical axis θX direction...
- Page 24 XG-P10XU Replacing the LCDs With the top cabinet removed (1) Disconnect the LCD flat cable from the output PWB connector. (2) Remove the lock screws "b" and "c". Detach the R/B adjusting plate or the G adjusting plate together with the LCD panel.
- Page 25 XG-P10XU Adjusting the optical axis of the mirrors (M1, M5 and M6) The optical axis must be readjusted if an eclipse happens with the R. G or B mirrors. Generally speaking, this adjustment is needed when any of the internal optical components has been replaced.
- Page 26 XG-P10XU Adjusting the lamp duct. Lock screws Lamp duct Adjustment procedure reguired when the lamp has been replaced and you can see ununifomity. (Case of Right and Left have ununifomity on the screen) (1) Let the lamp light up. (2) Receive the white pattern signal at 100%.
-
Page 27: Electrical Adjustment
XG-P10XU ELECTRICAL ADJUSTMENT Hook up a signal generator, or a DOSV or Mac personal computer to the projector in order to feed the signals specified in the Adjusting conditions. Adjusting point Adjusting conditions Adjusting procedure » Make the following settings: EEPROM 1. - Page 28 XG-P10XU Adjusting point Adjusting conditions Adjusting procedure » Choose the subject R1-GAIN and adjust the sig- RGB 1 system 1. Make the following choice: black level Group : OUTPUT 1 nal amplitude to 3.25 ±0.03 Vp-p using the control signal amplitude Subject : R1-BLK switches or the remote controller buttons.
- Page 29 XG-P10XU Adjusting point Adjusting conditions Adjusting procedure » Using the control switches or the remote controller Sample-and- 1. Feed the XGA mode 75-Hz hold pulse black signal. buttons, make sure that the “OUTPUT 3” charac- phase ters are not blurry and there is no ghost image. If RCK-PHASE 2.
- Page 30 XG-P10XU Adjusting point Adjusting conditions Adjusting procedure » Using the control switches or the remote controller 1. Feed the split color bar sig- Video picture nal. buttons, adjust the black-to-white (100%) level adjustment Group : VIDEO 1 difference to 1.2 ±0.03 Vp-p.
- Page 31 XG-P10XU Adjusting point Adjusting conditions Adjusting procedure » Using the control switches or the remote controller 1. Feed the split color bar sig- NTSC color nal. buttons, adjust the difference between the 100% saturation level Group : VIDEO 1 white portion and the red portion to 0.10 ±0.02 Vp-p.
- Page 32 XG-P10XU Adjusting point Adjusting conditions Adjusting procedure » Using the control switch or the button on the DVD Tint 1. Feed the color bar signal of the 480I component signal remote controller, adjust the B-Y waveform to form to the BNC Y, Pb and Pr in- a straight slope.
- Page 33 XG-P10XU Adjusting point Adjusting conditions Adjusting procedure » Adjust R4215 to minimize the right-hand and left- Color 1. Feed the gray-only RGB irregularity color signal. (XGA 60Hz) hand color irregularity. correction gain (in case of colorirregularity) » Make sure that a white balance is the best condi- Checking and 1.The adjustment condition of...
-
Page 34: Adjusting The Pc Interface
XG-P10XU ADJUSTING THE PC INTERFACE (CPCi-0047CE11. PC I/F Unit) 1.The initialization of the set. 1) Press the S2601 switch to go to the process mode. 2) Perform S1 of the SSS menu. (S1 initializes only a PC I/F board. Don’t perform S2 because adjustment data except for the PC board are initialized. -
Page 35: Trouble Shooting Table
XG-P10XU TROUBLE SHOOTING TABLE Checking the PWB performance Video input in trouble RGB input in trouble Through-output in trouble Remote control in trouble Go to "Checking the video unit Feed test pattern signal from Through-output circuit in Go to "Checking the remote circuit". - Page 36 XG-P10XU TROUBLE SHOOTING TABLE (Continued) Checking the video system Is the lamp on? Go to "Lamp fails to light-up". Is specified voltage fed to EA connectors? Check the power circuit and its parts. Are there signal inputs at pins (7), (9)
- Page 37 XG-P10XU TROUBLE SHOOTING TABLE (Continued) Checking IC801 (RGB signal output circuit) Are there RGB output waveforms at pins (31), (32) and (33) of IC801? Go to "No colour or unusual tone", Check the data transfer and other "No Y signal" or "Out of sync".
- Page 38 XG-P10XU TROUBLE SHOOTING TABLE (Continued) Checking IC6001 (3-D noise reduction circuit) and its peripheral circuits Are there signal inputs at pins (40) (Y signal) and (45)(chroma signal) of IC6001? Check the buffer circuit of Q6004 thru Q6006 as well as Q6001 thru Q6003.
- Page 39 XG-P10XU TROUBLE SHOOTING TABLE (Continued) No or unusual Y signal Is there Y signal input at pin (21) of IC801? Go back to the signal processing block. Is there Y signal output at pin (40) of IC801? Check IC801 and its peripheral circuits.
- Page 40 XG-P10XU TROUBLE SHOOTING TABLE (Continued) Checking the output PWB unit Are there signal inputs at SC1404, SC1405, SC1501 and SC1502? Are voltages applied to EA connectors and SC8404, If there is no signal at EA If there is no signal at SC8404...
-
Page 41: No Audio Output
XG-P10XU TROUBLE SHOOTING TABLE (Continued) No audio output Are there audio signal inputs at pins (2) and (23) of IC1301? Check the input, the switching circuit of IC441 and IC442, and their peripheral circuit. Are there audio signal outputs at pins... - Page 42 XG-P10XU TROUBLE SHOOTING TABLE (Continued) Power on Is the right input selected? Select the right input with remote control. Are the PC, video and LCP cables as specified and properly connected? Use the right cables or reconnect the cables. With the contrast control at maximum, does the image appear? Readjust the video system.
- Page 43 XG-P10XU TROUBLE SHOOTING TABLE (Continued) Lamp fails to light-up Turn on the power switch. Is discharging sound heard from the lamp? Is the lamp out of socket? Is the ballast cooling fan running? Replace the Reconnect the lamp. lamp into socket.
- Page 44 XG-P10XU TROUBLE SHOOTING TABLE FOR PC I/F UNIT-1 Checking the clock circuit and its peripheral circuits X8001 or its peripheral part faulty. Is X8001 (6MHz) oscillating? X8003 or its peripheral part faulty. Is X8003 (1.84MHz) oscillating? X8004 or its peripheral part faulty.
- Page 45 XG-P10XU TROUBLE SHOOTING TABLE FOR PC I/F UNIT-2 Checking the PLL circuit and its peripheral circuits Are there signals at pin(111) of IC8606 and TL8606? IC8025 or its peripheral circuit faulty. Is there signal at pins (100) and (101) of IC8606? IC8606 or its peripheral circuit faulty.
- Page 46 XG-P10XU TROUBLE SHOOTING TABLE FOR PC I/F UNIT-3 Checking the S- Checking the VGA's XGA's red video red video circuit and circuit and its its peripheral peripheral circuits circuits Is there signal at pin (139) of IC8606? Is there signal at pin (139) of IC8606? output PWB faulty.
- Page 47 XG-P10XU TROUBLE SHOOTING TABLE FOR PC I/F UNIT-4 Checking the S- Checking the VGA's XGA's green video green video circuit circuit and its and its peripheral peripheral circuits circuits Is there signal at pin (124) of IC8606? Is there signal at pin (124) of IC8606? output PWB faulty.
- Page 48 XG-P10XU TROUBLE SHOOTING TABLE FOR PC I/F UNIT-5 Checking the S- Checking the VGA's XGA's blue video blue video circuit circuit and its and its peripheral peripheral circuits circuits Is there signal at pin (133) of IC8606? Is there signal at pin (133) of IC8606? outpur PWB faulty.
- Page 49 XG-P10XU TROUBLE SHOOTING TABLE FOR PC I/F UNIT-6 Checking the OSD circuit and its peripheral circuits Display OSD on the screen. Are there signals at pins (56), (58), (71) and (72) of IC8048? IC8029 or its peripheral circuit faulty. Are there signals at pins (12), (14) thru (17) and (20) of IC8048? IC8048 or its peripheral circuit faulty.
-
Page 50: Chassis Layout
XG-P10XU XG-P10XU CHASSIS LAYOUT... -
Page 51: Block Diagram
XG-P10XU XG-P10XU BLOCK DIAGRAM... -
Page 52: Overall Wiring Diagram
XG-P10XU XG-P10XU OVERALL WIRING DIARGAM... -
Page 53: Description Of Schematic Diagram
XG-P10XU DESCRIPTION OF SCHEMATIC DIAGRAM VOLTAGE MEASUREMENT CONDITION: 1. Voltages at test points are measured at the supply voltage of AC 120V. Signals are fed by a color bar signal generator for servicing purpose and the above voltages are measured with a 20k ohm/V tester. - Page 54 XG-P10XU WAVEFORMS SC1101 7-pin SC1101 8-pin SC1201 8-pin SC1201 7-pin (RSIG5) (RSIG6) (GSIG6) (GSIG5) H : 10µsec/div H : 10µsec/div H : 10µsec/div H : 10µsec/div V : 2V/div V : 2V/div V : 2V/div V : 2V/div SC1301 7-pin...
- Page 55 XG-P10XU XG-P10XU Ë SIGNAL UNIT-1/4...
- Page 56 XG-P10XU XG-P10XU Ë SIGNAL UNIT-2/4...
- Page 57 XG-P10XU XG-P10XU Ë SIGNAL UNIT-3/4...
- Page 58 XG-P10XU XG-P10XU Ë SIGNAL UNIT-4/4...
- Page 59 XG-P10XU XG-P10XU Ë OUTPUT UNIT-1/7...
- Page 60 XG-P10XU XG-P10XU Ë OUTPUT UNIT-2/7...
- Page 61 XG-P10XU XG-P10XU Ë OUTPUT UNIT-3/7...
- Page 62 XG-P10XU XG-P10XU Ë OUTPUT UNIT-4/7...
- Page 63 XG-P10XU XG-P10XU Ë OUTPUT UNIT-5/7...
- Page 64 XG-P10XU XG-P10XU Ë OUTPUT UNIT-6/7...
- Page 65 XG-P10XU XG-P10XU Ë OUTPUT UNIT-7/7...
- Page 66 XG-P10XU XG-P10XU Ë TERMINAL UNIT-1/2...
- Page 67 XG-P10XU XG-P10XU Ë TERMINAL UNIT-2/2...
- Page 68 XG-P10XU Ë SOUND OUT UNIT...
- Page 69 XG-P10XU Ë R/C RECEIVER UNIT...
- Page 70 XG-P10XU XG-P10XU Ë OPERATION KEY UNIT...
- Page 71 XG-P10XU XG-P10XU Ë FILTER AND INLET UNIT...
-
Page 72: Power Unit
XG-P10XU XG-P10XU Ë POWER UNIT... - Page 73 XG-P10XU XG-P10XU Ë PC I/F UNIT-1/9...
- Page 74 XG-P10XU XG-P10XU Ë PC I/F UNIT-2/9...
- Page 75 XG-P10XU XG-P10XU Ë PC I/F UNIT-3/9...
- Page 76 XG-P10XU XG-P10XU Ë PC I/F UNIT-4/9...
- Page 77 XG-P10XU XG-P10XU Ë PC I/F UNIT-5/9...
- Page 78 XG-P10XU XG-P10XU Ë PC I/F UNIT-6/9...
- Page 79 XG-P10XU XG-P10XU Ë PC I/F UNIT-7/9...
- Page 80 XG-P10XU XG-P10XU Ë PC I/F UNIT-8/9...
- Page 81 XG-P10XU XG-P10XU Ë PC I/F UNIT-9/9...
-
Page 82: Printed Wiring Board Assemblies
XG-P10XU PRINTED WIRING BOARD ASSEMBLIES Signal Unit (Wiring Side) Signal Unit (Component Side) - Page 83 XG-P10XU Terminal Unit (Wiring Side) Terminal Unit (Component Side)
- Page 84 XG-P10XU R/C Receiver Unit (Wiring Side) Output Unit (Wiring Side)
- Page 85 XG-P10XU R/C Receiver Unit (Component Side) Output Unit (Component Side)
- Page 86 XG-P10XU Filter Unit (Wiring Side) Sound Out Unit (Wiring Side) Power Unit (Wiring Side)
- Page 87 XG-P10XU Filter Unit (Component Side) Sound Out Unit (Component Side) Power Unit (Component Side)
- Page 88 XG-P10XU PC I/F Unit (Wiring Side) PC I/F Unit (Component Side)
- Page 89 XG-P10XU Inlet Unit (Wiring Side) Inlet Unit (Component Side)
-
Page 90: Parts List
For location of SHARP Parts Distributor, IC1619 RH-iX1952CEZZ J 74F86SJ Please call Toll-Free; 1-800-BE-SHARP IC1620 RH-iX1952CEZZ J 74F86SJ IC2102 VHiLM2202M/-1 J LM2202MX in CANADA: Contact SHARP Electronics of Canada Limited IC2103 VHiNJM2060V-1 J NJM2060V Phone (416) 890-2100. IC2104 VHiTC4W53U/-1 J TC4W53FU IC2202 VHiLM2202M/-1 J LM2202MX... - Page 91 XG-P10XU Ref. No. Part No. Description Code Ref. No. Part No. Description Code DUNTKA184DE01 Q5003 VS2SC3928AR-1 J 2SC3928AR Q5004 VS2SC3928AR-1 J 2SC3928AR OUTPUT UNIT(Continued) Q5005 VS2SC3928AR-1 J 2SC3928AR Q5006 VS2SC3928AR-1 J 2SC3928AR IC7201 VHiPQ05SZ51-1 J PQ05SZ51 Q5007 VS2SC3928AR-1 J 2SC3928AR...
- Page 92 XG-P10XU Ref. No. Part No. Description Code Ref. No. Part No. Description Code DUNTKA184DE01 C1107 VCKYCY1EF104Z J 0.1 Ceramic C1108 RC-KZ0416CEZZ J 10 Ceramic OUTPUT UNIT(Continued) C1109 VCKYCY1CF104Z J 0.1 Ceramic C1110 RC-KZ0416CEZZ J 10 Ceramic D7011 VHDDAN202K/-1 J Diode...
- Page 93 XG-P10XU Ref. No. Part No. Description Code Ref. No. Part No. Description Code DUNTKA184DE01 C2235 VCKYCY1EF104Z J 0.1 Ceramic C2236 VCKYCY1EF104Z J 0.1 Ceramic OUTPUT UNIT(Continued) C2237 VCKYCY1EF104Z J 0.1 Ceramic C2301 RC-KZ0416CEZZ J 10 Ceramic C1621 VCKYCY1CF104Z J 0.1...
- Page 94 XG-P10XU Ref. No. Part No. Description Code Ref. No. Part No. Description Code DUNTKA184DE01 C7204 VCEAPF1EW336M J 33 Electrolytic C7205 VCEAPV1CW476M J 47 Electrolytic OUTPUT UNIT(Continued) C7206 VCKYCY1CF104Z J 0.1 Ceramic C7207 VCKYCY1CF104Z J 0.1 Ceramic C5220 VCEAPV1CW106M J 10...
- Page 95 XG-P10XU Ref. No. Part No. Description Code Ref. No. Part No. Description Code DUNTKA184DE01 R1197 VRS-CY1JF272J J 2.7k 1/16W Metal Oxide R1198 VRS-CY1JF561J J 560 1/16W Metal Oxide OUTPUT UNIT(Continued) R1199 VRS-CY1JF391J J 390 1/16W Metal Oxide R1201 VRS-CY1JF332J J 3.3k 1/16W Metal Oxide R1104 VRS-CY1JF332J J 3.3k 1/16W Metal Oxide...
- Page 96 XG-P10XU Ref. No. Part No. Description Code Ref. No. Part No. Description Code DUNTKA184DE01 R1392 VRS-CY1JF100J J 10 1/16W Metal Oxide R1393 VRS-CY1JF332J J 3.3k 1/16W Metal Oxide OUTPUT UNIT(Continued) R1395 VRS-CY1JF272J J 2.7k 1/16W Metal Oxide R1396 VRS-TV1JD270J J 27...
- Page 97 XG-P10XU Ref. No. Part No. Description Code Ref. No. Part No. Description Code DUNTKA184DE01 R2314 VRS-CY1JF103J J 10k 1/16W Metal Oxide R2316 VRS-CY1JF470J J 47 1/16W Metal Oxide OUTPUT UNIT(Continued) R2320 VRS-CY1JF681J J 680 1/16W Metal Oxide R2324 VRS-CY1JF102J J 1.0k 1/16W Metal Oxide...
- Page 98 XG-P10XU Ref. No. Part No. Description Code Ref. No. Part No. Description Code DUNTKA184DE01 R5303 VRS-CY1JF101J J 100 1/16W Metal Oxide R5304 VRS-CY1JF000J 1/16W Metal Oxide OUTPUT UNIT(Continued) R5305 VRS-CY1JF101J J 100 1/16W Metal Oxide R5306 VRS-CY1JF101J J 100 1/16W Metal Oxide...
- Page 99 XG-P10XU Ref. No. Part No. Description Code Ref. No. Part No. Description Code DUNTKA184DE01 R7086 VRS-TV1JD000J 1/16W Metal Oxide R7087 VRS-TV1JD000J 1/16W Metal Oxide OUTPUT UNIT(Continued) R7091 VRS-CY1JF102J J 1.0k 1/16W Metal Oxide R7092 VRS-CY1JF103J J 10k 1/16W Metal Oxide...
- Page 100 XG-P10XU Ref. No. Part No. Description Code Ref. No. Part No. Description Code DUNTKA184DE01 FB2601 RBLN-0030TAZZ J Ferrite Bead FB2602 RBLN-0030TAZZ J Ferrite Bead OUTPUT UNIT(Continued) FB5001 RBLN-0062CEZZ J Ferrite Bead FB5301 RBLN-0067CEZZ J Ferrite Bead R7270 VRS-CY1JF103J J 10k...
- Page 101 XG-P10XU Ref. No. Part No. Description Code Ref. No. Part No. Description Code DUNTKA185DE01 DUNTKA187DE01 SOUND OUT UNIT SIGNAL UNIT INTEGRATED CIRCUIT INTEGRATED CIRCUITS IC302 VHiTDA1517/-2 J TDA1517/N2 IC801 VHiTDA8854H-2 J TDA8854H/N2 IC802 VHiTHC4538T-1 J TC74HC4538AFT CAPACITORS IC803 VHiTHC4538T-1 J TC74HC4538AFT...
- Page 102 XG-P10XU Ref. No. Part No. Description Code Ref. No. Part No. Description Code DUNTKA187DE01 C844 VCCCCY1EH102J J 1000p 25V Ceramic C845 VCKYCY1EF104Z J 0.1 Ceramic SIGNAL UNIT (Continued) C846 VCCCCY1EH102J J 1000p 25V Ceramic C847 VCCCCY1EH102J J 1000p 25V Ceramic...
- Page 103 XG-P10XU Ref. No. Part No. Description Code Ref. No. Part No. Description Code DUNTKA187DE01 C6019 VCKYCY1CF104Z J 0.1 Ceramic C6020 VCEAPF0JW476M J 47 6.3V Electrolytic SIGNAL UNIT (Continued) C6021 VCKYCY1CF104Z J 0.1 Ceramic C6022 VCKYCY1CF104Z J 0.1 Ceramic C4515 VCKYCY1EF104Z J 0.1...
- Page 104 XG-P10XU Ref. No. Part No. Description Code Ref. No. Part No. Description Code DUNTKA187DE01 R906 VRS-CY1JF223J J 22k 1/16W Metal Oxide R907 VRS-CY1JF103J J 10k 1/16W Metal Oxide SIGNAL UNIT (Continued) R908 VRS-CY1JF103J J 10k 1/16W Metal Oxide R909 VRS-CY1JF224J...
- Page 105 XG-P10XU Ref. No. Part No. Description Code Ref. No. Part No. Description Code DUNTKA187DE01 R4564 VRS-CY1JF000J 1/16W Metal Oxide R4565 VRS-CY1JF000J 1/16W Metal Oxide SIGNAL UNIT (Continued) R4566 VRS-CY1JF000J 1/16W Metal Oxide R4567 VRS-CY1JF102J J 1.0k 1/16W Metal Oxide R4352 VRS-CY1JF562J J 5.6k 1/16W Metal Oxide...
-
Page 106: Terminal Unit
XG-P10XU Ref. No. Part No. Description Code Ref. No. Part No. Description Code DUNTKA188DE01 DUNTKA187DE01 TERMINAL UNIT SIGNAL UNIT (Continued) INTEGRATED CIRCUITS R6068 VRS-CY1JF102J J 1.0k 1/16W Metal Oxide R6069 VRS-CY1JF101J J 100 1/16W Metal Oxide IC401 VHiNJM2245M-1 J NJM2245M... - Page 107 XG-P10XU Ref. No. Part No. Description Code Ref. No. Part No. Description Code DUNTKA188DE01 C445 VCEAPF1CW106M J 10 Electrolytic C446 VCEAPF1CW106M J 10 Electrolytic TERMINAL UNIT (Continued) C447 VCCCCY1HH101J J 100p Ceramic C449 VCCCCY1HH101J J 100p Ceramic D3005 VHDMA157A//-1 J Diode...
- Page 108 XG-P10XU Ref. No. Part No. Description Code Ref. No. Part No. Description Code DUNTKA188DE01 R470 VRS-CY1JF101J J 100 1/16W Metal oxide R471 VRS-CY1JF682J J 6.8k 1/16W Metal oxide TERMINAL UNIT (Continued) R472 VRS-CY1JF101J J 100 1/16W Metal oxide R473 VRS-CY1JF562J J 5.6k 1/16W Metal oxide...
- Page 109 XG-P10XU Ref. No. Part No. Description Code Ref. No. Part No. Description Code R3520 VRS-CY1JF222J J 2.2k 1/16W Metal oxide DUNTKA188DE01 R3521 VRS-CY1JF392J J 3.9k 1/16W Metal oxide TERMINAL UNIT (Continued) R3523 VRS-CY1JF330J J 33 1/16W Metal oxide R3524 VRS-CY1JF102J J 1.0k 1/16W Metal oxide...
- Page 110 XG-P10XU Ref. No. Part No. Description Code Ref. No. Part No. Description Code DUNTKA188DE01 RDENC0304CEZZ TERMINAL UNIT (Continued) POWER UNIT INTEGRATED CIRCUITS FB3306 RBLN-0060TAZZ J Ferrite Bead FB3401 RBLN-0060TAZZ J Ferrite Bead å IC701 9FJ0F01901340 J AN8027 FB3402 RBLN-0060TAZZ J Ferrite Bead...
-
Page 111: Filter Unit
XG-P10XU Ref. No. Part No. Description Code Ref. No. Part No. Description Code RDENC0304CEZZ RDENC0305CEZZ POWER UNIT (Continued) FILTER UNIT INTEGRATED CIRCUIT C720 9FJ0C01402193 J 470 Electrolytic C721 9FJ0C01510165 J 47 Electrolytic IC751 9FJ0F01901385 J I.C. C722 9FJ0C01302085 J 470... - Page 112 XG-P10XU Ref. No. Part No. Description Code Ref. No. Part No. Description Code RDENC0305CEZZ CPCi-0047CE11 FILTER UNIT (Continued) PC I/F UNIT INTEGRATED CIRCUITS R757 9FJ0R91501055 J 330k 1/10W chip R758 9FJ0R91502015 J 7.5k 1/10W chip IC8001 RH-iX3270CEZZ J HD6417709 R759...
- Page 113 XG-P10XU Ref. No. Part No. Description Code Ref. No. Part No. Description Code CPCi-0047CE11 C8268 9DK001-42096 J 0.01 Ceramic C8273 9DK001-42096 J 0.01 Ceramic PC I/F UNIT (Continued) C8281 9DK001-42096 J 0.01 Ceramic C8283 9DK001-42096 J 0.01 Ceramic FL8054 9DK001-82026...
- Page 114 XG-P10XU Ref. No. Part No. Description Code Ref. No. Part No. Description Code CPCi-0047CE11 R8043 9DK001-51030 J 10k 1/16W Resistor Array AD R8044 9DK001-51030 J 10k 1/16W Resistor Array AD PC I/F UNIT (Continued) R8050 9DK001-51030 J 10k 1/16W Resistor Array AD...
- Page 115 XG-P10XU Ref. No. Part No. Description Code Ref. No. Part No. Description Code CPCi-0047CE11 R8605 9DK001-50165 J 100 1/16W Chip1608 R8606 9DK001-50163 J 68 1/16W Chip1608 PC I/F UNIT (Continued) R8607 9DK001-50185 J 10k 1/16W Chip1608 R8608 9DK001-50161 J 47...
- Page 116 XG-P10XU Ref. No. Part No. Description Code Ref. No. Part No. Description Code 3-21 XRESJ30-06000 J E-Ring, x2 CABINET AND MECHANICAL PARTS 3-22 HINDP5405CESA J Lens Caution Label CCOVA1818CE06 J Lamp Cage Cover Ass'y Not Available – Top Cabinet Ass'y —...
-
Page 117: Ë Cabinet And Mechanical Parts
XG-P10XU Ref. No. Part No. Description Code Ref. No. Part No. Description Code CABINET AND MECHANICAL PARTS 2-1-3 2-1-2 1-1-5 1-12 1-1-9 2-1-1 1-1-6 1-1-8 1-1-6 1-1-7 1-12 1-1-3 1-1-1 1-1-2 1-11 1-1-3 1-11 1-10 3-23 3-19 3-21 3-11 3-12... - Page 118 XG-P10XU Ref. No. Part No. Description Code Ref. No. Part No. Description Code CABINET AND MECHANICAL PARTS 6-37 PMiR-0183CEZZ J Mirror-1 6-38 PMiR-0268CEZZ J Mirror-2 (Continued) 6-39 PMiR-0237CEZZ J Mirror-3 6-40 PMiR-0186CEZZ J Mirror-4 6-41 PMiR-0187CEZZ J Mirror-5 PGiDM0059CEKZ J PC Fan Duct...
- Page 119 XG-P10XU OPTICS MECHANISM PARTS Ref. No. Part No. Description Code Ref. No. Part No. Description Code...
-
Page 120: Ë Packing Parts
XG-P10XU Ref. No. Part No. Description Code Ref. No. Part No. Description Code PACKING PARTS SUPPLIED ACCESSORIES (NOT REPLACEMENT ITEM) ACCESSORIES SPAKC5431CEZZ – Packing Case — SPAKP0805CEZZ – Polystyrene Cover — PFiLD0080CEZZ J Extra Air Filter SPAKX2910CEZZ – Buffer Material —... -
Page 121: Packing Of The Set
XG-P10XU Ref. No. Part No. Description Code Ref. No. Part No. Description Code PACKING OF THE SET CD-ROM Extra Air Filter Guarantee Card Operation Manual Quick Reference CD-ROM Manual Soft Wear Caution Questionnaire Card (Back for Japanese Sending) AC Cord... - Page 122 Code Ref. No. Part No. Description Code COPYRIGHT © 2000 BY SHARP CORPORATION ALL RIGHTS RESERVED. No part of this publication may be reproduced, stored in a retrieval system, or transmitted in any form or by any means, electronic, mechanical, photocopying, recording, or otherwise, without prior written permission of the publisher.